Nikolai
TY 4 Stroke God
I guess I could say I officially started today. Got the diecast frame corners cut off, cleaned up, and the battery tray cut out. Let the weight saving begin.
Donor tunnel from Rick for mock up purposes.
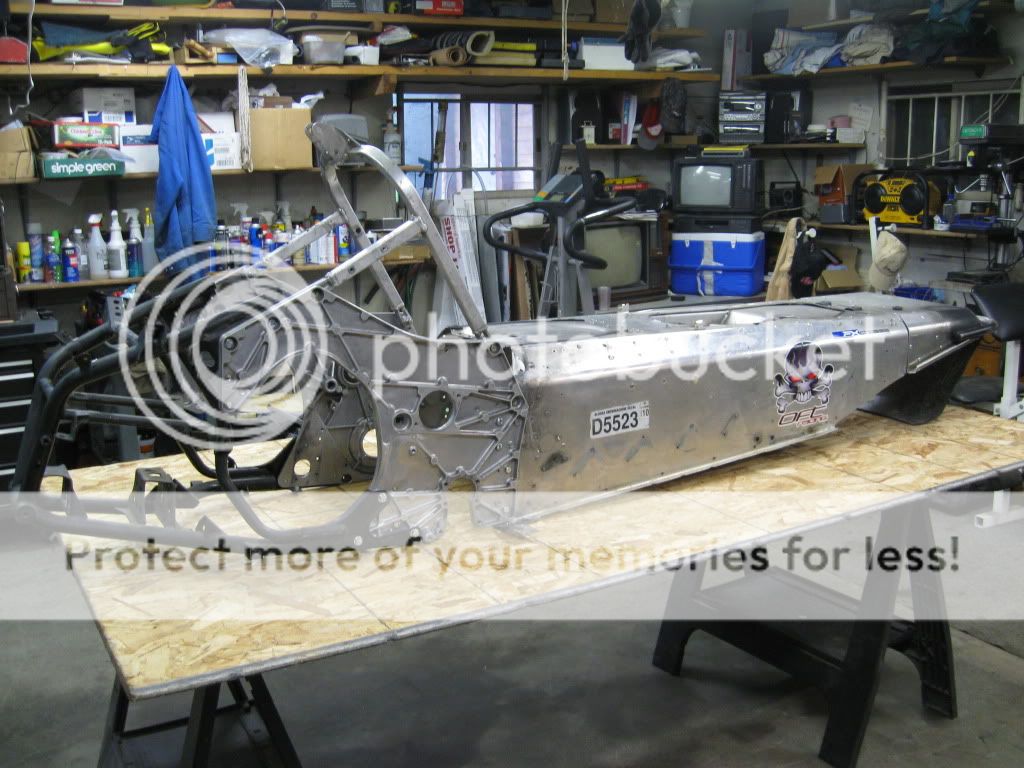

Donor tunnel from Rick for mock up purposes.
sorenson1610
TY 4 Stroke God
- Joined
- Dec 11, 2007
- Messages
- 1,746
- Location
- Rothschild,WI
- Website
- www.contrx.com
- Country
- USA
- Snowmobile
- 2016
Whats the plans for this one?


Nikolai
TY 4 Stroke God
Plans are
- .040 7075 T-6 tunnel, 4130 running boards, built in steering hoop and spars running from the hoop to the subframe shock mounts
- Garret 2554 turbo, 8-9 lbs boost, built as minimalistic as possible
- .065 1-1/8" 4130 steering post, ProRMK bushings, new lower tie rod mount that will be significantly lighter than last years
- Titanium front springs
- 4130 tie rods (might be Ti.)
- 4130 skid arms
- 4130 a-arms
- AC brake reservoir/lever (already bought off Snowest)
- move the brake caliper to the inside of the chaincase mounting ears, move the brake rotor over and cut off the extra jackshaft
I have a long list of mods I'll post ads I build the sled. A lot of the them are just small ways to cut weight but it all adds up. Ultimately I'm hoping to be under 450 lbs dry including the turbo. I have to go out of town for work again in a couple weeks so the major priorities before snow hits are the tunnel and turbo kit. The rest might have to get done throughout the winter.
sorenson1610
TY 4 Stroke God
- Joined
- Dec 11, 2007
- Messages
- 1,746
- Location
- Rothschild,WI
- Website
- www.contrx.com
- Country
- USA
- Snowmobile
- 2016
Sounds pretty sweet, can't wait  to start seeing the build pics
to start seeing the build picsNice!!! can't wait. New a-arms? Didn't you have the skinz skit on?
Nikolai
TY 4 Stroke God
I'm going to jig the Skinz. I wanted to keep my 16.5" shocks but change a few things with the design. I asked Jeff if he cared and he said not at all.
Nikolai
TY 4 Stroke God
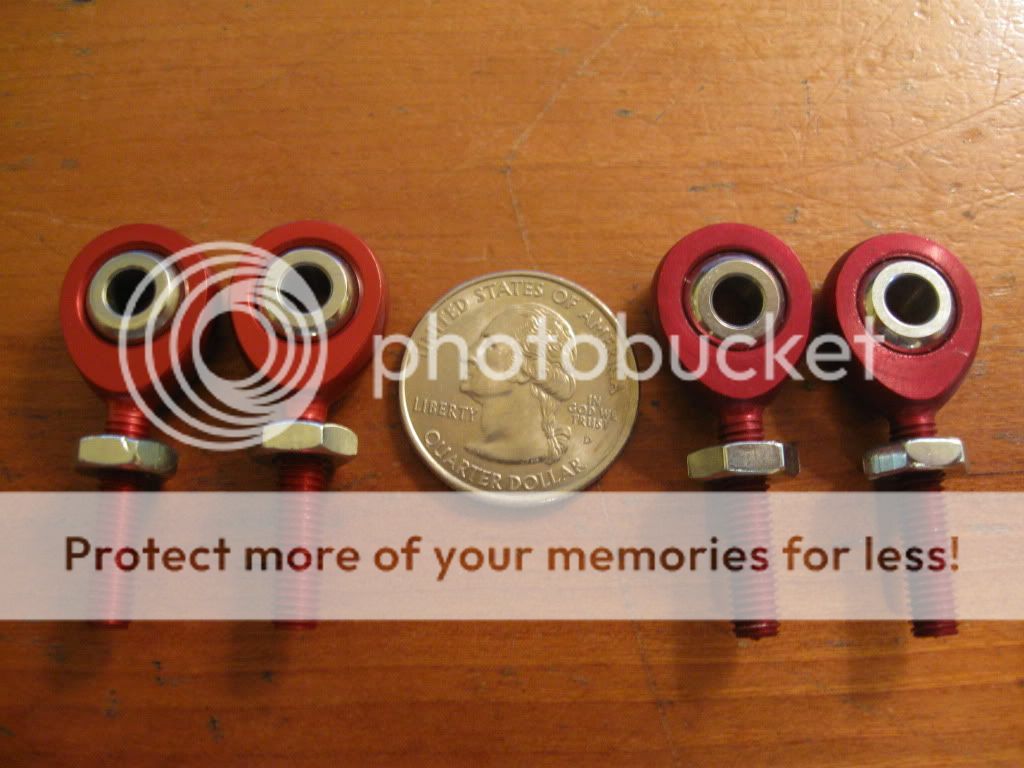
Ordered some goodies today. I got all the ProRMK steering post bushings coming, and I ordered my rod ends for the tie rods.
QA1 now has really nice new high misalignment chromoly rod ends so you no longer have to use spacers. The 3/8" I bought for the tie rods allow 55 degrees of misalignment. I made sure to get their aluminum jam nuts to keep the weight down. Info for anyone interested http://www.qa1.net/qa1_motorsports/drag ... steel.html

I also bought four little aluminum 10-24 rod ends for my linkages that will hold the charge tube to the frame. Info again http://www.qa1.net/qa1_motorsports/drag ... minum.html

Now to figure out what to do for a front cooler.
QA1 now has really nice new high misalignment chromoly rod ends so you no longer have to use spacers. The 3/8" I bought for the tie rods allow 55 degrees of misalignment. I made sure to get their aluminum jam nuts to keep the weight down. Info for anyone interested http://www.qa1.net/qa1_motorsports/drag ... steel.html
I also bought four little aluminum 10-24 rod ends for my linkages that will hold the charge tube to the frame. Info again http://www.qa1.net/qa1_motorsports/drag ... minum.html
Now to figure out what to do for a front cooler.
Off Trail Mike
Gone Riding!
New Turbo build sounds very cool.
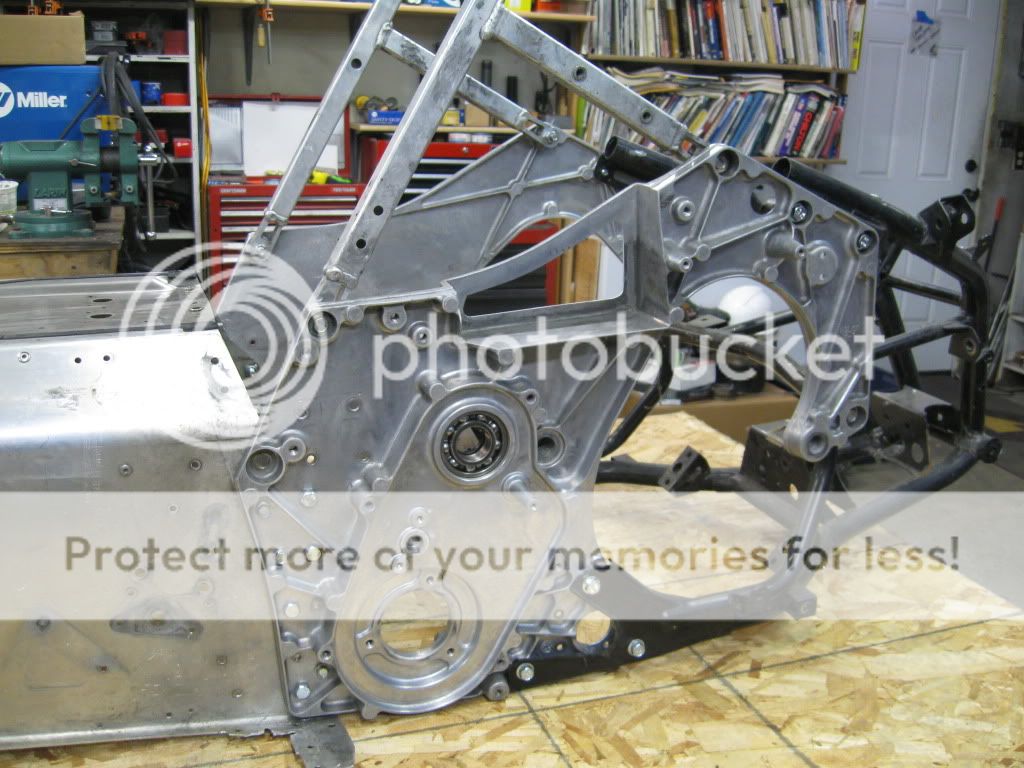
Hey Caleb, you know that third picture on the post.....Tell me if I am crazy but you think it might be possible to put a belt drive on a Nytro? Ditch the battery mount in the diecast frame (we're using lightweight batteries that take less space anyway) and use some of the mounting points around the jackshaft/battery box for a brake caliper mount. Tensioner mount is aready there. For sure you'd have to machine off the chaincase lip on the diecast where the cover mounts, but that's doable.
Not trying to hijack, or add more "features" to the build, but that picture got me thinking....Gotta be a good place to knock off a few more pounds.
Good luck
OTM
Nikolai
TY 4 Stroke God
I've thought about it and would probably give a try if I wasn't adding the turbo. Yamaha's driveline is damn near bulletproof and I'd hate to screw that up.
If you ground the cast edges off, I think you could do it fairly easy if you machined your own plate similar to CMX. I'm not sure what you would do for a driveshaft or jackshaft though aside from having custom ones made. I put a Diamond Drive in a Rev race chassis years ago so anything is possible.
If you ground the cast edges off, I think you could do it fairly easy if you machined your own plate similar to CMX. I'm not sure what you would do for a driveshaft or jackshaft though aside from having custom ones made. I put a Diamond Drive in a Rev race chassis years ago so anything is possible.
Nikolai
TY 4 Stroke God
The aluminum 10-24 rod ends next to a quarter for reference.
Nikolai
TY 4 Stroke God
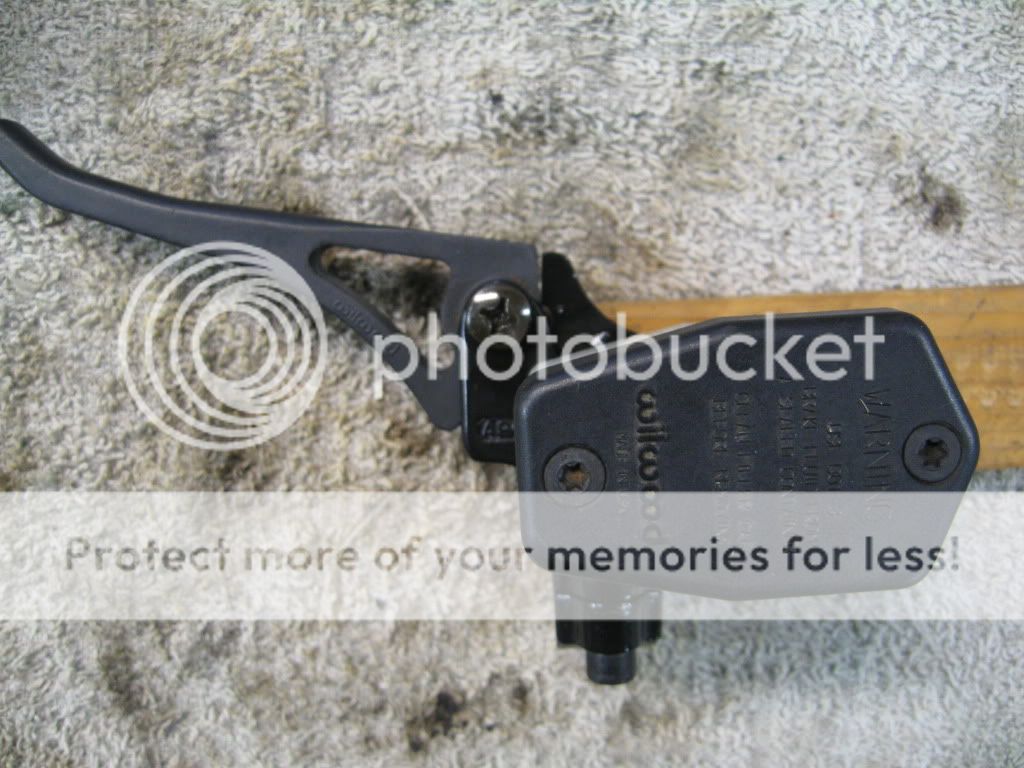
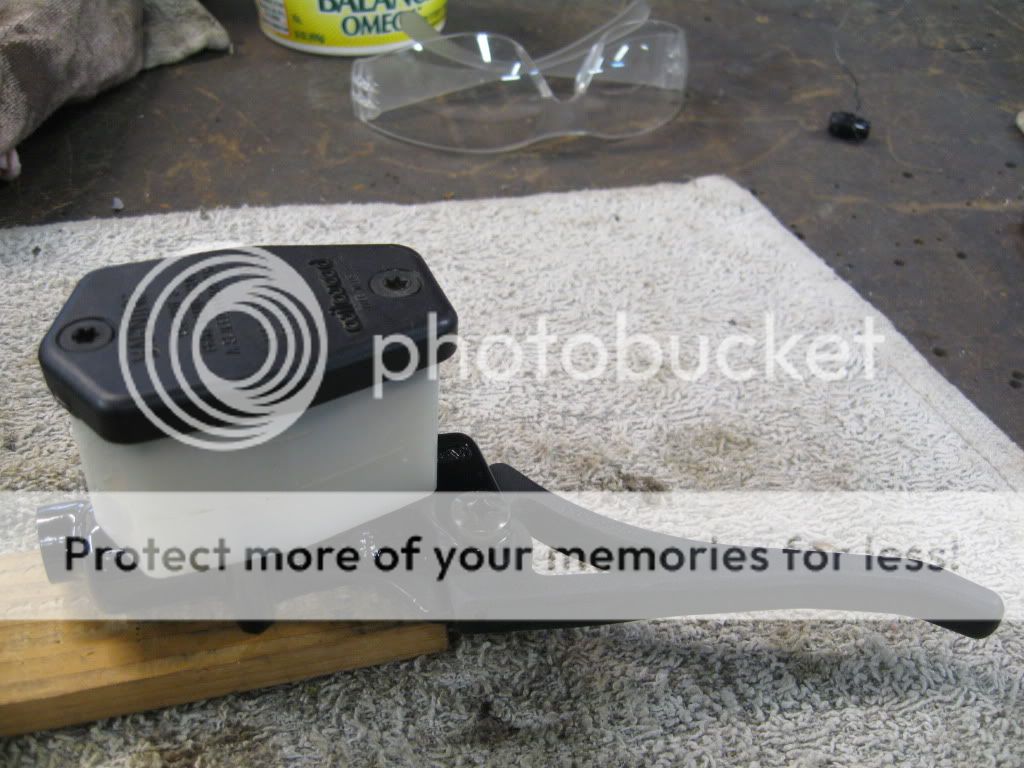
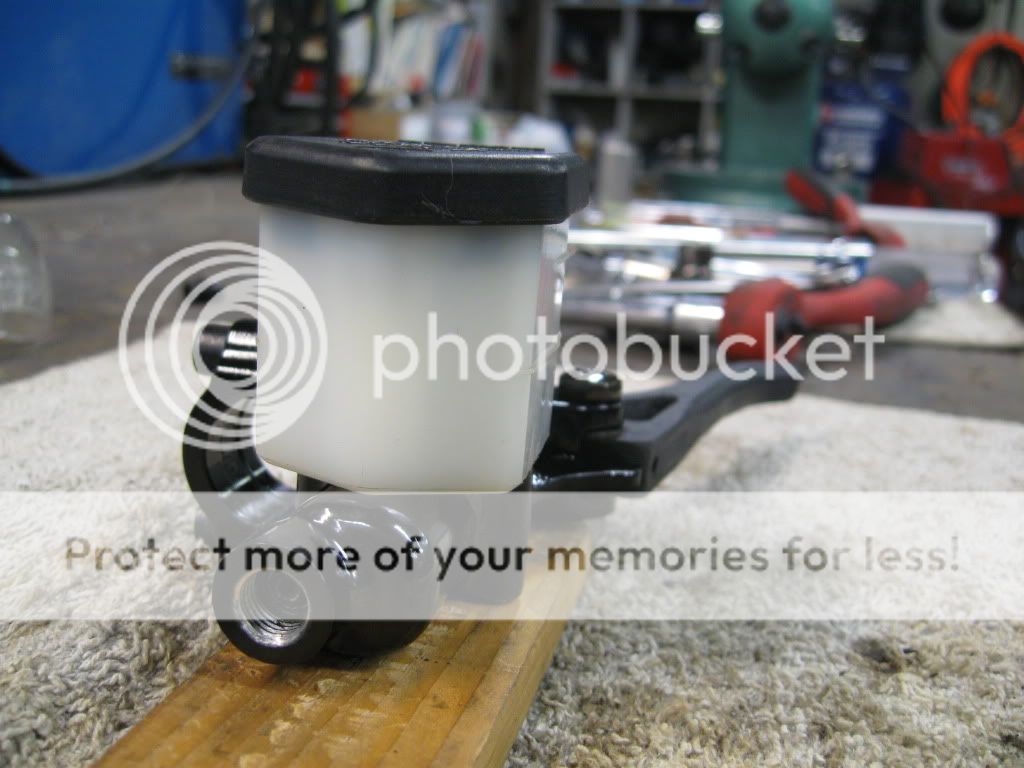
One of the goals this year is to shave weight (no matter how small) from every single part that's going back on the sled. I started on the brake reservoir last night and finished this morning. I used a 2001 ZR800 brake reservoir/lever and shaved it down and made a new brake lever stop.
After the initial shaving down with just files. I cut the webbing out of the brake lever as well. Unfortunately I didn't have any Argon but Rick was kind enough to tack my new lever stop on.
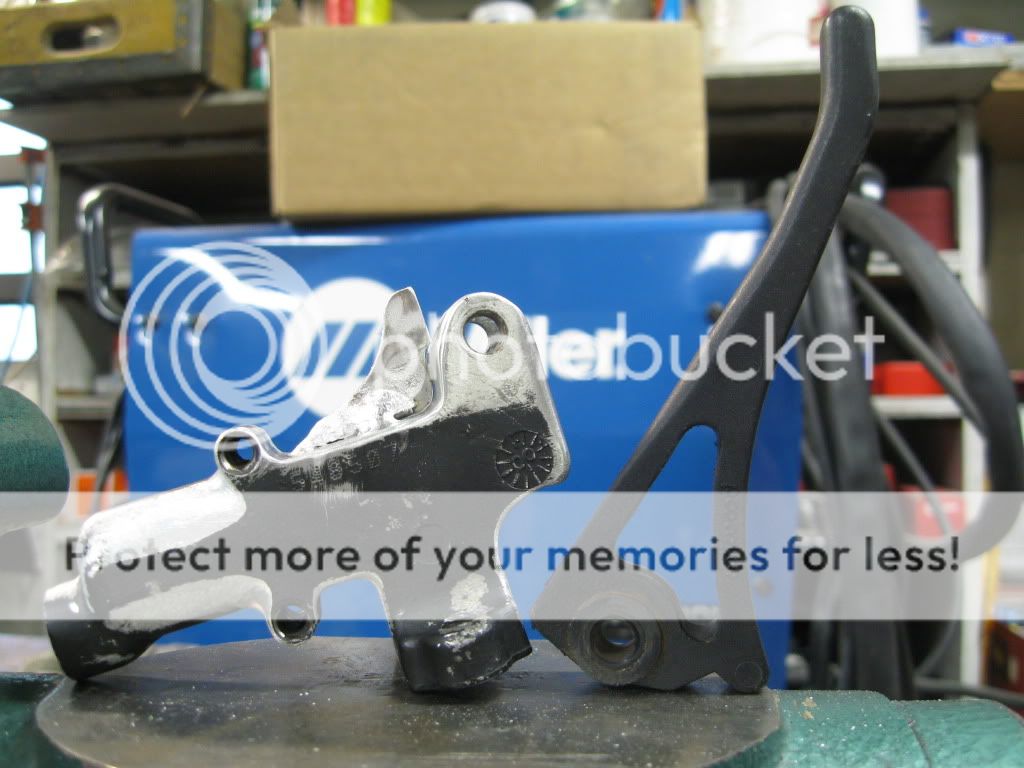
Polished and smoothed all the surfaces.
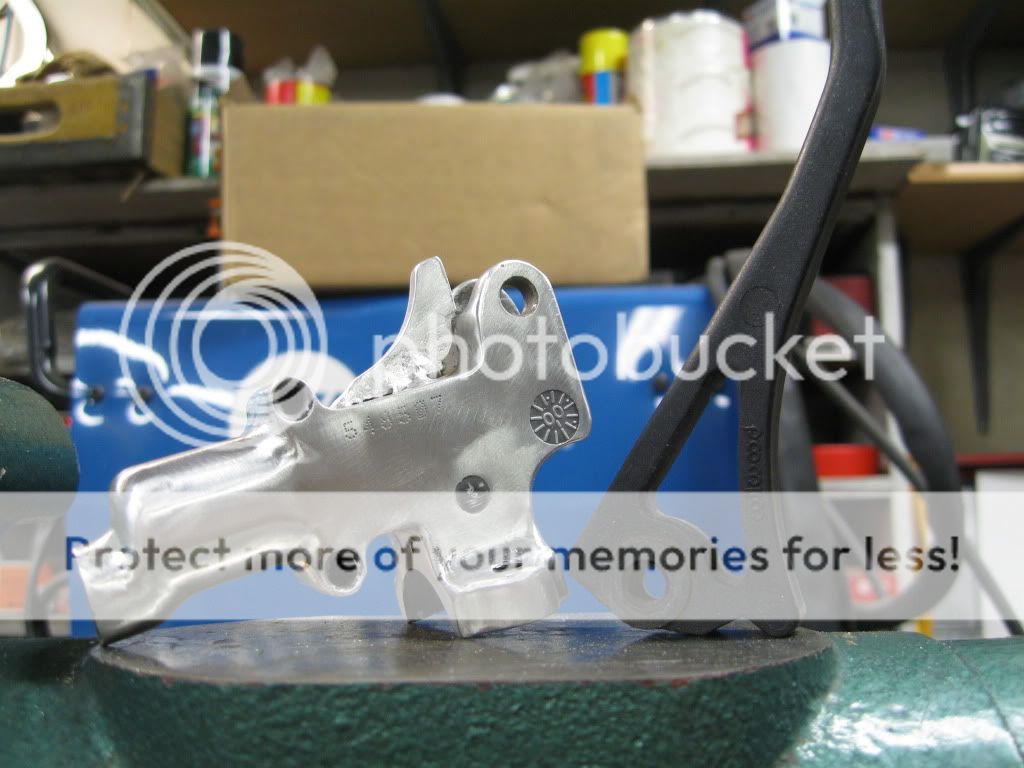
Painted and done. Complete weight without fluid is a scant 7 ounces. Almost a half pound lighter than stock. The lever bolt will eventually be replaced with an aluminum one.

After the initial shaving down with just files. I cut the webbing out of the brake lever as well. Unfortunately I didn't have any Argon but Rick was kind enough to tack my new lever stop on.
Polished and smoothed all the surfaces.
Painted and done. Complete weight without fluid is a scant 7 ounces. Almost a half pound lighter than stock. The lever bolt will eventually be replaced with an aluminum one.
judger101
Expert
this looks like it's going to be a sweet project. very excited to watch the process!
Off Trail Mike
Gone Riding!
Caleb:
Beeze will be laughing..all these AC brake converts. I also found a banjo bolt from Jegs that lets you adapt the AC brake resevoir to the Yami brake cable. Don't know if the polaris caliper uses a banjo or a tapered fitting like AC...but if you need the part number let me know. Works great.
I also converted the high beam switch on my yami over to the AC brake lever actuator (not that you'd use a brake light!) Got me thinking of getting rid of that plastic POS that contains the high/low/grip/thumb controls altogether.
How difficult was it to wire the thumb and grip heater down to the body? Did you use the stock grip/thumb heater? Thinking of a similar setup to what you did: putting two switches down below to eliminate the PITA yami handlebar setup. With Yami finally having 2 switches on the 2013 hopefully its backward compatible for the stock steup or can be wired somehow with two switches. Otherwise its new grip heaters and thumb units.
Very cool ..... keep the pictures coming.
OTM
Nikolai
TY 4 Stroke God
I used a momentary toggle switch so it's essentially like the oem setup. Push the toggle one way for hand warmers and the other way for the thumb warmer. It will cycle through the different heat stages just like stock.
-
This site uses cookies to help personalise content, tailor your experience and to keep you logged in if you register.
By continuing to use this site, you are consenting to our use of cookies.