kinger
VIP Member
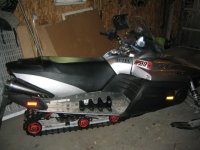
I thought I would make a post on the apex seat install I did today. There are lots of good posts out there on cutting the tank cover so I'll keep that short, however the wiring is not covered specifically how you get the old harness out and the into the apex seat. This should be the only 'right' way to do this because then everything plugs in and is factory.
Summary of steps:
Remove stock seat
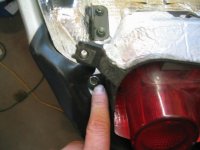
Remove tail light (2 10mm bolts)
Remove wiring harness
Install into apex seat
Bolt in the taillight
Cut tank cover
bolt it in place
Detail of steps:
Remove the stock seat, there are 4 5mm allen screw inside the tunnel holding the plastic shroud under the exhaust pipes on, remove those
There are two phillps screws holding the rear tailight plastic cover on remove those (they are to the sides of the tail light)
There are 3 5mm allen screws on each exhaust outlet, remove those, they are position at 12, 5, and 7 the other two are there for looks
Now everything should come off, next remove the 2-10mm nuts on the exhaust holding the J hooks and seat down.
Seat will now be removed, lift the back first and slide back gently, remove the tailight connection near the front plastic panel (I removed one more phillips heas screw too) and remove seat.
Remove tailight with 10mm socket
Removing the wiring harness, this is where no where on this site there is any info, the only thing I found was a statement saying to remove teh entire seat cover. Too much work and odds are I would never get it back on straight so this is what I did.
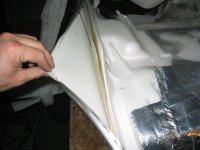
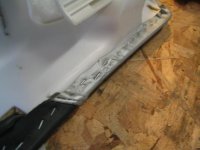
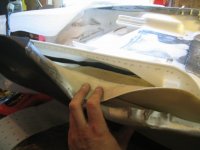
Remove about 15-18 staples on the wiring harness side, you will have to peel back enough of the riveted on heat shield to get two more staples.
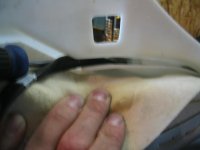
Now follow the wire harness into the seat with your hands it is taped down in 4 spots so I had to feel for it. This will be hard work and you will be grunting a little trying to wedge your arm in between the foam and plastic seat, try to create a cavity and pull on the tailight end of the harness, a few tugs and moving the cavity along as you go the plug will go through and pop out the tailight side. Nice work now staple of the stock seat and take her to the swap meet.
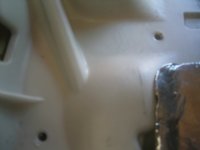
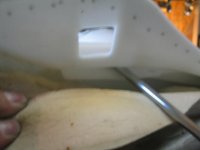
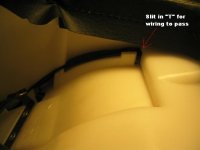
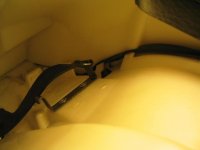
Installing the wire harness into the apex seat is easier then removing it from the stocker. First remove the "T" access panel from inside the glove box. Next with the seat upside down you can reach in there and feel in the corners where the wires should go, it feels like its a dead end! It isn't but here is what you have to do, the glove box assembly is riveted on to the seat frame with a hole just big enough to fit the wiring, what I did was drill out the rivets, and from teh front of the seat feed the tailight end of the harness through the glove box and fframe by prying it open, once its through the wire will fit through the small gap. Re-rivet the 2 rivets and run your wires. If you look in the glove box there are spaces to run the wire harness just feed it in there. On the "T" panel there is a slit on one side where the wiring goes from the tailight. The pictures are worth a 1000 words here.
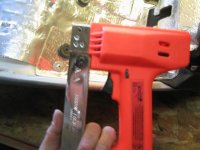
Next staple up the seat ( used a power arrow stapler I got from Ace hardware) tap all the staples flush, bolt in the taillight and your done!
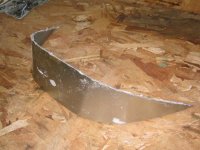
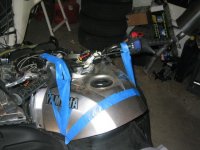
Next cut your tank shroud, go 3.5" not 3.25" like some posts say, and go out to the ends of your tank shroud where there is a little point. I used 3M painters tape and layed my line over and over and over again till I got it perfect then used a dremel cutting wheel to cut. I also did it on the sled and just suspended it in air with tape, a small bungee would work great here. Make sure to put the gas tank cap on UNDER the shroud before cutting, the plastic flys everywhere!
Install the seat in reverse and enjoy your new ride height!
Any questions ask!
Attachments

kinger
VIP Member

kinger
VIP Member
That's a nice step-by-step.

kinger
VIP Member

kinger
VIP Member
Wish I could organize the pictures so they are in order! LOL
kinger said:Wish I could organize the pictures so they are in order! LOL
Always remember the first picture you post will be the last one you see just delete and repost in reverse order

Nice job on the step by step btw looks real good

sleddheadd
TY 4 Stroke God
nice job, Kinger!! i will be doing that same thing to my warrior real soon , thanks for posting the pics.! .... i might be getting back to you with some questions! 


kinger
VIP Member
Seat is fricken Awesome, I love just sitting on it!! Any questions ask I tried take pictures of problem areas. Thanks!!


mulot30th
Lifetime Member
- Joined
- Jul 7, 2007
- Messages
- 1,634
- Age
- 49
- Website
- youtube.com
- Country
- Canada
- Snowmobile
- 2023 thundercat
apex mountain crracing 174
apex blower 136 for asphalt racing
osp drag race sled (apex engine based)

kinger
VIP Member
Yeah I thought they looked too aftermarket and I wanted a trunk and factory look. They are also to tall for trail riding in Wisconsin, I rarely stand when go flying down the trails.
Kinger do you still have the peice of plastic you cut off. I could use it as a template. Did you just go down 3.5 right in the middle then go straight out? I don't want to mess mine up when I cut it. Paul

kinger
VIP Member
Hey max,
Yeah just like you said. There is a point on the gas cap cover on the sides go straight to that point from the center. Dont worry it was easy! Just use tape and it from teh 3.5" mark and the point on the side till its perfect then cut.
Yeah just like you said. There is a point on the gas cap cover on the sides go straight to that point from the center. Dont worry it was easy! Just use tape and it from teh 3.5" mark and the point on the side till its perfect then cut.
Swiss Sledder
TY 4 Stroke God
Great job. Moving to FAQ section for future reference.
- Status
- Not open for further replies.
Similar threads
-
This site uses cookies to help personalise content, tailor your experience and to keep you logged in if you register.
By continuing to use this site, you are consenting to our use of cookies.

