Off Trail Mike
Gone Riding!
Since I've been under the gun to finish this year's MTX mods, I haven't had much time to look at the Crossfire skid in my XTX. But had some time this am and after comparing Alatalo's Yami Light Weight dimensions, I started looking at the collapsed position of the skid when comparing MTX and AC shocks and noticed something interesting.
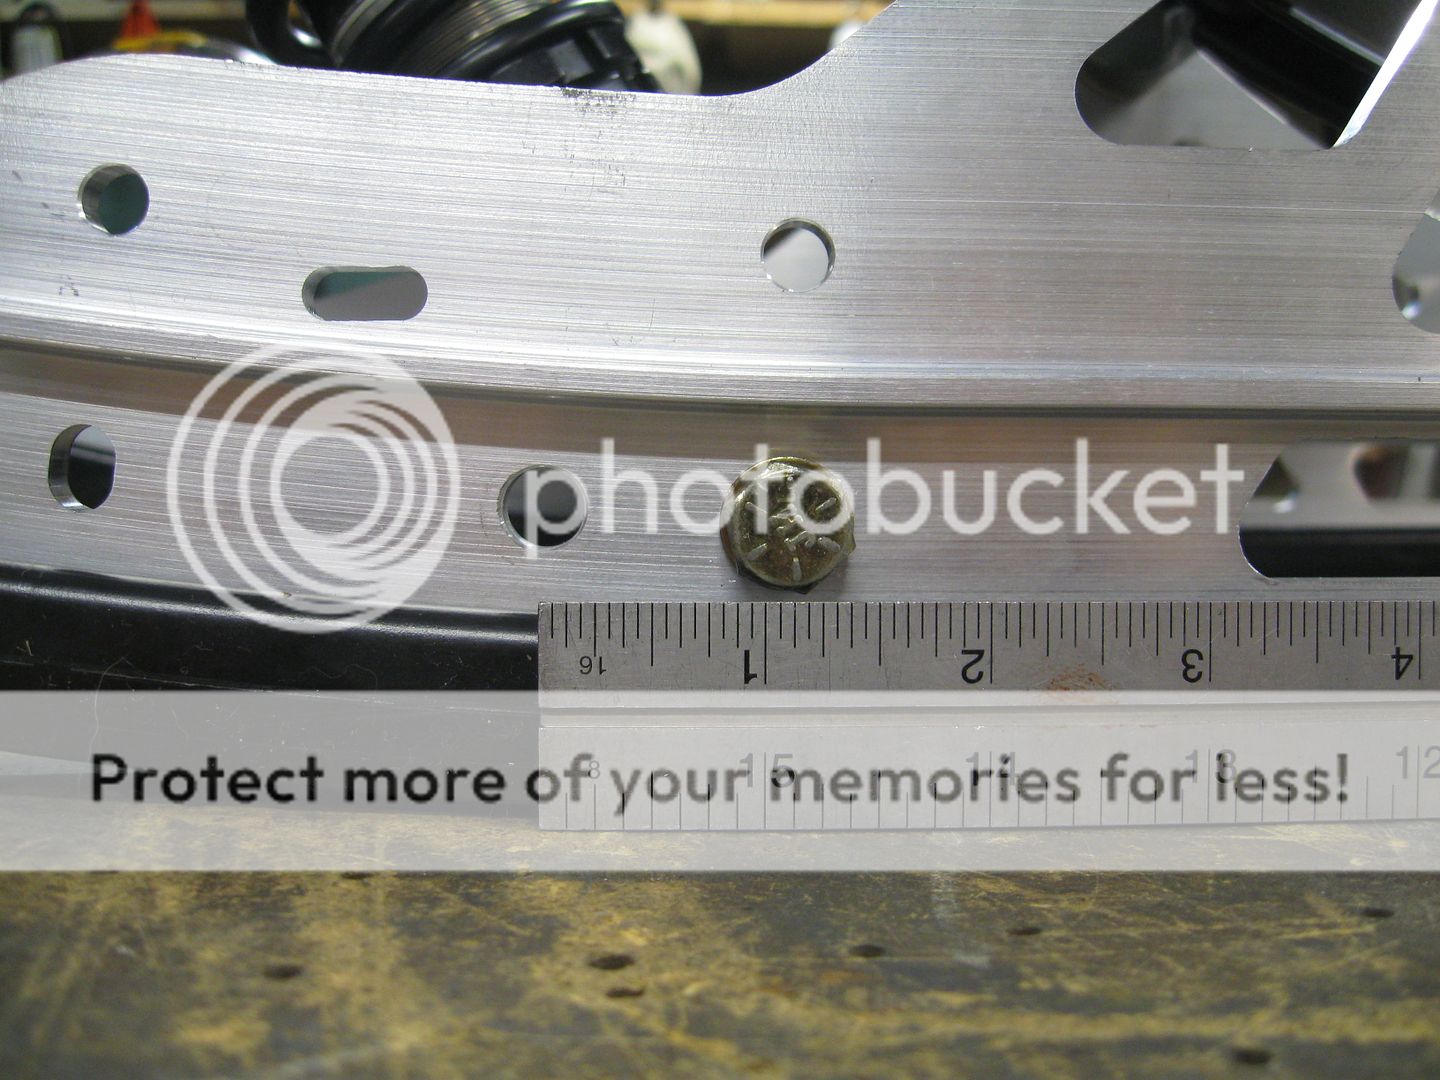
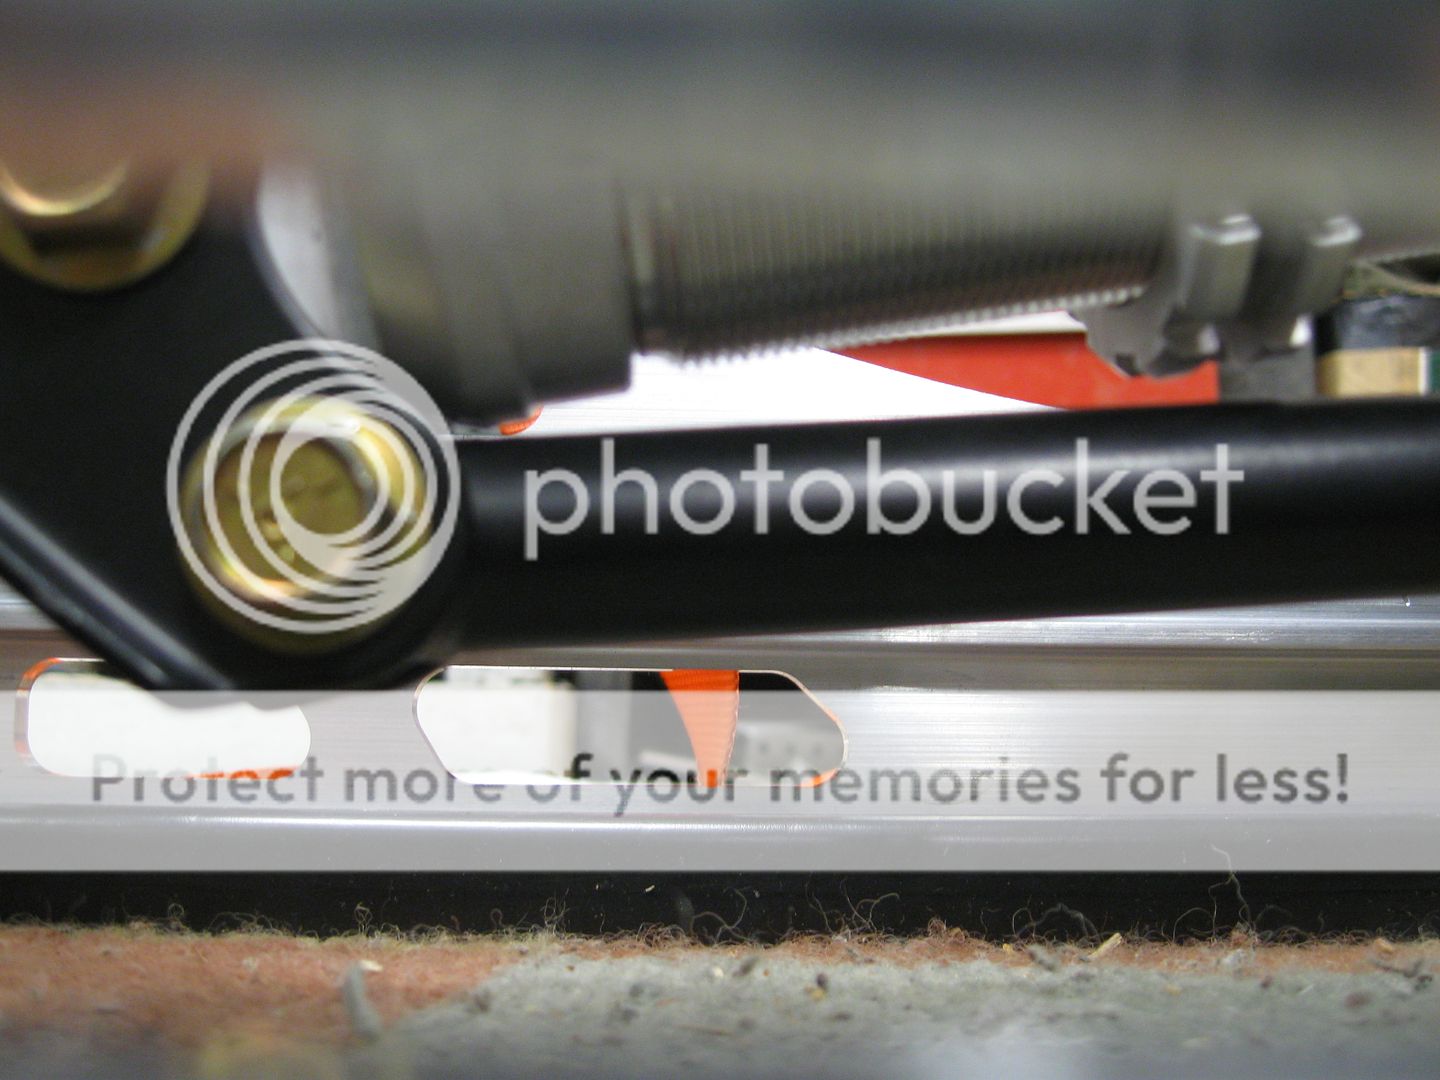
Using the stock 16" c-c rear shock, and the 12.5" c-c CF front shock, I realized that the inter axle spacing is not the same as the M skid (31.25"), the optimum spacing is likely between 30.4" and 30.7. The why is simple. The crossfire shock has more travel and puts the "at rest" front arm higher and closer relative to the rear mount. The reason its important has to do with the collapsed position of the rear shock. At 31" spacing you can see below that there is virtually no space (maybe 0.020") between the suspension pull rod and the shock. So any ice accumulation on the pull rod is going to grind into the shock seal surface when bottomed out if axle spacing is at 31" plus.

Here is the same gap at 30.375 axle spacing showing how sensitive the position is to the pull rod/shock gap. The gap expands to about 3/16" (4.75mm)

So, I'm using 30.5 as the inter axle spacing.
Next was to figure out the front axle relative to the track and tunnel, which I can say after a few hours of playing around on CAD is rather tricky. In the "at rest" position, I only have a gap of an inch or so between the front axle pivot and the inside of the track (1.36" track to bolt centerline), which is tight, meaning the track may rub on the axle. The only option is to pull in the limiter strap and reduce the front skid suspension travel a bit. The question is how much? So I used Nikolai's positioning as a start.
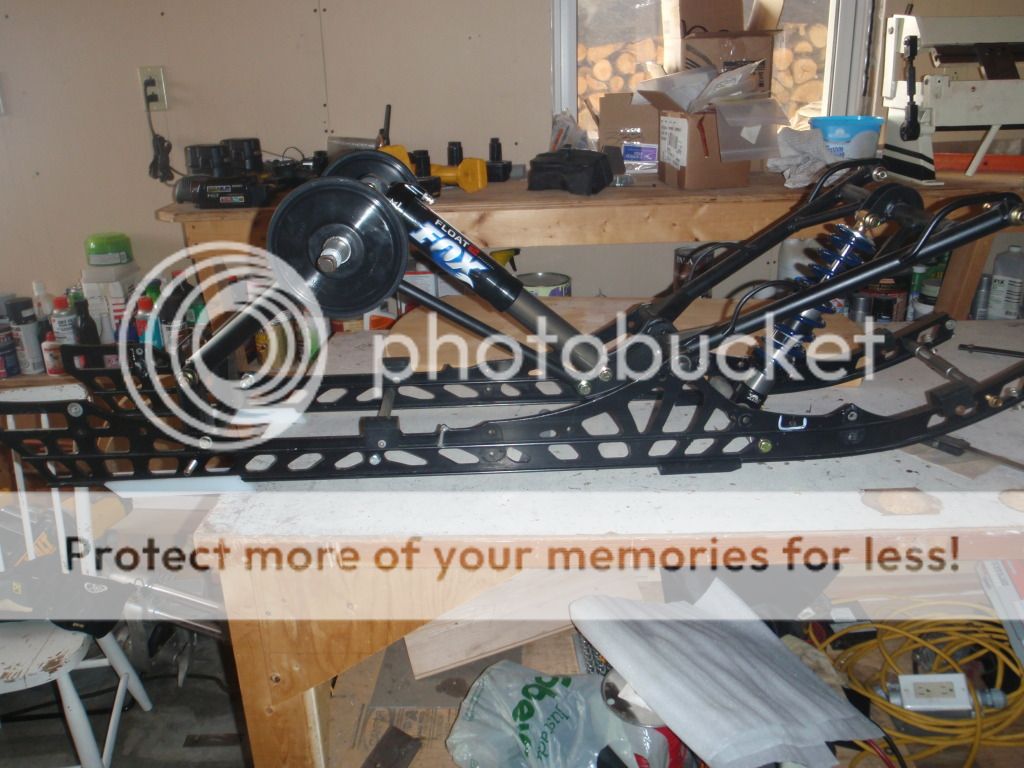
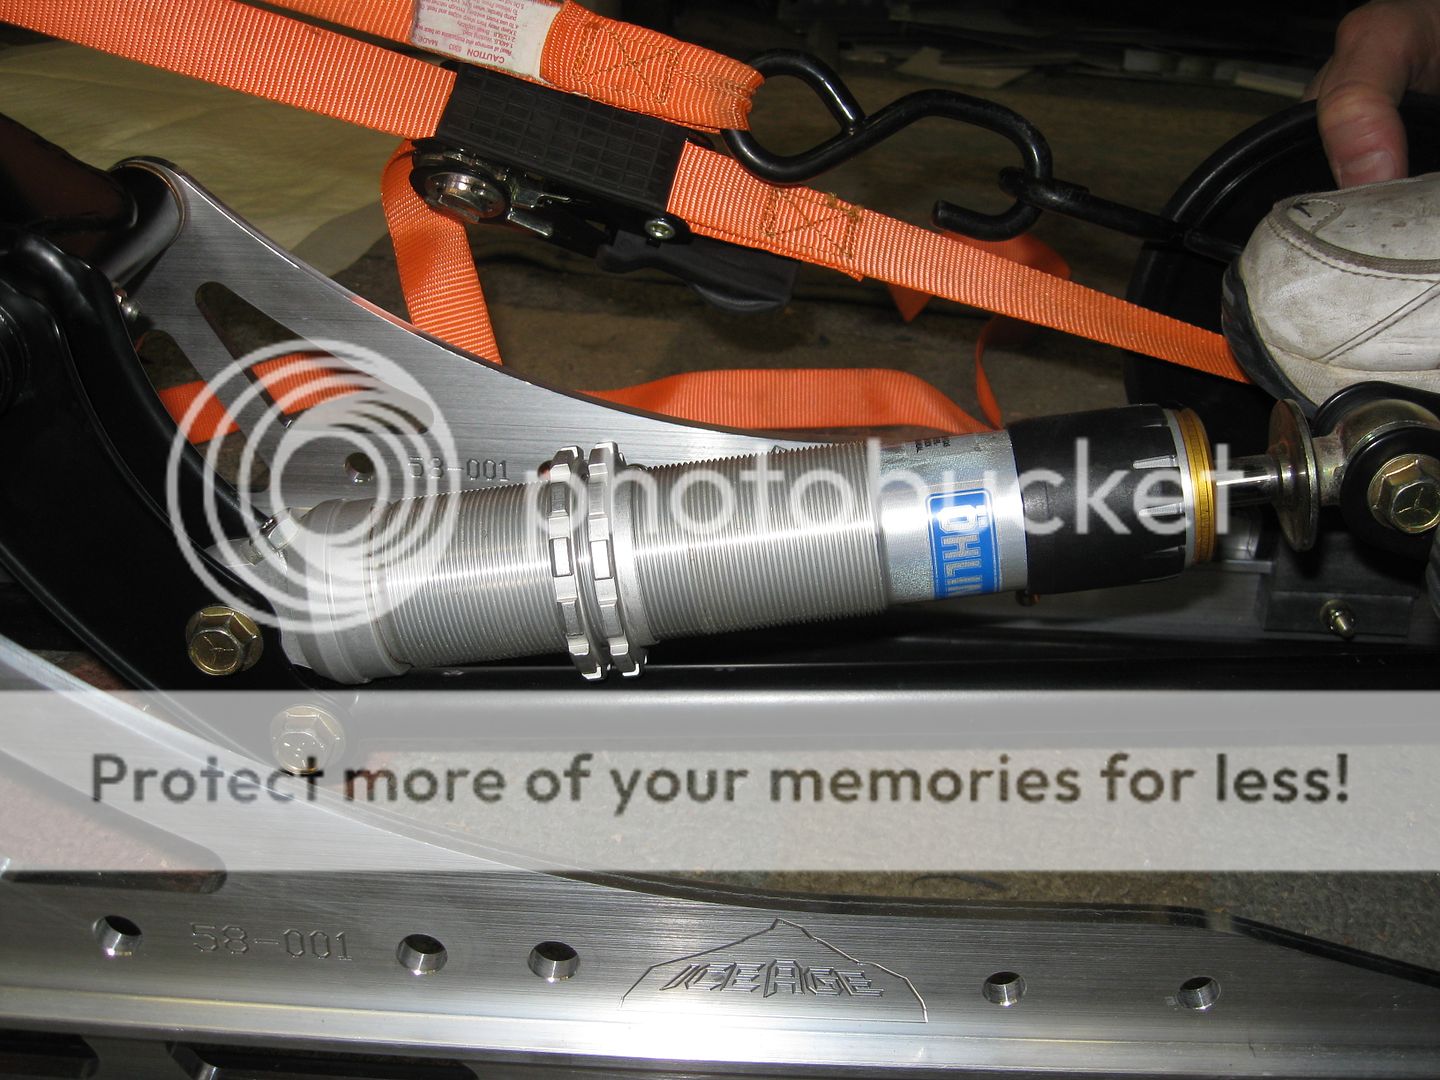
I am pretty sure Arctic Cat struggles with this too, as I can see wear on my rail tips which means their tipped up section can protrude into the track line if someone maxed out their limiter strap, Here are a few pic's of the skid and the mountinig positions.
Stock suspension layout, which has much longer front travel than the M
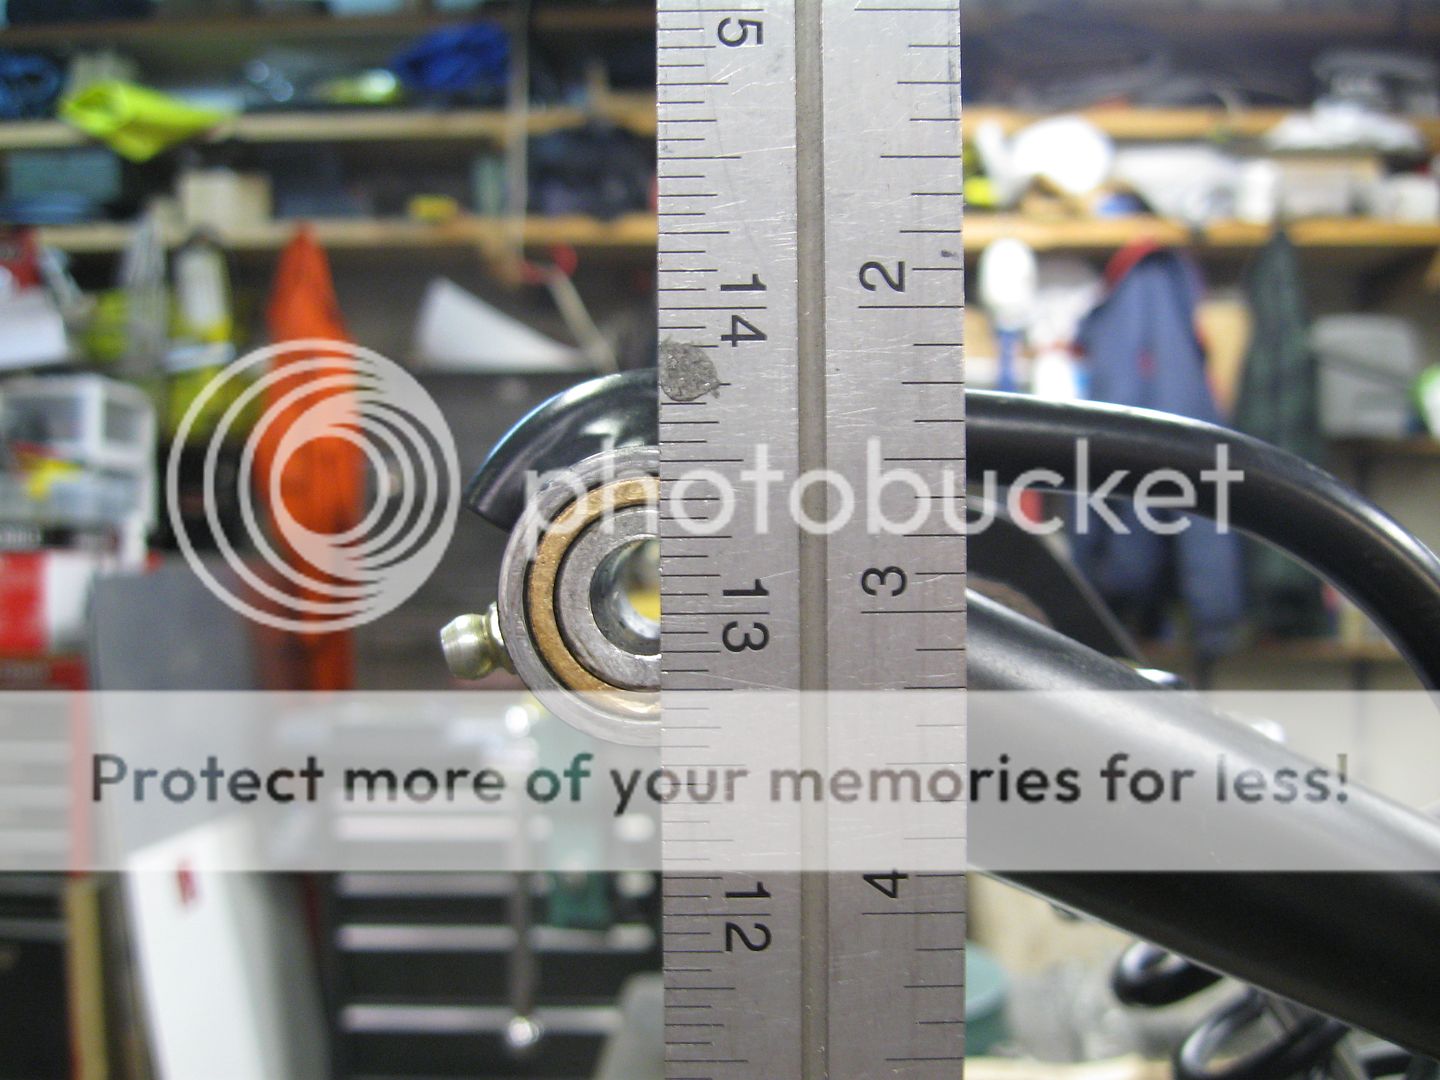
The front "at rest" mounting height above the Hyfax (13.614)
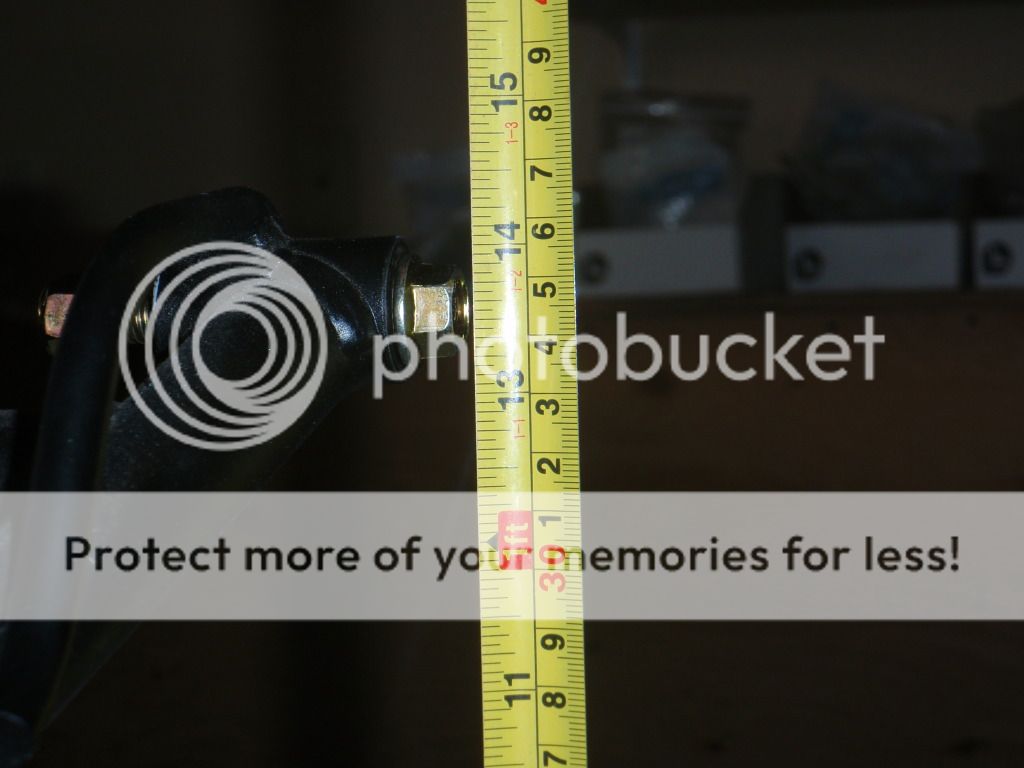
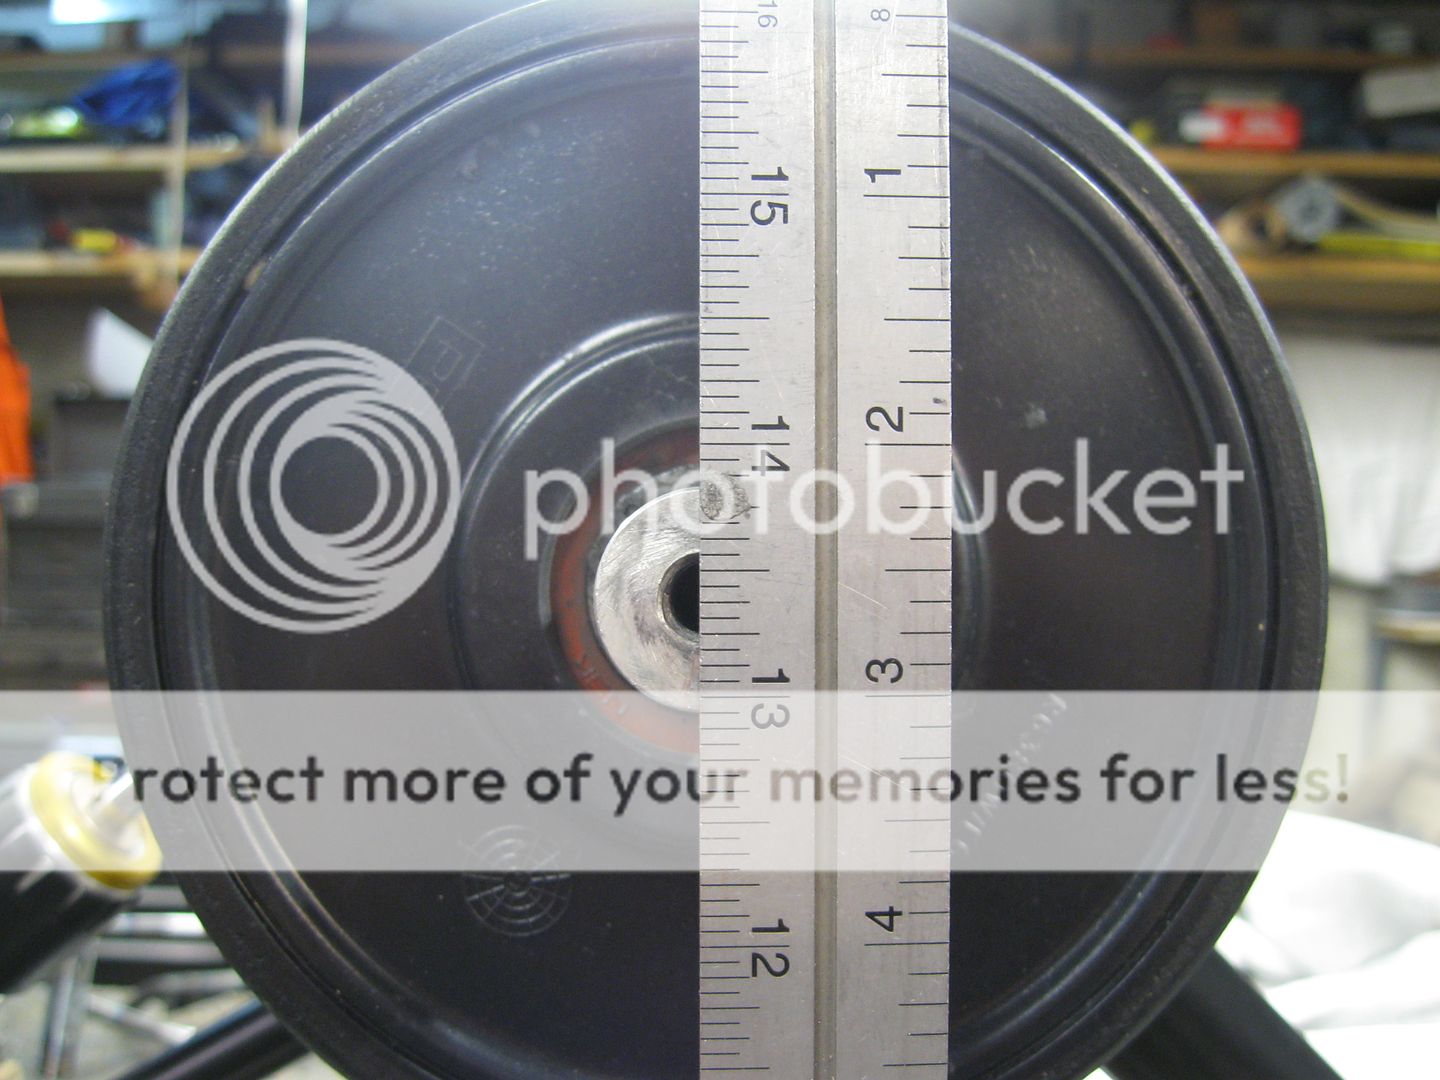
The rear mounting height "at rest" above the hyfax (12.678")

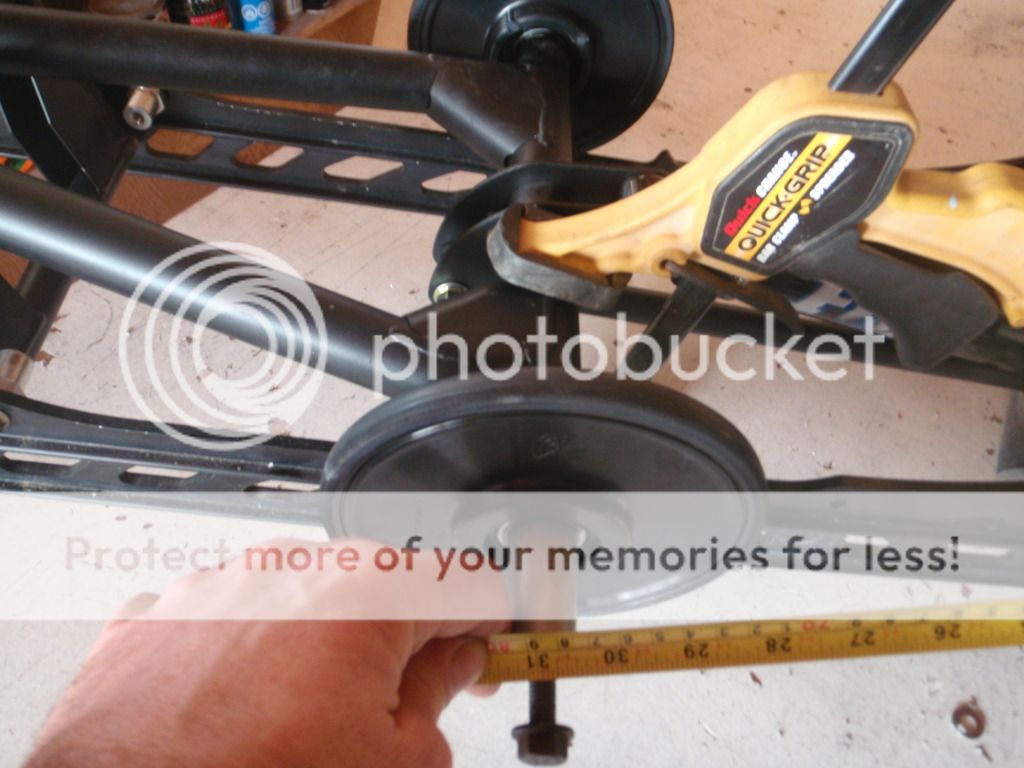
Here's the collapsed axle spacing with a pull rod/shock gap at >0.020
So my first pass of suspension positioning of the 141 CF suspension for a 144 Nytro is the following:
Drive Axle to Front Mount: 12.45"
Top of tunnel to Front Mount: 8.84"
This is about the same as Nikolai, but slightly back of his position. The difference is likely due to my setups normally put the rear axle as far forward as possible in the rear axle tension adjusters...just seem to work out this way. You can see it in yellow below:
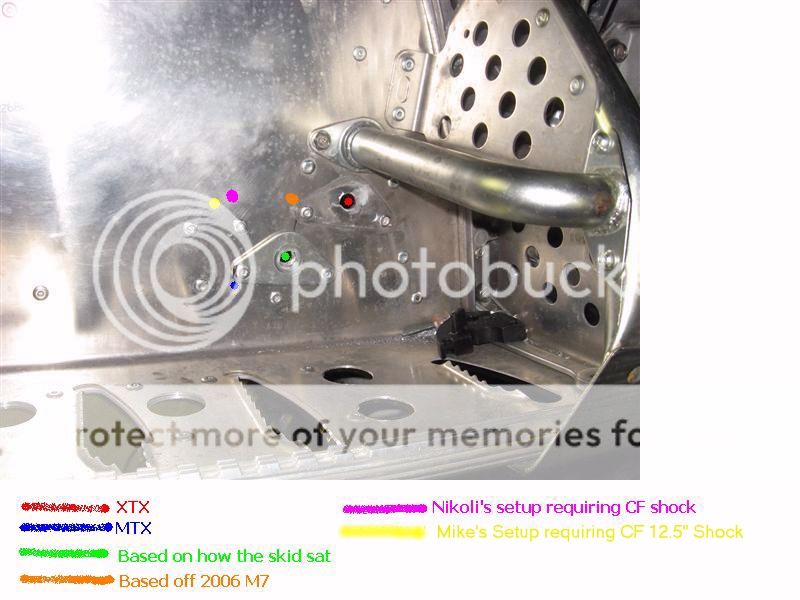
The mount is roughly 2.25" above the MTX mounting hole and 0.44" back towards the rear of the sled. I'll get a pdf of the position relative to surrounding rivets once I do a bit more checking.
Interaxle spacing is 30.5" (remember for the CF 12.5" front shock only. If you use the 11.25 M shock, this won't work)
Rear Axle is 12.0 below the top of the tunnel, which again is the same as Nikolai.
Next steps for me are to figure out the reinforcing plates for the new front axle position and drop brackets, but it's going to have to wait as we are heading out for a run tomorrow!
OTM
Using the stock 16" c-c rear shock, and the 12.5" c-c CF front shock, I realized that the inter axle spacing is not the same as the M skid (31.25"), the optimum spacing is likely between 30.4" and 30.7. The why is simple. The crossfire shock has more travel and puts the "at rest" front arm higher and closer relative to the rear mount. The reason its important has to do with the collapsed position of the rear shock. At 31" spacing you can see below that there is virtually no space (maybe 0.020") between the suspension pull rod and the shock. So any ice accumulation on the pull rod is going to grind into the shock seal surface when bottomed out if axle spacing is at 31" plus.
Here is the same gap at 30.375 axle spacing showing how sensitive the position is to the pull rod/shock gap. The gap expands to about 3/16" (4.75mm)
So, I'm using 30.5 as the inter axle spacing.
Next was to figure out the front axle relative to the track and tunnel, which I can say after a few hours of playing around on CAD is rather tricky. In the "at rest" position, I only have a gap of an inch or so between the front axle pivot and the inside of the track (1.36" track to bolt centerline), which is tight, meaning the track may rub on the axle. The only option is to pull in the limiter strap and reduce the front skid suspension travel a bit. The question is how much? So I used Nikolai's positioning as a start.
I am pretty sure Arctic Cat struggles with this too, as I can see wear on my rail tips which means their tipped up section can protrude into the track line if someone maxed out their limiter strap, Here are a few pic's of the skid and the mountinig positions.
Stock suspension layout, which has much longer front travel than the M
The front "at rest" mounting height above the Hyfax (13.614)
The rear mounting height "at rest" above the hyfax (12.678")
Here's the collapsed axle spacing with a pull rod/shock gap at >0.020
So my first pass of suspension positioning of the 141 CF suspension for a 144 Nytro is the following:
Drive Axle to Front Mount: 12.45"
Top of tunnel to Front Mount: 8.84"
This is about the same as Nikolai, but slightly back of his position. The difference is likely due to my setups normally put the rear axle as far forward as possible in the rear axle tension adjusters...just seem to work out this way. You can see it in yellow below:
The mount is roughly 2.25" above the MTX mounting hole and 0.44" back towards the rear of the sled. I'll get a pdf of the position relative to surrounding rivets once I do a bit more checking.
Interaxle spacing is 30.5" (remember for the CF 12.5" front shock only. If you use the 11.25 M shock, this won't work)
Rear Axle is 12.0 below the top of the tunnel, which again is the same as Nikolai.
Next steps for me are to figure out the reinforcing plates for the new front axle position and drop brackets, but it's going to have to wait as we are heading out for a run tomorrow!
OTM
Alatalo
TY 4 Stroke Master
Thank you OTM - quality information...!
In order to complete the comparison, I will check my axle spacing in the tunnel as well as on the rails. I already know that my center swingarm mounting point is slightly lower and more forward than your calculated point for the "real" AC skid (likely because of the more "curved" Yamaha rail design), but it will be interesting to see if the other numbers match too. Who knows, maybe one of you guys is interested in trying your AC swingarms on Yamaha rails...?
I did another 100 kilometers during two days, unfortunately wet and heavy but still fresh snow only (we are being dumped on and the temperature is just above freezing point...). I do prefer the behaviour of the Lightweight Kit compared to the OEM skid. Part because of the weight transfer characteristics, part because of the slow speed flotation.
The initial weigh transfer feels more intense which means it is easier to wheelie with your right thumb. However, in comparison to the OEM skid, the wheelie is much more easy to control with body position. I would call it a more linear weight transfer feeling than the OEM skid.
Also, during slow speed riding, it does feel like the Lighweight Kit climbs up on top of the snow instead of trenching or digging a ditch. This is important to me that spends a lot of time between the trees.
Nikolai
TY 4 Stroke God
Excellent information Mike, especially the pictures with the rear shock collapsed. My setup is a little different now and it made me go pull the spring off my shock and double check the pullrod clearance.
Specs:
153 Ice Age rails part#58-001
Crossfire 12.5" front shock
Ohlins rear shock is 16.625"
"At rest" axle C to C is 31.5". I have to use a ratchet strap or relax the spring on the Ohlins to get the skid in to the 31-1/4" mounting holes and I'm sure this is because of the longer Ohlins shock.
The Ice Age rails only come with the lower shock hole for M shocks. I wanted to retain the longer crossfire shock, so I opened up the next set of holes (meant for bogie wheel mounting blocks) behind the lower shock mount holes. They're further back than they should be but there wasn't enough room to drill holes in the right spot so I had to make due.
The front hole is for the M series track shock which based off my Ice Age rails, is about 31.375" C to C from the rear lower swing arm bolt.
Looking at my 141 Crossfire rails, the C to C of the lower shock mount and rear lower swing arm mount is about 29.5".
The Bogie wheel hole I used to mount the Crossfire shock on my Ice Age is rails, is 29.1875". I end up with a little less travel and have a slightly flatter shock angle than a factory CF skid.
Front arm height
Rear arm height
Resting on the bumpstops with the swing arms 31.25" apart.
Shock body/pull rod clearance 31.25" apart. I was relieved to see it not hitting the pull rod.
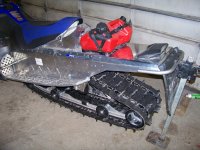
Here's the complete skid.

Specs:
153 Ice Age rails part#58-001
Crossfire 12.5" front shock
Ohlins rear shock is 16.625"
"At rest" axle C to C is 31.5". I have to use a ratchet strap or relax the spring on the Ohlins to get the skid in to the 31-1/4" mounting holes and I'm sure this is because of the longer Ohlins shock.
The Ice Age rails only come with the lower shock hole for M shocks. I wanted to retain the longer crossfire shock, so I opened up the next set of holes (meant for bogie wheel mounting blocks) behind the lower shock mount holes. They're further back than they should be but there wasn't enough room to drill holes in the right spot so I had to make due.
The front hole is for the M series track shock which based off my Ice Age rails, is about 31.375" C to C from the rear lower swing arm bolt.
Looking at my 141 Crossfire rails, the C to C of the lower shock mount and rear lower swing arm mount is about 29.5".
The Bogie wheel hole I used to mount the Crossfire shock on my Ice Age is rails, is 29.1875". I end up with a little less travel and have a slightly flatter shock angle than a factory CF skid.
Front arm height
Rear arm height
Resting on the bumpstops with the swing arms 31.25" apart.
Shock body/pull rod clearance 31.25" apart. I was relieved to see it not hitting the pull rod.
Here's the complete skid.
beeze455
Expert
I went with the orange dot setup location and she finally did not ratchet and was a fairly loose track!
I think anybody doing this mod should lookat those dots and discover that height is key. Nikoli, OTM and Me all have the same height and came up with it different ways.
My setup dug holes all day to china until I cranked my front shocks to 140! seemed really high.
I think anybody doing this mod should lookat those dots and discover that height is key. Nikoli, OTM and Me all have the same height and came up with it different ways.
My setup dug holes all day to china until I cranked my front shocks to 140! seemed really high.
kennyspec
Expert
Such a awesome thread!! I will be looking to it during my cat skid swap. One question though, does the skid need to be from a M series (looking for a 153) or can we use the newer cat skid from the 2012+ HCR? also my MTX is running a 156" track. will the cat skid have enough track adjustment to run the 156 track in a 153 skid? i think i recall that guys were running the rear idlers as far forward as they could go when using the 153 skid and a 153 track.
beeze455
Expert
Not sure about the new skids.
Adjustment you can get an offset axel with biggers wheels to adjust. Takes up a lot more track.
Adjustment you can get an offset axel with biggers wheels to adjust. Takes up a lot more track.
hugger70mtnmax
Expert
Kenny not sure on the differences but find one and compare measurements. Someone has to do it first so let us know how it goes.
Off Trail Mike
Gone Riding!
Kenny:
The new AC skid isn't much different than the old one, so yes it will fit. The new HCR's have lowered the mounting holes in the tunnel to accommodate the 2.6" lug on the new powerclaw. I also know they have a service bulliten out as a result of moving the front mount. The new track position stabs more easily, but basically the SKID remains unchanged.
On the 153/156 question, its no issue with my mounting position as I have my rear axle way forward in the adjuster with the 153 track on it, so you could easily pull it back the 1.5" you need to make the 156 work. Look at Nikolai's build thread and that is exactly what he is running: a 156 track on a 153 skid.
http://www.ty4stroke.com/viewtopic.php?t=111935
Its one mod I am planning to do when my current track is worn out....
OTM
..SNAKEBIT..
Expert
So I bought a 2007 cat 162 skid
and I should start out with OTM pdf for the front hole and build rear brackets out of 1/4 aluminum
and I should start out with OTM pdf for the front hole and build rear brackets out of 1/4 aluminum
Off Trail Mike
Gone Riding!
Snakebit:
I used the 1/4" aluminum and built the upper part of the drop bracket the same overall dimension of the stocker and used the same holes (bolts and rivets), so its beefy but still way lighter than stock. My reasoning is there is a lot of load on these brackets during drops and air, and we've seen the narrow drop brackets crinkle the tunnel. I am on year two and so far, no problems, mind you I'm not doing drops with my sled either.
I also bent a 1.5mm thick aluminum plate that ties the drop bracket to the running board for added security. Again, I was trying to mimick's the stock brackets strength but in aluminium rather than steel.
If you want pictures, I can post them tonight, but I think somewhere back in the pages of this thread you can see how they were built.
OTM
..SNAKEBIT..
Expert
I just dont want to make swiss cheese out of the tunnel to find the correct mount location if I can help it. also running under tunnel exhaust
so I think I have read every cat skid post 10 times
and sometimes I think I get more confused lol
I also wanted to use the 8" cat rear wheels.
so I think I have read every cat skid post 10 times
and sometimes I think I get more confused lol
I also wanted to use the 8" cat rear wheels.
Nikolai
TY 4 Stroke God
If you are running 162 rails with the 162 track in your sig, you'll have to set the suspension forward 1.5" from my measurements and you will also be lower because mine are based off the CF shock.
Looking at Mikes picture with all the mounting locations, I think maybe 1/2" forward and above of the green dot would be a good place to start. Just make sure to cycle the suspension without the front track shock in to check clearance from the drivers to your rail tips.
Looking at Mikes picture with all the mounting locations, I think maybe 1/2" forward and above of the green dot would be a good place to start. Just make sure to cycle the suspension without the front track shock in to check clearance from the drivers to your rail tips.
Off Trail Mike
Gone Riding!
X2 Nikolai:
That's pretty much where my pdf of the 153 front axle mount is. You can move slightly forward (1/2" and maybe 1/4" below my mount and it will still work, but you will need to lower your drop bracket location slightly, and it will definitely add a bit of ski pressure.
Snakebit, we are all running Arctic Cat 8 inch rear wheels. Its the stock setup with these rails unless you run offset axles, which is not neccessary, and would be tough to make fit.
On the undertunnel. IMHO it's a RPITA. I've basically given up on the idea, preferring to go to a Vector Header/Yoshi tipped up at 30 degrees. There is simply not enough room for an undertunnel without doing a pile of work, and you will see this when you collapse the rear shock, while keeping the front fully extended how little clearance you have. Rick's (rlcofmn's) comments regarding clearance really made me think twice about the undertunnel.
With the Yoshi (or any sportbike pipe) and the skinz seat, I am able to carry a 3 gallon rotopak tank and and a rear pack. I have 500km's on this setup and no melting or burning or discoloration on gas tank or bag whatsoever and tunnel ice buildup is pretty much non existant.
Here's the profile
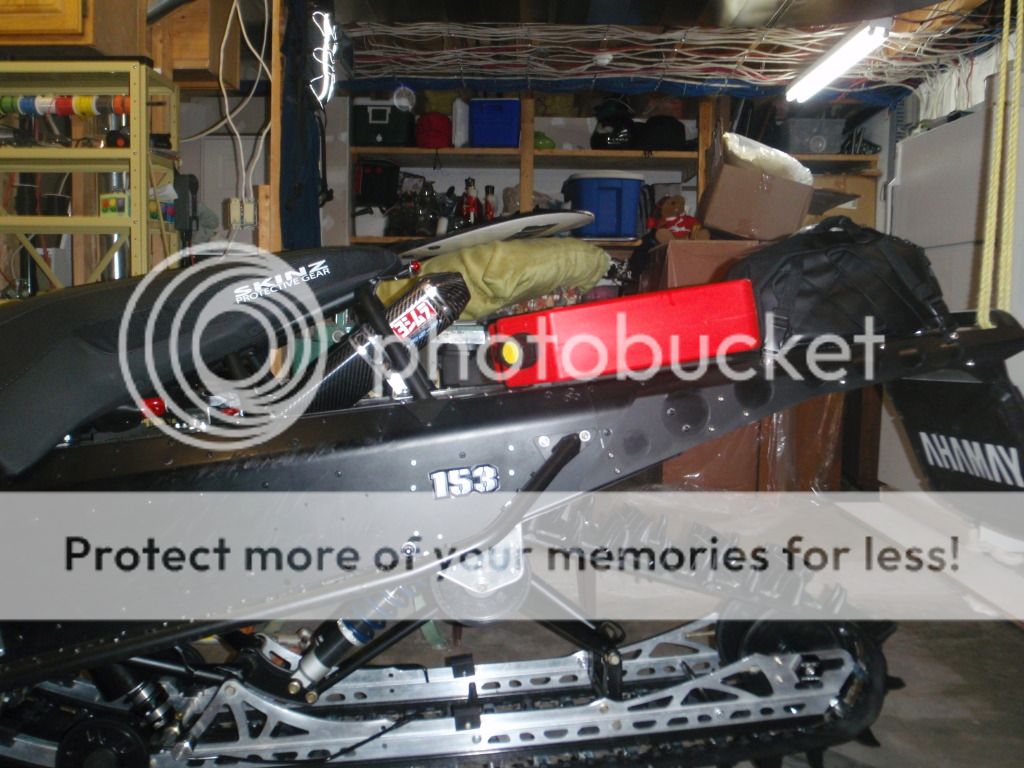
And you can see on this shot the exhaust clearance is pretty big.
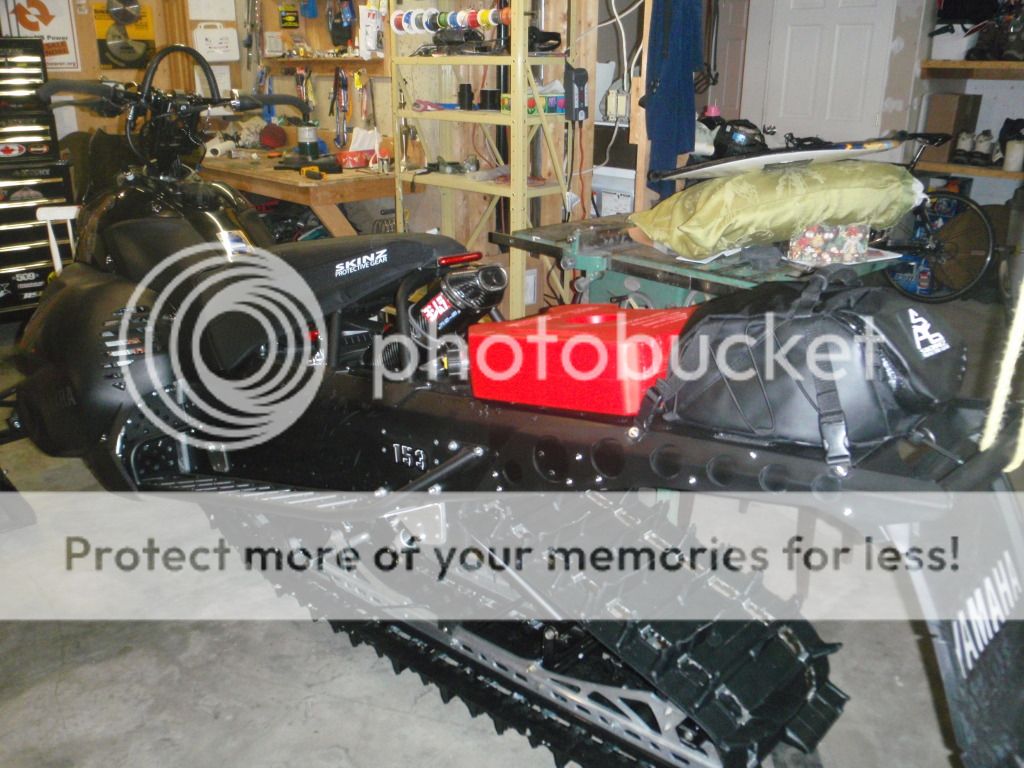
Only negative is its slighlty louder, in that position but with the low volume insert in the muffler, its not bad.
All this said, I do love the AC skid. It does work really well.
OTM
That's pretty much where my pdf of the 153 front axle mount is. You can move slightly forward (1/2" and maybe 1/4" below my mount and it will still work, but you will need to lower your drop bracket location slightly, and it will definitely add a bit of ski pressure.
Snakebit, we are all running Arctic Cat 8 inch rear wheels. Its the stock setup with these rails unless you run offset axles, which is not neccessary, and would be tough to make fit.
On the undertunnel. IMHO it's a RPITA. I've basically given up on the idea, preferring to go to a Vector Header/Yoshi tipped up at 30 degrees. There is simply not enough room for an undertunnel without doing a pile of work, and you will see this when you collapse the rear shock, while keeping the front fully extended how little clearance you have. Rick's (rlcofmn's) comments regarding clearance really made me think twice about the undertunnel.
With the Yoshi (or any sportbike pipe) and the skinz seat, I am able to carry a 3 gallon rotopak tank and and a rear pack. I have 500km's on this setup and no melting or burning or discoloration on gas tank or bag whatsoever and tunnel ice buildup is pretty much non existant.
Here's the profile
And you can see on this shot the exhaust clearance is pretty big.
Only negative is its slighlty louder, in that position but with the low volume insert in the muffler, its not bad.
All this said, I do love the AC skid. It does work really well.
OTM
..SNAKEBIT..
Expert
..SNAKEBIT..
Expert
printed out pdf have 60 mm between plate rivets
But the top two rivet are no where close, on my 09 MTX 153
my other measurement on my sled is 40mm not 50mm
any ideals?
But the top two rivet are no where close, on my 09 MTX 153
my other measurement on my sled is 40mm not 50mm
any ideals?
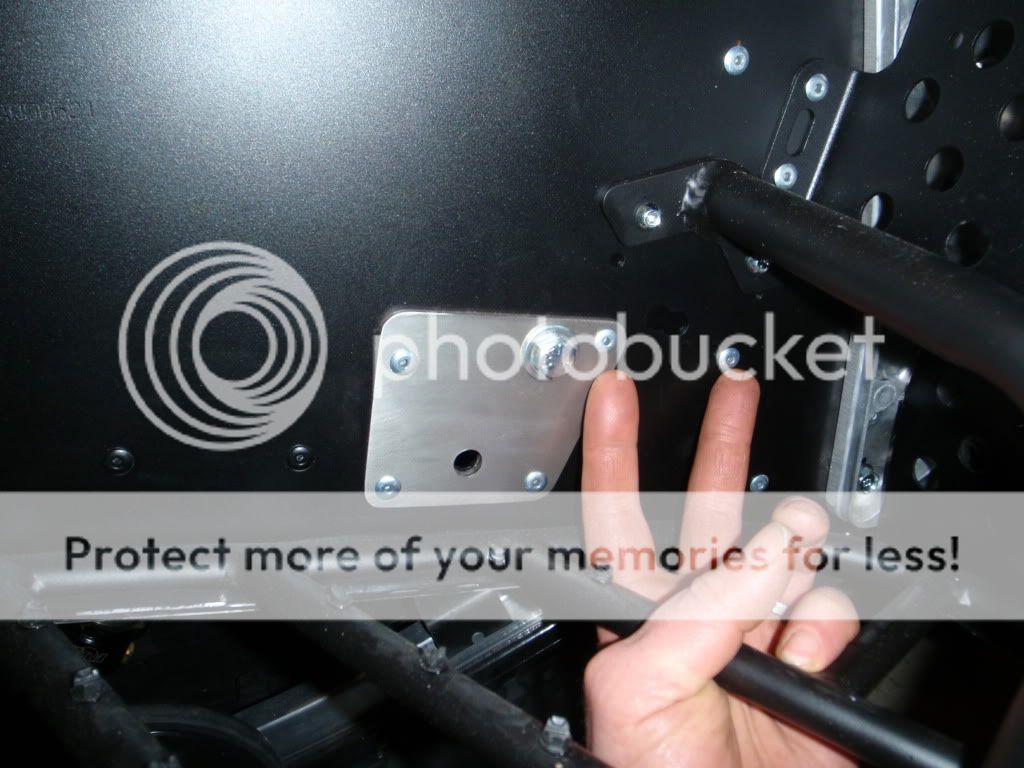
Off Trail Mike said:Guys:
Here's the pdf of the exterior reinforcing plate I fabricated out of 1/8" stainless. Basically it replaces the triangular stock piece on the outside of the tunnel (its alot stronger). You can locate it by using the 4 rivet holes that surround the stock MTX front mounting hole.
This works for swapping the AC 153/162 skid into the MTX 153/162. Beeze, I 'm not sure it will fit your 141/144 because of setback and rail tip up angle/drivers. I'll get the XTX/CF setup on CAD pretty soon. As soon as I do, I'll let you know.
For the pdf, just print it out full scale on letter paper (8.5 x 11) and it should be scaled correctly. It is easy to confirm this by using a ruler/tape to measure the rivet spacings dimension. Your measurement and the one on the drawing should be the same. If not, you will have to play with pdf scale on your printer until they match.
Here is a picture of the plate I am talking about:
Similar threads
- Replies
- 46
- Views
- 146K
- Replies
- 4
- Views
- 31K
-
This site uses cookies to help personalise content, tailor your experience and to keep you logged in if you register.
By continuing to use this site, you are consenting to our use of cookies.