
- Joined
- Apr 13, 2003
- Messages
- 21,533
- Age
- 54
- Location
- Schofield, WI
- Website
- www.totallyamaha.com
- Country
- USA
- Snowmobile
- 2020 Sidewinder SRX
Muffin Works Extension, Exhaust gaskets Change/Inspection, chain case and track removal and AirWave Preliminary install:
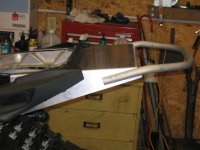
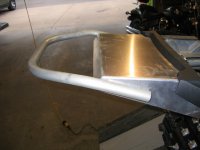
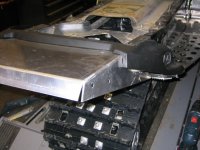
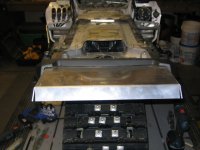
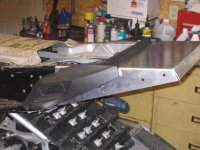
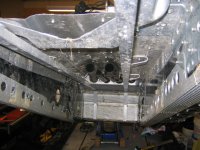
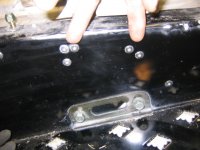
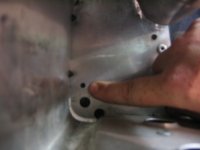
Here is the latest on the sled build. Muffin Works dropped off the tunnel extension for the build and we had to remove some rear bracing and rivets to test fit the extension prior to having the extension powder coated.
Here is the latest on the sled build. Muffin Works dropped off the tunnel extension for the build and we had to remove some rear bracing and rivets to test fit the extension prior to having the extension powder coated.
Attachments


- Joined
- Apr 13, 2003
- Messages
- 21,533
- Age
- 54
- Location
- Schofield, WI
- Website
- www.totallyamaha.com
- Country
- USA
- Snowmobile
- 2020 Sidewinder SRX
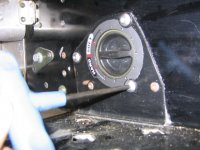
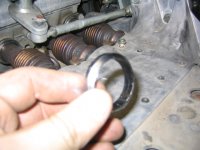
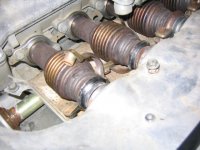
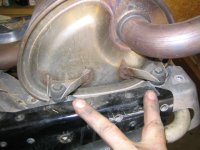
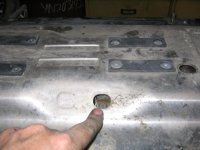
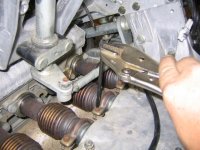
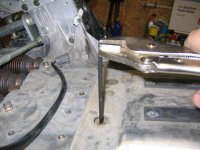
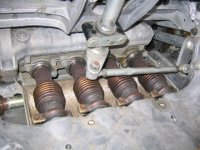
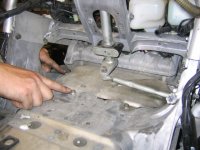
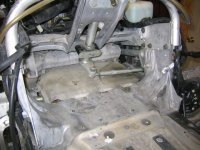
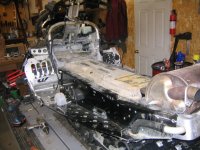
Once the extension was fitted I returned to finish the exhaust gasket inspection and replacement. The gaskets were in perfect condition so there was no need for replacement. The inspection and replacement of these gaskets is not a very simple fast process. As you can see from the pics, you have to remove the seat, tank shrouds, gas tank to get to the access plate under the tank. Once the access plate is removed the exhaust will need to come off to be able to slide the header pipes back to inspect or remove the exhaust donuts.
Note: When removing fuel tank, once the 2 nuts are removed at the base of the tank and the fuel connection and sensor are disconnected, you will have to remove the connection at the front of the tank on the left side and remove the main line on the right front and vent line on the top.
Note: When removing fuel tank, once the 2 nuts are removed at the base of the tank and the fuel connection and sensor are disconnected, you will have to remove the connection at the front of the tank on the left side and remove the main line on the right front and vent line on the top.
Attachments
-
 gasket10.JPG144.3 KB · Views: 560
 -
 gasket9.JPG164.3 KB · Views: 561
 -
 gasket8.JPG178.7 KB · Views: 556
 -
 gasket7.JPG160.9 KB · Views: 546
 -
 gasket6.JPG191.6 KB · Views: 565
 -
 gasket5.JPG167.2 KB · Views: 565
 -
 gasket4.JPG195.7 KB · Views: 540
 -
 gasket2.JPG174.3 KB · Views: 563
 -
 gasket1.JPG192.5 KB · Views: 568
 -
 exhaust1.JPG217.6 KB · Views: 536


- Joined
- Apr 13, 2003
- Messages
- 21,533
- Age
- 54
- Location
- Schofield, WI
- Website
- www.totallyamaha.com
- Country
- USA
- Snowmobile
- 2020 Sidewinder SRX


- Joined
- Apr 13, 2003
- Messages
- 21,533
- Age
- 54
- Location
- Schofield, WI
- Website
- www.totallyamaha.com
- Country
- USA
- Snowmobile
- 2020 Sidewinder SRX
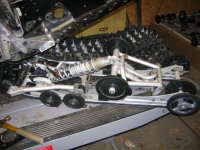
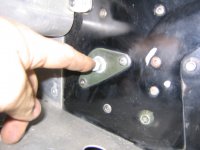
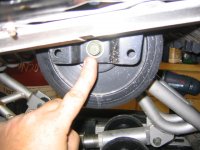
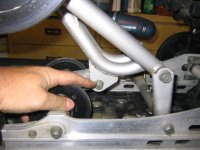
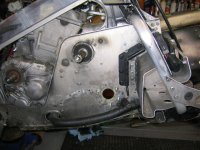
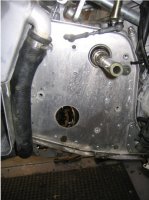
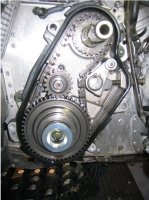
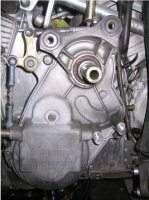
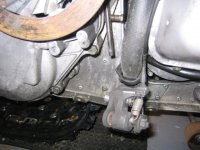
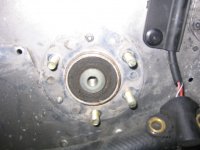
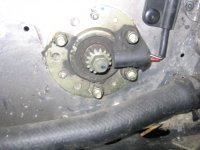
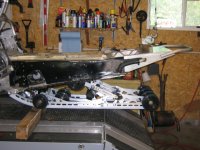
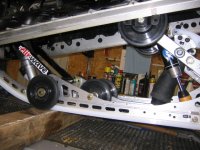
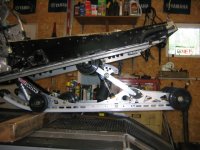
Now that I had the rear skid out, I needed to pull the track. To pull the track we needed to remove the left side speedo pick up, speedo gear, and bearing cup retainer. Move over to the right side of the machine. Remove the Parking brake by loosening the 2 Allen head screws. You may need to flip the brake off and on to get the fastener loose enough to remove it from the chain case cover. Remove the brake disk E-Clip with snap wring pliers and pay close attention to each washer and spacer location as you take thing out of the chain case and off the drive shaft. If you loose track of the locations, you can always go to the Yamaha Parts Finder on line to see the correct orientation and location. Before you pull the cover you will have to remove the drive shaft locking collar. You will need a star socket to remove the set screw from that collar. If you have reverse you will need to remove the lower linkage bar from one side in order to manually move the linkage in the cover or the linkage reverse forks inside the cover will prevent you from removing the cover. Remove 12mm cover bolts and the 10 mm bolt in the center of the cover. It may take a little bit of messing around to finesse that cover off. In order to remove the drive shaft upper nut you will need to hold the shaft from turning. I found that if you wrap a rag around the secondary shaft and lock a Vise-Grips on the splines (be careful not to go to tight), let the shaft rotate until the Vise-grips contact the foot hold, then you can put on a deep socket or big crescent wrench and release the upper nut. Its usually not very tight. Break loose the 14mm bolt on the bottom drive gear before you remove the Vise Grip and remove lower cup on drive gear and spring. Remove chain tensioner, remover secondary middle gear and be careful not ot loose the little spring between those gears. Then slide out upper, lower gear and chain at the same time. Once again place close attention to the spacers and washers. Now that you have the internal of the chain case out you can remove the inner case by removing the 14 mm bolts that hold the case to the chassis. Go back the left side of the sled by the speedo and reach under the sled and pull the drive cog shaft toward you. You should see the 2 star type set screw that lock the collar bearing to the shaft. Remove set screws to allow you to either pull bear off or you may have to use a 3 jaw puller to assist you if it feels stuck. With the bearing off you can now push the axel back to the chain case and the axel will drop out. It may get hung up on the track so don’t panic. You now have a clean tunnel with no track connected.
Attachments


- Joined
- Apr 13, 2003
- Messages
- 21,533
- Age
- 54
- Location
- Schofield, WI
- Website
- www.totallyamaha.com
- Country
- USA
- Snowmobile
- 2020 Sidewinder SRX
Attachments
-
 aw14.JPG210.7 KB · Views: 558
 -
 aw13.JPG203.3 KB · Views: 543
 -
 aw12.JPG191.3 KB · Views: 567
 -
 aw11.JPG181.1 KB · Views: 557
 -
 aw10.JPG114.1 KB · Views: 527
 -
 aw9.JPG124.3 KB · Views: 532
 -
 aw8.JPG177.6 KB · Views: 548
 -
 aw6.JPG181.9 KB · Views: 544
 -
 aw5.JPG176.5 KB · Views: 527
 -
 aw2.JPG180.3 KB · Views: 552
 -
 aw1.JPG158.6 KB · Views: 548
 -
 airwave2.JPG162 KB · Views: 541
 -
 airwave1.JPG124.3 KB · Views: 550
sleddheadd
TY 4 Stroke God
looking good, Tom!
 You gonna have it ready for Haydays?
Awsome.


- Joined
- Apr 13, 2003
- Messages
- 21,533
- Age
- 54
- Location
- Schofield, WI
- Website
- www.totallyamaha.com
- Country
- USA
- Snowmobile
- 2020 Sidewinder SRX
Convert said:You gonna have it ready for Haydays?
Damn I hope so!!! I am still waiting on the super charger, not sure what the hold up is, but that will be my biggest time eater.....


1CrazySledder
Lifetime Member
- Joined
- Aug 11, 2005
- Messages
- 2,006
- Location
- Cartersville, GA.
- Country
- USA
- Snowmobile
- None, looking now!
MrSled said:Convert said:You gonna have it ready for Haydays?
Damn I hope so!!! I am still waiting on the super charger, not sure what the hold up is, but that will be my biggest time eater.....
It's not bad at all, Tom. Peice of cake. You'll be suprised. I'd be happy to give ya a hand if need be, just let me know when you have it and the clutch kit from Ulmer.


- Joined
- Apr 13, 2003
- Messages
- 21,533
- Age
- 54
- Location
- Schofield, WI
- Website
- www.totallyamaha.com
- Country
- USA
- Snowmobile
- 2020 Sidewinder SRX
Vince as soon as it shows I will be in contact with you. I think it would be great fun to have you over and do the install 


1CrazySledder
Lifetime Member
- Joined
- Aug 11, 2005
- Messages
- 2,006
- Location
- Cartersville, GA.
- Country
- USA
- Snowmobile
- None, looking now!
MrSled said:Vince as soon as it shows I will be in contact with you. I think it would be great fun to have you over and do the install
Sounds good. In the mean time, leave the rear of the sled apart. ( e.i. seat. gas tank. etc. ) Need to be able to get at the bolt head holding the steering together.


yamadoo
Yamadoo is a snowmobile ' aholic'.
- Joined
- Jun 3, 2003
- Messages
- 3,645
- Country
- USA
- Snowmobile
- 15 Viper STX DX red/white- GPS and KING AIR suspension 4kmiles
13 Apex XTX 45 anniversary RED/WHITE/BLACK 3K miles
10 Vector LTX Blue 9kmiles
11 Venture GT 4k miles
86 SnoScoot(2) for grand kids
WOW
GREAT JOB
This is going to be a sweet sled and ride.
Going to set the suspension up for 200 miles per DAY
OR
200 miles per HOUR
Both would be nice
Yamadoo
GREAT JOB
This is going to be a sweet sled and ride.
Going to set the suspension up for 200 miles per DAY

OR
200 miles per HOUR

Both would be nice

Yamadoo


- Joined
- Apr 13, 2003
- Messages
- 21,533
- Age
- 54
- Location
- Schofield, WI
- Website
- www.totallyamaha.com
- Country
- USA
- Snowmobile
- 2020 Sidewinder SRX
yamadoo said:WOW
GREAT JOB
This is going to be a sweet sled and ride.
Going to set the suspension up for 200 miles per DAY
OR
200 miles per HOUR
Both would be nice
Yamadoo
Both the miles and the speed sounds fun
 LOL
LOLVince, I can do that... I have the track and painting of the tunnel to get done anyway


Turtle
Lifetime Member
- Joined
- Feb 27, 2006
- Messages
- 1,340
- Location
- Marathon, WI
- Country
- USA
- Snowmobile
- '17 Polaris Switchback 800 Pro S LE
'15 Viper RTX SE w/ MPI turbo - sold
'07 FX Phazer GT
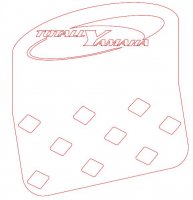
Hey guys ... Along with a host of products that Muffinworks is donating to the TY build, we are making up a custom set of tunnel supports just for this sled.
I thought I would give you a bit of a teaser for what we are having made. Attached is a drawing of the supports that we will have laser cut. The drawing shows the left-side support before it will be formed to fit the running boards.
Let me know what you think.
I thought I would give you a bit of a teaser for what we are having made. Attached is a drawing of the supports that we will have laser cut. The drawing shows the left-side support before it will be formed to fit the running boards.
Let me know what you think.
Attachments
Similar threads
-
This site uses cookies to help personalise content, tailor your experience and to keep you logged in if you register.
By continuing to use this site, you are consenting to our use of cookies.

