Southfork Sooner
Pro
I went to look at what I have to do to swap out my A-Arms, I dont see how you are supposed to take them off... Do I have to take out the tool box holder/cupholder? Are the arms difficult to get off? Thanks for any help!
AaronBND
TY 4 Stroke Junkie
Pretty easy to take off. Yes you will have to be able to get down under the stock airbox inside. Jack the center of the sled up under the front. Basically the sway bar bolt off each side, the lower shock mount bolt off both sides, the steering knuckle bolts and then it is just 2 big bolts that run through them from front to back (I think you will need to remove a couple plastic panels under the front to expose them). You will need a wrench on the backside and a ratchet on the front. Be careful going back together you get all the bushings in the ends of everything. You will figure it out. It's pretty straight-forward. Good luck!
Aaron
P.S. The big long main bolts run through sleeves that actually slide inside the a-arms.
Aaron
P.S. The big long main bolts run through sleeves that actually slide inside the a-arms.
Southfork Sooner
Pro
Thanks Aaron. Sounds kinda complicated if I have to take off some side plastic panels.... I dont really have any way of jacking it up, when I replaced the steering knuckle I just turned it on its side. Im sure I can figure it out, I was just hoping it wouldn't take too long.
AaronBND
TY 4 Stroke Junkie
Dude it takes like 60 seconds to remove the plastic under the bumper and about 15 minutes per side. It's about a 30 minute process! It takes you longer than that "sitting on the throne" reading a good snowmobile magazine.
Aaron
Aaron
BlgsRX-1mtn
TY 4 Stroke God
- Joined
- Apr 16, 2003
- Messages
- 1,530
- Reaction score
- 0
- Points
- 841
- Location
- Billings, MT
- Country
- USA
- Snowmobile
- '03 RX-1 Mountain LE
Southfork, you don't need to remove the side pannels. Just remove the front nose cone below the front bumper (4 screws I think). You will see the two bolt heads right at the edge of the bulkhead assembly. The nuts on the other end are going to require the airbox to be removed. You don't have a floorjack handy? I sure make it easier than doing one side at a time.
Edit; FYI if you are changing the A-arms due to damage, you might find that the bolts and collars are also bent and it's just as easy to use a hacksaw to cut them out. I managed to hook a rock and bend both A-arm bolts going through the bulkhead with out doing damage to the bulkhead itself.
Edit; FYI if you are changing the A-arms due to damage, you might find that the bolts and collars are also bent and it's just as easy to use a hacksaw to cut them out. I managed to hook a rock and bend both A-arm bolts going through the bulkhead with out doing damage to the bulkhead itself.
Southfork Sooner
Pro
I replaced the right side, as that was the only damaged side. The A-Arms I bought off a guy dont have the reinforcing between the arms like my stock ones do, so I will have to take care of that. I kept stripping the nuts on the A-Arms when I went to install the new ones. Its still really tight, but they arent coming off again without sawing the ends off. My biggest problem is realigning the ski, I either get it toed-out or toed-in. I will go back and work on it tonight. I disconnected the sway bars while I was at it, so when the season comes, I will try that out.
Oh, BTW, I was not only changing the A-Arms, but also the knuckle assembly and the bolts that connect the knuckle to the A-Arms, thats why I am having the problem with the ski alignment.
Oh, BTW, I was not only changing the A-Arms, but also the knuckle assembly and the bolts that connect the knuckle to the A-Arms, thats why I am having the problem with the ski alignment.
BlgsRX-1mtn
TY 4 Stroke God
- Joined
- Apr 16, 2003
- Messages
- 1,530
- Reaction score
- 0
- Points
- 841
- Location
- Billings, MT
- Country
- USA
- Snowmobile
- '03 RX-1 Mountain LE
Southfork Sooner said:I replaced the right side, as that was the only damaged side. The A-Arms I bought off a guy dont have the reinforcing between the arms like my stock ones do, so I will have to take care of that. I kept stripping the nuts on the A-Arms when I went to install the new ones. Its still really tight, but they arent coming off again without sawing the ends off. My biggest problem is realigning the ski, I either get it toed-out or toed-in. I will go back and work on it tonight. I disconnected the sway bars while I was at it, so when the season comes, I will try that out.
Oh, BTW, I was not only changing the A-Arms, but also the knuckle assembly and the bolts that connect the knuckle to the A-Arms, thats why I am having the problem with the ski alignment.
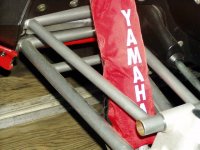
Does the new right side look similar to mine (see pics)? If so you have an MPI on the right side vs. a stocker. This might be your problem in getting proper ski alligment.
Jim
Jim
Attachments

Southfork Sooner
Pro
My top one looks very similar to yours, but the bottom looks stock, same as the other side.
When I originally jacked up the steering knuckle assembly, a friend let me borrow one of his while I waited on mine to be shipped. Even then I couldn't line the skis up. It's only toed out slightly, but if I turn it on the steering thing that goes inside the knuckle, it toes way in. Maybe when I get mine to the dealer to get the oil changed I will have him look at it. It doesnt seem like a huge deal, but we will see.
When I originally jacked up the steering knuckle assembly, a friend let me borrow one of his while I waited on mine to be shipped. Even then I couldn't line the skis up. It's only toed out slightly, but if I turn it on the steering thing that goes inside the knuckle, it toes way in. Maybe when I get mine to the dealer to get the oil changed I will have him look at it. It doesnt seem like a huge deal, but we will see.
otis
Expert
Check out the www.totallyamaha.com web site and they have install instructions for the MPI wide front end kit which gives the skinny with pics on how to remove and replace everything. But since it seems you have it apart you don't really need these anymore. Anyone else who is trying the same might still benefit.
Otis
Otis
BlgsRX-1mtn
TY 4 Stroke God
- Joined
- Apr 16, 2003
- Messages
- 1,530
- Reaction score
- 0
- Points
- 841
- Location
- Billings, MT
- Country
- USA
- Snowmobile
- '03 RX-1 Mountain LE
Southfork Sooner said:My top one looks very similar to yours, but the bottom looks stock, same as the other side.
When I originally jacked up the steering knuckle assembly, a friend let me borrow one of his while I waited on mine to be shipped. Even then I couldn't line the skis up. It's only toed out slightly, but if I turn it on the steering thing that goes inside the knuckle, it toes way in. Maybe when I get mine to the dealer to get the oil changed I will have him look at it. It doesnt seem like a huge deal, but we will see.
I am assuming you are trying to get it by sliding the steering arm a tooth one way or the other over the spindle. If I am on the same page as you; steering knuckle is the cast piece (Yamaha's Parts Schematic). The spindle slides up in it & through you the steering arm.
Have you tried to adjust the toe in/out by loosening the jamb nuts on the ball joint at each end of your tie rod (the alluminum rod that goes though the rubber boot)? With the nuts at each end loose, you should be able to use the 10mm (maybe 8mm) on the flat spot of the tie rod and turn it. Clockwise turn should toe out your ski. The other jamb nut should be about the middle of the sled just below the CDI box and battery bracket. In this diagram (see attachment); it would be parts 46 and 47 that you have to loosen b4 the tie rod will turn correctly.
Jim
Attachments

Southfork Sooner
Pro
Wow, thanks for the replies guys.
Jim, I have not tried that method you are talking about. I will take a look at that tonight or tomorrow night, sounds like it may work. I will go take a picture of it and show you how it's toed out.
Jim, I have not tried that method you are talking about. I will take a look at that tonight or tomorrow night, sounds like it may work. I will go take a picture of it and show you how it's toed out.
Southfork Sooner
Pro


BlgsRX-1mtn
TY 4 Stroke God
- Joined
- Apr 16, 2003
- Messages
- 1,530
- Reaction score
- 0
- Points
- 841
- Location
- Billings, MT
- Country
- USA
- Snowmobile
- '03 RX-1 Mountain LE
!") . Hows the bulkhead/heat exchanger looking with it on?
. Hows the bulkhead/heat exchanger looking with it on? 

Southfork Sooner
Pro
The heat exchanger is fine.... ") Were you involved in the whole escapade with the heat exchanger/skid plate a long time ago? haha
Were you involved in the whole escapade with the heat exchanger/skid plate a long time ago? haha
Were you involved in the whole escapade with the heat exchanger/skid plate a long time ago? haha Southfork Sooner
Pro
So that latest thing that you attached seems to be the same as you mentioned earlier, correct?
Similar threads
- Replies
- 3
- Views
- 645
-
This site uses cookies to help personalise content, tailor your experience and to keep you logged in if you register.
By continuing to use this site, you are consenting to our use of cookies.