
- Joined
- Apr 13, 2003
- Messages
- 21,833
- Reaction score
- 9,428
- Points
- 2,103
- Location
- Schofield, WI
- Website
- www.totallyamaha.com
- Country
- USA
- Snowmobile
- 2020 Sidewinder SRX
BTW a stock secondary should have been in 3-3.
Irv
TY 4 Stroke God
- Joined
- Mar 23, 2005
- Messages
- 3,778
- Reaction score
- 44
- Points
- 1,233
- Location
- ONT. Canada
- Country
- Canada
- Snowmobile
- 2008 40th Anniversary Vector.
1995 XLT SP (Son's)
Re: irv
Thanks Tom, I will be sure to look closer and be sure to wear my glasses this time!
I assume the numbers are in sequence? Meaning, if I find say number 2 then I can assume number 3 will be to the right of it?
MrSled said:Irv said:MrSled said:yamadog1 said:put new buttons in your secondary yamaha ones.
If they are warn, replace
Bought new buttons today.
Just curious on my above question?
"P.S. Is hole number#1 the original hole? I see no numbers on the clutch but I can see what hole the spring came out due to it being a bit shiny/polished plus it has a black paint mark from the spring in it"
Sometimes the castings number imprints are really hard to read. Take a look at each one of them and you should be able to make out at least one of the numbers and the partial of another.... take a flash light and really look.
Thanks Tom, I will be sure to look closer and be sure to wear my glasses this time!
I assume the numbers are in sequence? Meaning, if I find say number 2 then I can assume number 3 will be to the right of it?


- Joined
- Apr 13, 2003
- Messages
- 21,833
- Reaction score
- 9,428
- Points
- 2,103
- Location
- Schofield, WI
- Website
- www.totallyamaha.com
- Country
- USA
- Snowmobile
- 2020 Sidewinder SRX
Re: irv
They are counter clockwise, 1, 2, 3
Irv said:MrSled said:Irv said:MrSled said:yamadog1 said:put new buttons in your secondary yamaha ones.
If they are warn, replace
Bought new buttons today.
Just curious on my above question?
"P.S. Is hole number#1 the original hole? I see no numbers on the clutch but I can see what hole the spring came out due to it being a bit shiny/polished plus it has a black paint mark from the spring in it"
Sometimes the castings number imprints are really hard to read. Take a look at each one of them and you should be able to make out at least one of the numbers and the partial of another.... take a flash light and really look.
Thanks Tom, I will be sure to look closer and be sure to wear my glasses this time!
I assume the numbers are in sequence? Meaning, if I find say number 2 then I can assume number 3 will be to the right of it?
They are counter clockwise, 1, 2, 3
Irv
TY 4 Stroke God
- Joined
- Mar 23, 2005
- Messages
- 3,778
- Reaction score
- 44
- Points
- 1,233
- Location
- ONT. Canada
- Country
- Canada
- Snowmobile
- 2008 40th Anniversary Vector.
1995 XLT SP (Son's)
Re: irv
Thanks Tom, I got it.
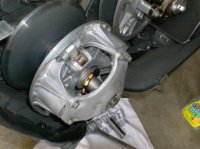
I found the numbers in the pockets that had the small hole for the small back ring/cover.
The number 1 was easy to see as was the 3 but the 2 was a bit harder.
The number 1 was located to the left of the 3 which made sense once you told me the numbers were counter clockwise.
Next step, the Primary.
Thanks again for your help,,,,,so far. lol
MrSled said:Irv said:MrSled said:Irv said:MrSled said:yamadog1 said:put new buttons in your secondary yamaha ones.
If they are warn, replace
Bought new buttons today.
Just curious on my above question?
"P.S. Is hole number#1 the original hole? I see no numbers on the clutch but I can see what hole the spring came out due to it being a bit shiny/polished plus it has a black paint mark from the spring in it"
Sometimes the castings number imprints are really hard to read. Take a look at each one of them and you should be able to make out at least one of the numbers and the partial of another.... take a flash light and really look.
Thanks Tom, I will be sure to look closer and be sure to wear my glasses this time!
I assume the numbers are in sequence? Meaning, if I find say number 2 then I can assume number 3 will be to the right of it?
They are counter clockwise, 1, 2, 3
Thanks Tom, I got it.
I found the numbers in the pockets that had the small hole for the small back ring/cover.
The number 1 was easy to see as was the 3 but the 2 was a bit harder.
The number 1 was located to the left of the 3 which made sense once you told me the numbers were counter clockwise.
Next step, the Primary.
Thanks again for your help,,,,,so far. lol


- Joined
- Apr 13, 2003
- Messages
- 21,833
- Reaction score
- 9,428
- Points
- 2,103
- Location
- Schofield, WI
- Website
- www.totallyamaha.com
- Country
- USA
- Snowmobile
- 2020 Sidewinder SRX
Re: irv
Your very welcome
Irv said:MrSled said:Irv said:MrSled said:Irv said:MrSled said:yamadog1 said:put new buttons in your secondary yamaha ones.
If they are warn, replace
Bought new buttons today.
Just curious on my above question?
"P.S. Is hole number#1 the original hole? I see no numbers on the clutch but I can see what hole the spring came out due to it being a bit shiny/polished plus it has a black paint mark from the spring in it"
Sometimes the castings number imprints are really hard to read. Take a look at each one of them and you should be able to make out at least one of the numbers and the partial of another.... take a flash light and really look.
Thanks Tom, I will be sure to look closer and be sure to wear my glasses this time!
I assume the numbers are in sequence? Meaning, if I find say number 2 then I can assume number 3 will be to the right of it?
They are counter clockwise, 1, 2, 3
Thanks Tom, I got it.
I found the numbers in the pockets that had the small hole for the small back ring/cover.
The number 1 was easy to see as was the 3 but the 2 was a bit harder.
The number 1 was located to the left of the 3 which made sense once you told me the numbers were counter clockwise.
Next step, the Primary.
Thanks again for your help,,,,,so far. lol
Your very welcome

Irv
TY 4 Stroke God
- Joined
- Mar 23, 2005
- Messages
- 3,778
- Reaction score
- 44
- Points
- 1,233
- Location
- ONT. Canada
- Country
- Canada
- Snowmobile
- 2008 40th Anniversary Vector.
1995 XLT SP (Son's)
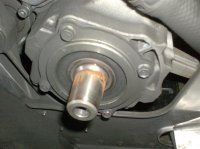
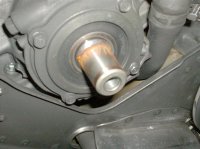
Just took the primary off and seen this, is this normal or anything to be concerned about?
I also used a Johnston Bar and a spanner wrench as a holder and it was a BUGGER to get off!
Could/should have I used an impact gun? I was worried about possible crankshaft damage?
I also accidently turned the motor backwards slightly during removal, anything to be concerned about with this as well?
I also used a Johnston Bar and a spanner wrench as a holder and it was a BUGGER to get off!
Could/should have I used an impact gun? I was worried about possible crankshaft damage?
I also accidently turned the motor backwards slightly during removal, anything to be concerned about with this as well?
Attachments


- Joined
- Apr 13, 2003
- Messages
- 21,833
- Reaction score
- 9,428
- Points
- 2,103
- Location
- Schofield, WI
- Website
- www.totallyamaha.com
- Country
- USA
- Snowmobile
- 2020 Sidewinder SRX
Irv said:Just took the primary off and seen this, is this normal or anything to be concerned about?
I also used a Johnston Bar and a spanner wrench as a holder and it was a BUGGER to get off!
Could/should have I used an impact gun? I was worried about possible crankshaft damage?
I also accidently turned the motor backwards slightly during removal, anything to be concerned about with this as well?
Are you talking about the rust?? Nothing new, I clean that taper with some scotch bright and toss her back on. I always take the clutches off with a impact gun. Quick and easy... then put back on with an impact but just to snug it then you do the final spec with torque wrench.
Irv
TY 4 Stroke God
- Joined
- Mar 23, 2005
- Messages
- 3,778
- Reaction score
- 44
- Points
- 1,233
- Location
- ONT. Canada
- Country
- Canada
- Snowmobile
- 2008 40th Anniversary Vector.
1995 XLT SP (Son's)
MrSled said:Irv said:Just took the primary off and seen this, is this normal or anything to be concerned about?
I also used a Johnston Bar and a spanner wrench as a holder and it was a BUGGER to get off!
Could/should have I used an impact gun? I was worried about possible crankshaft damage?
I also accidently turned the motor backwards slightly during removal, anything to be concerned about with this as well?
Are you talking about the rust?? Nothing new, I clean that taper with some scotch bright and toss her back on. I always take the clutches off with a impact gun. Quick and easy... then put back on with an impact but just to snug it then you do the final spec with torque wrench.
Thanks Tom, good to know.
In the shop service manual it says to install and torque to 85 ft lbs then loosen bolt off completely and re-torque to 43 ft lbs. I assume the original 85 is to seat the clutch then the 43 is the final torque to hold it in place?
Is there any type of lube or Loc-Tite I will need to use on re-assembly?
It says to oil the threads of the main clutch bolt when re-installing the clutch to the crank, what is the reason for that?
(As you can tell, this is my first clutch job)
Thanks again


- Joined
- Apr 13, 2003
- Messages
- 21,833
- Reaction score
- 9,428
- Points
- 2,103
- Location
- Schofield, WI
- Website
- www.totallyamaha.com
- Country
- USA
- Snowmobile
- 2020 Sidewinder SRX
Irv said:MrSled said:Irv said:Just took the primary off and seen this, is this normal or anything to be concerned about?
I also used a Johnston Bar and a spanner wrench as a holder and it was a BUGGER to get off!
Could/should have I used an impact gun? I was worried about possible crankshaft damage?
I also accidently turned the motor backwards slightly during removal, anything to be concerned about with this as well?
Are you talking about the rust?? Nothing new, I clean that taper with some scotch bright and toss her back on. I always take the clutches off with a impact gun. Quick and easy... then put back on with an impact but just to snug it then you do the final spec with torque wrench.
Thanks Tom, good to know.
In the shop service manual it says to install and torque to 85 ft lbs then loosen bolt off completely and re-torque to 43 ft lbs. I assume the original 85 is to seat the clutch then the 43 is the final torque to hold it in place?
Is there any type of lube or Loc-Tite I will need to use on re-assembly?
It says to oil the threads of the main clutch bolt when re-installing the clutch to the crank, what is the reason for that?
(As you can tell, this is my first clutch job)
Thanks again
It can be done that way. It sets the clutch on the taper and then you re torque to hold clutch bolt. The oil on the thread just keep it from resting on to the inside taper thread bore... I would do as the manual says.. everyone has their own methods and at least this one is in writing from Yamaha.
Irv
TY 4 Stroke God
- Joined
- Mar 23, 2005
- Messages
- 3,778
- Reaction score
- 44
- Points
- 1,233
- Location
- ONT. Canada
- Country
- Canada
- Snowmobile
- 2008 40th Anniversary Vector.
1995 XLT SP (Son's)
MrSled said:Irv said:MrSled said:Irv said:Just took the primary off and seen this, is this normal or anything to be concerned about?
I also used a Johnston Bar and a spanner wrench as a holder and it was a BUGGER to get off!
Could/should have I used an impact gun? I was worried about possible crankshaft damage?
I also accidently turned the motor backwards slightly during removal, anything to be concerned about with this as well?
Are you talking about the rust?? Nothing new, I clean that taper with some scotch bright and toss her back on. I always take the clutches off with a impact gun. Quick and easy... then put back on with an impact but just to snug it then you do the final spec with torque wrench.
Thanks Tom, good to know.
In the shop service manual it says to install and torque to 85 ft lbs then loosen bolt off completely and re-torque to 43 ft lbs. I assume the original 85 is to seat the clutch then the 43 is the final torque to hold it in place?
Is there any type of lube or Loc-Tite I will need to use on re-assembly?
It says to oil the threads of the main clutch bolt when re-installing the clutch to the crank, what is the reason for that?
(As you can tell, this is my first clutch job)
Thanks again
It can be done that way. It sets the clutch on the taper and then you re torque to hold clutch bolt. The oil on the thread just keep it from resting on to the inside taper thread bore... I would do as the manual says.. everyone has their own methods and at least this one is in writing from Yamaha.
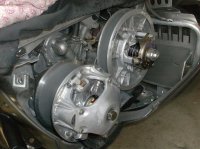
Did as the manual said, just didn't re-torque to 43 but did to 50 as my torque wrench doesn't go that low.
See any problems torquing to that number?
Job wasn't bad at all, thanks to your vid and info Tom, appreciate it very much!

Attachments


- Joined
- Apr 13, 2003
- Messages
- 21,833
- Reaction score
- 9,428
- Points
- 2,103
- Location
- Schofield, WI
- Website
- www.totallyamaha.com
- Country
- USA
- Snowmobile
- 2020 Sidewinder SRX
Irv said:MrSled said:Irv said:MrSled said:Irv said:Just took the primary off and seen this, is this normal or anything to be concerned about?
I also used a Johnston Bar and a spanner wrench as a holder and it was a BUGGER to get off!
Could/should have I used an impact gun? I was worried about possible crankshaft damage?
I also accidently turned the motor backwards slightly during removal, anything to be concerned about with this as well?
Are you talking about the rust?? Nothing new, I clean that taper with some scotch bright and toss her back on. I always take the clutches off with a impact gun. Quick and easy... then put back on with an impact but just to snug it then you do the final spec with torque wrench.
Thanks Tom, good to know.
In the shop service manual it says to install and torque to 85 ft lbs then loosen bolt off completely and re-torque to 43 ft lbs. I assume the original 85 is to seat the clutch then the 43 is the final torque to hold it in place?
Is there any type of lube or Loc-Tite I will need to use on re-assembly?
It says to oil the threads of the main clutch bolt when re-installing the clutch to the crank, what is the reason for that?
(As you can tell, this is my first clutch job)
Thanks again
It can be done that way. It sets the clutch on the taper and then you re torque to hold clutch bolt. The oil on the thread just keep it from resting on to the inside taper thread bore... I would do as the manual says.. everyone has their own methods and at least this one is in writing from Yamaha.
Did as the manual said, just didn't re-torque to 43 but did to 50 as my torque wrench doesn't go that low.
See any problems torquing to that number?
Job wasn't bad at all, thanks to your vid and info Tom, appreciate it very much!
Looks good
 50 is fine, most just crank them on with an impact and leave it.
Good tips!
livinloud
Extreme
I can't see this video anywhere can it be fixed please


- Joined
- Mar 1, 2004
- Messages
- 4,868
- Reaction score
- 502
- Points
- 1,663
- Location
- WINTERPEG / MANITOBA / CANADA
SWEET VIDEO....... 
Did you guys hire a Professional Actor?.....He was really good almost seemed like a real sledder right in charactor
GREAT JOB

Did you guys hire a Professional Actor?.....He was really good almost seemed like a real sledder right in charactor

GREAT JOB


- Joined
- Apr 13, 2003
- Messages
- 21,833
- Reaction score
- 9,428
- Points
- 2,103
- Location
- Schofield, WI
- Website
- www.totallyamaha.com
- Country
- USA
- Snowmobile
- 2020 Sidewinder SRX
BOUNTYHUNTER said:SWEET VIDEO.......
Did you guys hire a Professional Actor?.....He was really good almost seemed like a real sledder right in charactor
GREAT JOB
LMAO

Similar threads
- Replies
- 8
- Views
- 3K
-
This site uses cookies to help personalise content, tailor your experience and to keep you logged in if you register.
By continuing to use this site, you are consenting to our use of cookies.


