GP292
Extreme
- Joined
- Mar 5, 2007
- Messages
- 76
- Reaction score
- 5
- Points
- 858
- Location
- Southern-Tier New York State
- Country
- USA
- Snowmobile
- 2016 RS Venture TF
Would it help eliminate some of the ice if I had the muffler and/or exhaust pipe cermaic coated?
jeffT
Pro
I didnt use a template. If you want to make a template, just use some cardboard and a black marker. When i made mine i didnt use a template. I just put it in and took it out a few times. Just remember to drill the holes in the rear (for those push pins) over sized so that they will fit easilly through your pre drilled holes for alignment. You said you want professional.................... Who can actually see it other than you when the seat & heat shield is off?
As i said in my earlier post....... the size i used was 12"L x 13W" and that covered to just beyond/forward of the muffler.
My new snow shield is getting its trial run today. I'll let you guys know if and how it worked.
 Someone tell me how to post photos!!!! LOL
As i said in my earlier post....... the size i used was 12"L x 13W" and that covered to just beyond/forward of the muffler.
My new snow shield is getting its trial run today. I'll let you guys know if and how it worked.
Someone tell me how to post photos!!!! LOL rhoag
Expert
I need pics!!! How hard is it to take the seat and heat shield off? To post pics just left click add an attachment below the window you are typing in, then browse (go to) the location the pic is at and click open. Last click submit. Watch for an error that may say your attachment is to large... if you get that you will have to resize the pic. If all this doesn't work just e-mail them to me at rhoag@new.rr.com and I will post them for you.
jeffT
Pro
I will say this. The first time i took the heatshield off it was tricky. You have to take the heat shield and the muffler at the same time by sliding the muffler back after loosening the the clamp and removing the muffler mounts on the front of the muffler. its under the 3 rubber plubs in the heat shield under the seat.
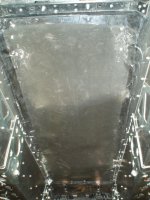
Here are the photos of my ice shield. As you can see it has my OWN custom made exhaust on it as well.
Here are the photos of my ice shield. As you can see it has my OWN custom made exhaust on it as well.
GT03235
Expert
after having to literally bang the tunnel with a hammer to get the ice off i have decided for next year something needs to be done. The ice is just to much it hinders the track and the weight is quite substantial also. My wifes phazer had the same problem until i blocked the tunnel off. Probally experiment doing something similair after the snow goes dont want to waste sleding weather lol
LeeKo
TY 4 Stroke Junkie
plate
Is it possible to just rivet a sheet of aluminum to the top of the tunnel protectors? Will this interfere with the track? It just seems as though it would be easier and could make it extend the entire length of the tunnel.
Is it possible to just rivet a sheet of aluminum to the top of the tunnel protectors? Will this interfere with the track? It just seems as though it would be easier and could make it extend the entire length of the tunnel.
GT03235
Expert
This what i am thinking!
red800rev
Newbie
I made a 12.5 buy 20 in peace and riveted to the top of the tunnel protectors you have to slide it in place through the hole its a tight squeeze but it makes it ,rode a 150 miles in island pond, and 85%the snow and ice is gone and the seat did not get hot at all
rhoag
Expert

rhoag
Expert

skullman
Veteran
I used some roofing aluminum to shape a full length block off plate - shaped the sides so I could attach with rivets, finished off with aluminum tape.
Tested and worked fantastic - no ice build up at all! Need to test some more to determine heat build up - temp was -10C and melted the strap off my new saddle bags. The bags were placed over the plastic heat shield (too far back) so restricted cooling - the plastic panels were extremely hot, may need to cut a few holes for cooling.
[/img]
Attachments


ShootToThrill
VIP Member
This summer I'm gonna run coolant through my tunnel protectors in a loop. To big of a job to start right now. Anybody try this yet?
sd5500
Expert
Its hard to believe that Yamaha isn't working on something for this significant problem.
stewartb
Expert
I bought one of these. When I stop and after the sled has had a chance to cool down I whack the outside of the tunnel on rivet heads. The ice drops right out. It weighs 1 pound and is under 12" long. I stow the little hammer in the handlebar bag and off I go. Works great. That isn't such a burden if you ask me.
http://www.amazon.com/Stanley-57-53...ref=sr_1_2?ie=UTF8&s=hi&qid=1233545369&sr=1-2
http://www.amazon.com/Stanley-57-53...ref=sr_1_2?ie=UTF8&s=hi&qid=1233545369&sr=1-2
Koeckman
Extreme
stewartb said:I bought one of these. When I stop and after the sled has had a chance to cool down I whack the outside of the tunnel on rivet heads. The ice drops right out. It weighs 1 pound and is under 12" long. I stow the little hammer in the handlebar bag and off I go. Works great. That isn't such a burden if you ask me.
http://www.amazon.com/Stanley-57-53...ref=sr_1_2?ie=UTF8&s=hi&qid=1233545369&sr=1-2
Good stuff........I like it, and I got a good chuckle out of it.
Hammer.....1 pound
Built up ice.......20+ pounds
Similar threads
- Replies
- 15
- Views
- 7K
- Replies
- 17
- Views
- 4K
-
This site uses cookies to help personalise content, tailor your experience and to keep you logged in if you register.
By continuing to use this site, you are consenting to our use of cookies.