Hey I'd like to see the finished product, I just might give you a call next time I'm in the city if that's what it takes...later


1CrazySledder
Lifetime Member
- Joined
- Aug 11, 2005
- Messages
- 2,006
- Location
- Cartersville, GA.
- Country
- USA
- Snowmobile
- None, looking now!
Hey basher brother, I'm waiting also!


I sent Pm's out to most of you as to whereabouts this project is and what is going on so please bear with me. As soon as spring Bear Hunting is over and work lets up a bit I'll open this thread back up and finish what I started. 
Sorry for the delays guys

Sorry for the delays guys


Finially getting back on this project and should be done by the weekend, if there are no further delays.
Pulled the skid out, only to find out that it wobbled on the floor as the rails were spead apart slightly. The sliders were just about welded on as I had cut them off a ways before I could pull on them and peel them off with vise grips. The rails must get super hot from having the track banjo string tight to the point where it took off the metal from each rail and made flat spots both both. I had to file and sand each rail in order to get rid of all the gouges and burrs before any rails would ever go back on. I just pressed the whole skid into a frame jig that we have for something else and squeezed it back into shape. Changed all the limiter straps as the old ones were shot and added another set of wheels to the skid. Might need to add another set of the smaller wheels up front to help keep the pressure off the front skid where it wearing those flat spots, you can actually see rail material inside the old sliders.
I'm putting the whole front end back into it tonight with the Almer bushing kit and ski's and then remounting the skid.
Attachments
-
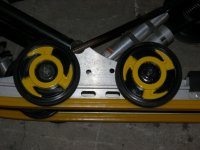 Finial Assembly Of The RTX-T Project #1 009.jpg344.7 KB · Views: 154
 -
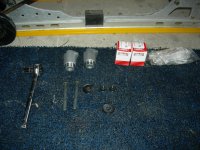 Finial Assembly Of The RTX-T Project #1 008.jpg445.7 KB · Views: 145
 -
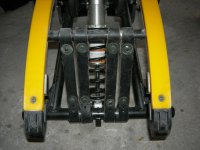 Finial Assembly Of The RTX-T Project #1 007.jpg470.3 KB · Views: 147
 -
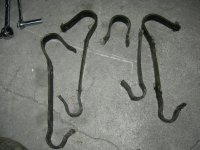 Finial Assembly Of The RTX-T Project #1 006.jpg525.9 KB · Views: 138
 -
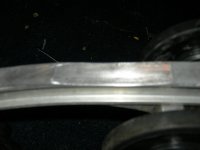 Finial Assembly Of The RTX-T Project #1 005.jpg297.5 KB · Views: 149
 -
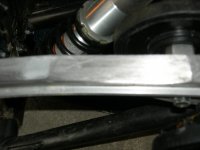 Finial Assembly Of The RTX-T Project #1 004.jpg315.7 KB · Views: 145
 -
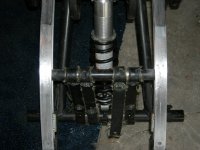 Finial Assembly Of The RTX-T Project #1 003.jpg478 KB · Views: 143
 -
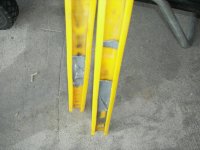 Finial Assembly Of The RTX-T Project #1 002.jpg476.6 KB · Views: 149
 -
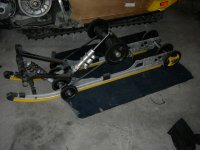 Finial Assembly Of The RTX-T Project #1 001.jpg461.1 KB · Views: 149


birkebeiner
Lifetime Member
- Joined
- Jul 27, 2009
- Messages
- 895
- Location
- Norway
- Country
- Norway
- Snowmobile
- 2015 Yamaha SR Viper X-TX
Welcome back Bounty!!  I was actually thinking about your project the other day, wondering if it ever got back on track. Good to see the progress!
 I was actually thinking about your project the other day, wondering if it ever got back on track. Good to see the progress!


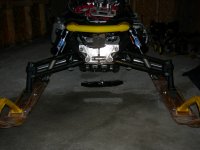
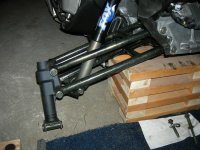
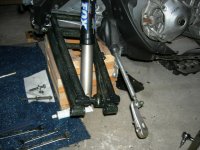
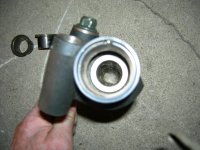
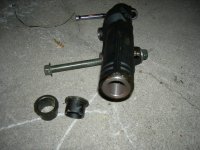
Bulk Head, Spindles & A-Arms all have the new bushings and the front end is back in, of course I must of dropped those back Bulk Head bushings and nuts countless times before I was done. Ski's are on with teflon shims, I took the carbides off for now for moving it around. The rear skid is in just need to screw in the hardware as I was having trouble getting the front axail to line up....Long Day and was just beat.
Be back at it tonight with some electrical, oil change, mount battery and start getting the intercooler back in with the plumbing.
Of course everything has a layer of dust on it from sitting Way Too Too Long
Be back at it tonight with some electrical, oil change, mount battery and start getting the intercooler back in with the plumbing.
Of course everything has a layer of dust on it from sitting Way Too Too Long

Attachments
-
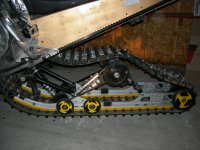 Finial Assembly Of The RTX-T Project #2 008.jpg466.9 KB · Views: 154
 -
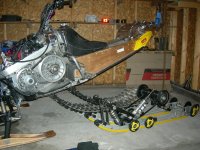 Finial Assembly Of The RTX-T Project #2 007.jpg496.2 KB · Views: 172
 -
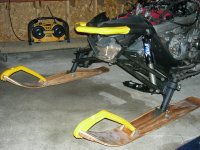 Finial Assembly Of The RTX-T Project #2 006.jpg499 KB · Views: 160
 -
 Finial Assembly Of The RTX-T Project #2 005.jpg371.2 KB · Views: 147
 -
 Finial Assembly Of The RTX-T Project #2 004.jpg500.6 KB · Views: 145
 -
 Finial Assembly Of The RTX-T Project #2 003.jpg471.9 KB · Views: 161
 -
 Finial Assembly Of The RTX-T Project #2 002.jpg469.8 KB · Views: 144
 -
 Finial Assembly Of The RTX-T Project #2 001.jpg473.5 KB · Views: 148


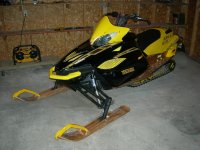
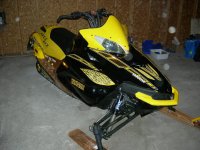
BOUNTYHUNTER said:After careful consideration of color choices and what I want to accomplish with a theme, I'm going back to a reto sled, one Yamaha Built in 1980...One Of My Favorites the "GOLD & BLACK" SRX 440's.
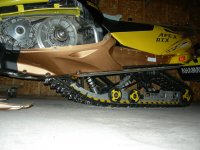
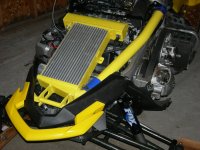
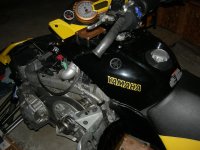
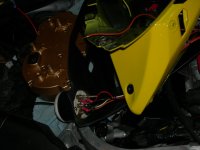
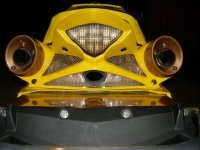
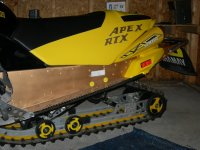
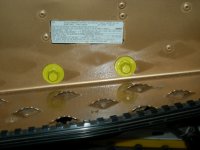
Well it took a lot longer than I wanted with a few unexpected delays along the way, but it's finially done. Other than taking the spindles off and making them yellow, shock covers that match the seat,hand guards & powder coating a bit more hardware.....It came out pretty much the way I thought.
Already looking to do a S.C.'ed Project for my next sled.

Attachments
-
 Finial Assembly Of The RTX-T Project #3 016.jpg513.5 KB · Views: 227
 -
 Finial Assembly Of The RTX-T Project #3 015.jpg511.6 KB · Views: 224
 -
 Finial Assembly Of The RTX-T Project #3 013.jpg475.6 KB · Views: 179
 -
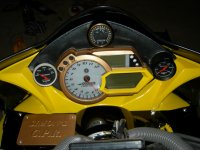 Finial Assembly Of The RTX-T Project #3 012.jpg340.9 KB · Views: 160
 -
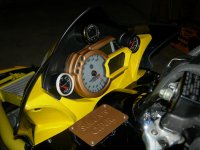 Finial Assembly Of The RTX-T Project #3 011.jpg347.5 KB · Views: 154
 -
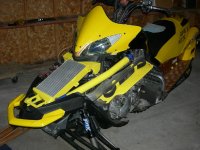 Finial Assembly Of The RTX-T Project #3 010.jpg483 KB · Views: 166
 -
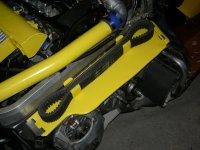 Finial Assembly Of The RTX-T Project #3 008.jpg465.4 KB · Views: 145
 -
 Finial Assembly Of The RTX-T Project #3 007.jpg478.9 KB · Views: 174
 -
 Finial Assembly Of The RTX-T Project #3 005.jpg462.8 KB · Views: 143
 -
 Finial Assembly Of The RTX-T Project #3 004.jpg306.4 KB · Views: 151
 -
 Finial Assembly Of The RTX-T Project #3 003.jpg439.7 KB · Views: 173
 -
 Finial Assembly Of The RTX-T Project #3 002.jpg352.8 KB · Views: 169
 -
 Finial Assembly Of The RTX-T Project #3 001.jpg370.1 KB · Views: 151
rx1 fern
TY 4 Stroke Junkie
very nice larry. you did a good job


Nick1945
TY 4 Stroke Master
Amazing job, thats a work of art 


Nick1945 said:Amazing job, thats a work of art
TK's was a lot of fun to do.....Just took so long to finish

Irv
TY 4 Stroke God
- Joined
- Mar 23, 2005
- Messages
- 3,778
- Age
- 60
- Location
- ONT. Canada
- Country
- Canada
- Snowmobile
- 2008 40th Anniversary Vector.
1995 XLT SP (Son's)
I'm still drooling over your 08 40th Apex you did.
This is another awesome job you have done, wish I had just a bit of your talent
This is another awesome job you have done, wish I had just a bit of your talent


Irv said:I'm still drooling over your 08 40th Apex you did.
This is another awesome job you have done, wish I had just a bit of your talent
Tk's 4 the kind words......It really is a true passion of mine to take some thing and invision what I see and then start to make it come to life. It helps that I'm a little handy with Powder Coating & Paint and can turn a wrench or two ....BTW You Gotta See This Thing In The Sun Light
Really looking forward to my next project as I'm already starting to draw it out.


Super Sled
Lifetime Member
- Joined
- Feb 25, 2009
- Messages
- 3,631
- Location
- Riding on the North Shore, MN
- Country
- USA
- Snowmobile
- Summit X
Great job Bounty...... I'm glad you could finally get back to this, and this may be your best one yet!!!!!!!!!!!
tell us more about the motor and all of the other components that went into it..... Is it turbo charged? What kind of turbo and where did you get it from?
Thanks Bounty and you did such a great job!!!!!!!
Mike
tell us more about the motor and all of the other components that went into it..... Is it turbo charged? What kind of turbo and where did you get it from?
Thanks Bounty and you did such a great job!!!!!!!
Mike


Super Sled said:tell us more about the motor and all of the other components that went into it.....
.............Is it turbo charged?
.......... What kind of turbo and where did you get it from?
Mike
TK's Mike
...The Motor is stock as far as I know, But I did put on a Turbine Tech Header to replace the CPR Header that the kit comes with. See page #3 of this build.
...Yes it is Turbo'd, on Page #17 you can see the Intercooler & Charge Tube going into the Turbo Housing.
...It is a Garrett 0.64, you can see it on Page #7, I got it from B.B.Y.

Similar threads
- Replies
- 15
- Views
- 3K
- Replies
- 35
- Views
- 6K
-
This site uses cookies to help personalise content, tailor your experience and to keep you logged in if you register.
By continuing to use this site, you are consenting to our use of cookies.
