CaptCaper
VIP Member
- Joined
- Jan 1, 2007
- Messages
- 2,256
- Reaction score
- 194
- Points
- 1,283
- Location
- Northern N.H.
- Country
- USA
- Snowmobile
- 2016 RS Vector XTX 1.25 Lug wifes..2013 RS Vector LTX.. 2003 600 VMax Past Machines 3-2007 Attaks 1-2010 Vector LTX.. sorry no Stinkdoos or poo's cats.
Right side is junk...Travis didn't have one...calling Excell monday.
View attachment 138082
Try Spa City Sled's.. in Balliston Spa NY ...
SumpBuster
TY 4 Stroke God
- Joined
- Jul 18, 2003
- Messages
- 2,359
- Reaction score
- 1,272
- Points
- 1,483
- Location
- Carlisle, NY .
- Country
- USA
- Snowmobile
- 18 sidewinder; 06 Apex RTX
Thanks..I will...a little closer if they have one.Try Spa City Sled's.. in Balliston Spa NY ...
Big concern is getting the y pipes separated. Never been apart, tried years ago and gave up as I got the donuts in without needing to split them.
Last edited:

CaptCaper
VIP Member
- Joined
- Jan 1, 2007
- Messages
- 2,256
- Reaction score
- 194
- Points
- 1,283
- Location
- Northern N.H.
- Country
- USA
- Snowmobile
- 2016 RS Vector XTX 1.25 Lug wifes..2013 RS Vector LTX.. 2003 600 VMax Past Machines 3-2007 Attaks 1-2010 Vector LTX.. sorry no Stinkdoos or poo's cats.
They'll come with some heat.. I bought a torch kit combo from HomeDepot.. has Mapp and O2 and get's the hardware,etc cherry red fast.. everything comes off. I just did a OEM Attak... with no issues getting them off with the torch kit. Also you don't have to have SS pipes it seems ..if the donuts never fail the pipes don't get trashed at the flanges.
SumpBuster
TY 4 Stroke God
- Joined
- Jul 18, 2003
- Messages
- 2,359
- Reaction score
- 1,272
- Points
- 1,483
- Location
- Carlisle, NY .
- Country
- USA
- Snowmobile
- 18 sidewinder; 06 Apex RTX
Hope so...I have mapp gas and a home Depot gift card! I mean, they are coming out one way or another..lol. I tend to agree....I'd put a good titanium back....lasted almost 7000 miles...most tug hill pounding, so all the rivets are loose too...I'll replace with button heads and star locknuts....(did that on a ski doo once, well, twice....we switched suspensions and needed the brackets reused...sc10 to a prs back in the day) instead of rivets..worked great, never loosened.They'll come with some heat.. I bought a torch kit combo from HomeDepot.. has Mapp and O2 and get's the hardware,etc cherry red fast.. everything comes off. I just did a OEM Attak... with no issues getting them off with the torch kit. Also you don't have to have SS pipes it seems ..if the donuts never fail the pipes don't get trashed at the flanges.
But why the right donut...the others are perfect. And the right one went last time...probably when it ate the flange...it was gone...hmmmm....

CaptCaper
VIP Member
- Joined
- Jan 1, 2007
- Messages
- 2,256
- Reaction score
- 194
- Points
- 1,283
- Location
- Northern N.H.
- Country
- USA
- Snowmobile
- 2016 RS Vector XTX 1.25 Lug wifes..2013 RS Vector LTX.. 2003 600 VMax Past Machines 3-2007 Attaks 1-2010 Vector LTX.. sorry no Stinkdoos or poo's cats.
Mspp and o2...Not just mapp...
SumpBuster
TY 4 Stroke God
- Joined
- Jul 18, 2003
- Messages
- 2,359
- Reaction score
- 1,272
- Points
- 1,483
- Location
- Carlisle, NY .
- Country
- USA
- Snowmobile
- 18 sidewinder; 06 Apex RTX


gitrdun
Lifetime Member
- Joined
- Mar 15, 2007
- Messages
- 555
- Reaction score
- 93
- Points
- 1,008
- Location
- north of superior
- Country
- Canada
- Snowmobile
- 07 Attak
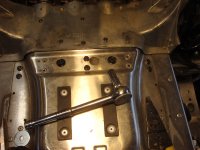
Since you are talking about bolt replacement for the rivets, here is a pic of my replacement. I used 6 bolts out of 10 holes, I would think that would be enough. You could also throw a couple of rivets in for good measure if you don't trust it, but mine has held. The locknut are the metal kind so there is no plastic to melt when you weld to the bracket. The bolt has the flange on the head so less likely to pull through the thin aluminum tunnel.
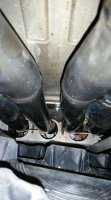
Regarding the donut clamps, when I was putting the clamps in place over the new donuts I found that the two clamps where the donuts had disintegrated, were very close to bottoming out, where the two that were in good shape had about a 1/4 inch space when squeezed together with two fingers(pic). So I ground off enough on the stoppers of those two, that they all four had the 1/4 inch before tightening.


I also substituted the same bolts that are used to hold the Y pipe to the muffler, for those dreaded Allen bolts.
Regarding the donut clamps, when I was putting the clamps in place over the new donuts I found that the two clamps where the donuts had disintegrated, were very close to bottoming out, where the two that were in good shape had about a 1/4 inch space when squeezed together with two fingers(pic). So I ground off enough on the stoppers of those two, that they all four had the 1/4 inch before tightening.


I also substituted the same bolts that are used to hold the Y pipe to the muffler, for those dreaded Allen bolts.
SumpBuster
TY 4 Stroke God
- Joined
- Jul 18, 2003
- Messages
- 2,359
- Reaction score
- 1,272
- Points
- 1,483
- Location
- Carlisle, NY .
- Country
- USA
- Snowmobile
- 18 sidewinder; 06 Apex RTX
Nice job!Since you are talking about bolt replacement for the rivets, here is a pic of my replacement. I used 6 bolts out of 10 holes, I would think that would be enough. You could also throw a couple of rivets in for good measure if you don't trust it, but mine has held. The locknut are the metal kind so there is no plastic to melt when you weld to the bracket. The bolt has the flange on the head so less likely to pull through the thin aluminum tunnel.
Regarding the donut clamps, when I was putting the clamps in place over the new donuts I found that the two clamps where the donuts had disintegrated, were very close to bottoming out, where the two that were in good shape had about a 1/4 inch space when squeezed together with two fingers(pic). So I ground off enough on the stoppers of those two, that they all four had the 1/4 inch before tightening.View attachment 138118View attachment 138119View attachment 138120
I also substituted the same bolts that are used to hold the Y pipe to the muffler, for those dreaded Allen bolts.
I used 10-32 button head with star nuts that bite into the aluminum, and welded 2 new 3/8 -24 grade 8 nuts on the bracket, and 2 3/8-24 button heads, with antisieze on everything. 1 hole tore through, but the 10-32''s are really tight so I think I'm good. Not as clean....she's gettin old....but solid. Just need a right side pipe and I'd be back on the....60 degree mud...yuk.


gitrdun
Lifetime Member
- Joined
- Mar 15, 2007
- Messages
- 555
- Reaction score
- 93
- Points
- 1,008
- Location
- north of superior
- Country
- Canada
- Snowmobile
- 07 Attak
There you go! At the speed you're going with the repair, with a little luck you'll be back on the hill by nightfall!
SumpBuster
TY 4 Stroke God
- Joined
- Jul 18, 2003
- Messages
- 2,359
- Reaction score
- 1,272
- Points
- 1,483
- Location
- Carlisle, NY .
- Country
- USA
- Snowmobile
- 18 sidewinder; 06 Apex RTX
All finished except for the pipe!There you go! At the speed you're going with the repair, with a little luck you'll be back on the hill by nightfall!
Last edited:


rafikie
Lifetime Member
- Joined
- Oct 10, 2005
- Messages
- 116
- Reaction score
- 0
- Points
- 966
- Location
- Lunenburg, MA
- Country
- USA
- Snowmobile
- 06 Attack
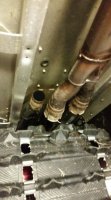
So I ended up removing the Manifolds to give them a good look and was glad to find no cracks. I was also very surprised as to how easily the manifold bolts actually came out. Now with the manifolds out of the way it was super easy to remove the damaged Y-pipes without messing with the riveted in hanger and the skid still up in place.
So new questions:
1- Can I reuse the original manifold exhaust gasket? Seems like it's just tin anyway
2- Does anyone have torque specs for the manifold and exhaust clamp bolts?
Thanks
So new questions:
1- Can I reuse the original manifold exhaust gasket? Seems like it's just tin anyway
2- Does anyone have torque specs for the manifold and exhaust clamp bolts?
Thanks
SumpBuster
TY 4 Stroke God
- Joined
- Jul 18, 2003
- Messages
- 2,359
- Reaction score
- 1,272
- Points
- 1,483
- Location
- Carlisle, NY .
- Country
- USA
- Snowmobile
- 18 sidewinder; 06 Apex RTX
I have reused them and put a tiny bit of copper high temp permatex like on the donuts. I just go by feel for tightness. Never had any loosen and they always come out easy. Tight, and then some more, but not enough to break them...lol. Antisieze generously.So I ended up removing the Manifolds to give them a good look and was glad to find no cracks. I was also very surprised as to how easily the manifold bolts actually came out. Now with the manifolds out of the way it was super easy to remove the damaged Y-pipes without messing with the riveted in hanger and the skid still up in place.
So new questions:
1- Can I reuse the original manifold exhaust gasket? Seems like it's just tin anyway
2- Does anyone have torque specs for the manifold and exhaust clamp bolts?
Thanks
snowman 700
Pro
- Joined
- Oct 10, 2005
- Messages
- 166
- Reaction score
- 72
- Points
- 883
- Location
- Mid-Michigan
- Country
- USA
- Snowmobile
- 2011 Apex SE
2012 Vector (wifes)
So I ended up removing the Manifolds to give them a good look and was glad to find no cracks. I was also very surprised as to how easily the manifold bolts actually came out. Now with the manifolds out of the way it was super easy to remove the damaged Y-pipes without messing with the riveted in hanger and the skid still up in place.
So new questions:
1- Can I reuse the original manifold exhaust gasket? Seems like it's just tin anyway
2- Does anyone have torque specs for the manifold and exhaust clamp bolts?
Thanks
Torque spec is 25Nm or 18 ft/lb for the manifold (flex pipe) and 18Nm or 13ft/lb for the clamp bolt...If the gasket looks good, reuse it.....but put in new clamp bolts as the stretch from heat cycling and reusing them can make the clamp come loose and cause the same problems as bad donuts .
EDIT: spec for clamp ....13 ft. lbs is for 2011, 06-10 is 7 ft. lbs...thx gitrdun
Last edited:
CCCT
Extreme
- Joined
- Jan 9, 2017
- Messages
- 108
- Reaction score
- 18
- Points
- 448
- Location
- Barrie/Sudbury/Muskoka
- Country
- Canada
- Snowmobile
- 2007 Apex
2009 PhazerGT
During y pipe replacement, Anyone have tips for getting the 2 Y pipes into the muffler side? Trying a test fit before putting back in the sled but extremely tight, and can only get the pipes slid in about 1 inch each.
The 2 mesh gaskets are still in on the muffler side. Not sure if it's better to remove those and attempt to install on the ypipes first?
The 2 mesh gaskets are still in on the muffler side. Not sure if it's better to remove those and attempt to install on the ypipes first?

Winderallday!
VIP Member
- Joined
- Dec 4, 2007
- Messages
- 588
- Reaction score
- 167
- Points
- 1,058
- Location
- SW, Ontario
- Country
- Canada
- Snowmobile
- 2018 Sidewinder DX
During y pipe replacement, Anyone have tips for getting the 2 Y pipes into the muffler side? Trying a test fit before putting back in the sled but extremely tight, and can only get the pipes slid in about 1 inch each.
The 2 mesh gaskets are still in on the muffler side. Not sure if it's better to remove those and attempt to install on the ypipes first?
Alignment is key, the ends of the pipe can snag the mesh and they can distort/fold over easily. I always polished the y-pipes with emery cloth, then greased both pipes and mesh gaskets and usually had success.
The pipes are a tight fit because the muffler inlet side is segmented to allow the clamps to compress the mesh gaskets over the pipes and the mesh doesn't relax after the pipes are separated from the muffler inlet.
When installing new gaskets, I have used a tail pipe expander or similar mandrel to open up the segmented muffler inlet tubes which makes the job much easier.
Similar threads
-
This site uses cookies to help personalise content, tailor your experience and to keep you logged in if you register.
By continuing to use this site, you are consenting to our use of cookies.


