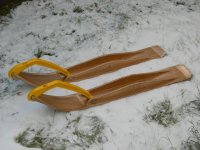

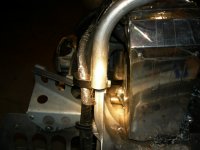
BTW Jan; I'm not sure if you noticed it or not but I had to notch out the steeing post just a tad more up and to the right with a SS/Alum grinding bit. As the clearance for the waste gate rod and end swivel was just hitting. 

rxrider
Jan-Ove Pedersen
- Joined
- Apr 25, 2003
- Messages
- 7,355
- Age
- 60
- Location
- Lakselv - 70N & 25E
- Country
- Norway
- Snowmobile
- 2014 Phazer XTX, 2013 Phazer RTX, 2008 Apex RTX, 2007 Warrior, 2006 Attak
Yes I noticed it  I love the looks of the TT header
On my RX-1 I had to roll the actuator 180 deg to get better clearance for the boost signal line, there's always something that needs modifications to make it fit.
On my RX-1 I had to roll the actuator 180 deg to get better clearance for the boost signal line, there's always something that needs modifications to make it fit.


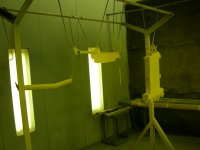
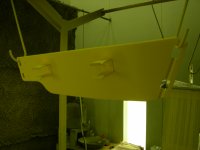
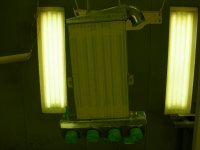
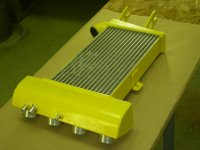
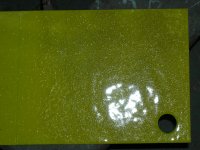
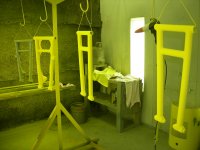
Ok as promised; I worked on some of the powder coating items, I'm a little disappointed on these as they didn't come out quite the way I wanted so I'm redoing the clutch cover. The sun Light Yellow came out Absolutely Perfect on ALL the pieces, phase #2 of the P.C. was the problem as I'm waiting for a piece of equipment for the gun to do the Gold Glitter. Without it it's hard to get the powder to do what i want as it needs to be fluidized and electrically charged
Attachments


The Sun Light Yellow was sprayed then only partly curred, then the gold glitter was now added then fully curred. This piece isn't that bad after all it's under the hood and you'll never see it.....but I will know it's not quite right and I'll have to remove it and look at it when I'm changing the oil & filter 

Attachments


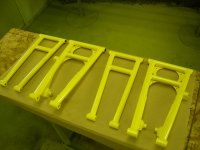
A-Arms look Great....but again they were suppose to be Midnight Mercedes Black then clear coated with the Gold Glitter. I'll live with this 4 now, but they will be comming off later to be redone 
The Ulmer bushing kit needs to go into these pieces as well as the bulk head & spindles

The Ulmer bushing kit needs to go into these pieces as well as the bulk head & spindles

Attachments


I never realized the bottom a-arm is steel and the upper is either aluminum or magnesium, you would think they would be the same material.
As well those pieces only had 1 mil of powder on them and they were pitted and scuffed up as they blasted way to easily. They now have 3 to 3.8 Mils of powder on them and look way richer and deeper as well will stand up a lot better for wear.
As well those pieces only had 1 mil of powder on them and they were pitted and scuffed up as they blasted way to easily. They now have 3 to 3.8 Mils of powder on them and look way richer and deeper as well will stand up a lot better for wear.


birkebeiner
Lifetime Member
- Joined
- Jul 27, 2009
- Messages
- 895
- Location
- Norway
- Country
- Norway
- Snowmobile
- 2015 Yamaha SR Viper X-TX
BOUNTYHUNTER said:[...] .....but I will know it's not quite right and I'll have to remove it and look at it [...]
I know the feeling, man!
 Keep up the good work! You think you will be done before this season is over??
rxrider
Jan-Ove Pedersen
- Joined
- Apr 25, 2003
- Messages
- 7,355
- Age
- 60
- Location
- Lakselv - 70N & 25E
- Country
- Norway
- Snowmobile
- 2014 Phazer XTX, 2013 Phazer RTX, 2008 Apex RTX, 2007 Warrior, 2006 Attak
Upper arms are aluminum, lower arms are mild steel.


birkebeiner said:You think you will be done before this season is over??
OMG.......I Sure Hope So


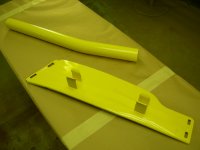
I re-did the charge tube & clutch cover, had to blast the P.C. off... that was fun. I turn the clutch cover into a rolled up news paper and spent the next 30 minutes trying to make it look good again, I thought I was buying a new one for sure......It came out pretty good, after all it's just a C.C. 

Attachments


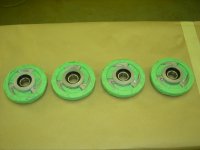
Seeing how I had two silver wheels I bought two more as Yamaha doesn't carry those type anymore. So it's painting time, probaly Yellow but maybe Gold then clear coated. I'll have to paint them Saturday as I forgot my snap ring Pliers to remove the bearings before I paint them. 

Attachments


Well...I hate to say it but this weekend was a TOTALL BUST 
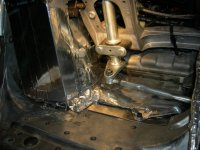
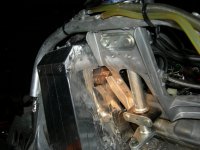
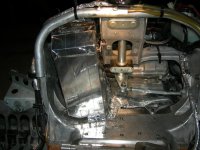
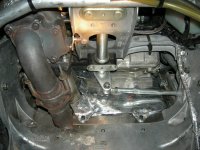
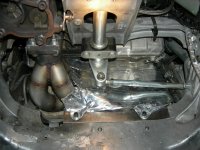
1st I went to install the turbo housing cover and the down spout that goes onto the exhaust only to find out that It WILL NOT FIT The header is just a bit wider at the turbo because of the way the tubes feed into it, and wouldn't let the elbo slide down and around. So I had to tear off the rear exhaust cover and the 4 bolts holding the exhaust and pull everything back. Then I had to die grind the opening on the chassis a bit more to finially get that elbow to go through it. Then remount the turbo cover and have everything loose just to check the clearances. Then slide the exhaust back up onto the elbow and tighten everything down.
Then the exhaust springs and flanges were the next small problem as it took a while to get them to where I coukld get them to Squeeze together as there was some clearance problems there as well.
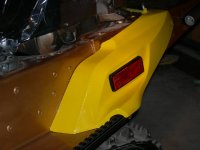
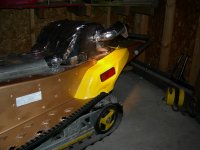
I went to install the seat Only to find out it wouldn't fit, as I was about 1/4 Too FAR BACK. The seat was hitting the Turbo Heat Sheild Box as it was just a tad too wide, so tear that off with all the other heat sheilds and start refabing them to go over and forward a tad. I dry fitted the seat and finially got it to go, then refit all the heat sheilds and the box last. I gave it a second coat of heat gasketing cloth while I had this all off anyways. Then I got the seat back to were it needs to go and double checked the waste gate control rods postion to make sure it moved freely without contacting anything.
I started to pull out all the plastic bushing as I'll be mounting the A-Arms with the bushing kit tomorrow. I did get the front bumber & rear plastic assembly back on.
Attachments
-
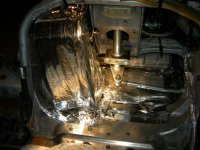 Assembling Header Pieces on RTX-T Project 011.jpg457.8 KB · Views: 127
 -
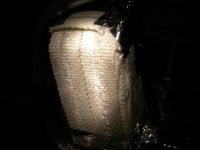 Assembling Header Pieces on RTX-T Project 010.jpg247.6 KB · Views: 129
 -
 Assembling Header Pieces on RTX-T Project 008.jpg347.9 KB · Views: 119
 -
 Assembling Header Pieces on RTX-T Project 007.jpg360.4 KB · Views: 128
 -
 Assembling Header Pieces on RTX-T Project 006.jpg433.9 KB · Views: 120
 -
 Assembling Header Pieces on RTX-T Project 005.jpg416.7 KB · Views: 140
 -
 Assembling Header Pieces on RTX-T Project 004.jpg355.7 KB · Views: 128
 -
 Assembling Header Pieces on RTX-T Project 003.jpg436.6 KB · Views: 124
 -
 Assembling Header Pieces on RTX-T Project 002.jpg468.3 KB · Views: 129
 -
 Assembling Header Pieces on RTX-T Project 001.jpg470.6 KB · Views: 126
rxrider
Jan-Ove Pedersen
- Joined
- Apr 25, 2003
- Messages
- 7,355
- Age
- 60
- Location
- Lakselv - 70N & 25E
- Country
- Norway
- Snowmobile
- 2014 Phazer XTX, 2013 Phazer RTX, 2008 Apex RTX, 2007 Warrior, 2006 Attak
Great work on the shielding, not to forget the paint work. This is far beyond bling hahaha


Similar threads
- Replies
- 15
- Views
- 3K
- Replies
- 35
- Views
- 6K
-
This site uses cookies to help personalise content, tailor your experience and to keep you logged in if you register.
By continuing to use this site, you are consenting to our use of cookies.

