Hooray!
TY 4 Stroke Junkie
- Joined
- Aug 12, 2017
- Messages
- 707
- Location
- Maine USA
- Country
- USA
- Snowmobile
- 2009 Yamaha FX Nytro XTX
1998 Yamaha VMAX 700 XTC
I almost have all my new parts now... 2014 three piece knuckles are last parts, planning to start this coming Tuesday, will the Ulmer bushings need a press tool of can I freeze them and press in with a regular C-clamp or block of wood and gentle hammer? Just read a thread about greasing the jackshaft bearing so that will be added to the list!
Hooray!
TY 4 Stroke Junkie
- Joined
- Aug 12, 2017
- Messages
- 707
- Location
- Maine USA
- Country
- USA
- Snowmobile
- 2009 Yamaha FX Nytro XTX
1998 Yamaha VMAX 700 XTC
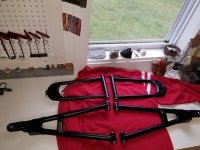
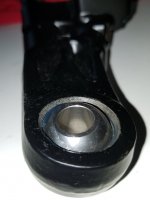
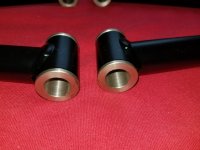
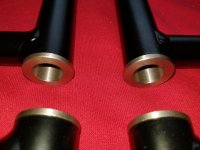
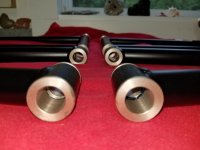
Tonight pressed the Ulmer bushings into fresh from the powder coater a-arms (black satin), I went with synthetic marine grease to lube things up for the insertion, bench vice and a piece of wood on the back side, socket on the bushing face and worked well. Anyone know if it is bad to lubricate the Ulmer bushing wear faces? I can go to their site too as I am sure they cover this. Forgot my c-clip pliers so was stopped short after pressing in the ball knuckles (that was ok, extra lubrication time aka beers to discuss and contemplate the situation), as noted earlier I went with 2014 three piece knuckles; comparing them to the 2009 version I removed, I could see the one piece has wear on the top (I think) face that mates with the washer, could have been the bottom as well but wear on one side only. Yamaha must have gone to the three piece so you could replace the wearing component for $8 when you needed to... does anyone have experience on how long those last and are you seeing wear on the top or bottom? I am going to lubricate all these parts with the synthetic adhesive lubricant used on German autos and spray on every now and then this winter as regular grease, marine synthetic waterproof or not will wash off after a few rides (or one!). Also found a set of Ulmer bushings for the spindles in the pile of parts that came with the sled (cool)... so inserted those as well. Next TU bolt it all together and install the new 150mm tuners... funny the next door neighbor dropped in by chance to talk about a Canada trip in mid-December as it was 49 F last night, snow is in the air : )
Hooray!
TY 4 Stroke Junkie
- Joined
- Aug 12, 2017
- Messages
- 707
- Location
- Maine USA
- Country
- USA
- Snowmobile
- 2009 Yamaha FX Nytro XTX
1998 Yamaha VMAX 700 XTC
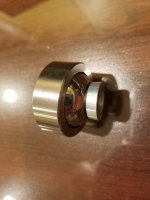
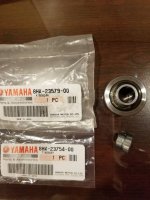
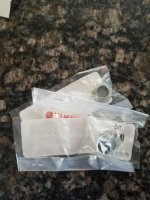
I was stopped last night as three of the four 3-piece 2014 ball joint parts were en route. Do people actually replace just the small upper "shim" on their ball joints? I did notice the old 2009 1-piece version which integrates these shims onto the "ball" had one side well worn, the other not at all. Makes sense to replace a $8 shim vs. the $65 ball joint... hope this helps the next person looking to do the same.


Hooray!
TY 4 Stroke Junkie
- Joined
- Aug 12, 2017
- Messages
- 707
- Location
- Maine USA
- Country
- USA
- Snowmobile
- 2009 Yamaha FX Nytro XTX
1998 Yamaha VMAX 700 XTC
Heard back from Allen Ulmer (next day!) so I am planning to lightly coat things before assembly. Considering the synthetic marine grease (waterproof) or the adhesive synthetic grease I posted earlier in this thread (might stay on longer).
-----Original Message-----
From: srxspec@gwtc.net [mailto:srxspec@gwtc.net]
Sent: Thursday, August 31, 2017 12:19 PM
Subject: Re: Oilite
A light coat of grease or oil won't hurt anything on assembly.
Best Regards,
Allen Ulmer
Ulmer Racing
On 2017-08-30 12:19, wrote:
> Hello,
>
> I purchased a set of your Oilite bushings for my 2009 Nytro FX XTX,
> wondering if I should lubricate the bushings or leave them dry, heard
> both ways. I suspect some extra marine synthetic grease on them will
> only help but what is your recommendation?
>
> Thanks,
Hooray!
TY 4 Stroke Junkie
- Joined
- Aug 12, 2017
- Messages
- 707
- Location
- Maine USA
- Country
- USA
- Snowmobile
- 2009 Yamaha FX Nytro XTX
1998 Yamaha VMAX 700 XTC
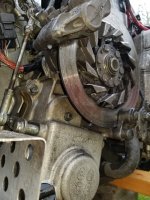
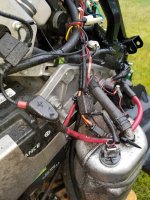
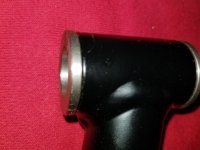
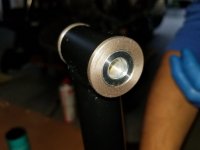
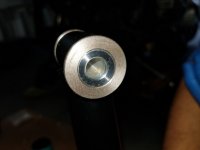
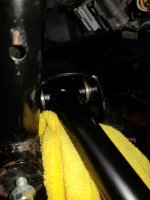
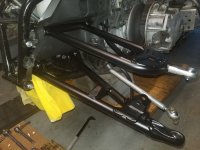
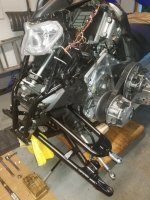
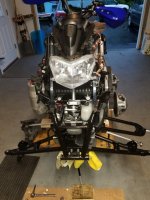
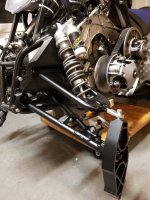
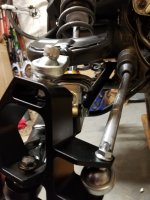
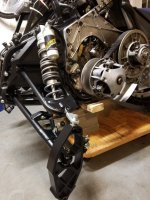
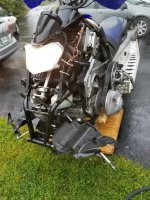
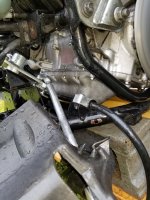
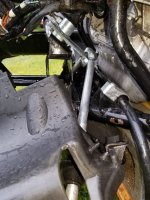
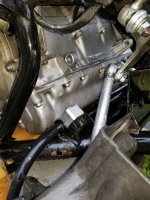
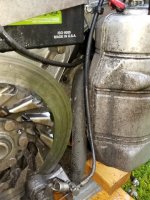
So last parts finally arrived today (few bolts and nuts) so build up is started tonight... I will put up all the pics I took in several posts as a reference for others here that may not have done this. Cleaned the crap out of the front end (as you can see) but the fresh powder coated A-arms and new parts make it all feel brand new. The Oilite bushings really show their copper color, will have to investigate what they are made out of. Andrew Ulmer answered my email to him and said some assembly grease wont hurt anything which makes sense. I ended up using the Wurth adhesive synthetic "oil" on the lower arm aluminum sleeves that go inside the Oilites (see pics). I then hit all the Oilite bushing faces after installing of the aluminum inner sleeves with Wurth, then let it get sticky. The upper sleeves are interesting, the bolt is tapered in the middle to create room for grease and yet no zerk on the upper A-arm until 2011+ I think. I kept my 2009 non-zerk A-arms as the Oilite bushings take away the lubrication demands of the plastic Yamaha stock bushings and I am on a $1000 prep budget all in (front end, skis / carbides, tank bag, shovel, tow strap, cover).
So first step, I discovered some left over muck from an 18" dip into swamp dip last February on one of my Brother-in-laws (BILs) last rides prior to selling me the sled. I pulled back the rubber / plastic steering arm covers / boots and dug out the muck with my fingers then hit the entire area with degreaser. Required I moved the sled outside to rinse and repeat after some stiff bristle brushing... gave some oil back to the grass and inside wiped down, really cleaned things up for the assembly. The mag rim cleaner removed alot of the grime and really shows in the pics how things cleaned up, my BIL asked what that smell was when I hit it is with the cotton rim cleaner... really cuts through it all. I hope this thread and pics helps the next person doing this, easy, nothing hard yet. I have learned so much here reading what other have done and the pics really help.
Surprised how tight and stiff the assembled A-arms / Oilites / new bolts are, actually takes good pressure to move the A-arms up and down but when they move, they do so with zero play and a solid lubricated almost hydraulic feel to them... sweet : ) Should be good for another 8000 miles, my BIL bought the sled 6000 miles five years ago, original owner did Oilites and custom zerks on spindles along with everything else (trail tank, suspension, etc), now he has 14000 miles on the odometer (1000 mile annual rides in Canada) but he replaced all four engine bearings, track (1.6 camoplast ice), copper exhaust gaskets and Yama-heaters, bags, etc on top of the previous owner's upgrades. Considering people suggest our engine will go 50,000+ I think I will be good to go with this sled once revamped for a few years and when I want to go retro, I'll ralley my 700 VMAX redhead, Klotz injector oil for it arrived today too, love that smell and Yamaha triples... pics start with cleanup.


Hooray!
TY 4 Stroke Junkie
- Joined
- Aug 12, 2017
- Messages
- 707
- Location
- Maine USA
- Country
- USA
- Snowmobile
- 2009 Yamaha FX Nytro XTX
1998 Yamaha VMAX 700 XTC
Hooray!
TY 4 Stroke Junkie
- Joined
- Aug 12, 2017
- Messages
- 707
- Location
- Maine USA
- Country
- USA
- Snowmobile
- 2009 Yamaha FX Nytro XTX
1998 Yamaha VMAX 700 XTC
Hooray!
TY 4 Stroke Junkie
- Joined
- Aug 12, 2017
- Messages
- 707
- Location
- Maine USA
- Country
- USA
- Snowmobile
- 2009 Yamaha FX Nytro XTX
1998 Yamaha VMAX 700 XTC
Hooray!
TY 4 Stroke Junkie
- Joined
- Aug 12, 2017
- Messages
- 707
- Location
- Maine USA
- Country
- USA
- Snowmobile
- 2009 Yamaha FX Nytro XTX
1998 Yamaha VMAX 700 XTC
Hooray!
TY 4 Stroke Junkie
- Joined
- Aug 12, 2017
- Messages
- 707
- Location
- Maine USA
- Country
- USA
- Snowmobile
- 2009 Yamaha FX Nytro XTX
1998 Yamaha VMAX 700 XTC
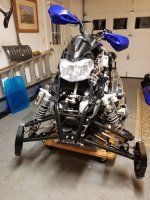
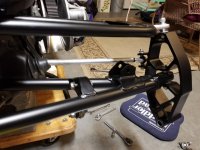
Spun some nuts tonight, pushing until I run out of parts, the top A-arm spindle bolt is still back ordered (interesting), I have last years to put in if needed but wanted to do everything new, known on the front end. I think I'll keep the old bolts, washers and nuts as a few ounces of trail prevention. Who knows, I suspect they can bolt up a Ski-Doo or Polaris in a fix too!
Pics from tonight, posting all I took as I always like looking at pics, cant have too many! From the 2014 blacked out Nytro I know it will look sweet when all assembled, black always looks good.
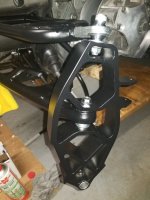
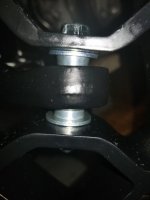
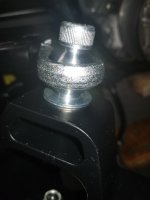
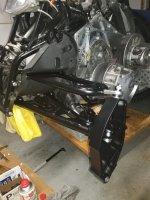
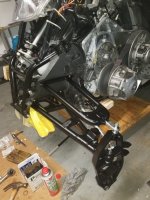
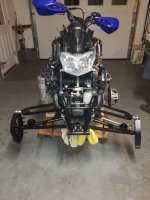
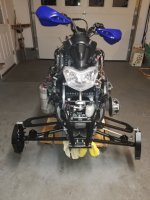
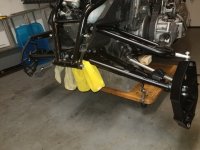
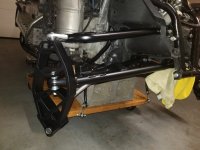
Pics from tonight, posting all I took as I always like looking at pics, cant have too many! From the 2014 blacked out Nytro I know it will look sweet when all assembled, black always looks good.


jimbur
Expert
- Joined
- Aug 16, 2013
- Messages
- 204
- Location
- Bernville Pa
- Country
- USA
- Snowmobile
- 09 NYTRO XTX
14 NYTRO XTX
08 NYTRO RTX
07 PHAZER
- LOCATION
- Pa.
Looks good! Make sure to loctite those long upper a-arm bolts, i think guys have had them back out a few times.
Hooray!
TY 4 Stroke Junkie
- Joined
- Aug 12, 2017
- Messages
- 707
- Location
- Maine USA
- Country
- USA
- Snowmobile
- 2009 Yamaha FX Nytro XTX
1998 Yamaha VMAX 700 XTC
Thanks jimbur, interesting you mention that as the torque spec sticky pages here don't mention Loctite ("LT") on the long upper A-arm bolts as well as others that I did hit with Loctite on the spindles. I went with blue medium Loctite. One issue on the upper long bolts is that you are greasing up the detent in the bolt heavy as there are no zerks on 2009 upper A-arms so the end of the bolt threads are greased up when they go into that welded in nut which you cant see... maybe I will back out the bolt, hit is with brake cleaner and Loctite in the nut from the back side and hope for the best. Cant remove the grease on the threads and maybe the high torque with the lock nut should hold it, possible reason why they don't suggest LT on it.? I plan to check the torques on the front end a few times this year so will see if any do loosen. Thanks again, great suggestion.
Hooray!
TY 4 Stroke Junkie
- Joined
- Aug 12, 2017
- Messages
- 707
- Location
- Maine USA
- Country
- USA
- Snowmobile
- 2009 Yamaha FX Nytro XTX
1998 Yamaha VMAX 700 XTC
Hooray!
TY 4 Stroke Junkie
- Joined
- Aug 12, 2017
- Messages
- 707
- Location
- Maine USA
- Country
- USA
- Snowmobile
- 2009 Yamaha FX Nytro XTX
1998 Yamaha VMAX 700 XTC
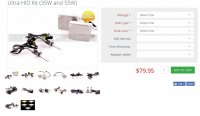
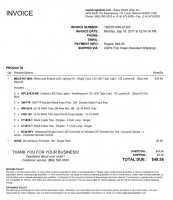
Ordered Bergstrom 8" triple point carbides and their 1/2" wear bar, ski savers and shims ($270). Will see how these Tuners work set up with their "system"... also ordered Autosol 1824 aluminum polish ($32 for two tubes), blue LED under lighting for the skid from www.superbrightled.com ($43) and about to pull the trigger on the DDM Ultra HID posted earlier in this thread ($79)... then rest the wallet. I would like to get the powermadd guards with LEDs and mirrors (then really rest it!) but that will wait until I have completed everything purchased thus far ($1050 +/-). Another work night tomorrow, last before I leave for Morocco for a month on business... praying for snow when I return! I am hoping the details in this thread helps the next guy along in his rebuild.


Similar threads
-
This site uses cookies to help personalise content, tailor your experience and to keep you logged in if you register.
By continuing to use this site, you are consenting to our use of cookies.

