Snowmobileaddict
TY 4 Stroke Junkie
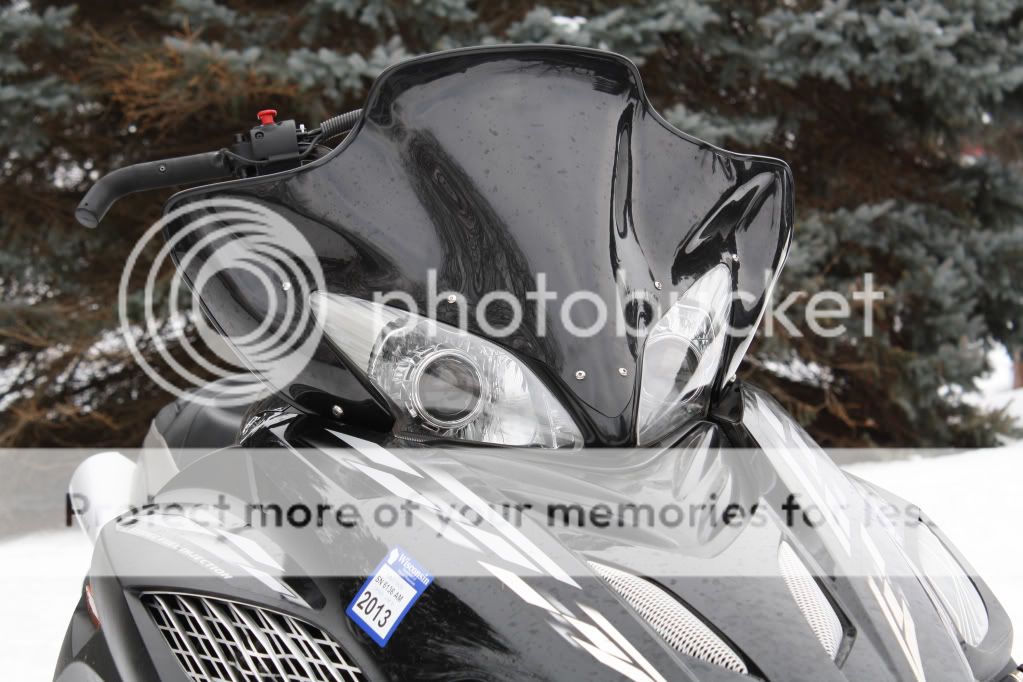

This is my 2.5" mini H1 projector retrofit mod on my 2006 yamaha apex gt. I chose to do this project because of the look that the projectors give the sled and because of the quality of the light output that that projectors provide with HID lights.
I already had a drop-in kit not unlike what is pictured below.
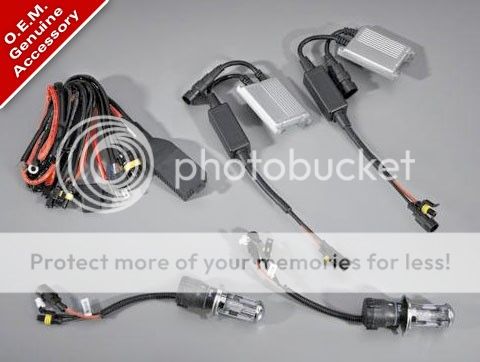
This project utilized my existing ballasts and hi/low relay harness. I added a mini H1 projector kit with Gatling Gun shrouds and 5000k pure white bulbs.
This projector kit calls for h1 type bulbs that I sourced for less than $10 for the pair. The projectors and shrouds were under $70. All project items were sourced from the ubiquitous online auction website that shall remain nameless. This project took about 4 hours start to finish and required the following:
Mini H1 projector and shroud kit
Bulbs for projectors
Existing ballasts
Existing relay harness to power up lights and actuate the high beams
Phillips screwdriver
Socket set
Flat head screw driver
Accurate oven
Pliers
As I said above, in addition to the bling factor I also wanted the wide angle of uniform light distribution and a seamless transition from low to high beams with no glare, hot spots, or dead space that HID bulbs can create when placed in a reflector housing designed for halogen equipment.
This is the projector kit I bought
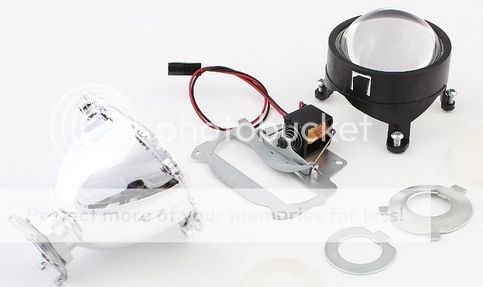
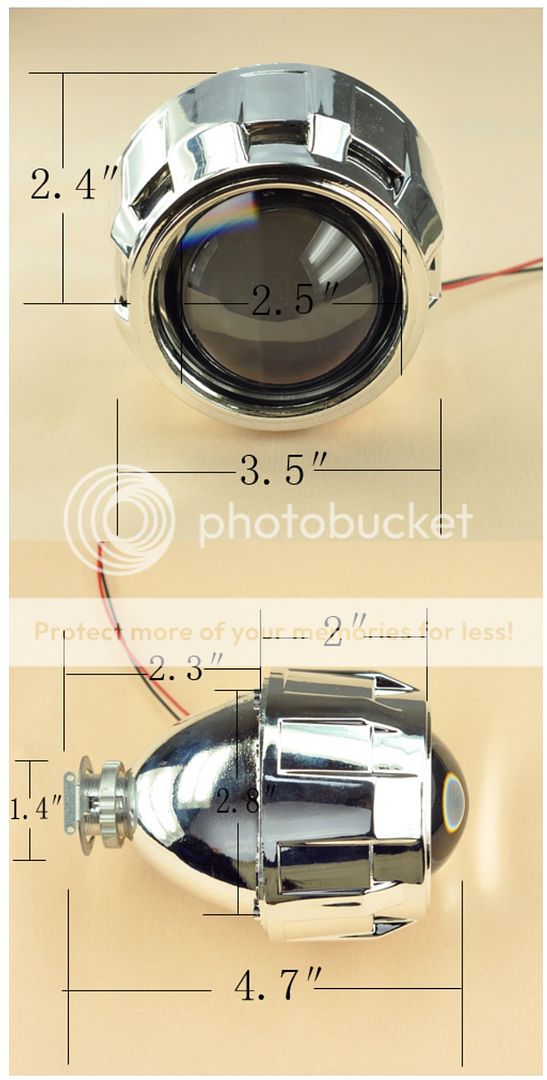
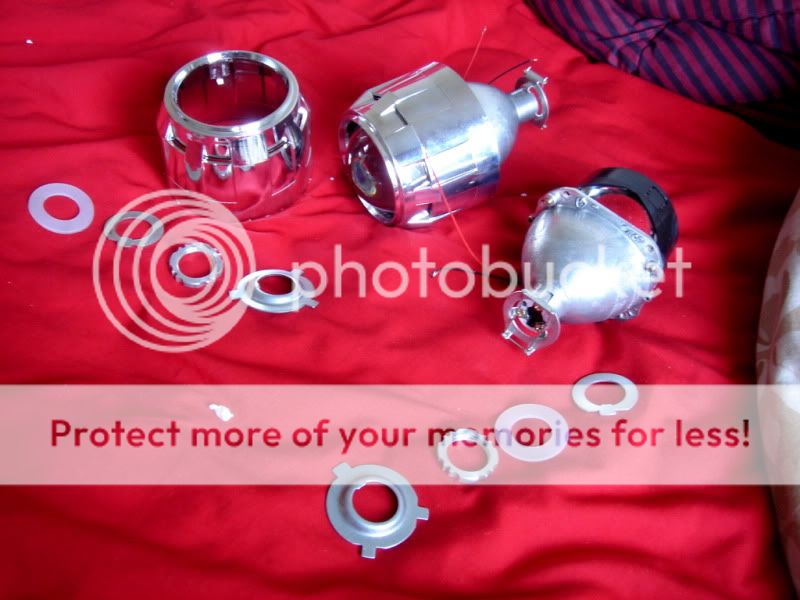
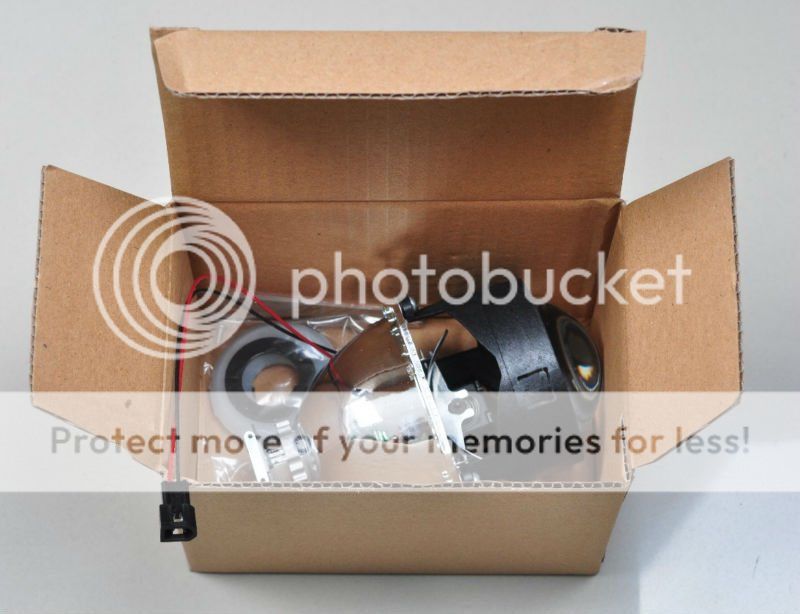
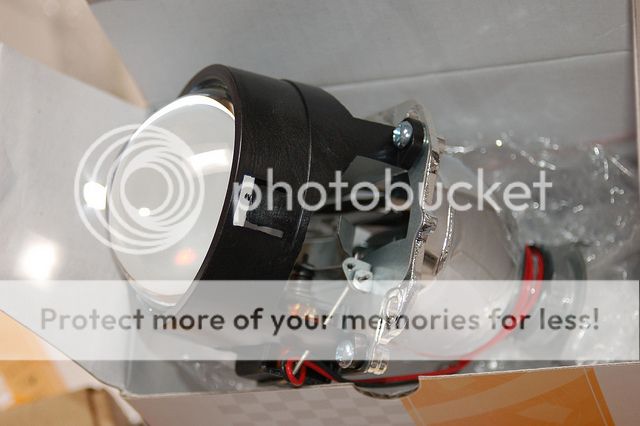
The bulbs look like this

And this is the lighting pattern that mini H1 projectors create
@High Beam
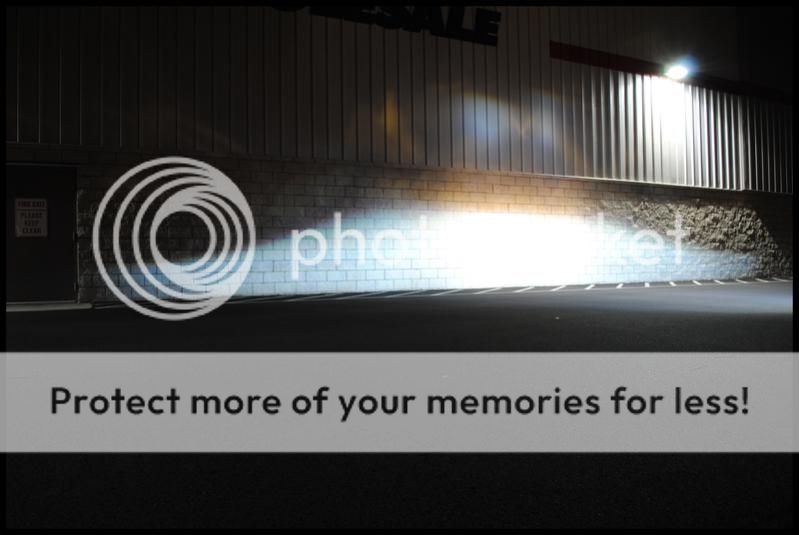
@Low Beam
These projectors fit right into the reflector housing and are aimed up and down with stock adjuster bolt. The only trick is the stock housing needs to be opened up in order to fit them. That is where the oven comes in.
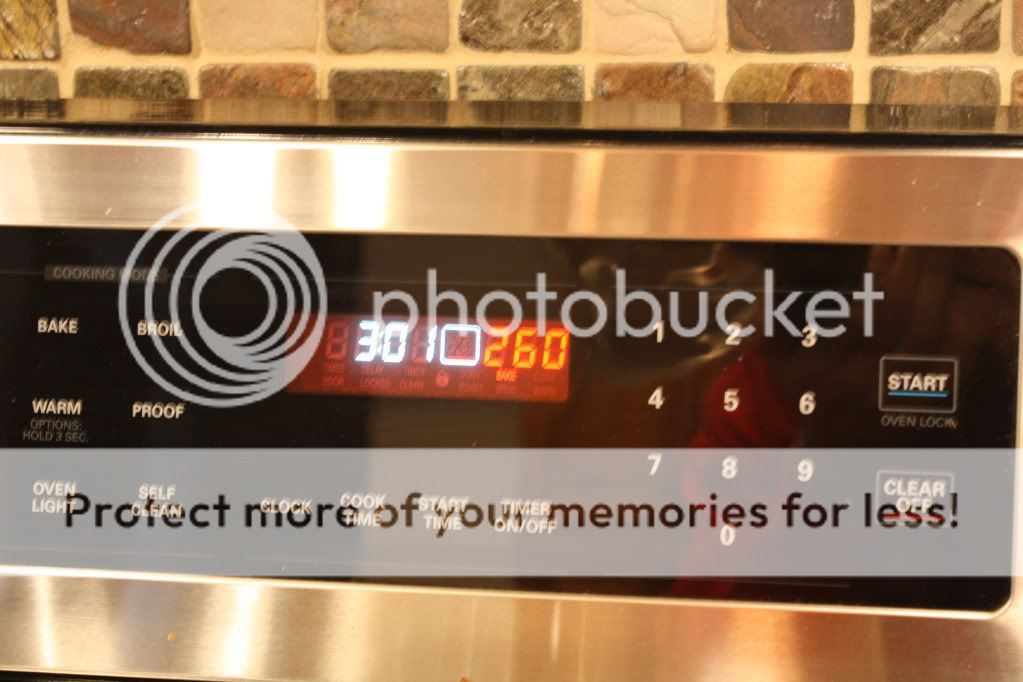
An accurate oven set to 260 degrees will soften the gooey butyl like glue so that it can be pried open with a flat blade screwdriver. Here is my stripped housing ready for the oven.
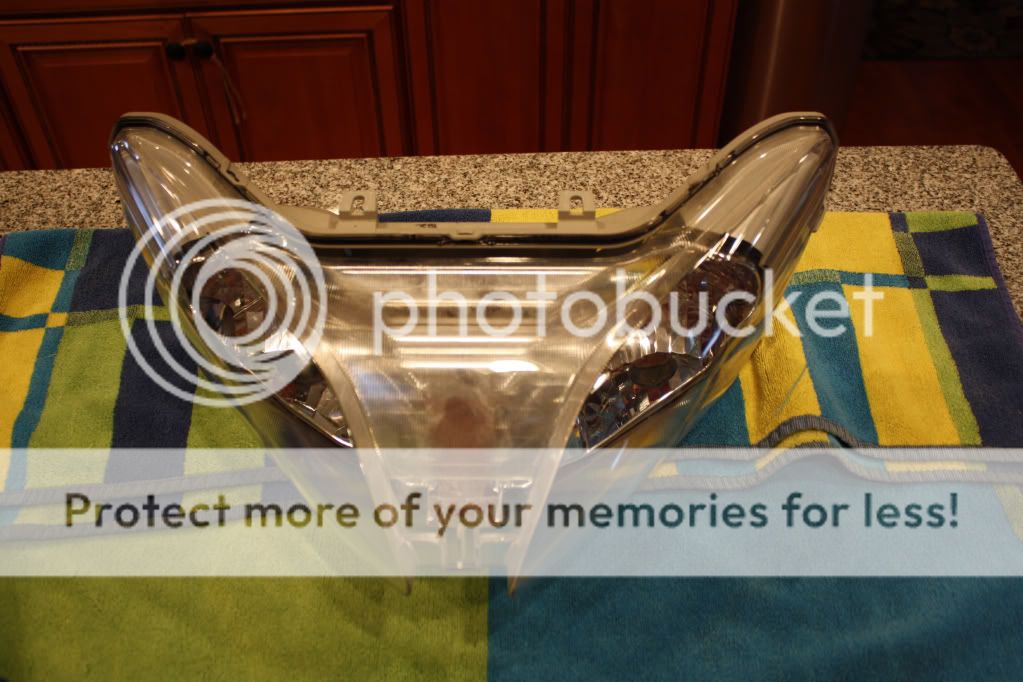
In the rack
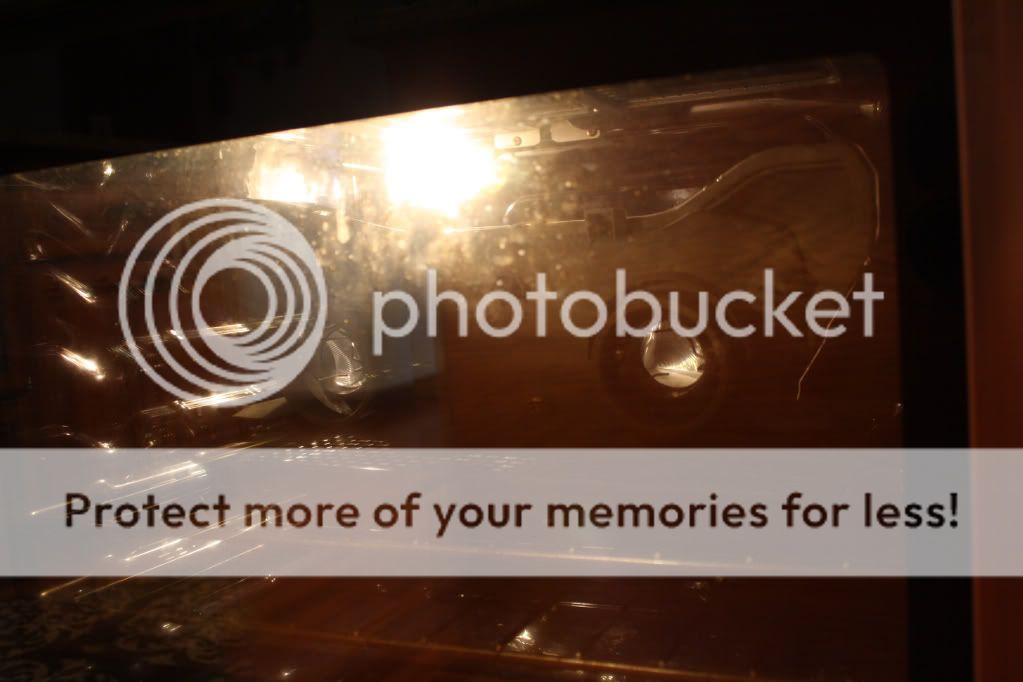
Seven minutes is all it takes at 260 degrees
The heat does not harm the plastic housing. Here it is separated. You have to work fast and oven mitts or gloves are helpful.
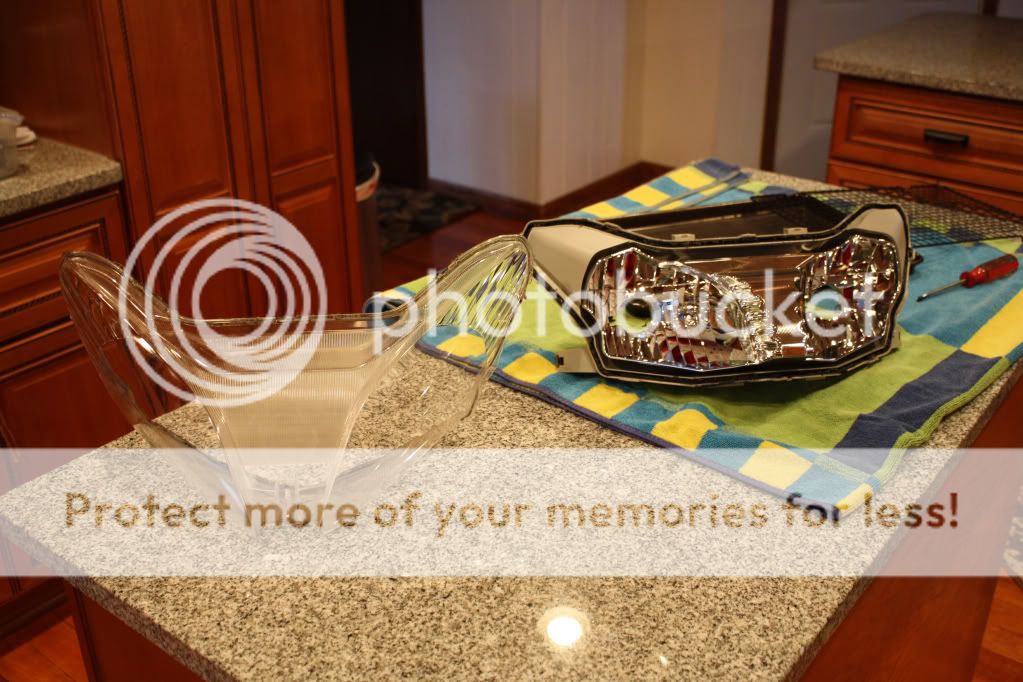
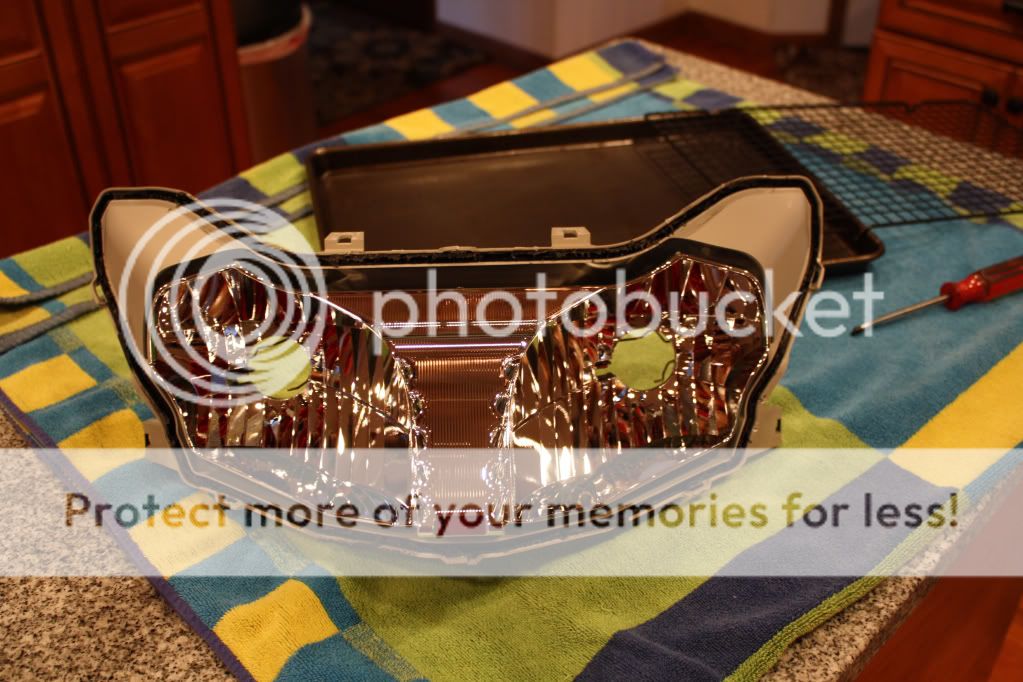
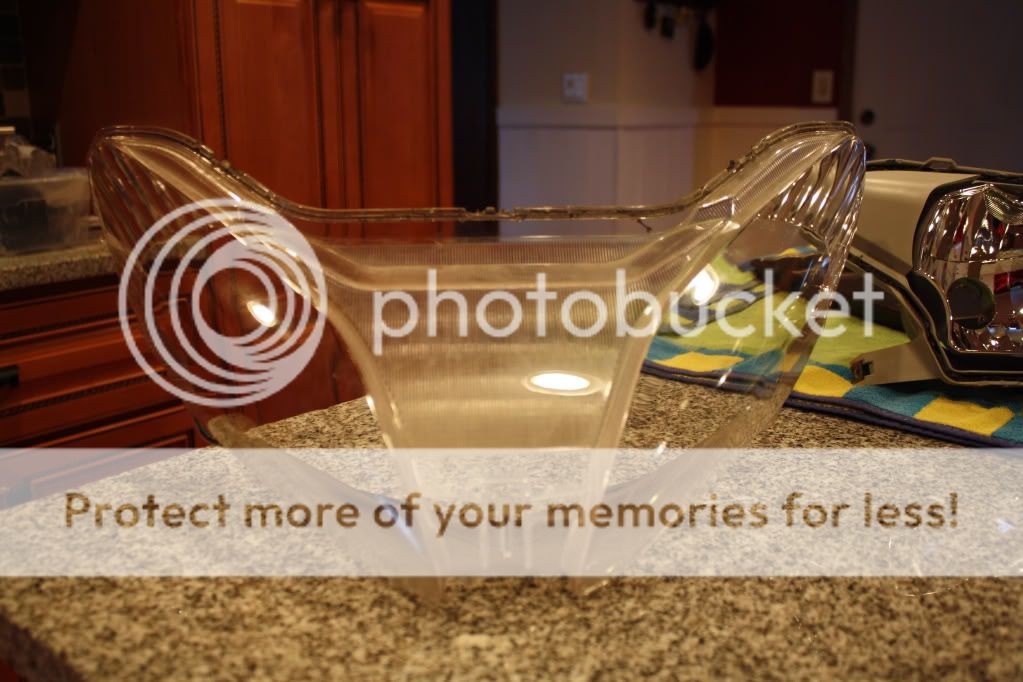
The next step is installing the projectors. They fit into the stock hole with the kit-provided H4 adapter ring
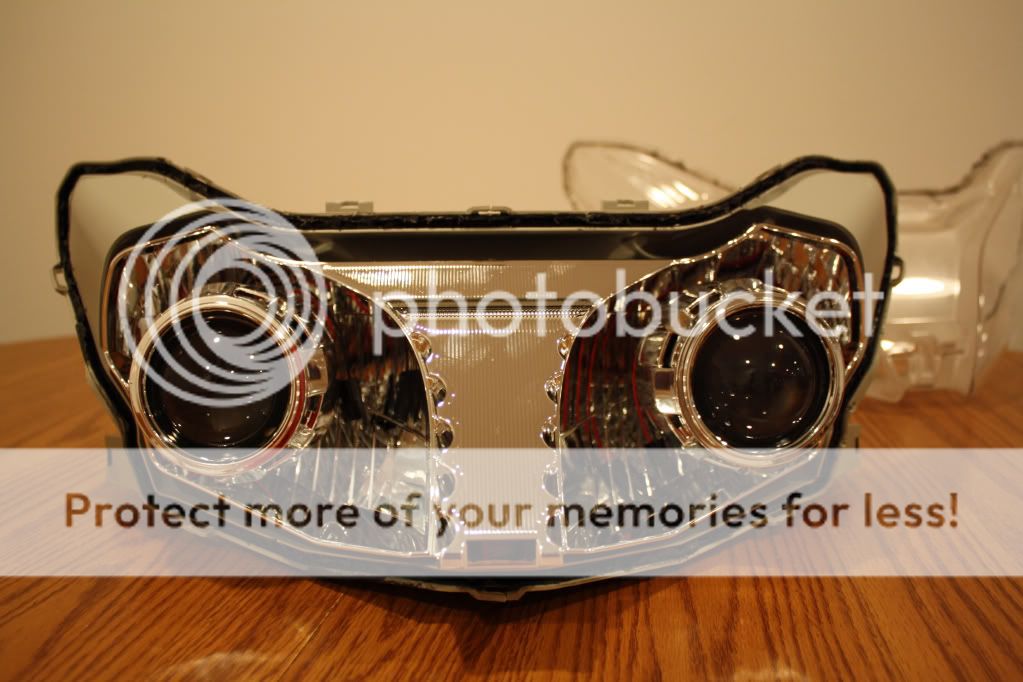
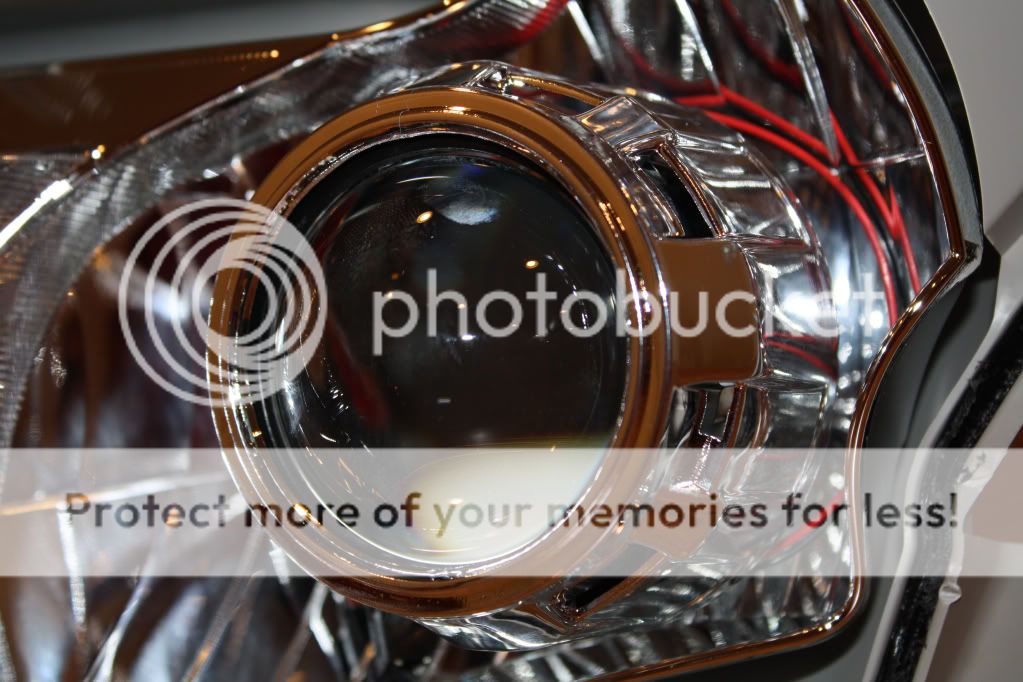
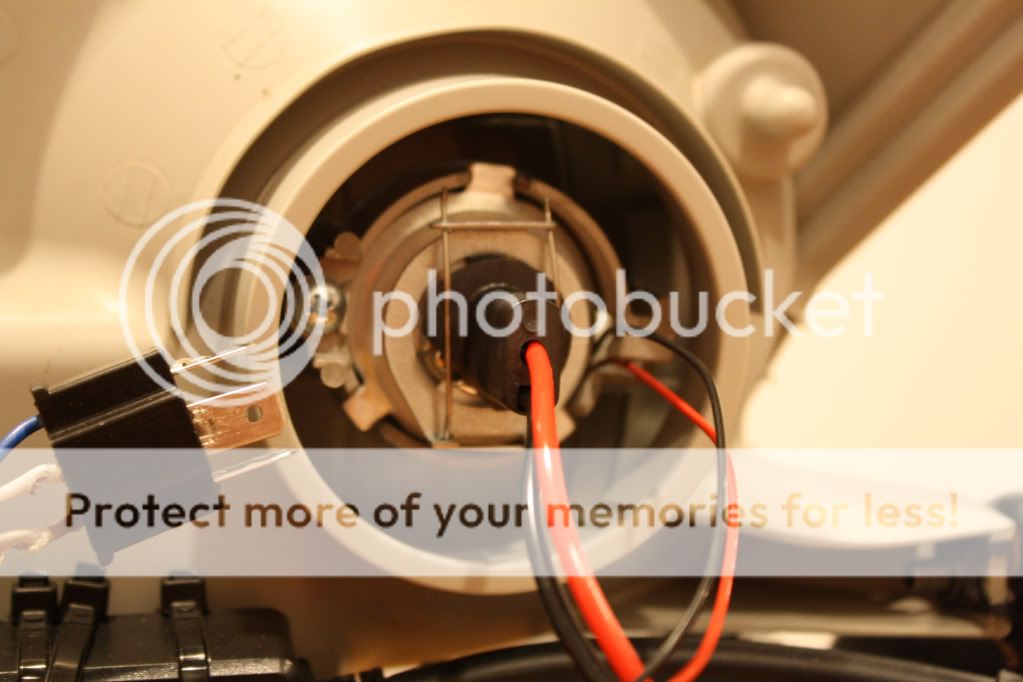
I used the thin silicone washer on the threaded base and then tightened the projector down until it wouldn't move. The only mod you have to do to the kit is Dremel off a flat locking tang on the adapter ring. This needs to be done so each projector can be "clocked" to provide a horizontal cutoff. The stock yamaha headlight socket holds the stock bulbs at a slight angle. This has to be worked around otherwise you'll end up with crooked cutoffs.
Here is picture of the projectors "clocked" to horizontal after I test lit them on my apex. You need to test light these on your sled before sealing the housing back up. You want to confirm horizontal cutoff alignment and that everything inside the housing is working.
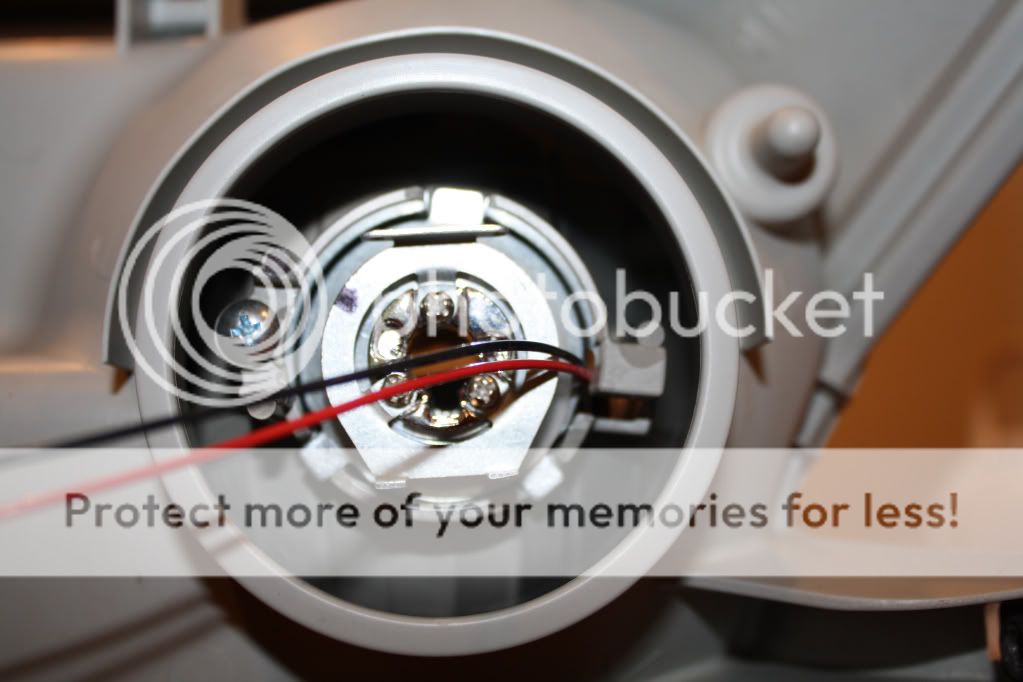
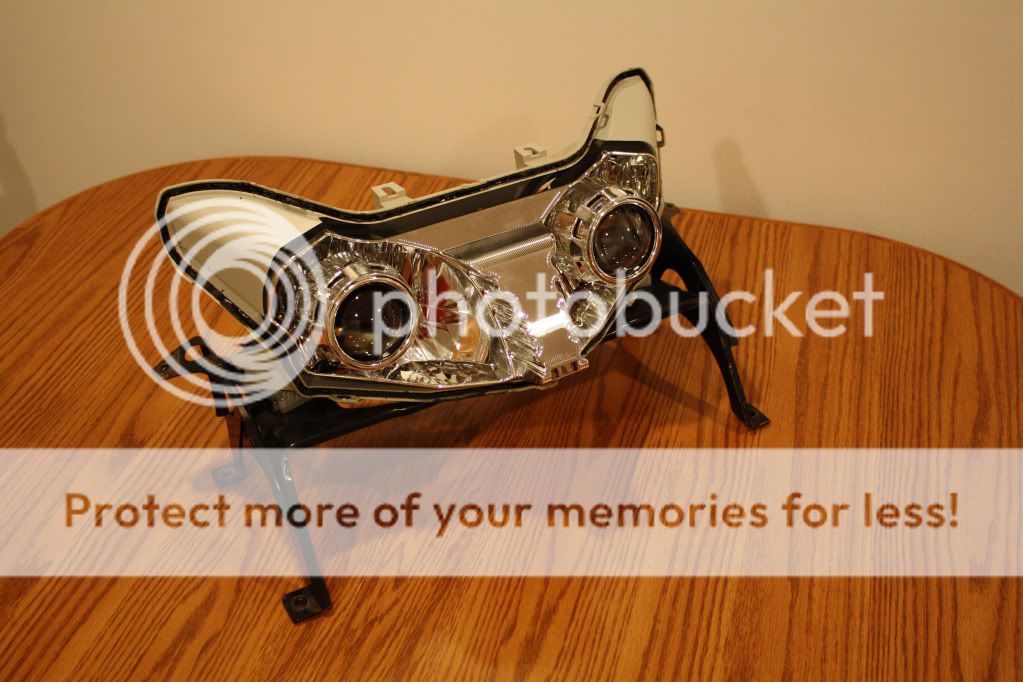
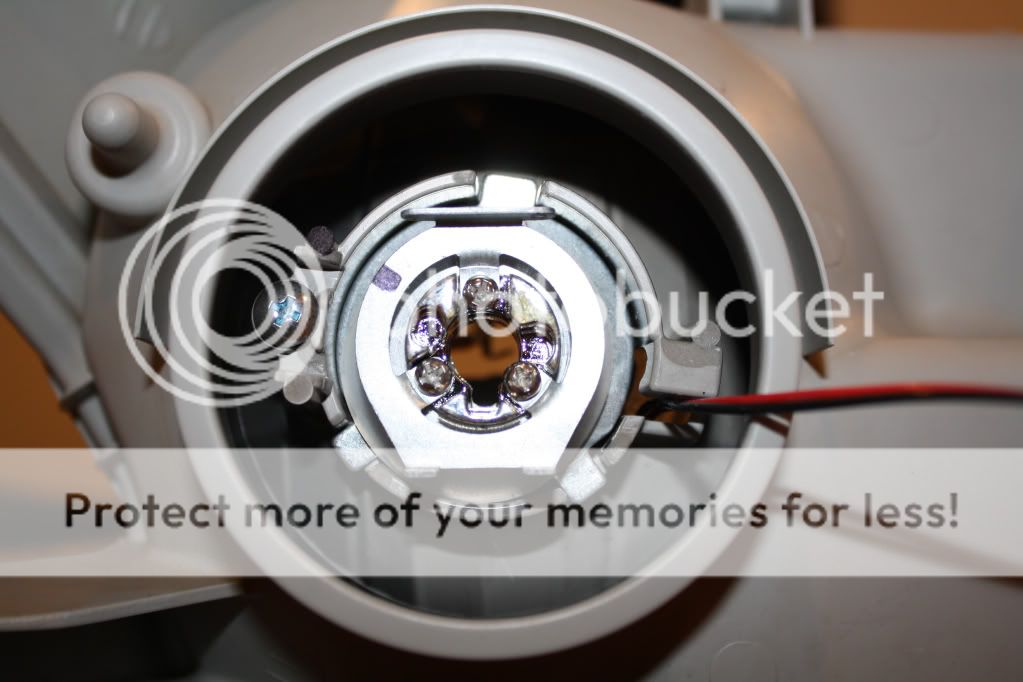
You can see my sharpie alignment dots indicating the correct orientation vs the skewed alignment the stock housing would have provided.
You can also see the light-gauge wires that power the shutter solenoid just like the old HID kit I had. These solenoid wires connect right up to my pre existing relay harness. At low beam a portion of the lens is covered. At high beam the shutter drops and allows light to shine up farther than low, no dead spots.
Next step is to drop it back in the oven to soften the glue and seal up the housing. Back in for 7 mins at 260 degrees. You remove the housing from the oven rack and use pliers to re-seat the housing and engage all the locking clips. It's very easy and again, the heat does to harm anything on the housing.
Here we are putting it back together
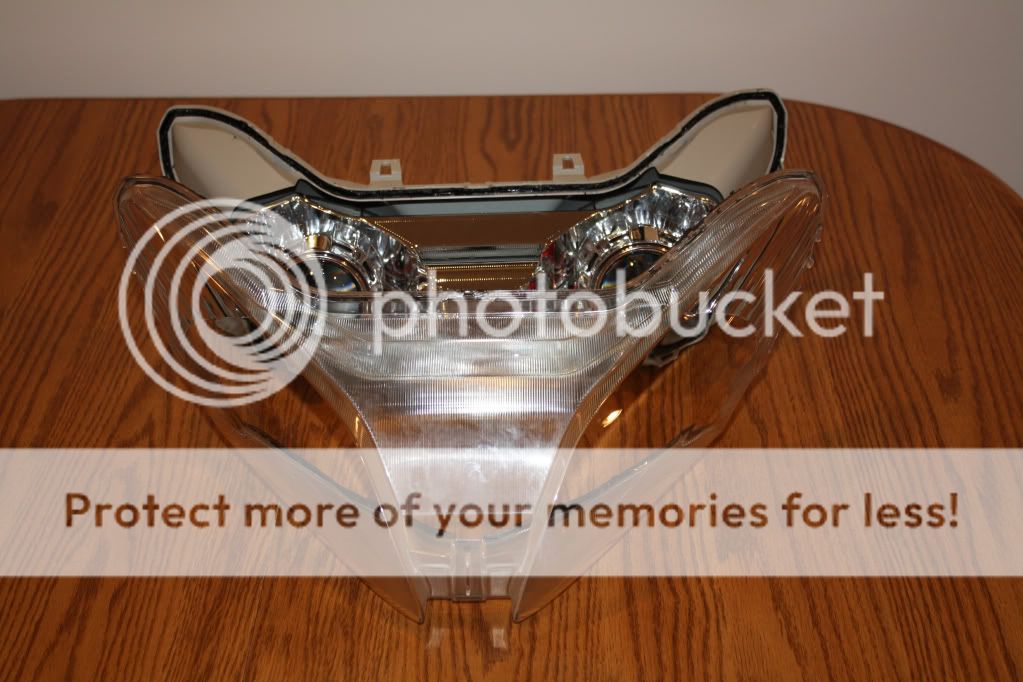
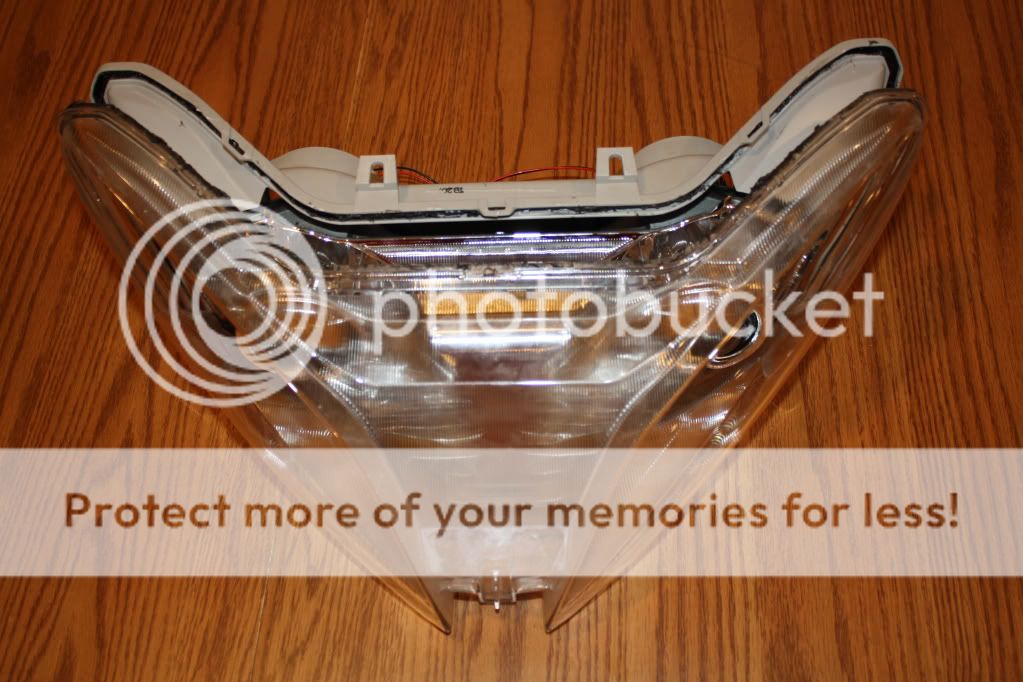
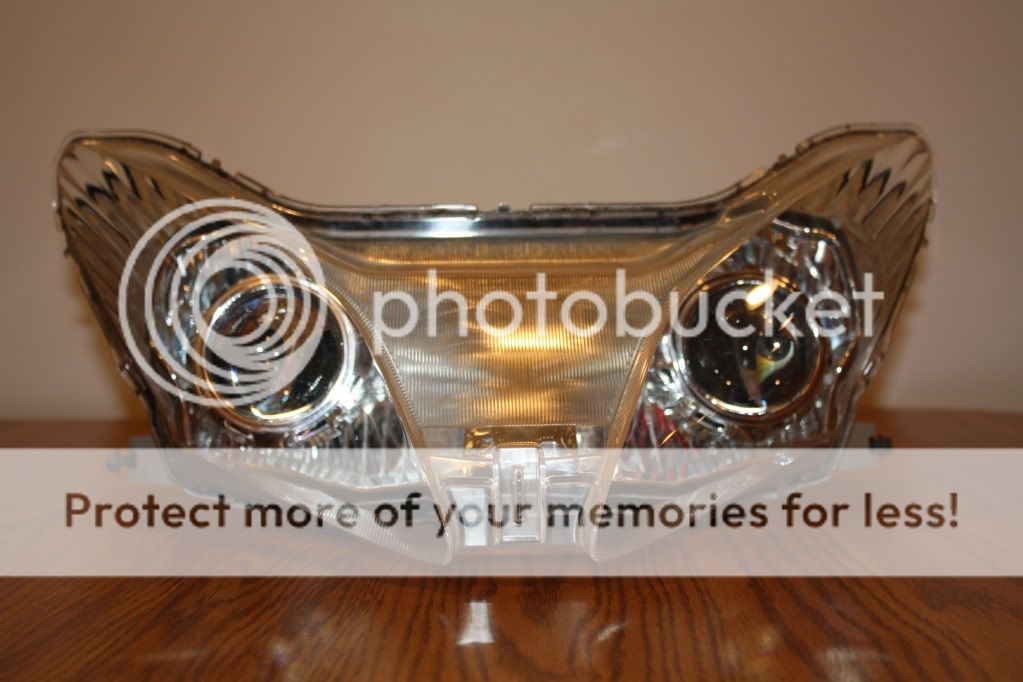
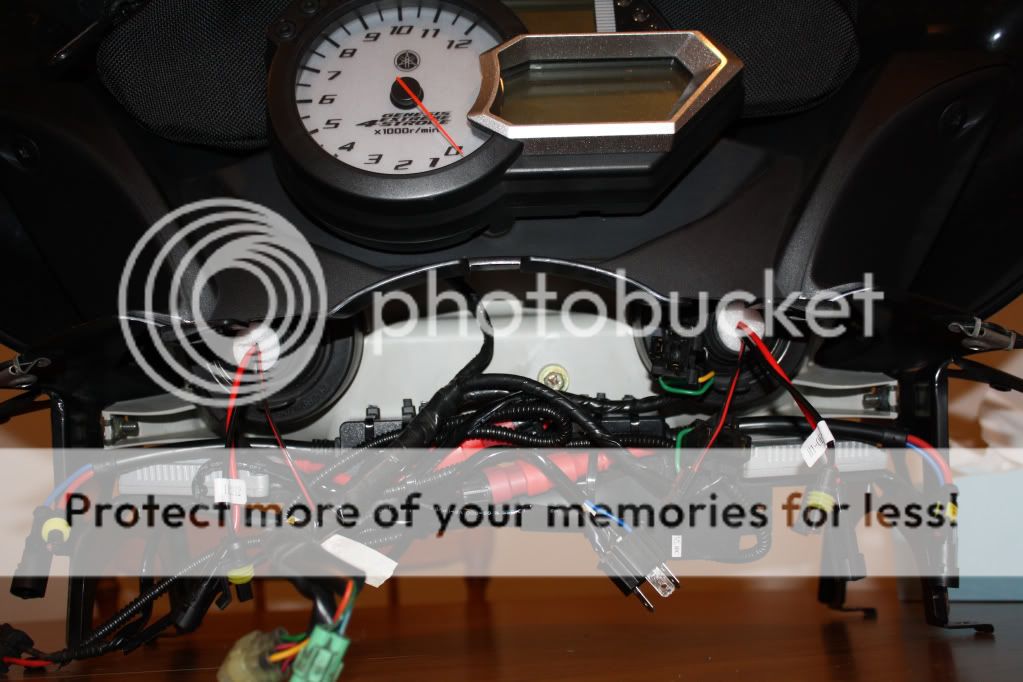
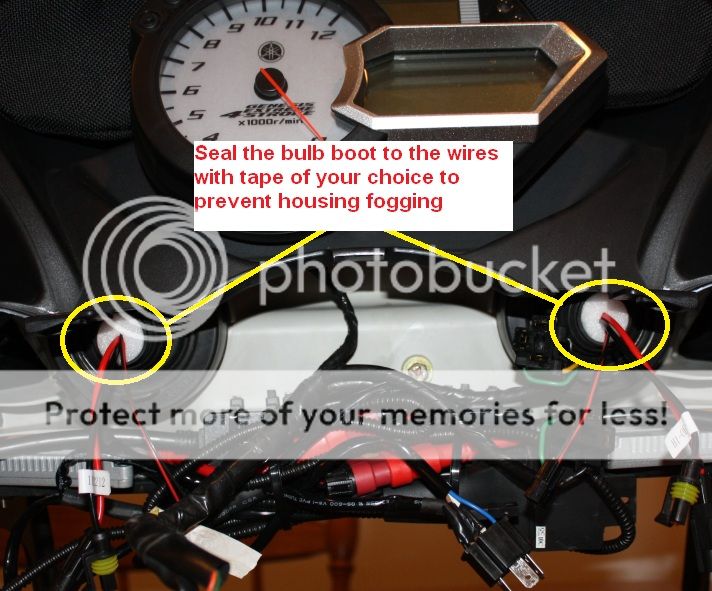
I used my stock rubber boots on the back of the headlight housing as shown in order to keep out moisture and dust. I just pulled the inner portion of the rubber boot outward so it sticks out instead of in and squeezed some poly styrene into the annular space between the rubber boot and the bulb wires. Use some tape as shown below to effectively seal this location as well. If you skip the tape, you may end up with fog finding its way intio the housing.
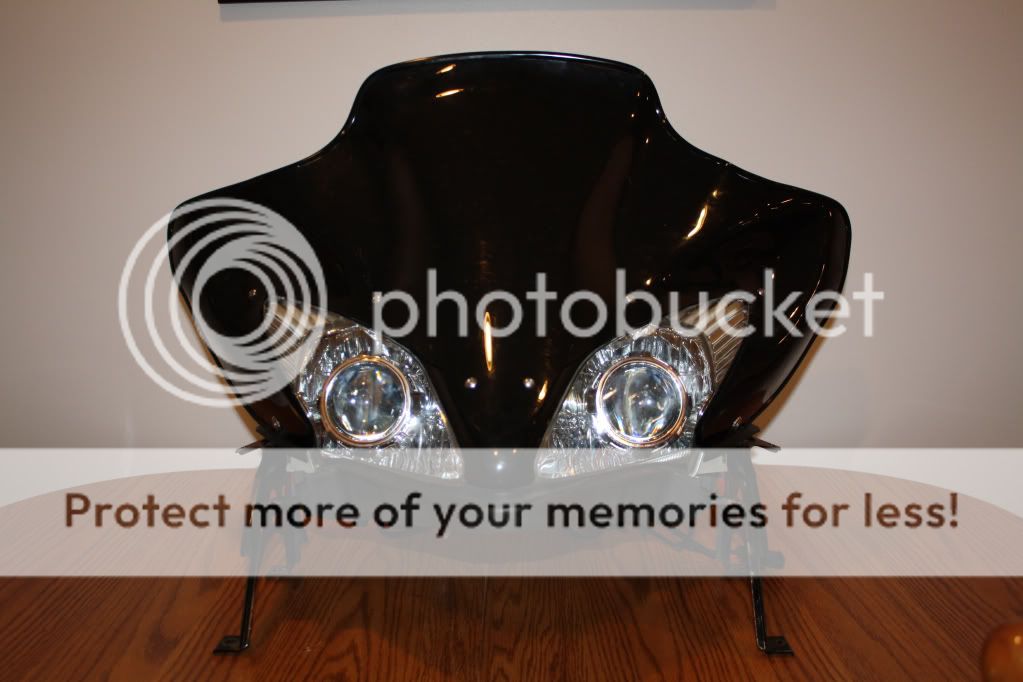
And back on my GT
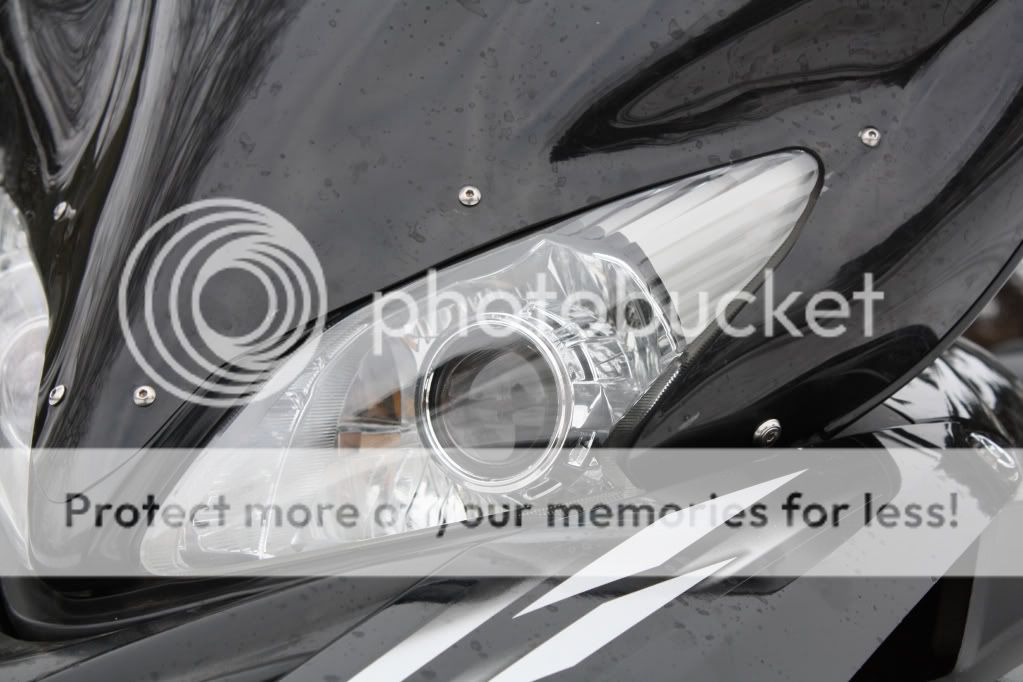
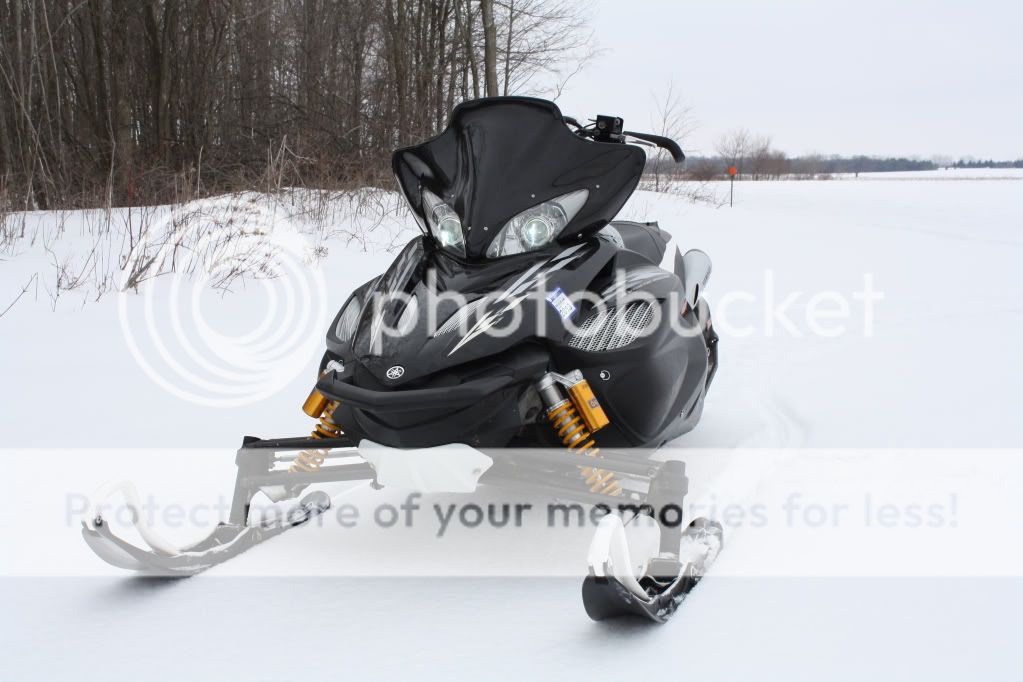
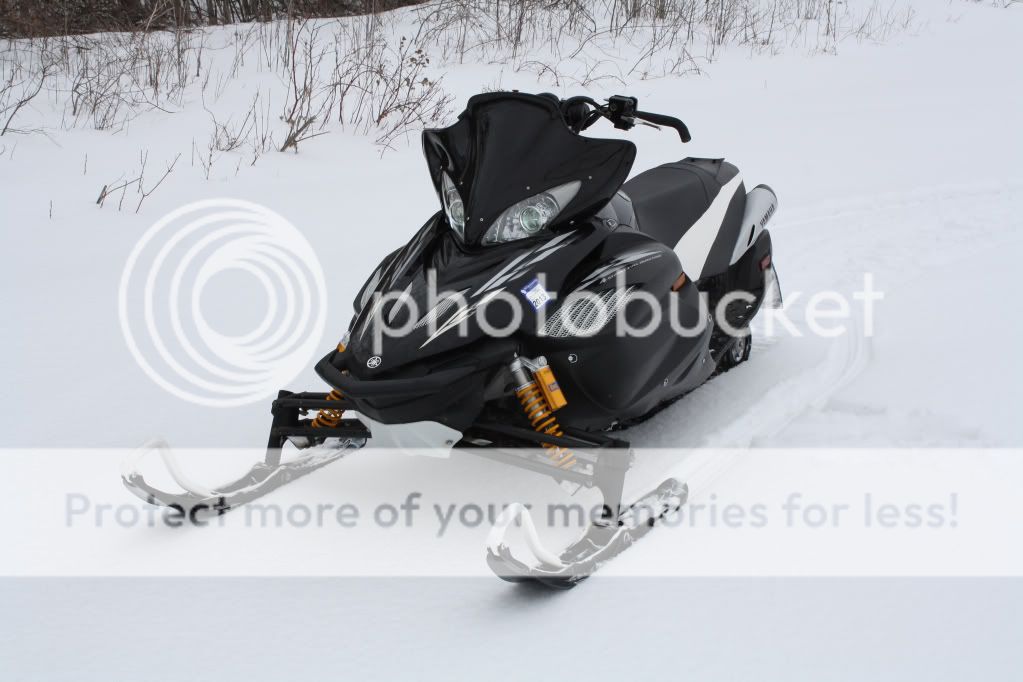
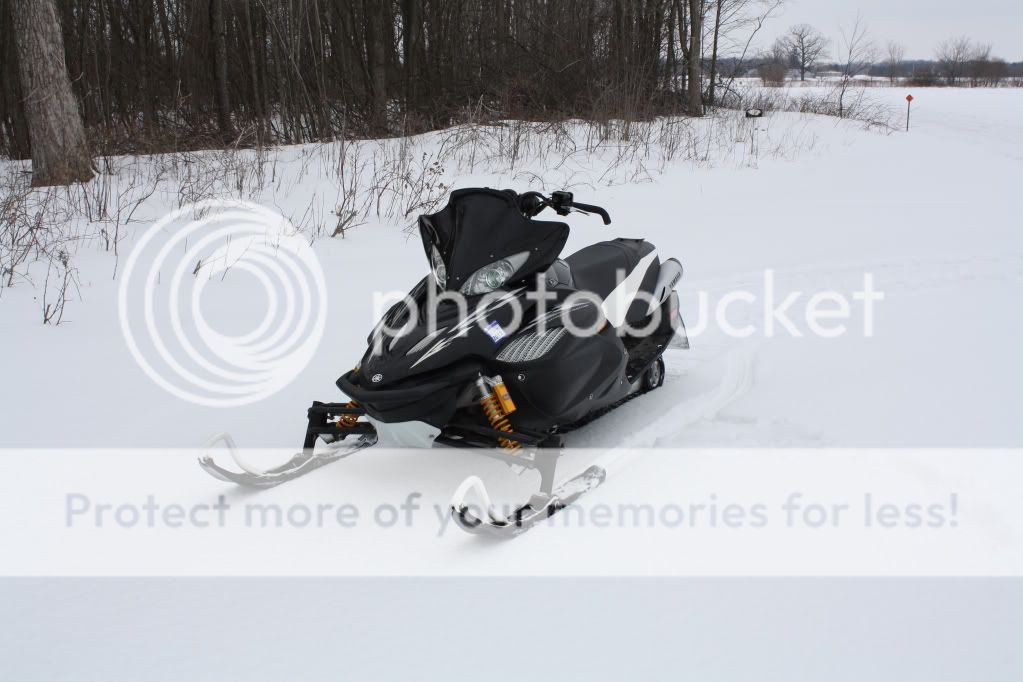
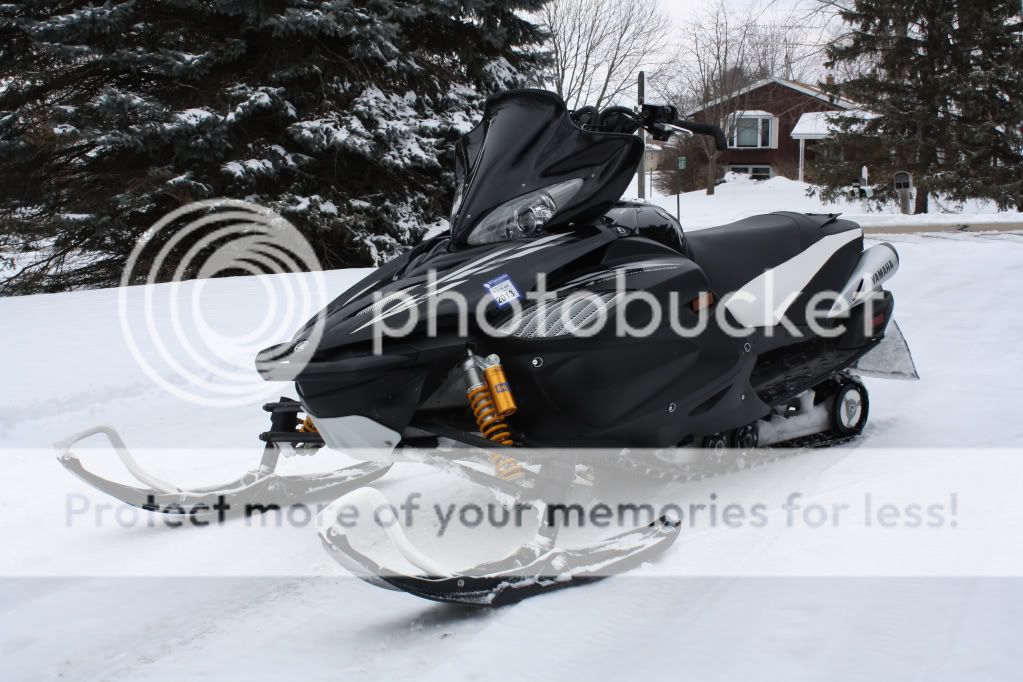
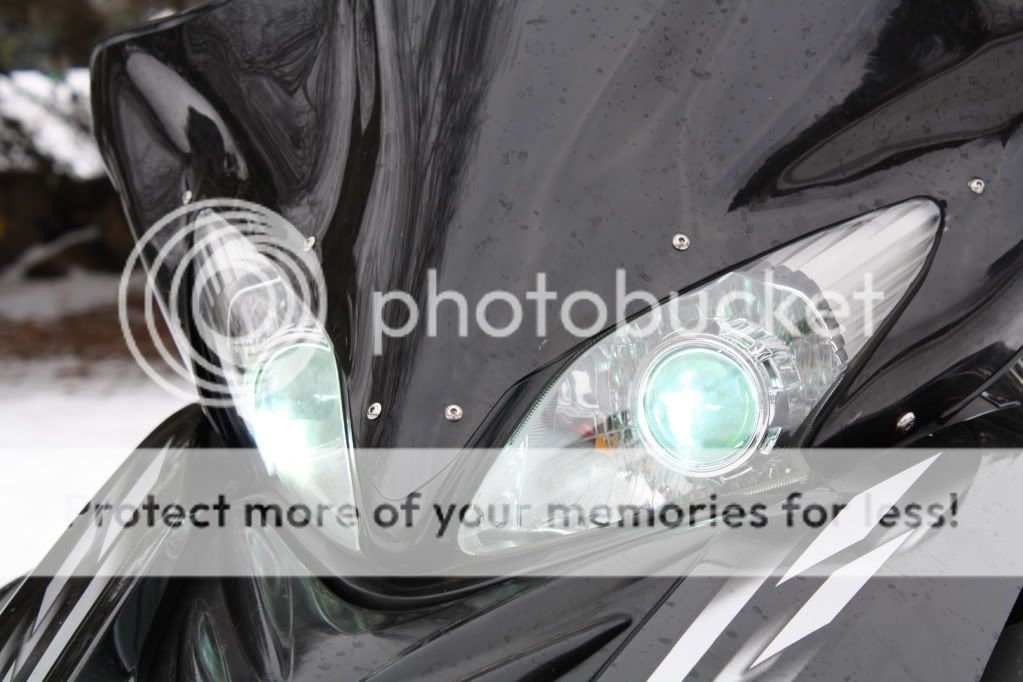
Even though they look bluish, this temp is nearly pure white at night.
I'll post some nite time photos of the cutoff in the next couple days. Overall, I couldn't be happier with the form and function of this lighting modification.
Last edited:
Nice!
Really nice pics, and an awsome looking sled!

Really nice pics, and an awsome looking sled!

yamaha1973
TY 4 Stroke Master
- Joined
- Nov 27, 2011
- Messages
- 1,288
- Reaction score
- 14
- Points
- 743
- Location
- St. Peter Minnesota
- Country
- USA
- Snowmobile
- 2014 Viper XTX SE
Sweet!
actionjack
TY 4 Stroke God
- Joined
- Apr 9, 2005
- Messages
- 2,519
- Reaction score
- 623
- Points
- 1,483
- Location
- Westminster, Maryland
- Website
- www.inspectorjack.com
- Country
- USA
- Snowmobile
- 2017 SideWinder LTX-LE
Awesome project.
Grimm
TY 4 Stroke God
- Joined
- Apr 15, 2005
- Messages
- 4,989
- Reaction score
- 234
- Points
- 1,573
- Location
- Ottawa, Ontario
- Country
- Canada
- Snowmobile
- 2018 MXZ 850
Great job...loks awesome...thanks for the pics and info. Let us know how they work under real conditions when you get some miles on them.


yamadoo
Yamadoo is a snowmobile ' aholic'.
- Joined
- Jun 3, 2003
- Messages
- 3,645
- Reaction score
- 1,501
- Points
- 1,753
- Country
- USA
- Snowmobile
- 15 Viper STX DX red/white- GPS and KING AIR suspension 4kmiles
13 Apex XTX 45 anniversary RED/WHITE/BLACK 3K miles
10 Vector LTX Blue 9kmiles
11 Venture GT 4k miles
86 SnoScoot(2) for grand kids
Wow great work and documentation. I am 100 percent sure I could screw this up. LOL
srxrob
Veteran
Nice work looks awesome!
Snowmobileaddict
TY 4 Stroke Junkie
I'll be sure to get some night photos up. I'm going to try to do it tonight. It is hard to find time when you have a 23 month old and a 7 week old at home! Some how I found time to do this mod yesterday afternoon and early this morning!
I only had a chance to drive around in the dark next to my house for about 3 mins to confirm the projector horizontal cutoff alignment last night before putting the housing back together. hopefully I can get out for a half hour tonight after the kids go to bed. We live right next to the trail and the heat wave is coming tomorrow, so it's going to be bye bye snow around here for a while. 5 days of sun and temps at 40 degrees
I only had a chance to drive around in the dark next to my house for about 3 mins to confirm the projector horizontal cutoff alignment last night before putting the housing back together. hopefully I can get out for a half hour tonight after the kids go to bed. We live right next to the trail and the heat wave is coming tomorrow, so it's going to be bye bye snow around here for a while. 5 days of sun and temps at 40 degrees

Snowmobileaddict
TY 4 Stroke Junkie
yamadoo said:Wow great work and documentation. I am 100 percent sure I could screw this up. LOL
Really the only place you could screw it up is forgetting you have your headlight in the oven, or having it on broil by mistake!

Snowmobileaddict
TY 4 Stroke Junkie
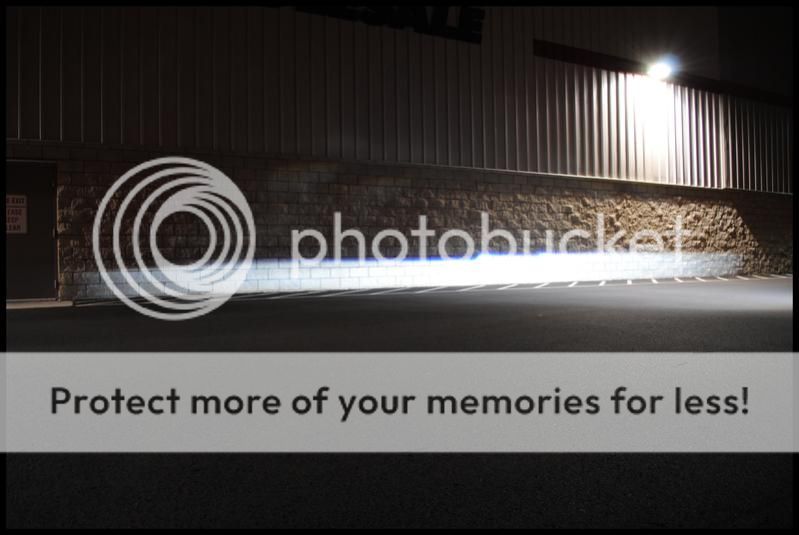
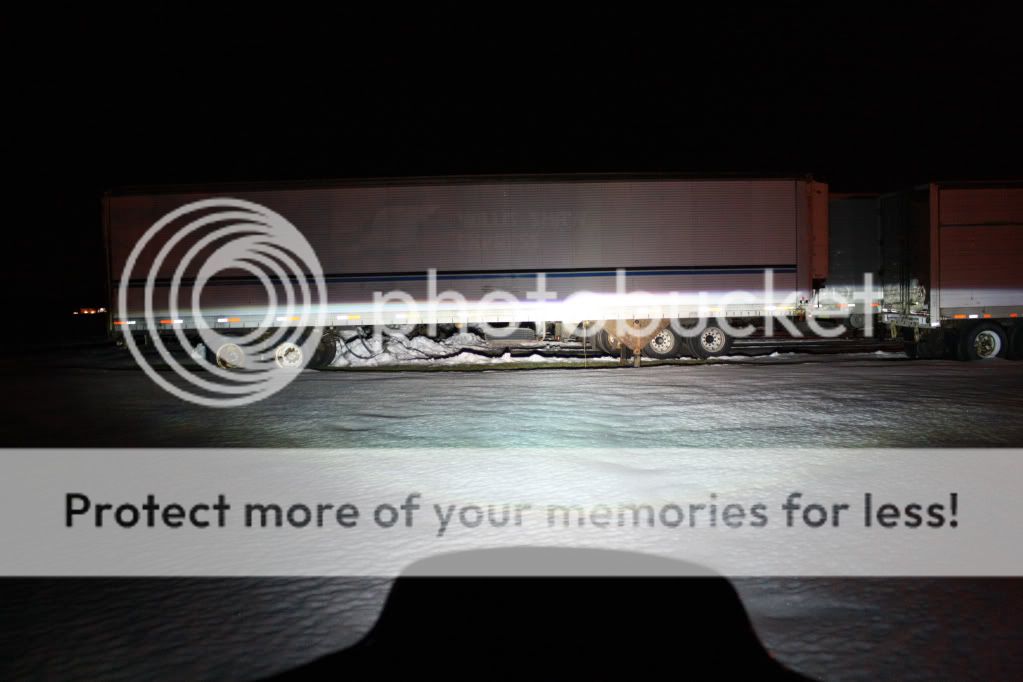
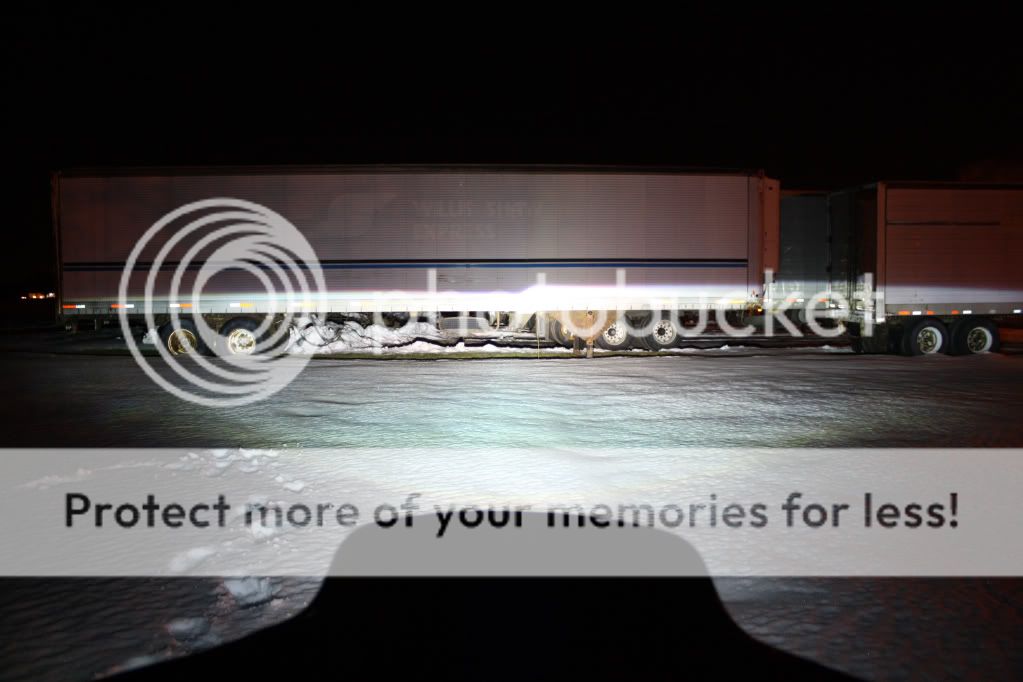
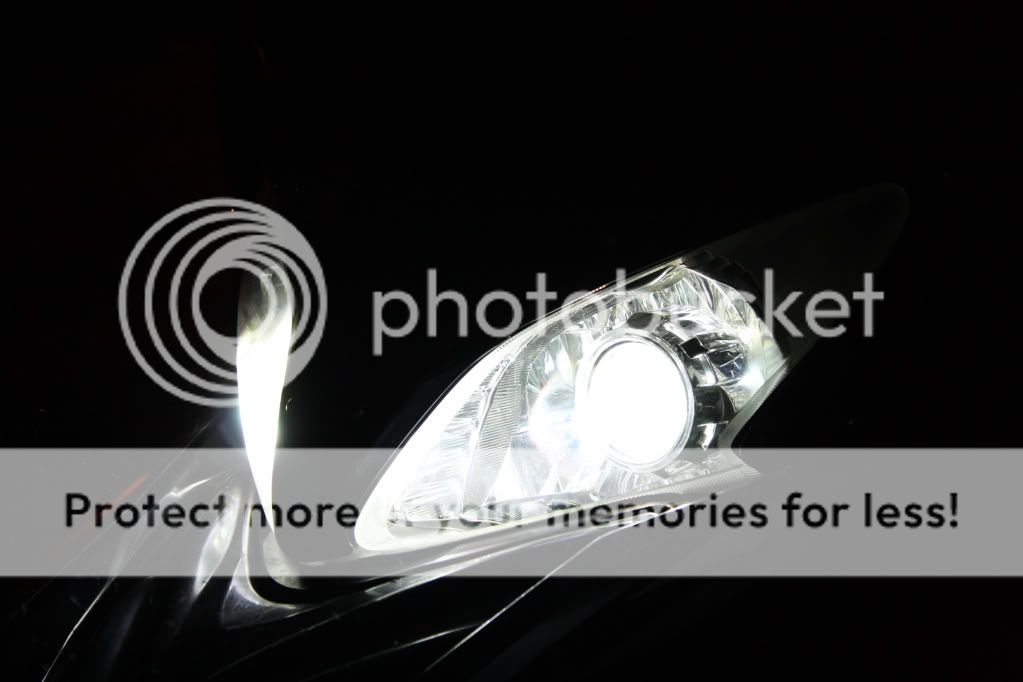
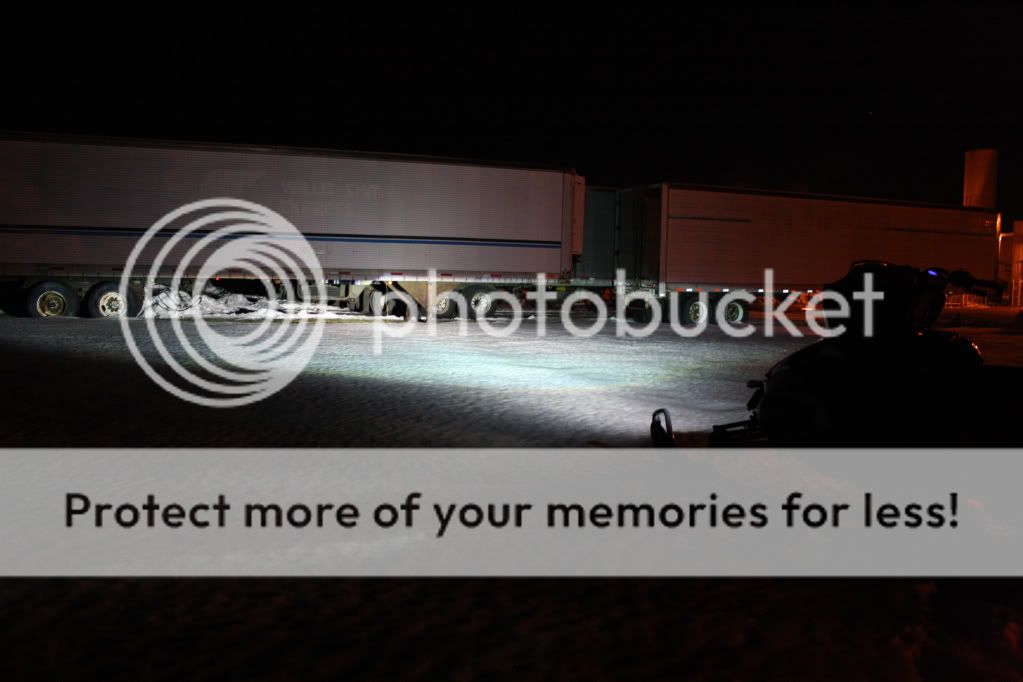
Here are some night photos of the light distribution and the cutoff. I love these lights. Field of view is ridiculous. These are all low beam shots. I managed to forget to snap any pics of the high beams! These are actually aimed a bit high. I'll need to turn my adjustment screw about 1 turn clockwise to lower them a bit.



erosled
Extreme
Nice write up and good job on upgrading your lighting correctly vs. just throwing a set of HID bulbs in a non-HID headlamp.
Snowmobileaddict
TY 4 Stroke Junkie
erosled said:Nice write up and good job on upgrading your lighting correctly vs. just throwing a set of HID bulbs in a non-HID headlamp.
Thanks!
Daranello
Suspended
How much do this mod if I shipped ya my headlight? My wife would kill me if I put my headlights in the oven
Snowmobileaddict
TY 4 Stroke Junkie
Daranello said:How much do this mod if I shipped ya my headlight? My wife would kill me if I put my headlights in the oven
I know what you mean, my wife had a puzzled look when she saw what I was doing!
Most people bake cookies this time of year not headlights! However, this method is not new at all. In fact there are scores of message boards like hidplanet.com devoted to people doing this very thing to modify their street vehicle headlights. Just google mini h1 projector retrofit and you'll get zillions of hits.
These types of retrofits are becoming quite routine and parts (bulbs ballasts and projectors) to do them are literally a commodity now many places on the Internet.
Also, just to let folks know 260 degrees F isn't incredibly hot. There aren't any odors or smoke or anything like that. It just has to soften the rubbery glue that the manufacturer uses. I actually only had to use oven mitts to get the housing out of the oven and onto my kitchen island. Then it was pretty much bare handed prying open evenly with a flat blade screw driver. Once you get it started you just pull it apart with your hands.
I'd love to help you out, however I posted this topic to give folks the inspiration to do their own retrofits.

More importantly, it's time to pray for more snow...CRAP!
ranger1
TY 4 Stroke Guru
Awesome job snowmobileaddict, looks fantastic & the light quality is superb!!! Where did you order the projectors/kit from & how much did it cost in total? Thanks alot for the pics & detailed instructions!!!Snowmobileaddict said:Daranello said:How much do this mod if I shipped ya my headlight? My wife would kill me if I put my headlights in the oven
I know what you mean, my wife had a puzzled look when she saw what I was doing!
Most people bake cookies this time of year not headlights! However, this method is not new at all. In fact there are scores of message boards like hidplanet.com devoted to people doing this very thing to modify their street vehicle headlights. Just google mini h1 projector retrofit and you'll get zillions of hits.
These types of retrofits are becoming quite routine and parts (bulbs ballasts and projectors) to do them are literally a commodity now many places on the Internet.
Also, just to let folks know 260 degrees F isn't incredibly hot. There aren't any odors or smoke or anything like that. It just has to soften the rubbery glue that the manufacturer uses. I actually only had to use oven mitts to get the housing out of the oven and onto my kitchen island. Then it was pretty much bare handed prying open evenly with a flat blade screw driver. Once you get it started you just pull it apart with your hands.
I'd love to help you out, however I posted this topic to give folks the inspiration to do their own retrofits.


Similar threads
- Replies
- 29
- Views
- 9K
-
This site uses cookies to help personalise content, tailor your experience and to keep you logged in if you register.
By continuing to use this site, you are consenting to our use of cookies.
