s1d3w1nd3r1480
Expert
Well after being on this site for a while and obtaining tons of ideas, valuable information, and a never ending amount of help and answers I sure most people didn't know they provided I thought it was time I started my own build thread on here and potentially give back and maybe help someone else out. I am a DIY type guy who doesn't always know what I am doing but can do the research to learn how to do it.
Back around Memorial Day in 2012 I purchased a 2011 Nytro XTX with around 1000 miles on it. It came with a decent amount already done to it:
- SLP Powder Pro skis
- Bender Racing clutch kit
- GYTR Bumper
- Roest (Mountaintech) full length skid plate
- 2" Powermadd riser
- 4th wheel kit
-Mountain strap
-Handlebar bag
Before even riding it for the 2012-2013 season I performed the basic maintenance and fluid changes and installed an OFT ROV and Tether. This is where things really started to get out of hand, once I got a taste for the sled and how much fun it was to ride the time spent on this site kept increasing and the mod wish list began growing. That plus more opportunities and places to ride in the backcountry here in Michigan the build took off and I'm not sure I will see it ever end.
Where do I start lol...
In the trailer on its way home

Fresh out of the trailer for the first time. New to me 2011 Nytro XTX with just over 1000 miles

The sled when I brought it home. Powder Pro skis, clutch kit, 2" bar risers, aftermarket front bumper, 4th wheel kit in skid, handle bar bag, and mountain strap

Just a pic from the guy I bought it from showing the headlights

Picture of the Aluminum full length aftermarket skid plate that came with the sled to beef it up and better protect the oil filter and motor than the flimsy stock plate. You could grind down concrete steps and not harm this thing.

Only 2 mods before the first season of riding was strapping the snow shovel to the back (was afraid to get stuck as this pig is HEAVY) and added an OFT Rollover valve and tether kit. This was to prevent any oil loss through the oil tanks breather line in the case of a rollover out in the backcountry (99.9% likely to happen lol)

Rollover valve installed in the oil tank's vent line

Tether installed to the riser, You can also see the steering post relocator that places the steering on a flatter plane tilting the post forward 6 degrees (the relocater was added a little bit later in the season)

Picture of how I mounted the tether to the riser block
Shortly into the season added a DDM HID 6000k Hi/Lo headlight kit. Dramatically improved nightime visibility in all conditions

Another of the lights

After only 2 trips and roughly 500 miles it was clear this sled needed more than the stock Ripsaw 144" Ripsaw 1.25" track...

... so onto what this sled should have came stock with from day one. 144" Camoplast Backcountry 1.75" track

Sled tore down to replace track. Also changed the to gear to a 20t ( down from the stock 21t). The backcountry track in itself lowered top end range so gearing down made the power usable in the low and mid range instead...

... single best thing that was ever done to this sled. Hooks up in all conditions and pulls the skis to the sky and stretches your arms from 0-80mph

Got a great chance to test out the new track in 5ft+ of powder in Curtis MI as well as the new Fox Floats for the front bought from my cousin Andy

Switched out the stock handguards for the Powermadd Rox ones. They are more forgiving when rolling the sled in the backcountry and won't break like the stock ones (Wish I wouldn't have broke one of the stock mounts first to do this ). Also added a steering relocater from OFT Racing. 2nd best mod ever done to this sled

Handguard mounts


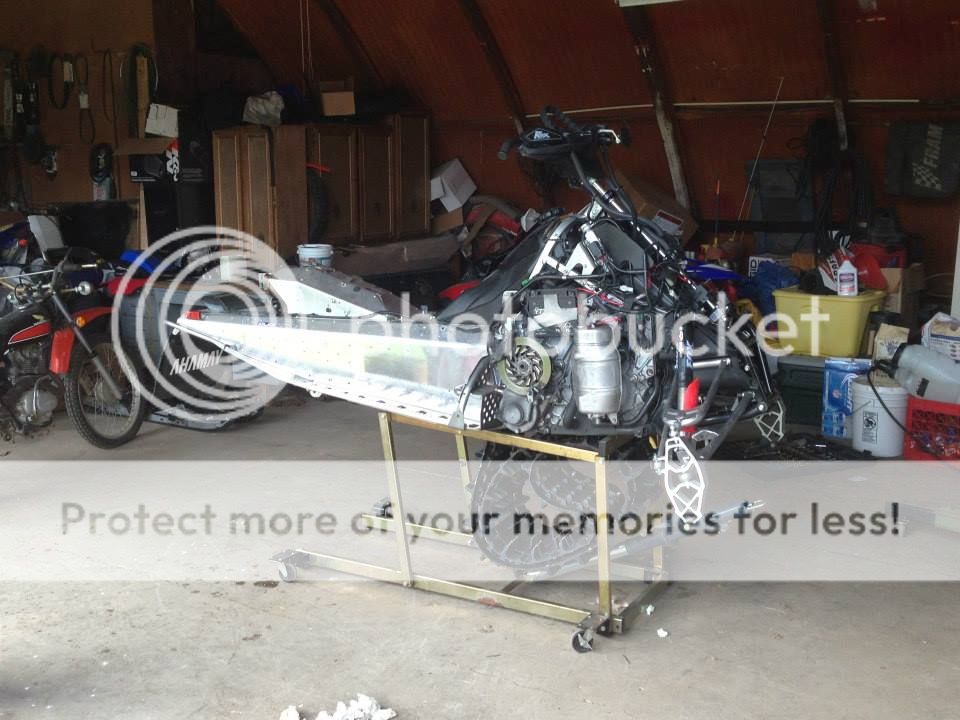
Here is the sled after the first season ready for a summer of new mods...


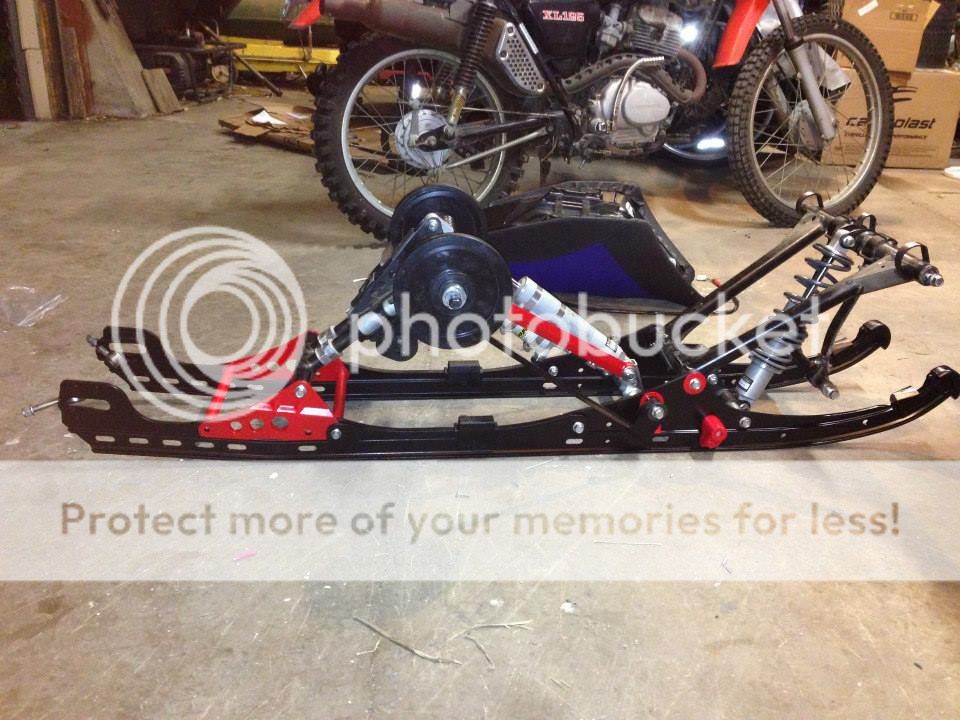
... and the tear down begins. Skid was removed to send center and rear shocks into Hygear for revalve and service

Plastics and dash off

Seat off

Bumper removed so the a-arms can be removed to get new Oillite Bushings to replace the stock worn out plastic ones

skis off and out of the way
Shocks off


a-arms off
Decided to remove the sway bar while everything was off...

... this will make for a more capable sled in the backcountry

Began to realize just how many parts were piling up

Pulled the gas tank (quite easy to do surprisingly)

Removed the exhaust and shroud along with tailight


Relocated the taillight to the back of the tunnel to help open up the top of the tunnel

Used Pex water pipe tubing to run the wires in the tunnel to protect them from any sort of ice build up and riveted them in place using tube clamps


Running lights

Brake light

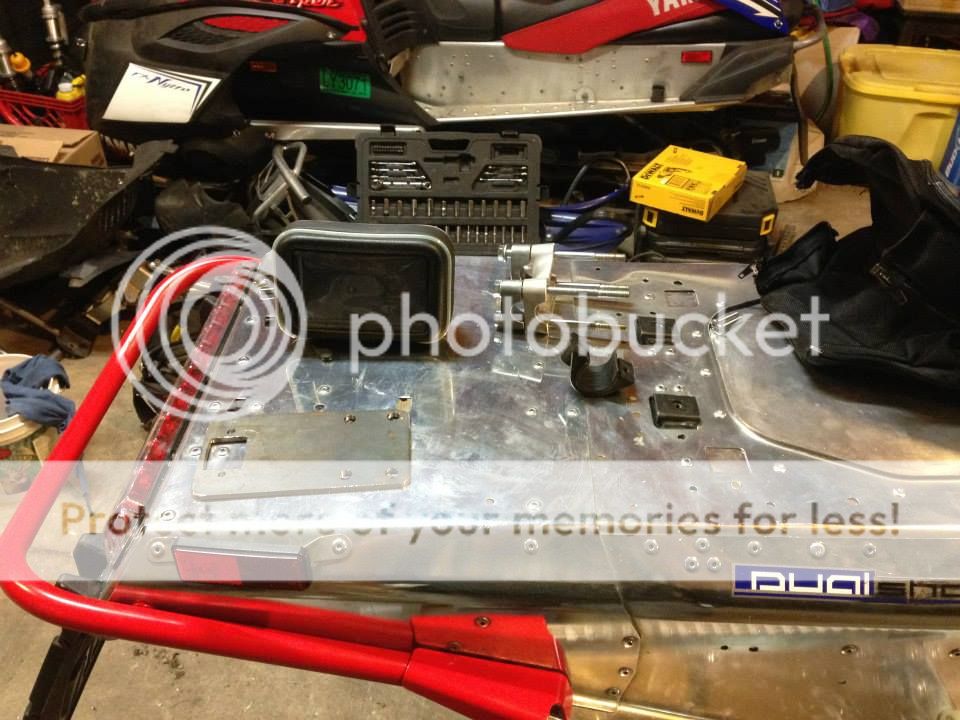
worked on polishing the tunnel some

Looks a bit better

Decided to switch plugs. Dyno tests have showed a 1-3hp gain simply by switching from the stock CR9E to CR10EK. Cheap inexpensive mod so why not, don't know if I will notice any difference

New ones are a slightly colder rated plug and have dual electrodes to improve combustion and even burn in the cylinder

set the seat back on to get an idea of how much tunnel space I will gain with undertunnel

Eventually want to put a Ski Doo LinQ jerry can on here for extra fuel and an underseat tunnel bag for storage

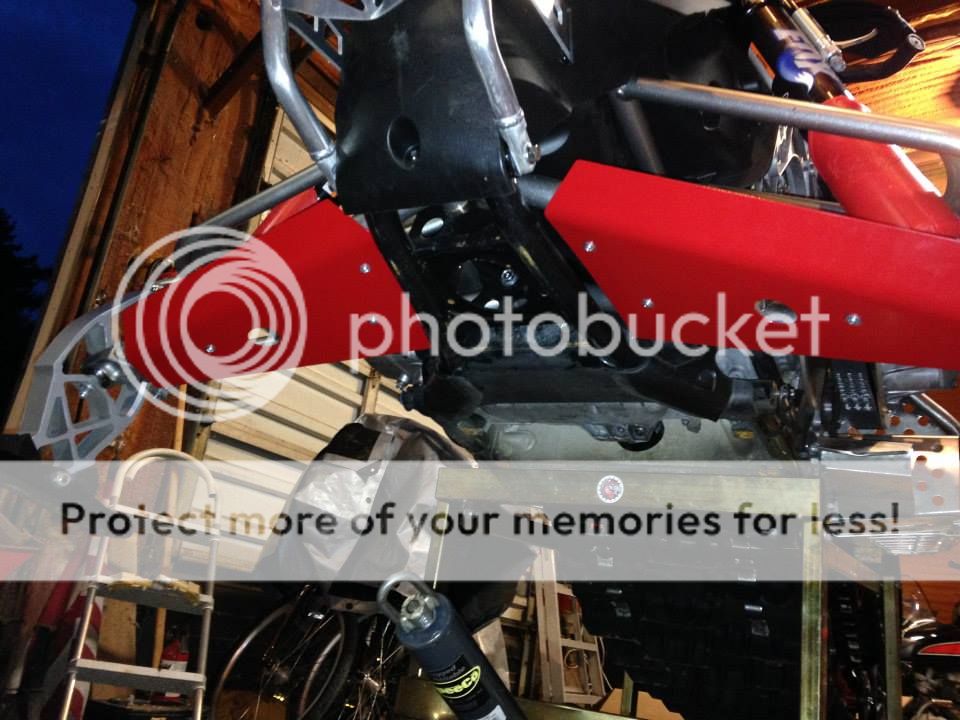
A-arm protectors to help with floatation as well as protect the a-arms from brush, branchs, and those inconvient baby pine trees lol

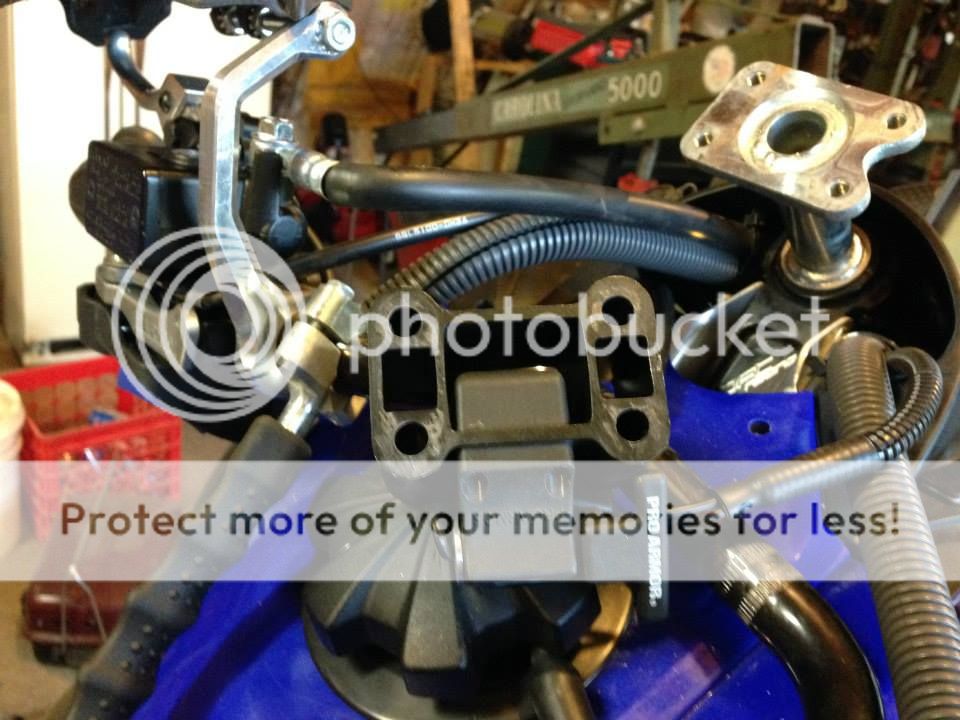
Undertunnel exhaust set up I bought from a fellow Totallyamaha member. Didnt need the seat but wanted the exaust and seat bracket. May use the extra seat and taillight set up for a seat mod on the old Viper for my brother.

Was out of Coors Light so settled for a Bud Light while starting to install the undertunnel exhaust

It is a modified stock header welded to a magnaflow can with brackets welding on to mount to the tunnel


Waiting on more parts to finish the install of the exhaust. Need to decide how to block off the tunnel first

Once the block off plate comes holes can be drilled and the seat bracket riveted on...

... until then its setting there to give a good representation of just how much tunnel space was created for fuel capacity and storage

Decided while the skid was out I would tear it down, clean it up with acetone, and paint the rails. Considered powdercoating but the cost was too much for this season and deciding $20 on paint would work. Excited to see how well they hold up for a season

Coat of primer done

Before and after

Both rails done with multiple coats

Some odds and ends parts from the skid done in red.

All the parts done with multiple coats

Waiting on my rear shocks to get back from Hygear and will begin reassembling the skid.

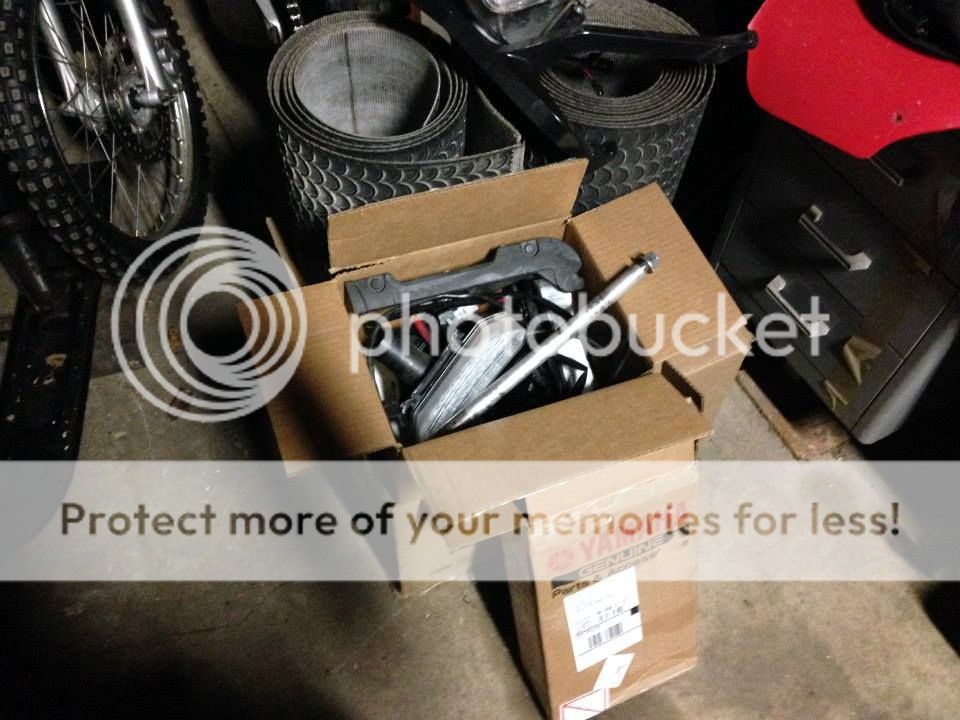
Always exciting to get more stuff for the sled

Hygear Torsion Spring Spacers and my center and rear shock back from hygear. Revalved and rebuilt as well as adding a dual rate spring to the center. Will give me a better ride in the stutter bumps but set it up to handle the big stuff all the time without bottoming

Most of the skid is back together. Its slowly coming together
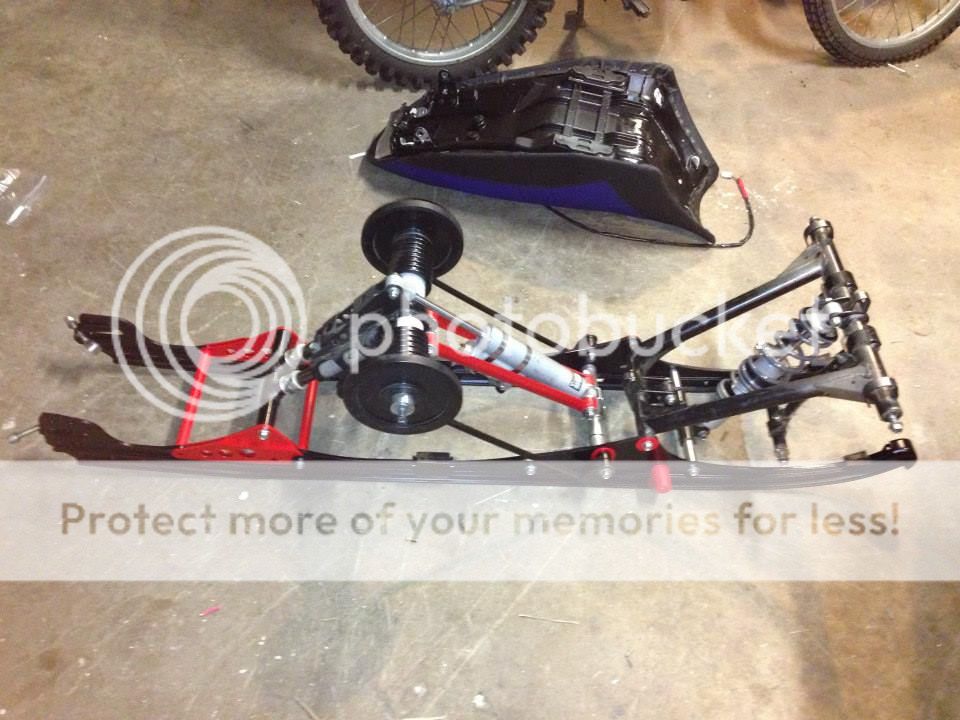
Just needs the wheel kit and a few odds and ends parts and should be ready for the sled again.
Decided to paint the bumper in a spur of the moment type of thing.

Cardboard cutout of tunnel block off

again testing it.

During the install

finished from underneath

all done with the block off


The seat is finally installed again

From the back with seat and tunnel blocked off

Parts are starting to roll in again. Just got the 12V aux plug for the sled, this will allow me to charge my phone and run my GPS

Handlebar mount case for the GPS, only one problem.... no more real estate on the bars to mount it...

Decided to fabricate a small plate that will mount underneath the handle bar riser block and place the GPS in the same field of view as the gauge pod... bracket has been painted and should get installed tomorrow

Bracket painted with mount for case attached

Bracket installed on riser

Handlebar bag and case mounted up and in a perfect location. Now we can explore the two tracks and backcountry and never need to worry about getting lost.

What it looks like from the back without the windshield

Box full of stock parts not going back on

Another box of more parts, they are all over haha
Decided to put the skid back in to check clearance of the exhaust and make sure everything is back to running shape since it will be a while before I get the wheel kit for the skid (Other expenditures are taking priority at the moment )

Plenty of room with the exhaust mounted in there. Enough that I could probably run a 2" as my next track. The exhaust also gives the sled an awesome sound.

Put the GPS on and plugged it in to make sure all of the works. Can't wait to download the trail maps from VV Mapping and install them to the GPS. Going to make the trips much better.

This is where it sits currently. I am waiting for my Oillite bushings to come and then the front will get completely reassembled and the oil and chain case oil will be changed. Then it will be ready to ride again for the season. Mods I plan on finishing before the first trip are the Excell wheel kit, LinQ jerry can, tunnel bag, and maybe some vents. Feel free to PM me with any questions or help with any of the mods I have done so far.
Thanks to all the members on here who I have gotten informatino from or bought parts from. I wouldn't have accomplished any of this without this site, heck I wouldn't even own this sled if it wasn't for this site
Back around Memorial Day in 2012 I purchased a 2011 Nytro XTX with around 1000 miles on it. It came with a decent amount already done to it:
- SLP Powder Pro skis
- Bender Racing clutch kit
- GYTR Bumper
- Roest (Mountaintech) full length skid plate
- 2" Powermadd riser
- 4th wheel kit
-Mountain strap
-Handlebar bag
Before even riding it for the 2012-2013 season I performed the basic maintenance and fluid changes and installed an OFT ROV and Tether. This is where things really started to get out of hand, once I got a taste for the sled and how much fun it was to ride the time spent on this site kept increasing and the mod wish list began growing. That plus more opportunities and places to ride in the backcountry here in Michigan the build took off and I'm not sure I will see it ever end.
Where do I start lol...
In the trailer on its way home

Fresh out of the trailer for the first time. New to me 2011 Nytro XTX with just over 1000 miles

The sled when I brought it home. Powder Pro skis, clutch kit, 2" bar risers, aftermarket front bumper, 4th wheel kit in skid, handle bar bag, and mountain strap

Just a pic from the guy I bought it from showing the headlights

Picture of the Aluminum full length aftermarket skid plate that came with the sled to beef it up and better protect the oil filter and motor than the flimsy stock plate. You could grind down concrete steps and not harm this thing.

Only 2 mods before the first season of riding was strapping the snow shovel to the back (was afraid to get stuck as this pig is HEAVY) and added an OFT Rollover valve and tether kit. This was to prevent any oil loss through the oil tanks breather line in the case of a rollover out in the backcountry (99.9% likely to happen lol)

Rollover valve installed in the oil tank's vent line

Tether installed to the riser, You can also see the steering post relocator that places the steering on a flatter plane tilting the post forward 6 degrees (the relocater was added a little bit later in the season)

Picture of how I mounted the tether to the riser block

Shortly into the season added a DDM HID 6000k Hi/Lo headlight kit. Dramatically improved nightime visibility in all conditions

Another of the lights

After only 2 trips and roughly 500 miles it was clear this sled needed more than the stock Ripsaw 144" Ripsaw 1.25" track...

... so onto what this sled should have came stock with from day one. 144" Camoplast Backcountry 1.75" track

Sled tore down to replace track. Also changed the to gear to a 20t ( down from the stock 21t). The backcountry track in itself lowered top end range so gearing down made the power usable in the low and mid range instead...

... single best thing that was ever done to this sled. Hooks up in all conditions and pulls the skis to the sky and stretches your arms from 0-80mph

Got a great chance to test out the new track in 5ft+ of powder in Curtis MI as well as the new Fox Floats for the front bought from my cousin Andy

Switched out the stock handguards for the Powermadd Rox ones. They are more forgiving when rolling the sled in the backcountry and won't break like the stock ones (Wish I wouldn't have broke one of the stock mounts first to do this
). Also added a steering relocater from OFT Racing. 2nd best mod ever done to this sled
Handguard mounts


Here is the sled after the first season ready for a summer of new mods...


... and the tear down begins. Skid was removed to send center and rear shocks into Hygear for revalve and service

Plastics and dash off

Seat off

Bumper removed so the a-arms can be removed to get new Oillite Bushings to replace the stock worn out plastic ones

skis off and out of the way

Shocks off


a-arms off

Decided to remove the sway bar while everything was off...

... this will make for a more capable sled in the backcountry

Began to realize just how many parts were piling up

Pulled the gas tank (quite easy to do surprisingly)

Removed the exhaust and shroud along with tailight


Relocated the taillight to the back of the tunnel to help open up the top of the tunnel

Used Pex water pipe tubing to run the wires in the tunnel to protect them from any sort of ice build up and riveted them in place using tube clamps


Running lights

Brake light

worked on polishing the tunnel some

Looks a bit better

Decided to switch plugs. Dyno tests have showed a 1-3hp gain simply by switching from the stock CR9E to CR10EK. Cheap inexpensive mod so why not, don't know if I will notice any difference

New ones are a slightly colder rated plug and have dual electrodes to improve combustion and even burn in the cylinder

set the seat back on to get an idea of how much tunnel space I will gain with undertunnel

Eventually want to put a Ski Doo LinQ jerry can on here for extra fuel and an underseat tunnel bag for storage

A-arm protectors to help with floatation as well as protect the a-arms from brush, branchs, and those inconvient baby pine trees lol

Undertunnel exhaust set up I bought from a fellow Totallyamaha member. Didnt need the seat but wanted the exaust and seat bracket. May use the extra seat and taillight set up for a seat mod on the old Viper for my brother.

Was out of Coors Light so settled for a Bud Light while starting to install the undertunnel exhaust

It is a modified stock header welded to a magnaflow can with brackets welding on to mount to the tunnel


Waiting on more parts to finish the install of the exhaust. Need to decide how to block off the tunnel first

Once the block off plate comes holes can be drilled and the seat bracket riveted on...

... until then its setting there to give a good representation of just how much tunnel space was created for fuel capacity and storage

Decided while the skid was out I would tear it down, clean it up with acetone, and paint the rails. Considered powdercoating but the cost was too much for this season and deciding $20 on paint would work. Excited to see how well they hold up for a season

Coat of primer done

Before and after

Both rails done with multiple coats

Some odds and ends parts from the skid done in red.

All the parts done with multiple coats

Waiting on my rear shocks to get back from Hygear and will begin reassembling the skid.

Always exciting to get more stuff for the sled

Hygear Torsion Spring Spacers and my center and rear shock back from hygear. Revalved and rebuilt as well as adding a dual rate spring to the center. Will give me a better ride in the stutter bumps but set it up to handle the big stuff all the time without bottoming

Most of the skid is back together. Its slowly coming together

Just needs the wheel kit and a few odds and ends parts and should be ready for the sled again.

Decided to paint the bumper in a spur of the moment type of thing.

Cardboard cutout of tunnel block off

again testing it.

During the install

finished from underneath

all done with the block off


The seat is finally installed again

From the back with seat and tunnel blocked off

Parts are starting to roll in again. Just got the 12V aux plug for the sled, this will allow me to charge my phone and run my GPS

Handlebar mount case for the GPS, only one problem.... no more real estate on the bars to mount it...


Decided to fabricate a small plate that will mount underneath the handle bar riser block and place the GPS in the same field of view as the gauge pod... bracket has been painted and should get installed tomorrow

Bracket painted with mount for case attached

Bracket installed on riser

Handlebar bag and case mounted up and in a perfect location. Now we can explore the two tracks and backcountry and never need to worry about getting lost.

What it looks like from the back without the windshield

Box full of stock parts not going back on

Another box of more parts, they are all over haha

Decided to put the skid back in to check clearance of the exhaust and make sure everything is back to running shape since it will be a while before I get the wheel kit for the skid (Other expenditures are taking priority at the moment
)
Plenty of room with the exhaust mounted in there. Enough that I could probably run a 2" as my next track. The exhaust also gives the sled an awesome sound.

Put the GPS on and plugged it in to make sure all of the works. Can't wait to download the trail maps from VV Mapping and install them to the GPS. Going to make the trips much better.

This is where it sits currently. I am waiting for my Oillite bushings to come and then the front will get completely reassembled and the oil and chain case oil will be changed. Then it will be ready to ride again for the season. Mods I plan on finishing before the first trip are the Excell wheel kit, LinQ jerry can, tunnel bag, and maybe some vents. Feel free to PM me with any questions or help with any of the mods I have done so far.
Thanks to all the members on here who I have gotten informatino from or bought parts from. I wouldn't have accomplished any of this without this site, heck I wouldn't even own this sled if it wasn't for this site
sorenson1610
TY 4 Stroke God
- Joined
- Dec 11, 2007
- Messages
- 1,746
- Location
- Rothschild,WI
- Website
- www.contrx.com
- Country
- USA
- Snowmobile
- 2016
Looks good! Very nice to see the mods start to pile up. I wish I would have documented mine over the years. What paint did you use for the skid? Hope it lasts for you!
s1d3w1nd3r1480
Expert
Thanks. I'm sure glad I took the pictures and now can look back and see all the progress and change I have made.
I just used some rustoleum high performance spray paint. It was only $5 a can and used some rustoleum aluminum primer on it. I took my time and prepped it real well using acetone to clean all the parts up and then used a wire brush followed by some fine grit sandpaper to get rid of the glossy surfaces on the materials. Then I put on multiple thin coats to get the best coating. Its far from perfect and already has some dings here and there from putting parts back together but these are the hidden areas anyways. Also it is just the skid which is usually covered in snow and ice anyways and not that visible. I would love to powdercoat them when finances allow but I figured for such a small investment I would try the paint as it does make a difference in the look of the sled overall.
I just used some rustoleum high performance spray paint. It was only $5 a can and used some rustoleum aluminum primer on it. I took my time and prepped it real well using acetone to clean all the parts up and then used a wire brush followed by some fine grit sandpaper to get rid of the glossy surfaces on the materials. Then I put on multiple thin coats to get the best coating. Its far from perfect and already has some dings here and there from putting parts back together but these are the hidden areas anyways. Also it is just the skid which is usually covered in snow and ice anyways and not that visible. I would love to powdercoat them when finances allow but I figured for such a small investment I would try the paint as it does make a difference in the look of the sled overall.


- Joined
- Apr 13, 2003
- Messages
- 21,321
- Age
- 54
- Location
- Schofield, WI
- Website
- www.totallyamaha.com
- Country
- USA
- Snowmobile
- 2020 Sidewinder SRX
Wow very nice write up. Great job!
Malibu
Expert


- Joined
- Nov 1, 2009
- Messages
- 3,564
- Location
- Winnipeg, Manitoba
- Country
- Canada
- Snowmobile
- 2009 Phazer RTX
X3 Very nice write up and mods.
s1d3w1nd3r1480
Expert
Thanks guys. I have quite the list of mods to come and so far haven't decided whats been more fun and rewarding, working on all the mods or actually riding it. The mods sure help pass the time during the summer though.
Looks good there bud, glad it all worked out for ya. 
Sevey
TY 4 Stroke God
- Joined
- Feb 15, 2011
- Messages
- 1,742
- Location
- Collingwood, ON
- Website
- www.ty4stroke.com
- Country
- Canada
- Snowmobile
- 2018 Sidewinder RTX
That's awesome you took the time to detail the entire breakdown and rebuild. Makes for a great story. I would like to read some follow-ups how the exhaust works.
Love the free'd up tunnel deck. Cant beat the look.
Also - did you consider putting a Trail Tank on?
MS
Love the free'd up tunnel deck. Cant beat the look.
Also - did you consider putting a Trail Tank on?
MS
s1d3w1nd3r1480
Expert
Thanks LEE337. Didn't take much work getting the exhaust on. And you were right, I love the sound it has. The seat was a touch trickier as it wasn't quite formed for my tunnel angles. Just used a vice and some patience and worked out well. Eventually I'll get my tunnel blacked out and complete the look. Putting aside money for a skinz front first lol
Sevey- I will definitely follow up throughout the season on the exhaust and other mods. I'm sure glad I took the pictures I did. It really worked out well so far. I can't wait for more parts to come and continue it. As for the trail tank... That was my original plan from before I even picked up the sled cause I knew buying it the fuel range wasn't going to fit my needs. After a ton of hours of research on here I decided on a jerry can for a few reasons.
- I wasn't encouraged by the fit and finish issues people seemed to be having.
- I wasn't too eager to plug up the space behind the front rad and really hinder the airflow as I felt it's pretty important to the cooling of the sled based on observations this year. I don't really wanna to any extra coolers right now and it cooled well last year as is. Only cooling issues I ran into were trying to navigate deep snow in trails that were blocked and going extremely slow. Otherwise never had a heat issue.
- Ultimately cost played the deciding factor. Originally I was going to pick up an older rev style jerry can for 100 bucks and mount that. Then a post came up recently using a LinQ style can and that sealed the deal. 125 for one of those plus parts around my shop and it will be mounted. Easy on easy off and it can used for someone else if they run out and I don't (unlikely).
- That and I can swap it out for a luggage bag if I wanted our just remove it completely if I'm just doing a short ride.
Sevey
TY 4 Stroke God
- Joined
- Feb 15, 2011
- Messages
- 1,742
- Location
- Collingwood, ON
- Website
- www.ty4stroke.com
- Country
- Canada
- Snowmobile
- 2018 Sidewinder RTX
Well wish me luck, I am planning to install a Trail Tank on my sled this Fall. Will let you know how it goes. I know they have made constant improvements so I am optimistic fit and finish will be there. Keep your fingers crossed.
MS
MS
s1d3w1nd3r1480
Expert
I look forward to hearing how it works out for you. I believe they switched to using the Yamaha quarter turn fasteners for the side panels so I doubt you will have any troubles with it. I may even consider it again down the road but like I said for me the decision was mainly based on price point and I wanted to spend the leftover money elsewhere on the sled this season.
s1d3w1nd3r1480
Expert
Made a little bit more progress on the sled over the weekend. Things have come close to a halt with midterms around the corner and the Michigan Archery season heating up (well hopefully finally cooling down 80 degrees is just too hot to get any good hunting in). The biggest hold up right now has been waiting on parts. Fortunately what I need to make it ridable again is ordered. I received my Excell 6 wheel kit this last week and installed on the sled this weekend. Went with the 6 wheel kit because I got a killer deal on a like new set from a member on here. Just waiting on my a-arm bushings from OFT and the sled will be ready for season (Considering they were ordered Sept 19th they shouldn't be much longer). From there it will be chipping away at desired mods as money and time allow. I have quite the list made up 
Excell 6 wheel kit

Got a deal on the 6 wheel kit and decided to replace the 4 outside wheels and add 2 inside with the extra mounts. Left the stock ones on the bottom of the front shock alone for now. Grabbed the kit for $175 shipped from this site as opposed to $305 shipped for a brand new set. I can always by the other 2 separate if I decide I need them but I believe this set up will be plenty to solve my issue.

80 degrees is just too hot to get any good hunting in). The biggest hold up right now has been waiting on parts. Fortunately what I need to make it ridable again is ordered. I received my Excell 6 wheel kit this last week and installed on the sled this weekend. Went with the 6 wheel kit because I got a killer deal on a like new set from a member on here. Just waiting on my a-arm bushings from OFT and the sled will be ready for season (Considering they were ordered Sept 19th they shouldn't be much longer). From there it will be chipping away at desired mods as money and time allow. I have quite the list made up Excell 6 wheel kit

Got a deal on the 6 wheel kit and decided to replace the 4 outside wheels and add 2 inside with the extra mounts. Left the stock ones on the bottom of the front shock alone for now. Grabbed the kit for $175 shipped from this site as opposed to $305 shipped for a brand new set. I can always by the other 2 separate if I decide I need them but I believe this set up will be plenty to solve my issue.

s1d3w1nd3r1480
Expert
Season is getting closer and I finally received some parts I was waiting on and made more progress on the sled. If all goes to plan it will be ready for the season this weekend.
Every time parts come in the mail it almost feels like Christmas morning... well at least till I find the invoice in the box and remember how much it cost me lol

Out with the old and in with the new. Oillite a-arm bushing kit to replace the worn out stock plastic ones which had a ton of slop in the front end.

A-arms and shocks are finally back on

Waiting on the oversize steering bushings to fix the binding issues and hard steering I was having with the Relocator. OFT Racing does a great job taking care of their customers.

A-arm protectors by Muffinworks installed

View from underneath. These should help add some flotation when coupled with the skid plate from Mountaintech as well as handle those pesky pine trees
Stock heat shield was tore up and decided it would be smart to replace it to prevent a potential burn down
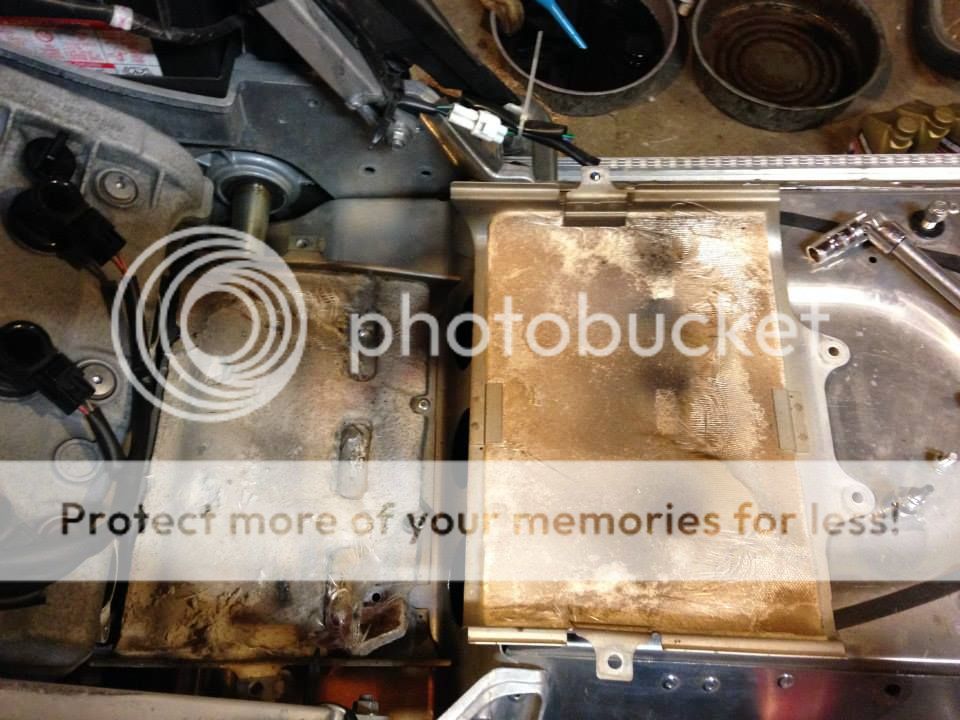
New Moose Racing adhesive heat shield installed (Thanks to revster for the idea and the success he has had)

Looks better than factory now (Should perform and outlast factory as well)

Every time parts come in the mail it almost feels like Christmas morning... well at least till I find the invoice in the box and remember how much it cost me lol

Out with the old and in with the new. Oillite a-arm bushing kit to replace the worn out stock plastic ones which had a ton of slop in the front end.

A-arms and shocks are finally back on

Waiting on the oversize steering bushings to fix the binding issues and hard steering I was having with the Relocator. OFT Racing does a great job taking care of their customers.

A-arm protectors by Muffinworks installed

View from underneath. These should help add some flotation when coupled with the skid plate from Mountaintech as well as handle those pesky pine trees

Stock heat shield was tore up and decided it would be smart to replace it to prevent a potential burn down

New Moose Racing adhesive heat shield installed (Thanks to revster for the idea and the success he has had)

Looks better than factory now (Should perform and outlast factory as well)

s1d3w1nd3r1480
Expert
Spent most of last season dealing with heavy steering thinking it was just a product of the Nytro's front end weight. Towards the end of the season felt the steering seem to bind on the lift. Some investigation found that my steering bushings were too small and when the blocks were tightened they would bind.

Contacted OFT and Rick took care of me. Got me some oversized bushings and the steering is like butter on the lift. Night and day difference. Should be pretty noticeable riding as well

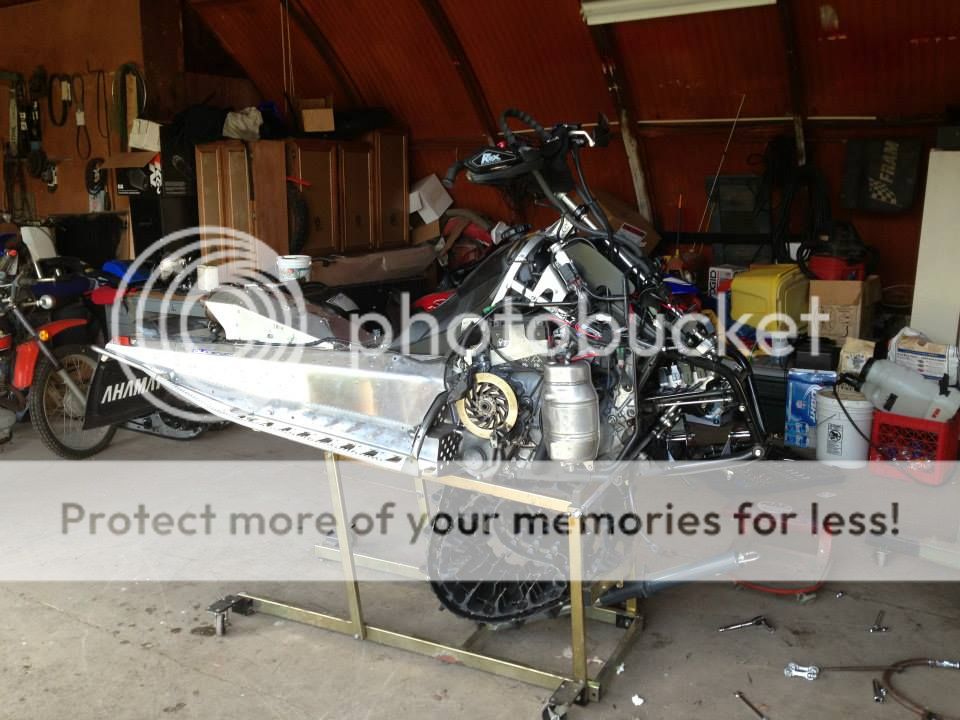
Looking like a sled again

Finally off the lift for the first time since I started the work

It lives....

Finally all buttoned up for the season...... Until I find more stuff to add lol


Contacted OFT and Rick took care of me. Got me some oversized bushings and the steering is like butter on the lift. Night and day difference. Should be pretty noticeable riding as well

Looking like a sled again

Finally off the lift for the first time since I started the work

It lives....

Finally all buttoned up for the season...... Until I find more stuff to add lol


Similar threads
-
This site uses cookies to help personalise content, tailor your experience and to keep you logged in if you register.
By continuing to use this site, you are consenting to our use of cookies.