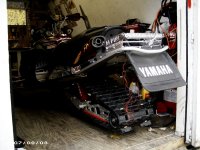
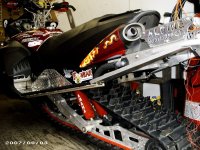
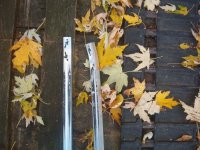
Mine rubbed, then it stopped. 1-1/4 track. I think its the new track isnt bending all the way.
Couple passes and it quit??
Couple passes and it quit??


1CrazySledder
Lifetime Member
- Joined
- Aug 11, 2005
- Messages
- 2,006
- Location
- Cartersville, GA.
- Country
- USA
- Snowmobile
- None, looking now!
I'm running the 144 x 1.5" Camoplast Crossover. I agree, I may just "rip those things out" and not worry about them. Maybe use the 1x.750" tubing for some other MOD? hehe...

kinger
VIP Member
Just say NO to mods now, get the damn thing done, dont buy anything else, just finish it! LOL


kinger said:Just say NO to mods now,
YA GOOD LUCK
MODS R Like Chips, U Just Can't Have One

sleddheadd
TY 4 Stroke God
Vince, the airport called and they want to know if you can bring your sled over! they need more runway lights for the plains too land!! lol..... my god!!! that thing is bright when its lit up at night!!! lol......this winter we should try sending morse code to the space shuttle with that thing!! lol,...... looks great! keep on plugging away at it!


1CrazySledder
Lifetime Member
- Joined
- Aug 11, 2005
- Messages
- 2,006
- Location
- Cartersville, GA.
- Country
- USA
- Snowmobile
- None, looking now!
Maybe with some help from Family and friends and some counseling, I may kick the habit for a month.....Naaa. I doubt it. lol
I'm cursed. My mind is constantly dreaming up new mods year round. Many of these never materialize, but I have many ideas. My head hurts most of the time. lol
I'll get allot of progress this month. I have to.
-1CS
I'm cursed. My mind is constantly dreaming up new mods year round. Many of these never materialize, but I have many ideas. My head hurts most of the time. lol
I'll get allot of progress this month. I have to.
-1CS


1CrazySledder
Lifetime Member
- Joined
- Aug 11, 2005
- Messages
- 2,006
- Location
- Cartersville, GA.
- Country
- USA
- Snowmobile
- None, looking now!
sleddheadd said:Vince, the airport called and they want to know if you can bring your sled over! they need more runway lights for the plains too land!! lol..... my god!!! that thing is bright when its lit up at night!!! lol......this winter we should try sending morse code to the space shuttle with that thing!! lol,...... looks great! keep on plugging away at it!
LMAO....I just saw this post. Yeah, it's bright. Wait til I have them all wired up. Like I said, I still have like 10 more lights to wire up yet.
-Vince
edge_kw
Extreme
Hey Vince -- it's looking good. Ton of work you got into her.
Cut those protectors off and like you said "use 'em for something else". (mine became my seat bracket).
If you're rubbing as you turn by hand, you'll be rubbing for sure when it's turning under power and the track gets some throw.
Cut those protectors off and like you said "use 'em for something else". (mine became my seat bracket).
If you're rubbing as you turn by hand, you'll be rubbing for sure when it's turning under power and the track gets some throw.


1CrazySledder
Lifetime Member
- Joined
- Aug 11, 2005
- Messages
- 2,006
- Location
- Cartersville, GA.
- Country
- USA
- Snowmobile
- None, looking now!
A few more updates.....
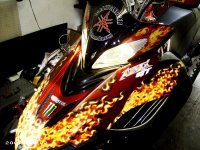
Yellow tinted headlight installed,
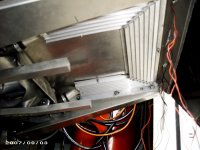
Rear cooler installed
Chaincase back together
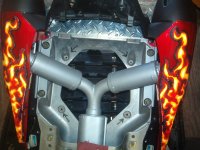
Stock Airbox re-installed so I could hear that sweat exhaust.
Yellow tinted headlight installed,
Rear cooler installed
Chaincase back together
Stock Airbox re-installed so I could hear that sweat exhaust.
Attachments


1CrazySledder
Lifetime Member
- Joined
- Aug 11, 2005
- Messages
- 2,006
- Location
- Cartersville, GA.
- Country
- USA
- Snowmobile
- None, looking now!
edge_kw said:Hey Vince -- it's looking good. Ton of work you got into her.
Cut those protectors off and like you said "use 'em for something else". (mine became my seat bracket).
If you're rubbing as you turn by hand, you'll be rubbing for sure when it's turning under power and the track gets some throw.
Kevin....what's going on? Yeah, I'm going to get them protectors pulled out of there this weekend. Nothing but Ice and snow to gling to.
Getting closer, I can't wait to run this beast.


1CrazySledder
Lifetime Member
- Joined
- Aug 11, 2005
- Messages
- 2,006
- Location
- Cartersville, GA.
- Country
- USA
- Snowmobile
- None, looking now!
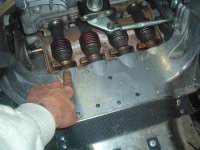
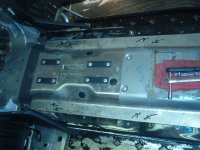
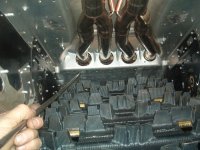
Well, I got those protectors out today. Wasn't bad at all. Wish I would have done this when I had the drivers out. There are 2 holes per protector right above the drivers to drill out. OTHERWISE, you have to remove the entire exhaust system including the 4 flex pipes, then the plate under those 4 pipes. I would say you could get away with just removing the flex pipes, however, then you could not get the plate below them out with the headers installed.
Well, I got them out with the drivers and exhaust installed. I DO NOT RECOMMEND THAT ROUTE, I had used a pry bar and snapped the rivets using the protector itself as a point of pivot. It worked with out any damage to anything, but I can see where damage could happen doing it this way. One could damage the aluminum plate that the protectors are riveted to. I got lucky is all.
I have a few pictures below. I drew arrows to show which rivets to drill out to remove the tunnel protectors. The 4 up above the drivers, I just used a poker to show, of course with the protectors installed, you will obviously know which 4 to drill.....I also have a pic of the protectors with arrows on them as well to show the 4 holes to drill out.
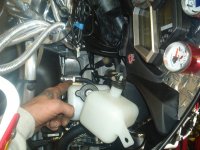
I also threw in TECH TIP below when removing the gas tank.
I know allot of us know all this stuff, but I thought I would post this info anyway for those of you who do not.
-Vince
P.S. 9000 HITS... I still have an awful lot to do yet. Should be interesting what the final view count will be. lol
Well, I got them out with the drivers and exhaust installed. I DO NOT RECOMMEND THAT ROUTE, I had used a pry bar and snapped the rivets using the protector itself as a point of pivot. It worked with out any damage to anything, but I can see where damage could happen doing it this way. One could damage the aluminum plate that the protectors are riveted to. I got lucky is all.
I have a few pictures below. I drew arrows to show which rivets to drill out to remove the tunnel protectors. The 4 up above the drivers, I just used a poker to show, of course with the protectors installed, you will obviously know which 4 to drill.....I also have a pic of the protectors with arrows on them as well to show the 4 holes to drill out.
I also threw in TECH TIP below when removing the gas tank.
I know allot of us know all this stuff, but I thought I would post this info anyway for those of you who do not.
-Vince
P.S. 9000 HITS...
 I still have an awful lot to do yet. Should be interesting what the final view count will be. lol
Attachments
Looks good Vinny!!!! But why is your track on backwards???????


1CrazySledder
Lifetime Member
- Joined
- Aug 11, 2005
- Messages
- 2,006
- Location
- Cartersville, GA.
- Country
- USA
- Snowmobile
- None, looking now!
chadg said:Looks good Vinny!!!! But why is your track on backwards???????
LOL...It's not. The directional arrow is pointing towards the front of the sled when on top. Unless I wanted to go in reverse all the time? lol
It's the Camoplast Crossover 1.5 track, not a ripsaw.
LOL just razzin ya there big time!!!
Looks good vinny
Chadg
Looks good vinny
Chadg

kinger
VIP Member
Good job on the progress!!!
Similar threads
- Replies
- 8
- Views
- 747
- Replies
- 46
- Views
- 149K
-
This site uses cookies to help personalise content, tailor your experience and to keep you logged in if you register.
By continuing to use this site, you are consenting to our use of cookies.

