DirtFarmer
Extreme
- Joined
- Aug 13, 2017
- Messages
- 118
- Location
- Galloway, NJ
- Country
- USA
- Snowmobile
- 2009 Yamaha Nytro R-TX SE
Hooray, I’ve been reading all your posts on the front end work you did and I think it jinxed mine. I dropped mine off to a buddy to look over and get me ready for winter and my ‘09 I just purchased needs all new bushings and ball joints. Not a huge deal or really all that unexpected but glad I had him look it all over and do it now before my first ride on it. Going with some parts through BOP.
Hooray!
TY 4 Stroke Junkie
- Joined
- Aug 12, 2017
- Messages
- 707
- Location
- Maine USA
- Country
- USA
- Snowmobile
- 2009 Yamaha FX Nytro XTX
1998 Yamaha VMAX 700 XTC
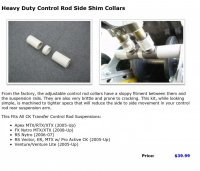
Lol... glad this thread was "helpful", that is all part of me posting like this, the next guy will have some intel and add some more information for the next guy, amazing what inspections will come up with! Mine rode fine too, cant go by seat of the pants feel as once you actually notice it at the bars, you are likely about to have a failure... Don't have him check your skid, I pulled mine out, tore entirely apart and found one cracked bushing, a bunch worn (as expected but serviceable) and then said what the heck, for less that $185 can do all new plastic bushings (no aftermarkets I could find) and determined the tight tolerance SB Control Rod Collars are actually less expensive then buying the three Yamaha parts! Supports a company trying to support us, like BOP as well. Make sure to check your spring hooks, mine were at the danger zone... Goal for mine is a reset on just about everything so I can ride for 5,000 miles with only regular grease and wear parts.

Hooray!
TY 4 Stroke Junkie
- Joined
- Aug 12, 2017
- Messages
- 707
- Location
- Maine USA
- Country
- USA
- Snowmobile
- 2009 Yamaha FX Nytro XTX
1998 Yamaha VMAX 700 XTC
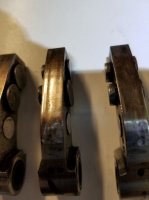
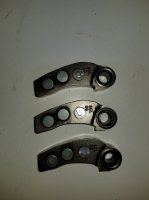
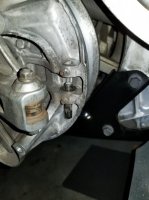
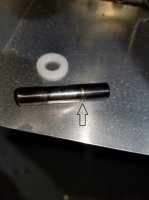
Ordered the SB Control Rod Collars from Chris today, he is super helpful... not sure how he has time to work, he spends as much time as needed on the phone, great customer service. He thinks he can machine a new radius on my stock clutch weights ($49) vs. having to replace them. I posted a pic of the pin as my first time pulling one apart, maybe others are curious too... easy job, took 15 minutes. Checking out the parts, will get expensive if I buy all new Yamaha, but have heard they are the longest lasting option due to the material they are made out of. Mine have some wear for sure, see grooves in pics, could have more than 7000 miles on these, maybe 14500 if never replaced if that is possible!


Gtbensley
Veteran
Hooray, I got my updated A arm bushings installed last night and you are correct, what a world of difference between those and stock. Absolutely zero play in the arms now!
Looks like you are making some pretty serious progress with your sled, lets hope we get some snow soon.
Looks like you are making some pretty serious progress with your sled, lets hope we get some snow soon.
Hooray!
TY 4 Stroke Junkie
- Joined
- Aug 12, 2017
- Messages
- 707
- Location
- Maine USA
- Country
- USA
- Snowmobile
- 2009 Yamaha FX Nytro XTX
1998 Yamaha VMAX 700 XTC
GT night and day isn't it! Mine are actually tight but I am sure will loosen up first ride. Just arrived back from Casablanca tonight, all my skid bushing parts were here waiting. Installing all Monday night and should be able to button up sled this week ready for snow.
Hooray!
TY 4 Stroke Junkie
- Joined
- Aug 12, 2017
- Messages
- 707
- Location
- Maine USA
- Country
- USA
- Snowmobile
- 2009 Yamaha FX Nytro XTX
1998 Yamaha VMAX 700 XTC
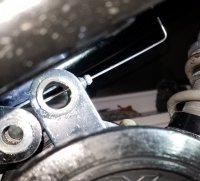
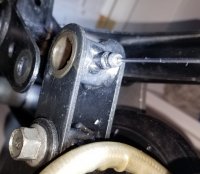
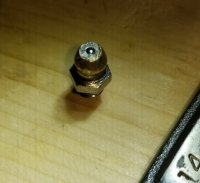
Started putting all the new skid bushings on tonight. Noticed that we have grease ports and not zerks on most of our suspension shafts. Zerks have the small spring and ball bearing so grease does not squirt back out but all the others are welded on and no ball or spring... My pics show inserting a small Allen wrench and goes through to shaft, seems strange they would use this type. Anyone know why?


DirtFarmer
Extreme
- Joined
- Aug 13, 2017
- Messages
- 118
- Location
- Galloway, NJ
- Country
- USA
- Snowmobile
- 2009 Yamaha Nytro R-TX SE
Hooray!
TY 4 Stroke Junkie
- Joined
- Aug 12, 2017
- Messages
- 707
- Location
- Maine USA
- Country
- USA
- Snowmobile
- 2009 Yamaha FX Nytro XTX
1998 Yamaha VMAX 700 XTC
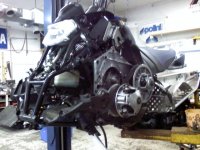
Looks good Dirt, wish I had a lift! Happy Thanksgiving...
Hooray!
TY 4 Stroke Junkie
- Joined
- Aug 12, 2017
- Messages
- 707
- Location
- Maine USA
- Country
- USA
- Snowmobile
- 2009 Yamaha FX Nytro XTX
1998 Yamaha VMAX 700 XTC
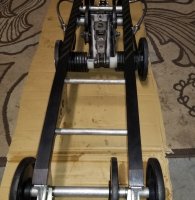
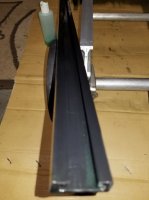
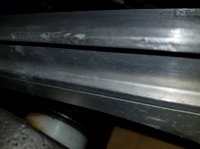
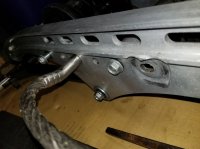
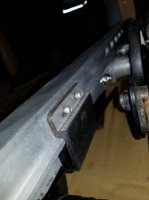
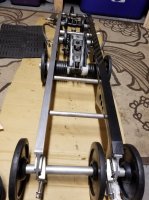
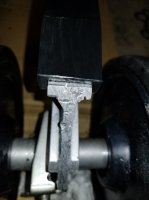
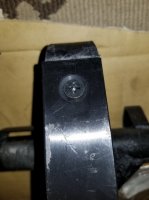
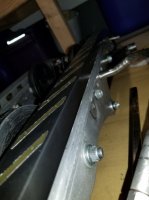
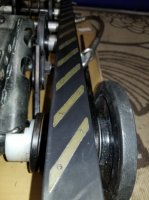
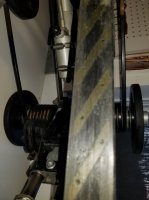
Replaced the Dupont hyfaxes last night... what a PITA for the first one. Learned quickly how soft the aluminum is and apparently created some burrs with a few well meaning screwdriver taps that held things up. Lesson learned, be super careful where you place the screwdriver and switch to a block of wood once you have the space. Second one, very careful not to add any dings and with a block of wood and firm hammer after moving 3/4" it came right off in less than two minutes. I then had to use a dremel to smooth out the new and old dings (last person made a few too). A liberal dose of Dawn soap and no issues new ones going on, actually could slide them up 70% of the way by hand. I had my skid off and as my last posts show am replacing all the bushings so decided to do the Duponts too so everything was new. From the looks of the small wear holes in the Dupont inserts, with the exception of one spot on the old hyfaxes, I likely could have squeezed out another 1000 miles. I am happy how good they looked with 6500 miles so no complaints. Sent rear shock out to HyGear today for rebuild, hose got crushed and leaked : ( Tomorrow is change the oil, put plastics back on and start the skid assembly... wrap up will be the HIDs and maybe PowerMadd LEDs. Goal is all done by Christmas...


Last edited:
Seavey82
Pro
I would like to do the full powermadd setup once done that will be an option vs. a 2-3" riser... Tonight I started on the "patches" to fix the tunnel crack issue. My sled has a welded crack that split and moved another 5/8" above the weld (gas was on that side of the tunnel) so tonight I did some recon and started to grind down the weld for the new plate. I will drill a hole at the top of the crack you will see above the finished plate but hope it stops there. The welding distorted the aluminum maybe 1/8" inward as shown in the pic at the weld so considering putting a filler (maybe 5200) behind the plate so the entire setup once bonded is one unit. A little more grinding and the weld face will be flush with the plate so you can see how things are deformed. Any suggestion on material? Marine 5200 bonds anything, but perhaps there is an aluminum specific material I am not aware of, open to suggestions.
View attachment 130209 View attachment 130210
I just installed a set of boondocker tunnel braces. They really stiffened up the tunnel you can find these on ebay for 129.00 may help with your crack issue.
Hooray!
TY 4 Stroke Junkie
- Joined
- Aug 12, 2017
- Messages
- 707
- Location
- Maine USA
- Country
- USA
- Snowmobile
- 2009 Yamaha FX Nytro XTX
1998 Yamaha VMAX 700 XTC
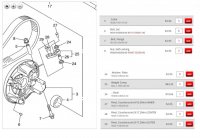
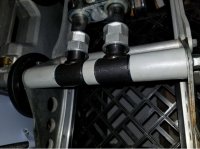
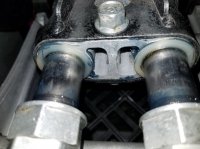
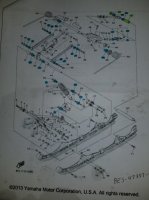
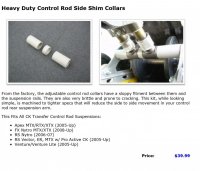
Worked on the skid some more tonight. Installed the Schmidt Brothers control rod collars, what a difference! Night and day how much stronger and thicker their version is and tighter tolerances. Best of all, their price is less than the combined stock Yamaha prices, great product if you are replacing these often overlooked parts. Mine was literally flopping around with 1/8" of tolerance as the stock plastic collars don't last. I posted a pic of how I keep track of all these parts, print out the parts diagram and highlight which parts I ordered with a reference to the PN on the bag on my order printout. Easy to remember 10 parts but not 100! The end is in sight, hope to have everything buttoned up by Sunday except the skid which is waiting now for HyGear to rebuild the rear shock.


Hooray!
TY 4 Stroke Junkie
- Joined
- Aug 12, 2017
- Messages
- 707
- Location
- Maine USA
- Country
- USA
- Snowmobile
- 2009 Yamaha FX Nytro XTX
1998 Yamaha VMAX 700 XTC
Thanks. Will check these out, extra weight of 1.3 gal of gas on left side rack caused the initial crack.I just installed a set of boondocker tunnel braces. They really stiffened up the tunnel you can find these on ebay for 129.00 may help with your crack issue.
Hooray!
TY 4 Stroke Junkie
- Joined
- Aug 12, 2017
- Messages
- 707
- Location
- Maine USA
- Country
- USA
- Snowmobile
- 2009 Yamaha FX Nytro XTX
1998 Yamaha VMAX 700 XTC
Just posted this on a separate thread I created but figure worth keeping here as well as an important topic, wrong grease and all the bushings wont last: Completed all my research on grease while waiting for parts. I have been using Peak synthetic marine water resistant grease (blue) to pre-lube all the bushings and parts after the Thurst adhesive synthetic lubricant but wanted to pump everything up with the best grease I could find. I ordered the Yamaha synthetic racing grease but have learned that the lithium soap grease is not the best water resistant one out there. Determined the Amsoil synthetic water resistant grease is the one I am going with. Hands down one of the better and most tested out there (as well as their oils) and amazingly only $8.55 at the local NAPA. Reading the label, it shows sleds on it and is "Designed specifically for wet applications"... blue it is!
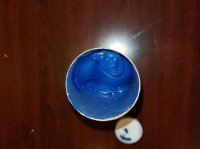
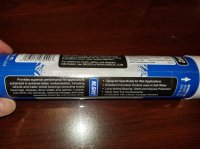
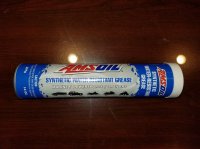


Hooray!
TY 4 Stroke Junkie
- Joined
- Aug 12, 2017
- Messages
- 707
- Location
- Maine USA
- Country
- USA
- Snowmobile
- 2009 Yamaha FX Nytro XTX
1998 Yamaha VMAX 700 XTC
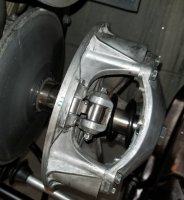
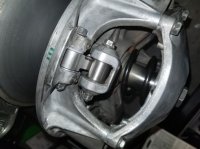
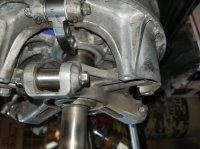
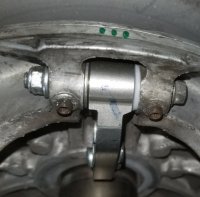
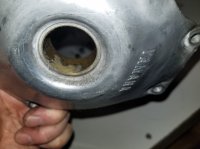
Primary clutch assembly night... Longer explanation as lots of details. First, I want to thank Chris Schmidt at Schmidt Brothers (http://www.schmidtbrosmotorsports.com/) for being there EVERY time I call... he may be on the other line or wrenching but damn he answers every call... thanks. I was in the garage about to install the SB quiet clutch and SB comfort clutch kits and wanted to be clear on where each shim on the flyweights and rollers go. Pics show below how they install but all important to get right. The SB instructions note turn the primary clutch counter-clockwise ONLY (direction of engine travel - as you may or may not know, NEVER turn the primary clockwise as you will detension the chain on the other side of the engine potentially skipping a tooth in the process and introducing your piston to a friendly valve encounter... resulting in a top end rebuild and maybe some pistons to add fun to the party) so you rotate the primary only CCW to bring the bolt holding the rollers and the bolt holding the flyweights to a vertical orientation (between the two clutches), nuts pointing up so it is easier to stack his shims / washers on the bolt - pin - roller / flyweight stack. On the rollers, the SB comfort clutch kit includes new smaller diameter rollers so the launch RPM drops from 4200 to 2900. The SB rollers are provided complete, outer roller, inner bushing and if you price out the Yamaha standard size rollers and bushings they are more expensive than the SB substitute. This combined with a softer spring engages the clutch at less RPM yet still inside the engine's torque curve thanks to our RX1 triple motors and their low end grunt. The SB quiet clutch shim kit provides one slightly wider (white) shim replacing the right side flyweight washer (see pics). This takes up any play in the flyweights between the casting mount points of the primary clutch. My original flyweights (8000+ miles) had nice grooves worn in them (see earlier thread pics) so I sourced some new pulls from Barn of Parts (great deal, saved 40%, thanks there), interesting the new ones had virtually the same profile as the old except for a noticeable depression in the mid section. Worth going new with the balance of my rebuild IMO; after installation with the SB shims two of the three flyweights still moved freely but with tension (my old ones and yours likely flip around if you push them up and down with your finger). Thee third was actually "snug" as Chris notes but not "tight". You can see in the pics I ran some 240 sandpaper over the flyweight faces to clean them up perfectly of any mfg blemishes as there is no lubricant on the rollers / weights. I wondered about spraying some of the Thurst adhesive grease on the rollers and weight faces as that is super thin synthetic barrier, not sure if that is a good idea or not. The SB Quiet Clutch kit includes seven thin black washer / shims that you put around the roller pin, between the casting and the bolt head and casting and nut (see pic). Make sure the pin butts against the bolt head or nut face and the washer / shim is compressed between them and the casting, yet still around the pin. If it it between the pin and the bolt/nut face it will be squeezed between them and deform out as you tighten things. If the bolt head end does not take up play, you can add a second one behind the nut. I had enough play to put the one under the nut too and this one requires careful placement to make sure the pin buts the nut face (metal to metal) and does not pinch the washer / shim as there is only a few hundredths (maybe thousands) to work with as the nut compresses down against the pin. Hard to explain in words... Final product, hydraulic tight, no play, no noise... great job Chris. Final comment on this, I noticed the fiberglass looking liner / bushing for the primary clutch shaft on mine had some wear through the first layer (see pic). I suppose this can be replaced but wonder if this is normal, seems like an unlubricated spinning shaft in a fabric like bushing... anyone else seen this?
Ps. I have a Camoplast 1.25" track, mint shape, all the lug tip studs still in place (maybe one or two missing, I saw none) that I am selling only because it has a Camoplast 1.6" mounted. PM me if you need a track, not giving it away but a good deal, will help me offset $1600 in parts!
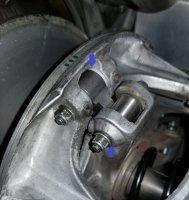

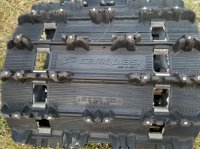
Ps. I have a Camoplast 1.25" track, mint shape, all the lug tip studs still in place (maybe one or two missing, I saw none) that I am selling only because it has a Camoplast 1.6" mounted. PM me if you need a track, not giving it away but a good deal, will help me offset $1600 in parts!


Last edited:
Hooray!
TY 4 Stroke Junkie
- Joined
- Aug 12, 2017
- Messages
- 707
- Location
- Maine USA
- Country
- USA
- Snowmobile
- 2009 Yamaha FX Nytro XTX
1998 Yamaha VMAX 700 XTC
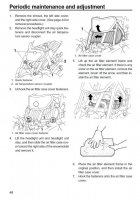
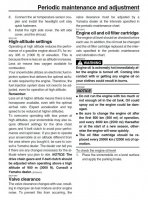
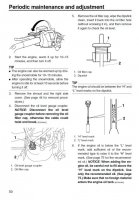
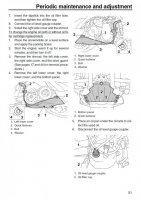
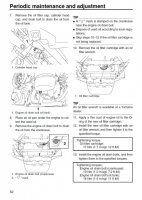
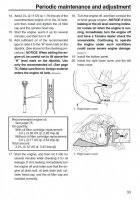
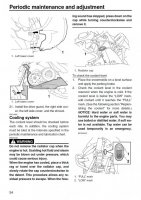
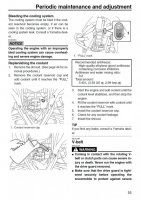
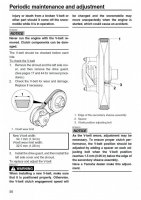
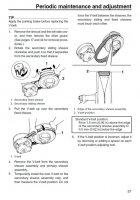
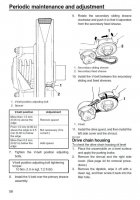
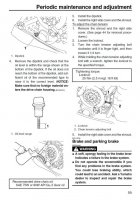
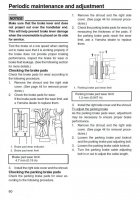
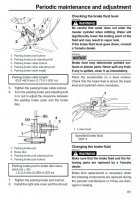
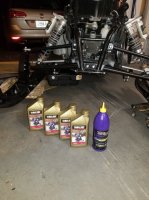
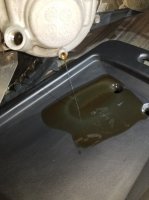
Changed oils tonight (full synthetic Yamaha 0W-40 & filter) and chain case gear oil (full synthetic Royal Purple 75W-90). The manual spells things out exactly as you should execute them, no mystery to it, RTFM. The "cap" on top of the engine is behind the battery and I think is there to prevent any hydraulic lock effect with a remote tank holding the oil. Many I read don't remove this but why not, if you are the 1 in 1000 that has a lock condition... bad (manual pages below you can print). I did learn that 4 oz. of oil is all it takes to go just below the "H" on the oil tank dipstick to the top of the "H". You do not screw in this dipstick to take a reading, all in takes 3 qts plus 4th qt down to the 14 oz. mark on the container, total 3 qt 18 oz to the bottom of the "H" with a new oil filter. Poor plastic color choice for the dip stick by Yamaha, oil colored tan makes is hard to see where the oil level really sits. I had to re-use the oil tank copper washer reversed as they sent the wrong size washer. Chain case appears to take about 8 oz. which is not much. This dip stick you do screw in to take a reading, again, not a large amount in there. I will order a new washer for the chain case bolt, a hybrid washer rubber o-ring style but it too could be re-used without a leak. My track is off so cant engage the chain to get a real level reading so plan to change it once more when I can run forward and backwards just to clean it out if I can do two with one qt.


Last edited:
Similar threads
-
This site uses cookies to help personalise content, tailor your experience and to keep you logged in if you register.
By continuing to use this site, you are consenting to our use of cookies.

