
- Joined
- Apr 13, 2003
- Messages
- 21,520
- Age
- 54
- Location
- Schofield, WI
- Website
- www.totallyamaha.com
- Country
- USA
- Snowmobile
- 2020 Sidewinder SRX
Very good! Yamahas branding of an Arctic Cat with their own name still really bothers me and I am not about to get rid of my Nytro. Every time I look at the name of this forum and think about the Viper, I have to chuckle.
Should I just close the door on the Vipers because they are not all Yamaha? You should be in my shoes. Its still Yamaha that makes the sale. Still Yamaha that honors the warrenty... I deal with a Yamaha Dealer...
Last edited:
edge_232
Expert
- Joined
- Jan 15, 2014
- Messages
- 254
- Age
- 50
- Location
- Madison WI
- Country
- USA
- Snowmobile
- 2011 Nytro MTX slowly being modded
2005 IQR Trail Converted
That's a tough call & a no win situation. Your going to piss someone no matter what you do on that one.
edge_232
Expert
- Joined
- Jan 15, 2014
- Messages
- 254
- Age
- 50
- Location
- Madison WI
- Country
- USA
- Snowmobile
- 2011 Nytro MTX slowly being modded
2005 IQR Trail Converted
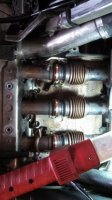
I'm thinking about doing the radiator delete or at least adding on to the piss poor nytro cooling system (even worse with my boosted sled) this summer and look for your thoughts to my options which are:
1. Do the complete MPI double stack rad delete kit which I can get at a real good price now in the off season
2. Use the Van amberg system cost more & get the same out come
3. Add just the van amberg right side cooler lines(from their delete kit) to a small extra rear tunnel cooler (I have sitting around from an old project) & relocate my current MTX cooler to the left side returning back to the engine through one of the V.A. side coolers. Cheapest since I have the MTX & small tunnel heat exchanger. I post a picture to clear this one up.
Low side cost is $250 plus the most labor but untested.
High end is around $450 for the full V.A. delete kit & MPI in the middle.
edge_232
Expert
- Joined
- Jan 15, 2014
- Messages
- 254
- Age
- 50
- Location
- Madison WI
- Country
- USA
- Snowmobile
- 2011 Nytro MTX slowly being modded
2005 IQR Trail Converted
edge_232
Expert
- Joined
- Jan 15, 2014
- Messages
- 254
- Age
- 50
- Location
- Madison WI
- Country
- USA
- Snowmobile
- 2011 Nytro MTX slowly being modded
2005 IQR Trail Converted
I finished up my throttle block earlier this week and I did the cheap way and really liked the way it turned out. Since I added a teether there was no need for the big bulky Yami throttle assy. so I use an old IQR throttle block and lever I had. Powder coated it black to clean the look of it up and attached the Yami thumb warmer element to it. Once I got the cable all hooked up I didn't have enough adjustment in the cable adjuster to take all the slack out (be sure to leave 1/8 " free play). I ended up using a moto cross style clutch lever cable adjuster to solve the problem. I threaded the throttle block so the cable adjuster would thread thread into it just like the mot clutch lever design. I also had to narrow up the thumb / lock down adjuster some as well. Now it has a cool custom look to it with actual functionality.

So here are the bars completed nice and clean.

Now to start on the new risers and gauge mounting. I added a Fly/RSI bar adapter and a set of 5" RSI risers last night and ran into a small problem.
The stock bars might not work with the offset position the bar adapter puts the risers clamps. The clamps end up on the curved part of the bars but I maybe able to adjust them enough to work I ways running out of time last night.

I might have to get a different set of bars but I hope not. You can also see my gauge mount mock up. I'll see what I can come up with this weekend.
So here are the bars completed nice and clean.
Now to start on the new risers and gauge mounting. I added a Fly/RSI bar adapter and a set of 5" RSI risers last night and ran into a small problem.
The stock bars might not work with the offset position the bar adapter puts the risers clamps. The clamps end up on the curved part of the bars but I maybe able to adjust them enough to work I ways running out of time last night.
I might have to get a different set of bars but I hope not. You can also see my gauge mount mock up. I'll see what I can come up with this weekend.
edge_232
Expert
- Joined
- Jan 15, 2014
- Messages
- 254
- Age
- 50
- Location
- Madison WI
- Country
- USA
- Snowmobile
- 2011 Nytro MTX slowly being modded
2005 IQR Trail Converted
I forgot all about adding an older Trail Tank on the sled once I first got it and hated having loose fasteners to hold the hood and side panels on. I was always afraid that I would loose them on the trail if I need to get to my tool bag or who know what. I found a great idea from Grizztracks using a jacket snap style connection which works amazing for me and no more lost fasteners. Here's his basic write
Parts needed and location to get the needed parts:
Order Summary: http://search.sailrite.com/category/...nvas-fasteners
333115 Snap Fastener Machine Screw 3/8" Stud Flangeless #10-32 (5mm) $0.28
444777 Snap Fastener Button 11/64" (Stainless Steel) $0.22
444050 Snap Fastener Normal Action Socket (Stainless Steel) $0.22
25204 Snap Fastener Installation Tool $2.95
* The tool is cheap but works. You may want to find a local upholtery shop to install the snaps with a better tool.


1) Stud installation

2) Remove square pads around the holes on the backside of the hood

3) Drill out the holes with a 7/16" bit. A Unibit works well

4)Insert the snap socket into the hole and use a installation tool to secure the button to it

5)The hood is slightly lifted away from the tank due to the snaps so I used a heat gun to bend the rear corners down. If you do this only heat the inside of the hood and use low heat until the plastic just starts to soften. It doesn't take much heat.

This is a fairly simple mod that works great but I recommend ordering a few extra snap assemblies because there is a learning curve to getting the fasteners sandwiched together.
Parts needed and location to get the needed parts:
Order Summary: http://search.sailrite.com/category/...nvas-fasteners
333115 Snap Fastener Machine Screw 3/8" Stud Flangeless #10-32 (5mm) $0.28
444777 Snap Fastener Button 11/64" (Stainless Steel) $0.22
444050 Snap Fastener Normal Action Socket (Stainless Steel) $0.22
25204 Snap Fastener Installation Tool $2.95
* The tool is cheap but works. You may want to find a local upholtery shop to install the snaps with a better tool.
1) Stud installation
2) Remove square pads around the holes on the backside of the hood
3) Drill out the holes with a 7/16" bit. A Unibit works well
4)Insert the snap socket into the hole and use a installation tool to secure the button to it
5)The hood is slightly lifted away from the tank due to the snaps so I used a heat gun to bend the rear corners down. If you do this only heat the inside of the hood and use low heat until the plastic just starts to soften. It doesn't take much heat.
This is a fairly simple mod that works great but I recommend ordering a few extra snap assemblies because there is a learning curve to getting the fasteners sandwiched together.


- Joined
- Apr 13, 2003
- Messages
- 21,520
- Age
- 54
- Location
- Schofield, WI
- Website
- www.totallyamaha.com
- Country
- USA
- Snowmobile
- 2020 Sidewinder SRX
I forgot all about adding an older Trail Tank on the sled once I first got it and hated having loose fasteners to hold the hood and side panels on. I was always afraid that I would loose them on the trail if I need to get to my tool bag or who know what. I found a great idea from Grizztracks using a jacket snap style connection which works amazing for me and no more lost fasteners. Here's his basic write
Parts needed and location to get the needed parts:
Order Summary: http://search.sailrite.com/category/...nvas-fasteners
333115 Snap Fastener Machine Screw 3/8" Stud Flangeless #10-32 (5mm) $0.28
444777 Snap Fastener Button 11/64" (Stainless Steel) $0.22
444050 Snap Fastener Normal Action Socket (Stainless Steel) $0.22
25204 Snap Fastener Installation Tool $2.95
* The tool is cheap but works. You may want to find a local upholtery shop to install the snaps with a better tool.
This is a fairly simple mod that works great but I recommend ordering a few extra snap assemblies because there is a learning curve to getting the fasteners sandwiched together.
Very nice mod... do those snaps hold really well or have you had them pop when really bashing on the sled?
edge_232
Expert
- Joined
- Jan 15, 2014
- Messages
- 254
- Age
- 50
- Location
- Madison WI
- Country
- USA
- Snowmobile
- 2011 Nytro MTX slowly being modded
2005 IQR Trail Converted
I put about 300 miles on/off trail & no issues at all. I really like & works great so far!
edge_232
Expert
- Joined
- Jan 15, 2014
- Messages
- 254
- Age
- 50
- Location
- Madison WI
- Country
- USA
- Snowmobile
- 2011 Nytro MTX slowly being modded
2005 IQR Trail Converted
Well I had some fun removing all the foam from under my hood and adding some vents this past weekend. The best way that I found to remove the foam is with a sharp razor blade and go at just like your skinning a deer or other game animal. Pinch the foam with the index finger and thumb and cut as close as you can to the glued surface as possible. Once I was all done I took a little angle grinder with a sanding head on it to remove the rest of the stray foam. now it wasn't baby smooth but I was afraid if I used any chemicals it might get onto wrap and ruin it. It works for plus you can see that side anyways!
As for hood vent kit I went with a partial kit from Mountain Fit Hoods and the shock kit from XXX Mod Rods. Both kits seem to be of high quality and made the exact same. I've used the XXX Mod Rod kits before on my IQR and had great results. Here are a few pics.
Now to get back to the risers and my gauges mounted / wired up. If any one happens to have a set of 4" dog bone style risers let me know. I got a brand new set of 5" RSI risers and they are a touch too high once I got my custom riser adapter on.
Attachments
edge_232
Expert
- Joined
- Jan 15, 2014
- Messages
- 254
- Age
- 50
- Location
- Madison WI
- Country
- USA
- Snowmobile
- 2011 Nytro MTX slowly being modded
2005 IQR Trail Converted
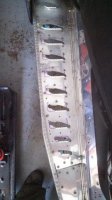
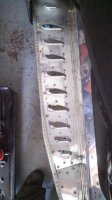
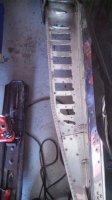
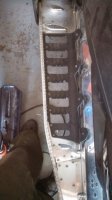
When I bought my sled it already had tunnel supports to help strengthen the boards plus they actually had good clean outs in the supports. The only issue was the stock boards were never cut to match the supports clean outs and I had terrible snow build up. Well not anymore the pictures will speak for them selves. Now this should take care of the snow build up. My concern would only be in front of the supports now and wondering if I should use a hole saw to but a few drop outs near the toe hook area. Has anyone tried this at all?
Attachments
edge_232
Expert
- Joined
- Jan 15, 2014
- Messages
- 254
- Age
- 50
- Location
- Madison WI
- Country
- USA
- Snowmobile
- 2011 Nytro MTX slowly being modded
2005 IQR Trail Converted
Anyone have some insight on the Rad delete kits and which ones my work better than others with a Push turbo? And yes I have done a search and read a ton of the other post.
edge_232
Expert
- Joined
- Jan 15, 2014
- Messages
- 254
- Age
- 50
- Location
- Madison WI
- Country
- USA
- Snowmobile
- 2011 Nytro MTX slowly being modded
2005 IQR Trail Converted
I finished running power for my gauges and plumbing my Koso Super Slim Style Temp gauge this weekend and here's is what I did:
Power for all gauges:
I'd recommend wiring your gauges (+) connection into the blue/white wire coming from the load side of the 20A headlight fuse. Strip some insulation back, solder your wire to the blue/white wire, and then tape / heat shrink everything up good. I also ran a separate 5 amp in-line fuse on the power lead for the gauges. Your (-) connection can go directly to the negative terminal on the battery (use a suitable ring terminal on the end of your wire.
The DC jack wiring would also work fine, but it's only protected by a 3A fuse. That doesn't leave much circuit capacity for other gadgets.

I located my Temp Sensor directly into the Thermostat housing. There is a molded port on the housing that will need to be drilled out and then tapped for your temp sensor. I needed to use a brass bushing (1/4 NPT x 1/8 NPT) for my sensor to fit into the housing, depending on your sensor this may or may not be the case.


Drill a small pilot hole directly in the center of the port all the way through into the T-stat housing.

Now start increasing the size of the hole until you get to the size needed for your thread tap. I had a ¼” NPT so my final size was 7/16”.

Now tap the port for your sensor of bushing. I used a ¼” NPT. Be sure to make the threads deep enough for your sensor to thread all the way in.

Now thread your bushing and or sensor into the housing and remember to use Teflon tape.

Re-install the housing and route your sensor wire back to the gauge.

I still need to mount the gauge but I'm not sure where it will end up yet.
Power for all gauges:
I'd recommend wiring your gauges (+) connection into the blue/white wire coming from the load side of the 20A headlight fuse. Strip some insulation back, solder your wire to the blue/white wire, and then tape / heat shrink everything up good. I also ran a separate 5 amp in-line fuse on the power lead for the gauges. Your (-) connection can go directly to the negative terminal on the battery (use a suitable ring terminal on the end of your wire.
The DC jack wiring would also work fine, but it's only protected by a 3A fuse. That doesn't leave much circuit capacity for other gadgets.
I located my Temp Sensor directly into the Thermostat housing. There is a molded port on the housing that will need to be drilled out and then tapped for your temp sensor. I needed to use a brass bushing (1/4 NPT x 1/8 NPT) for my sensor to fit into the housing, depending on your sensor this may or may not be the case.
Drill a small pilot hole directly in the center of the port all the way through into the T-stat housing.
Now start increasing the size of the hole until you get to the size needed for your thread tap. I had a ¼” NPT so my final size was 7/16”.
Now tap the port for your sensor of bushing. I used a ¼” NPT. Be sure to make the threads deep enough for your sensor to thread all the way in.
Now thread your bushing and or sensor into the housing and remember to use Teflon tape.
Re-install the housing and route your sensor wire back to the gauge.
I still need to mount the gauge but I'm not sure where it will end up yet.


- Joined
- Apr 13, 2003
- Messages
- 21,520
- Age
- 54
- Location
- Schofield, WI
- Website
- www.totallyamaha.com
- Country
- USA
- Snowmobile
- 2020 Sidewinder SRX
Nice work 

edge_232
Expert
- Joined
- Jan 15, 2014
- Messages
- 254
- Age
- 50
- Location
- Madison WI
- Country
- USA
- Snowmobile
- 2011 Nytro MTX slowly being modded
2005 IQR Trail Converted
Sportsterdanne
TY 4 Stroke Guru
Nice progress ! whats next ?
Similar threads
- Replies
- 4
- Views
- 4K
- Replies
- 78
- Views
- 8K
-
This site uses cookies to help personalise content, tailor your experience and to keep you logged in if you register.
By continuing to use this site, you are consenting to our use of cookies.

