
kinger
VIP Member
- Joined
- Jan 17, 2005
- Messages
- 7,422
- Reaction score
- 1,556
- Points
- 1,963
- Location
- Clear Lake, IA
- Website
- www.piergenius.com
Wait what you blew up the RX1? How?
rxrider
Jan-Ove Pedersen
- Joined
- Apr 25, 2003
- Messages
- 7,355
- Reaction score
- 64
- Points
- 1,753
- Location
- Lakselv - 70N & 25E
- Country
- Norway
- Snowmobile
- 2014 Phazer XTX, 2013 Phazer RTX, 2008 Apex RTX, 2007 Warrior, 2006 Attak
Yes I did. Back in April 2014. Rode across a lake at slow speed, 35 MPH when she all of a sudden threw one of the stock rods.
It had to happen sooner or later as it rode it at 22 lbs on stock rods. The last 30 minutes before she blew I had ticking sound coming from the motor.
I know I should have stopped it when the ticking started, but I was high up in the mountains with no other choice than driving the sled back home.
It blew with less than 10 miles to go :-(
My take is that the Wiseco wrist pin broke, taking out the rod as the piston hammered the head.
I ran a stock head gasket. I've talked to Dave Marshall about it and he said the stock gaskets on both the RX-1 and the Apex are too thin and piston hitting the head may occur.
Dave's recommendation is to run 0.36" head gasket thickness.
My friend had the same thing happen to his Apex only two weeks after my sled went.
I've taken over his sled and are working on rebuilding it, with a 0.36" Cometic head gasket.
I just got in a 2014 Apex for piston and rod change, it will have the 0.36" Cometic gasket installed for the very same reasons.
I will document the work of intstalling the pistons, rods, adjusting valve clearances and so on.
As payment for the work my customer handed over his 2007 Apex MCX315 turboed sled, it's in parts and he didn't care working on it anymore.
The 2007 sleds head had marks that indicated the pistons had hit the head, it's now been ported and rebuilt")
I have handed over the old RX-1 to a good friend of mine who still runs his turboed 2003 RX-1 with more than 19000 kilometers or 11785 miles on it, all turboed miles.
His plan is to buy a used motor and rebuild the sled
It had to happen sooner or later as it rode it at 22 lbs on stock rods. The last 30 minutes before she blew I had ticking sound coming from the motor.
I know I should have stopped it when the ticking started, but I was high up in the mountains with no other choice than driving the sled back home.
It blew with less than 10 miles to go :-(
My take is that the Wiseco wrist pin broke, taking out the rod as the piston hammered the head.
I ran a stock head gasket. I've talked to Dave Marshall about it and he said the stock gaskets on both the RX-1 and the Apex are too thin and piston hitting the head may occur.
Dave's recommendation is to run 0.36" head gasket thickness.
My friend had the same thing happen to his Apex only two weeks after my sled went.
I've taken over his sled and are working on rebuilding it, with a 0.36" Cometic head gasket.
I just got in a 2014 Apex for piston and rod change, it will have the 0.36" Cometic gasket installed for the very same reasons.
I will document the work of intstalling the pistons, rods, adjusting valve clearances and so on.
As payment for the work my customer handed over his 2007 Apex MCX315 turboed sled, it's in parts and he didn't care working on it anymore.
The 2007 sleds head had marks that indicated the pistons had hit the head, it's now been ported and rebuilt
I have handed over the old RX-1 to a good friend of mine who still runs his turboed 2003 RX-1 with more than 19000 kilometers or 11785 miles on it, all turboed miles.
His plan is to buy a used motor and rebuild the sled
kinger
VIP Member
- Joined
- Jan 17, 2005
- Messages
- 7,422
- Reaction score
- 1,556
- Points
- 1,963
- Location
- Clear Lake, IA
- Website
- www.piergenius.com
Wow we need like a retirement party for the turbo sled! At least it will be resurrected and enjoyed still!
rxrider
Jan-Ove Pedersen
- Joined
- Apr 25, 2003
- Messages
- 7,355
- Reaction score
- 64
- Points
- 1,753
- Location
- Lakselv - 70N & 25E
- Country
- Norway
- Snowmobile
- 2014 Phazer XTX, 2013 Phazer RTX, 2008 Apex RTX, 2007 Warrior, 2006 Attak
Hahaha I have serious problems, got rid off one turbo sled, now there's two of them LOL.
06 Attak Custom built turbo, and a 07 Apex MCX315, where will it end.
Right now I'm working on a 2014 Apex, strengthening the engine for high boost application for a customer, can't wait to se it run at 20+ lbs of boost
06 Attak Custom built turbo, and a 07 Apex MCX315, where will it end.
Right now I'm working on a 2014 Apex, strengthening the engine for high boost application for a customer, can't wait to se it run at 20+ lbs of boost
rxrider
Jan-Ove Pedersen
- Joined
- Apr 25, 2003
- Messages
- 7,355
- Reaction score
- 64
- Points
- 1,753
- Location
- Lakselv - 70N & 25E
- Country
- Norway
- Snowmobile
- 2014 Phazer XTX, 2013 Phazer RTX, 2008 Apex RTX, 2007 Warrior, 2006 Attak
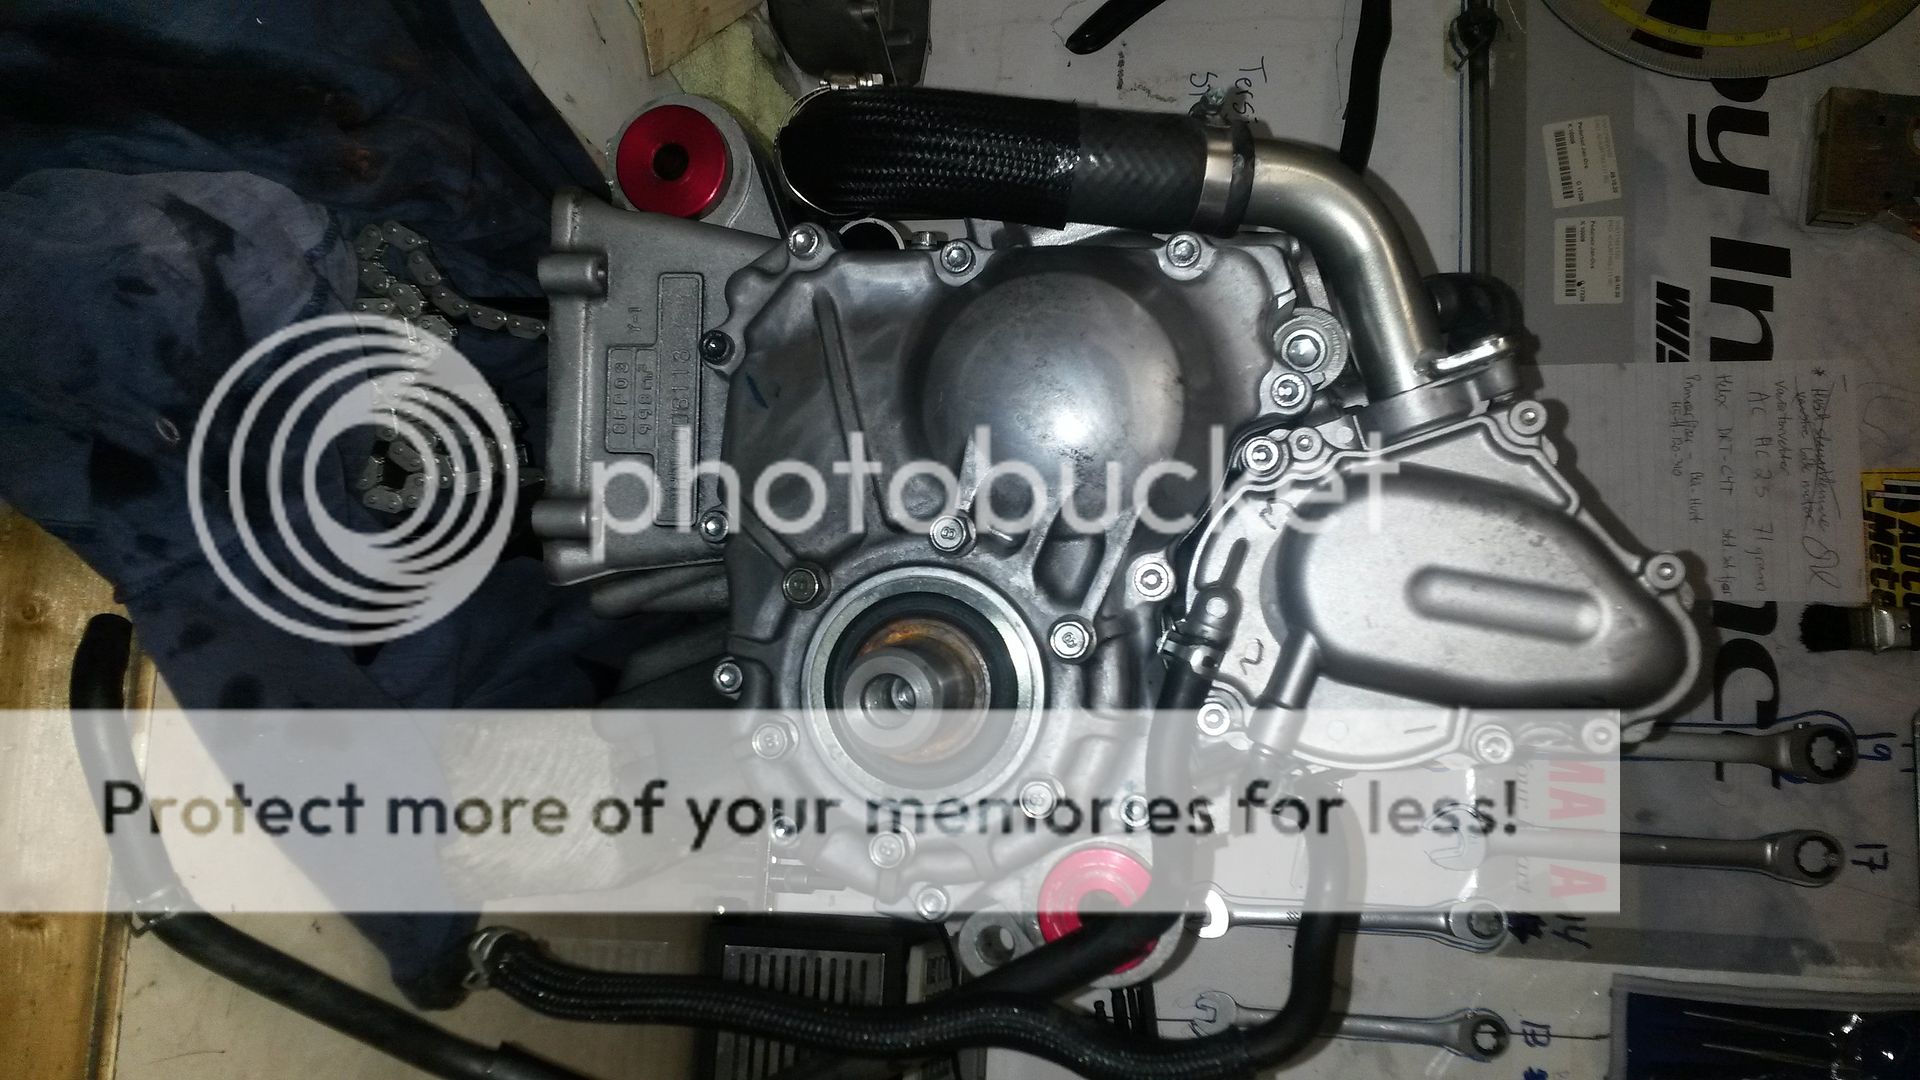
Update - November 10. - Building a 2014 Apex turbo engine with CP pistons and Carrillo rods.
I have started working on a 2014 Apex.
The engine is going to be strengthened to handle 20+ lbs of boost.
Stock pistons are replaced with CP pistions running Yamaha piston rings.
Stock rods are replaced with Carrillo rods.
Stock head gasket is replaced with a 0.036" Cometic steel head gasket.
I have torn down the sled and the engine is on the workbench.
I have not documented the tear down as it's covered numerous times earlier in my thread.
The 2014 Apex is almost the same as the 03-05 RX-1 and the 06-10 Apex.
I will document the engine work from the tear down of the engine, installation of the pistons and rods, and the assembly. The 2014 Apex engine is slightly different from the older engines but not much, hardly detectable unless you look at the engine part numbers.
The engine is out of the chassis and on my workbench.

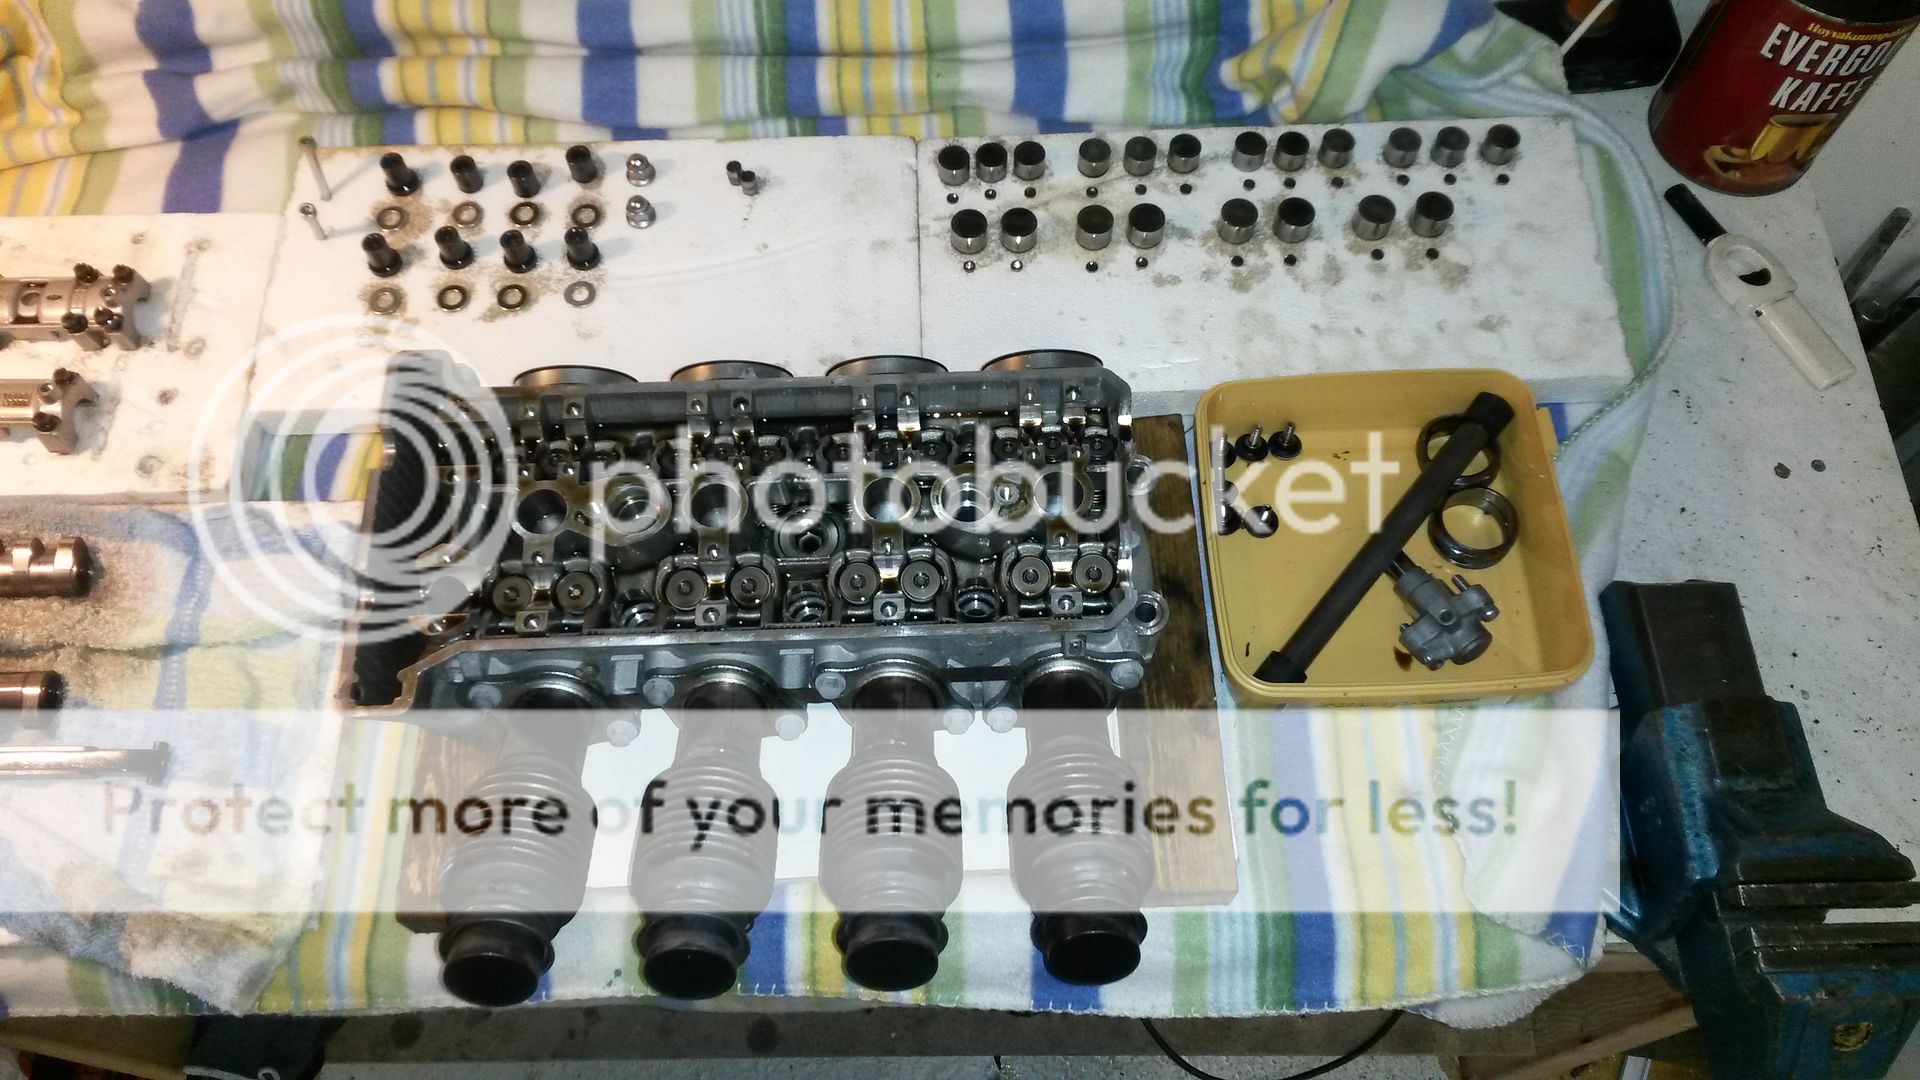
Disassembling the engine.
Cams out.
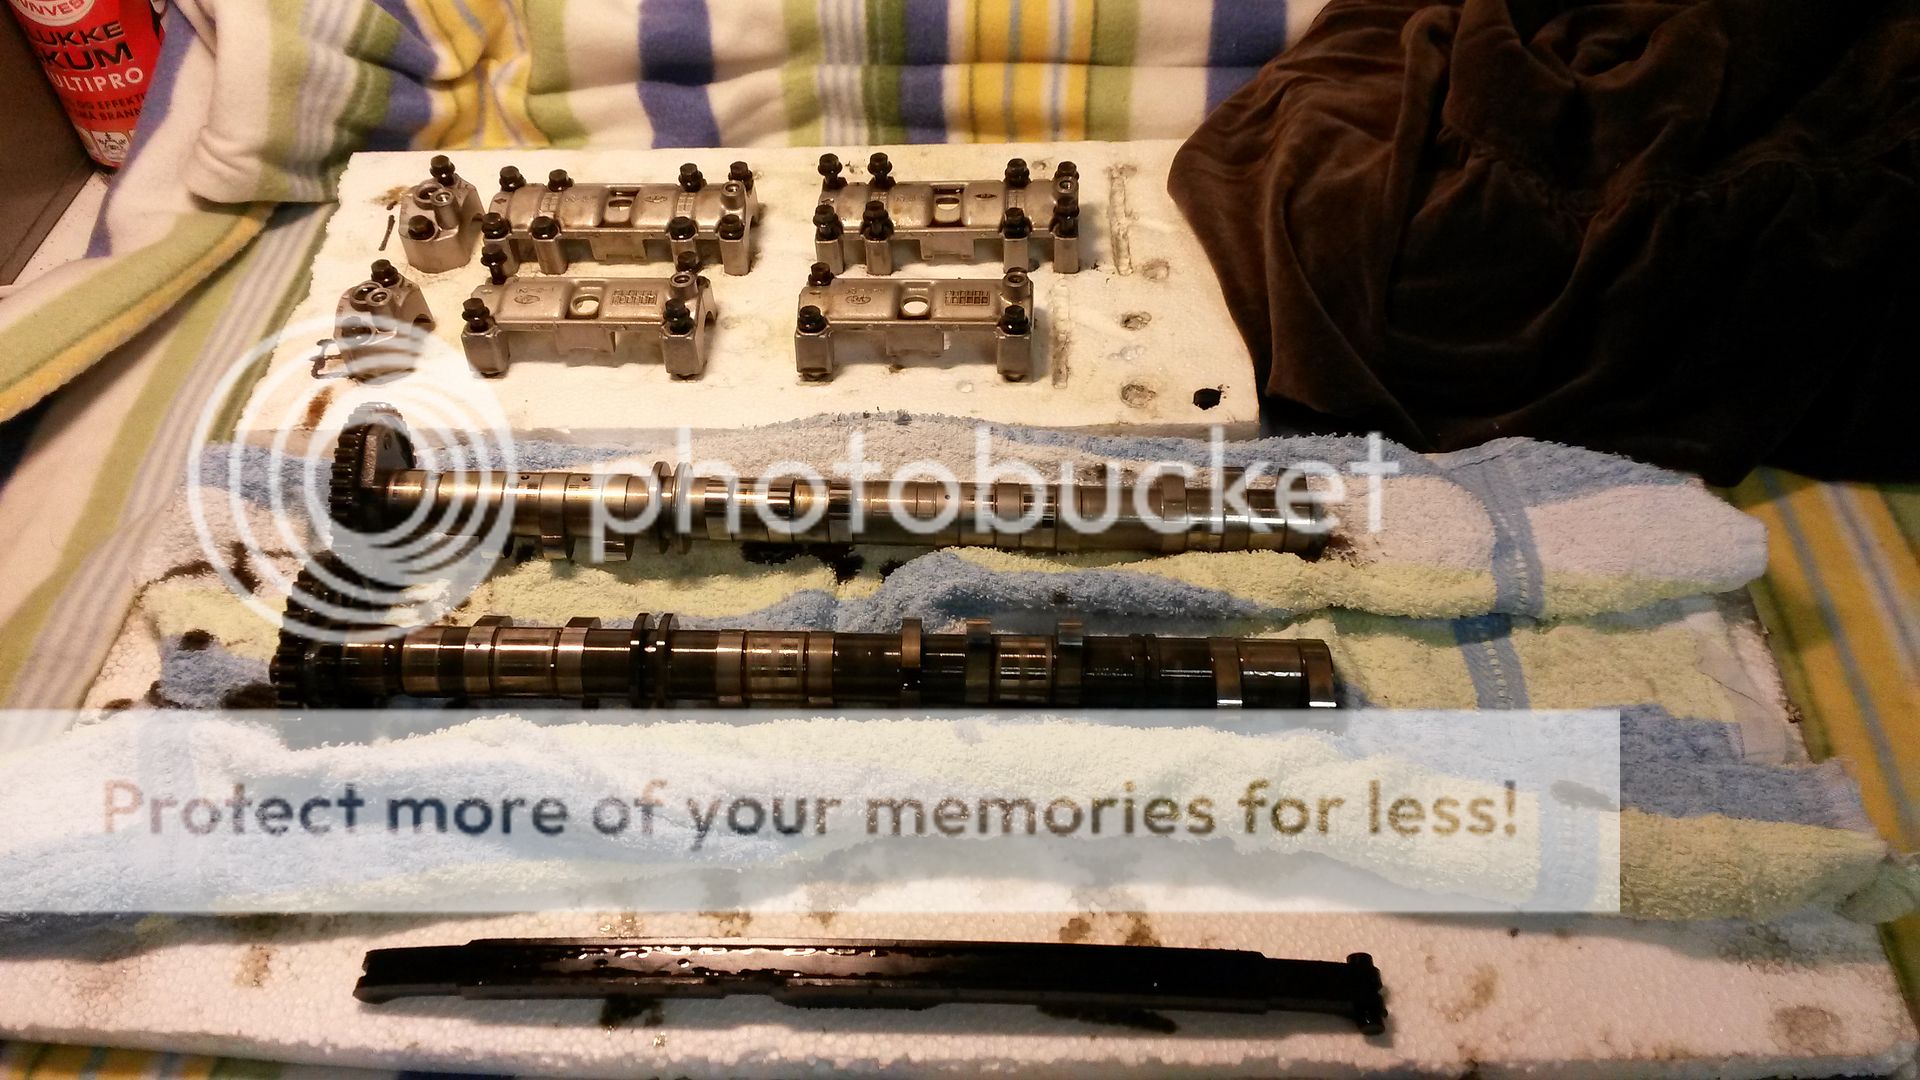
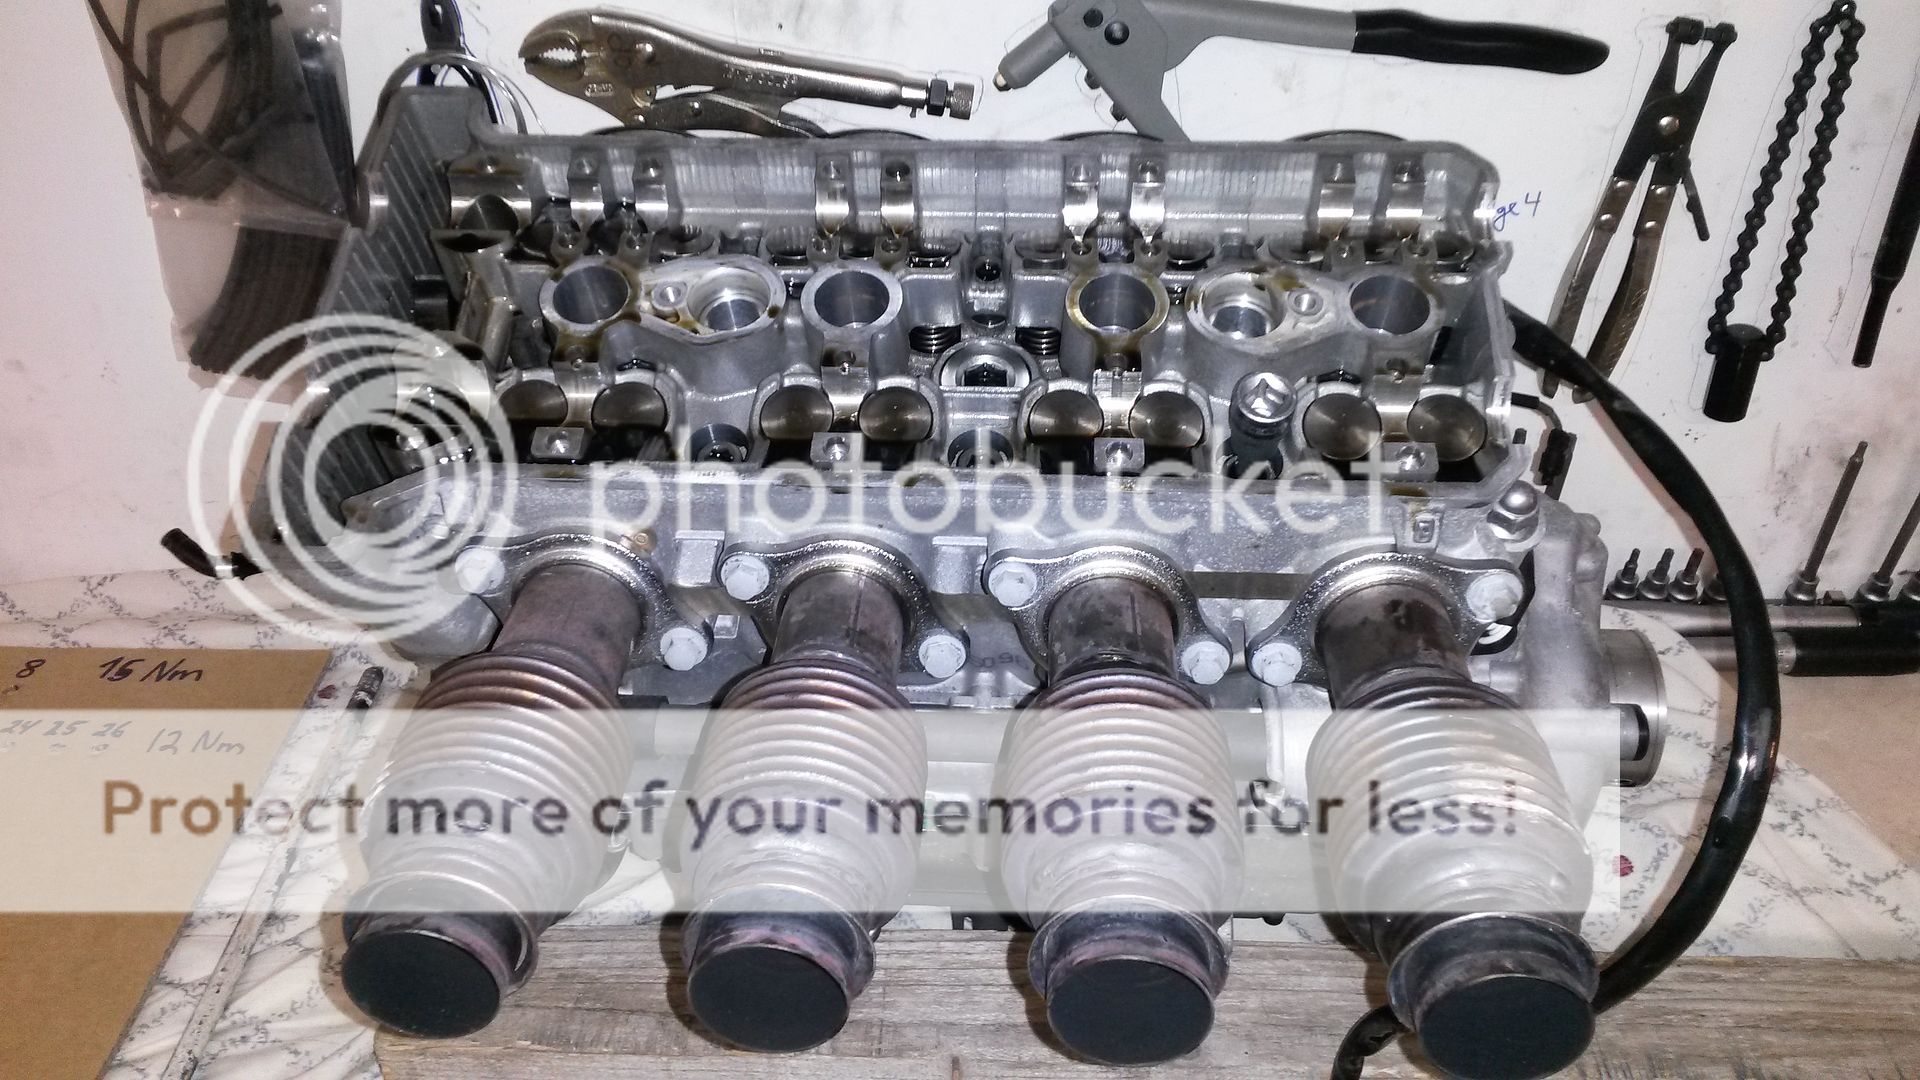
Head off.
Headgasket removed.
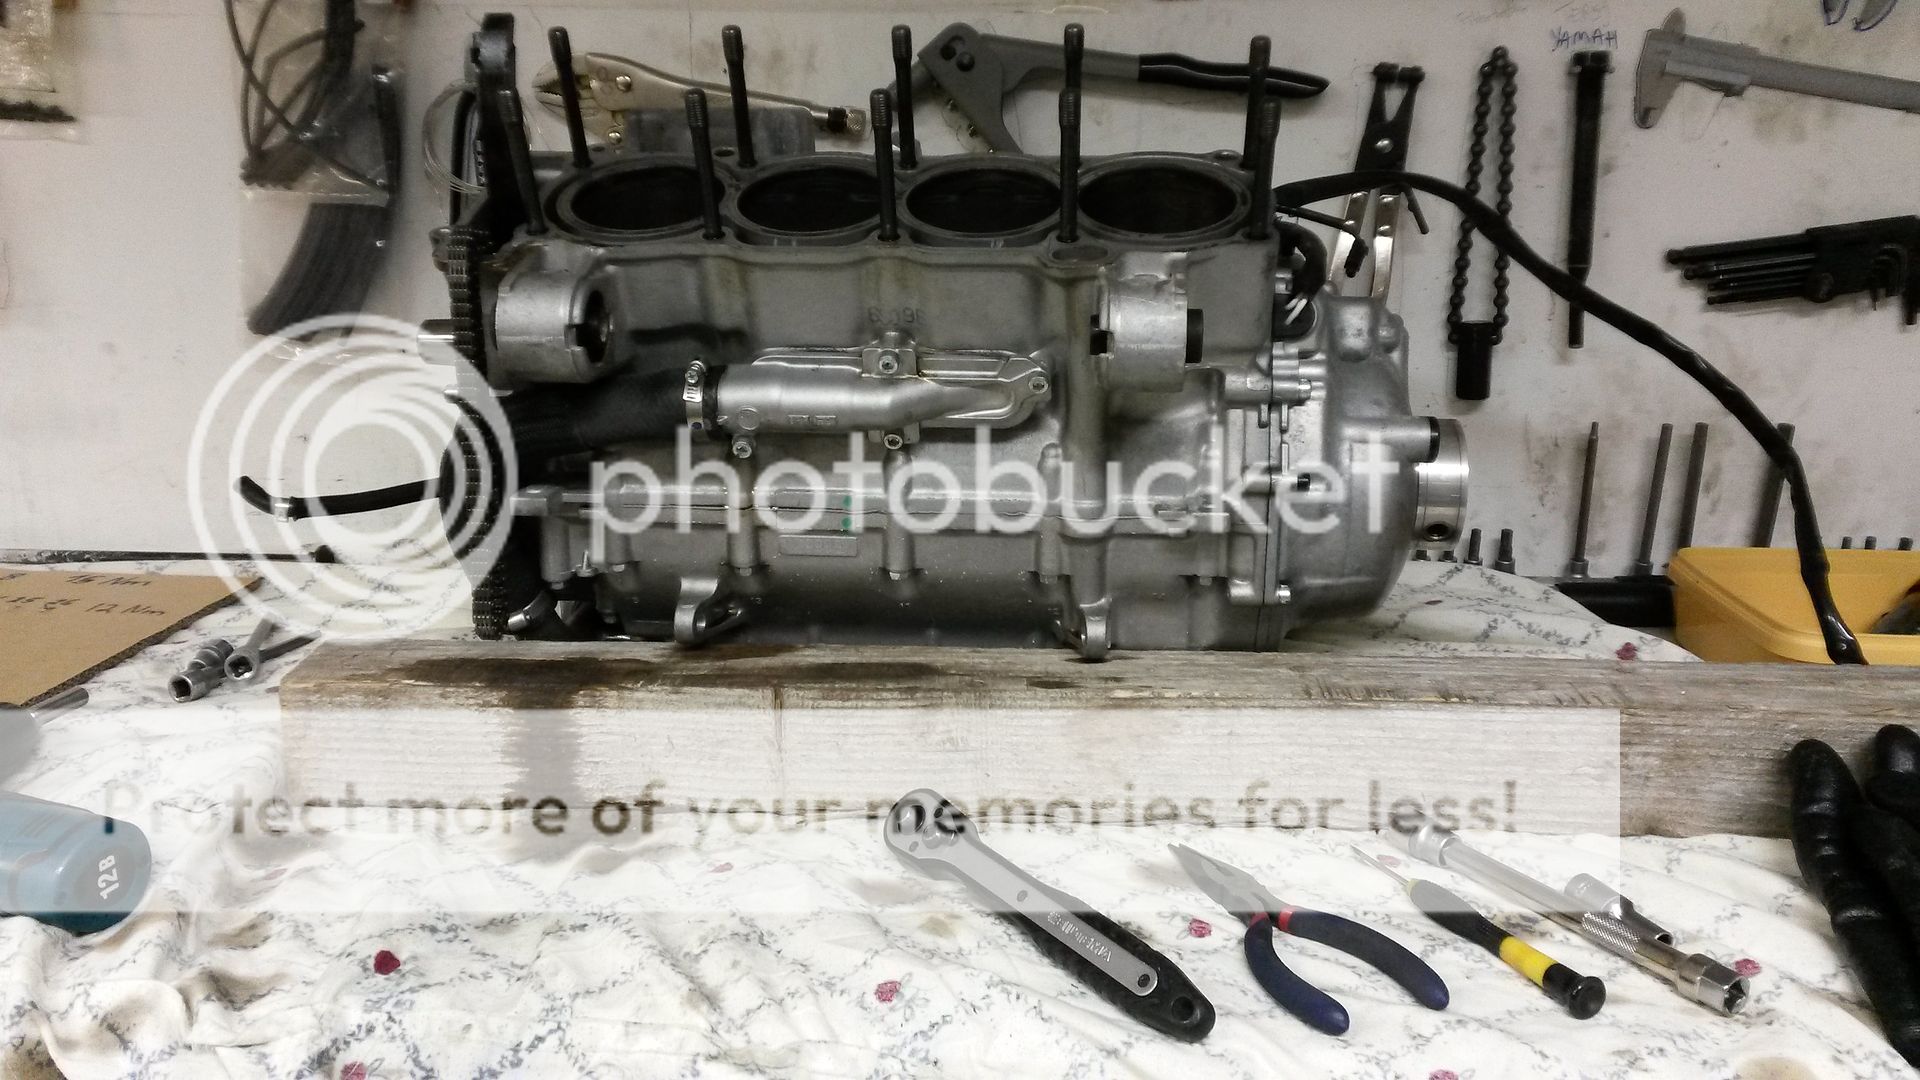
Block ready to be torn apart.
Removing stock head pin bolts. I'm using two of the ARP head nuts against each other to loosen the pin bolts from the block.
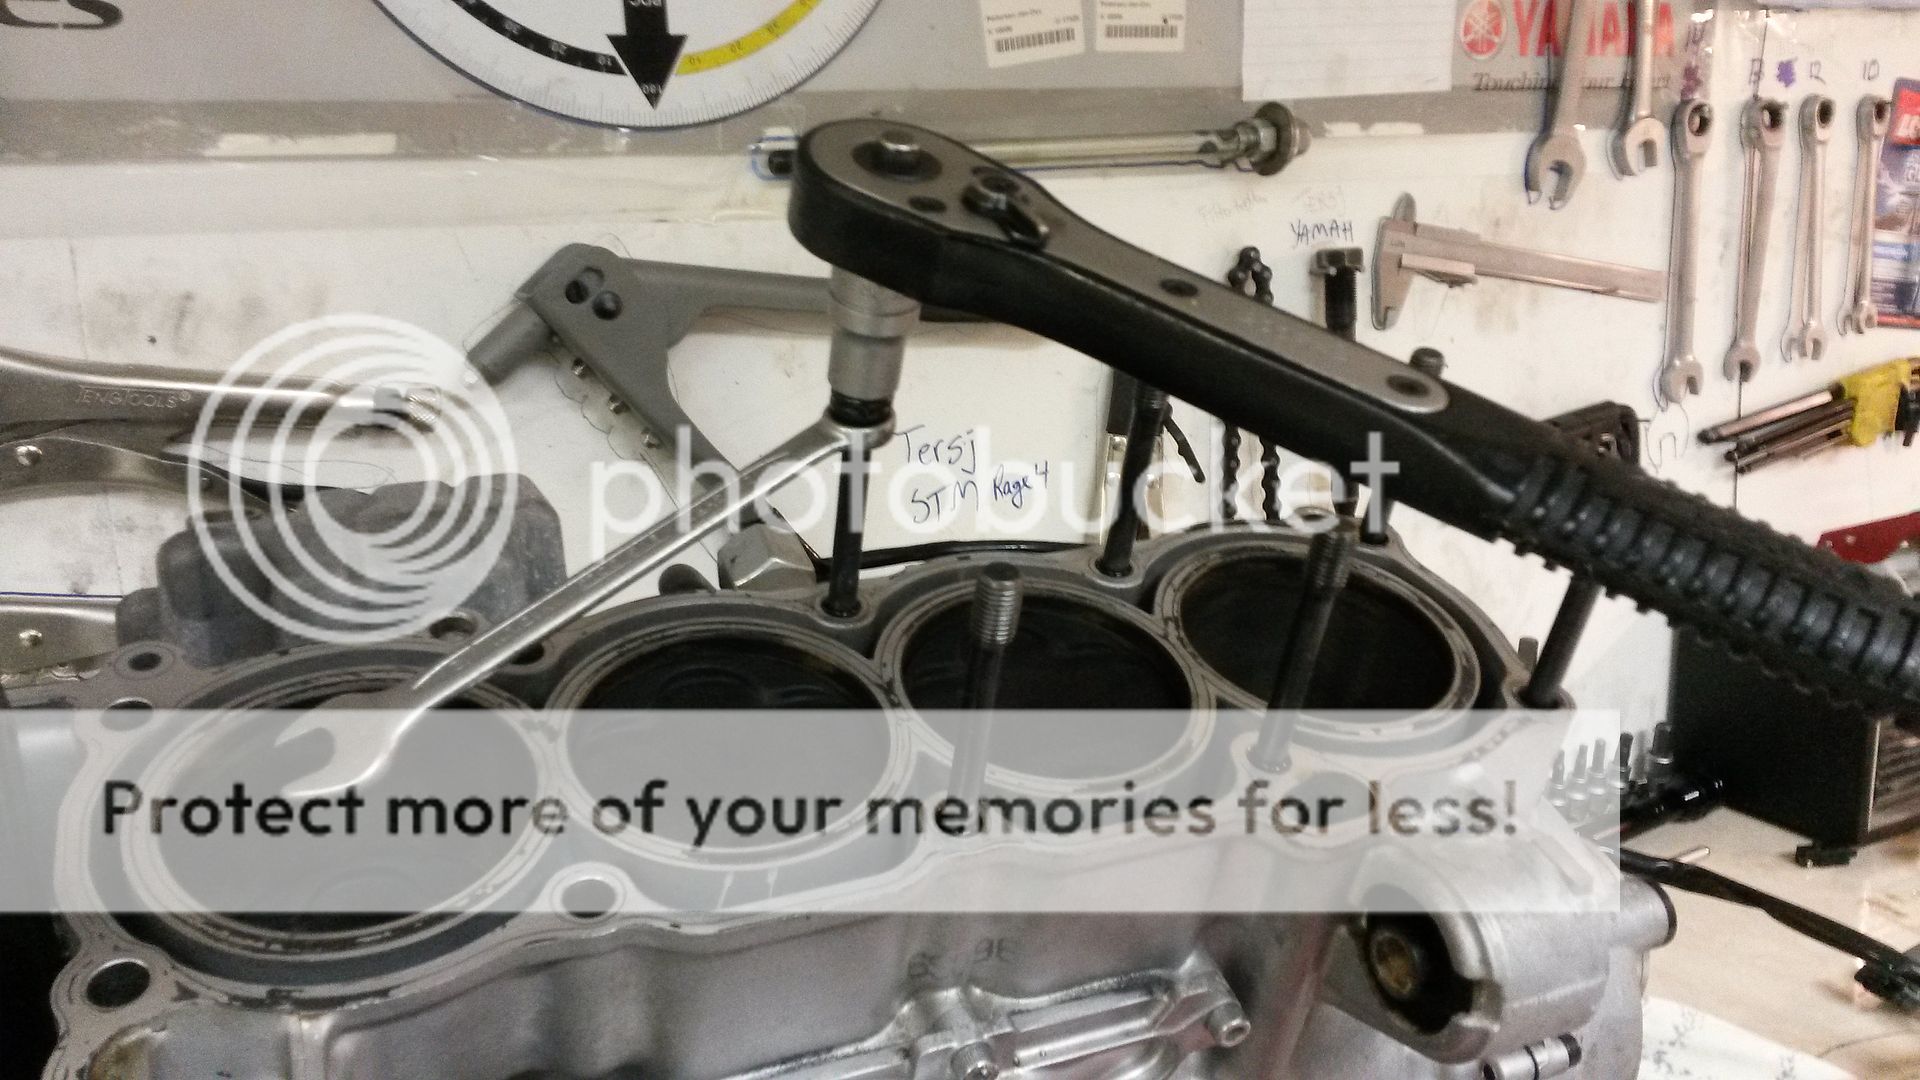

Stock vs ARP 10 mm. head bolts.
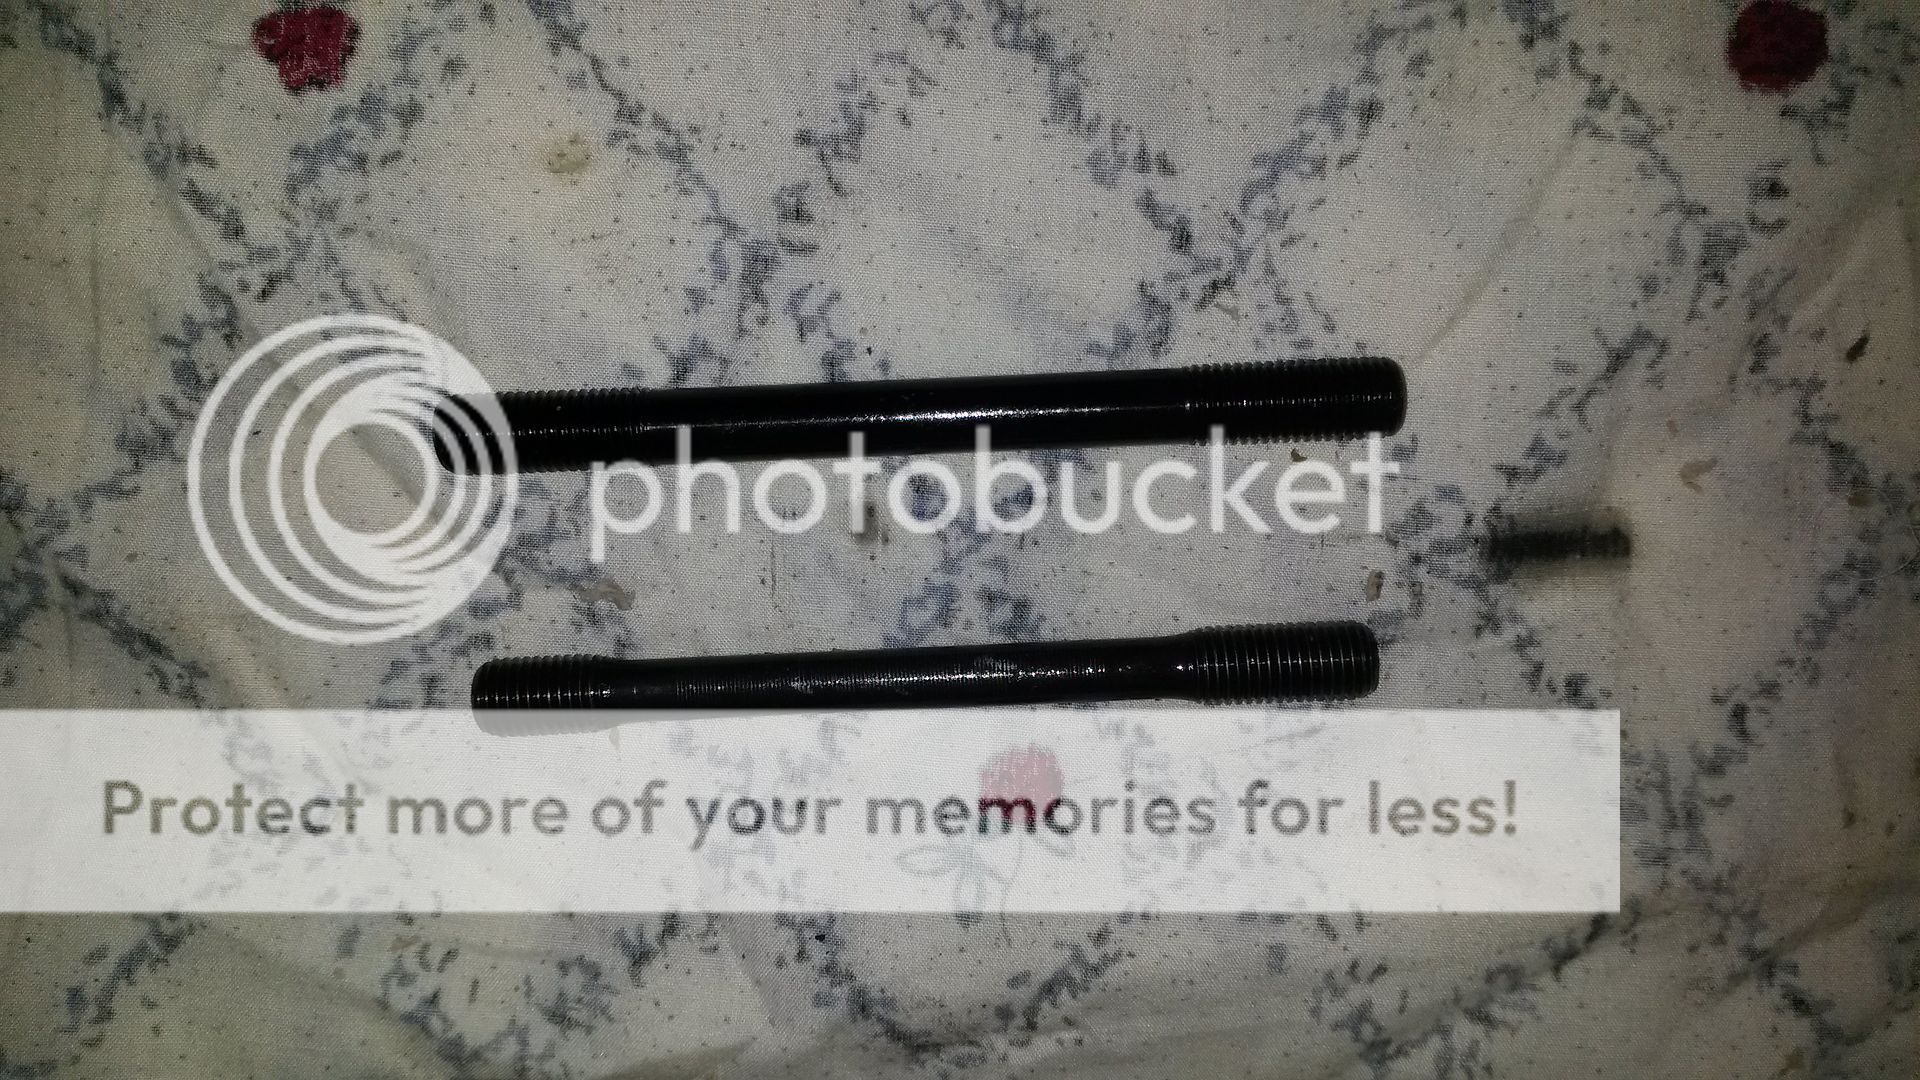
ARP head studs vs stock. Remeber to use the ARP washers when running ARP studs.
You will have to use both the ARP and stock washers stacked upon each other or else the nuts will bottom out without clamping down the head. Install the ARP washers first then the stock ones on top.
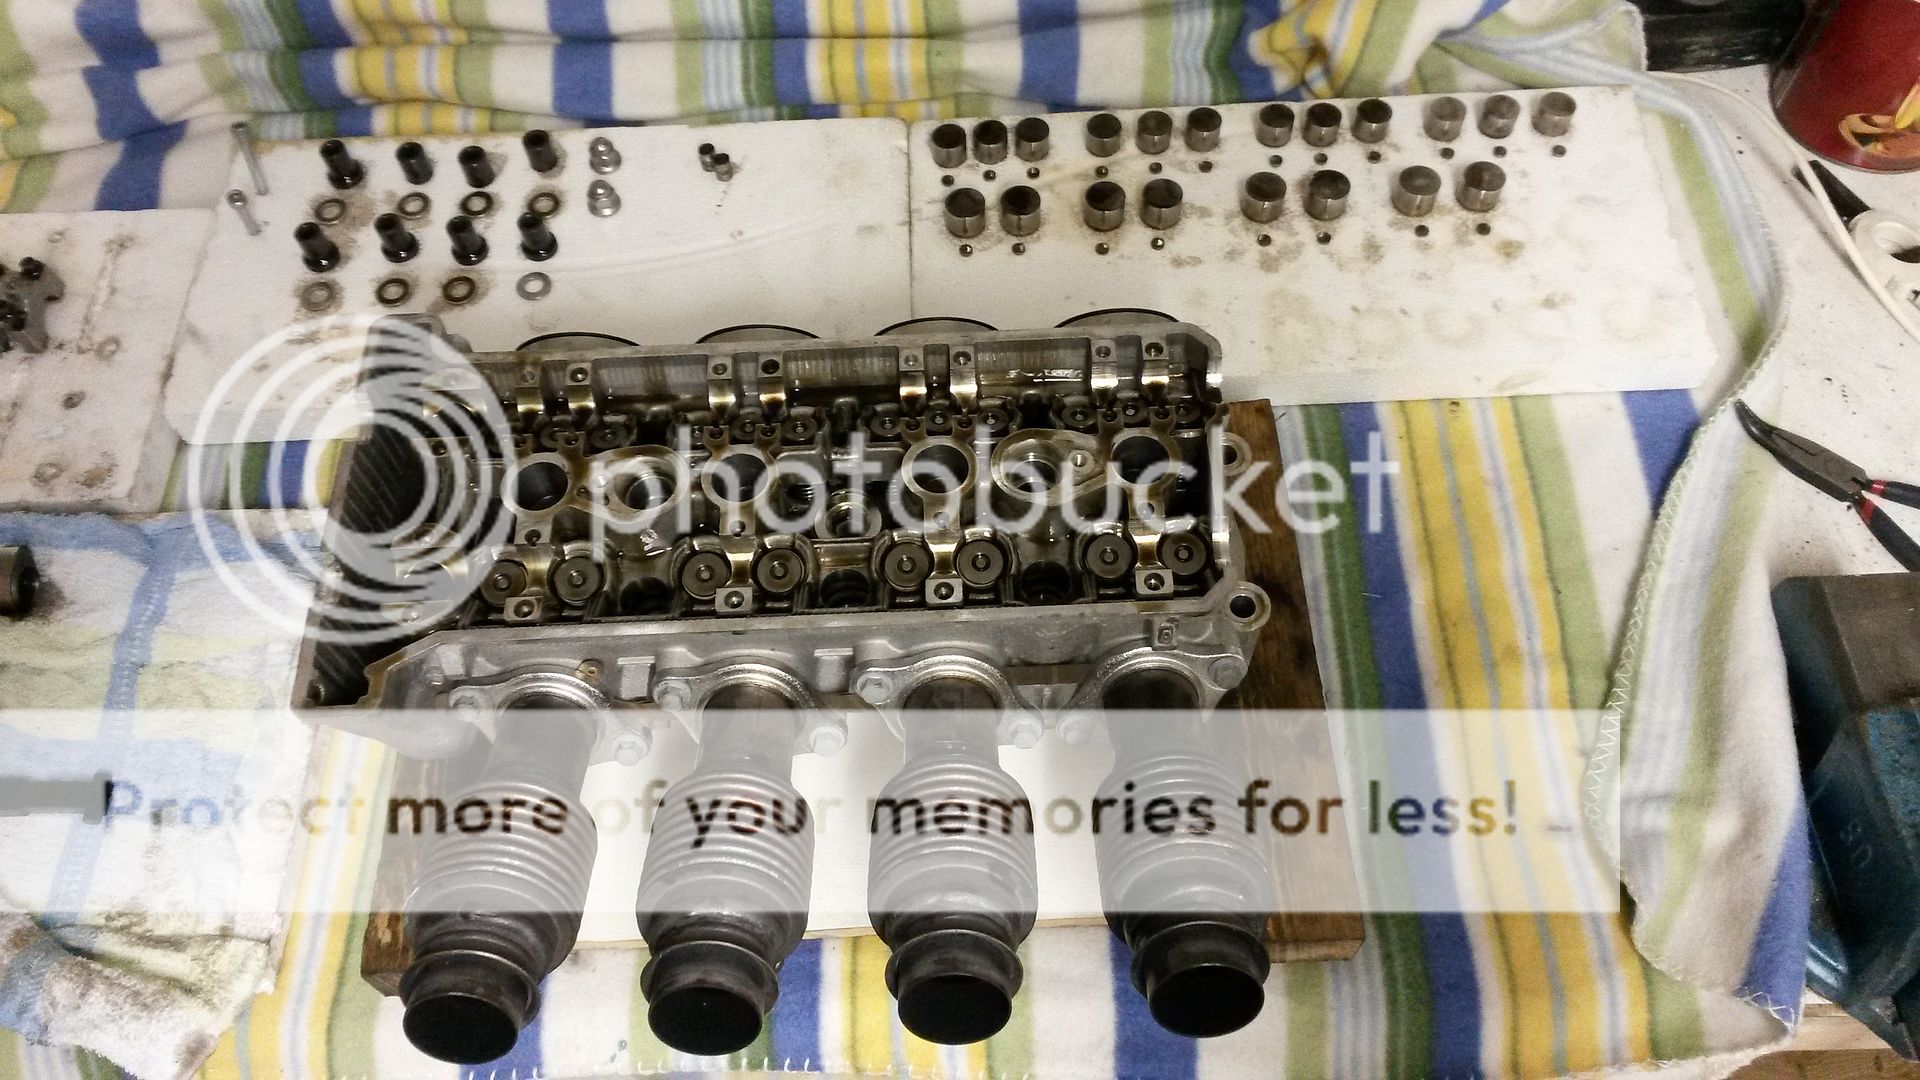
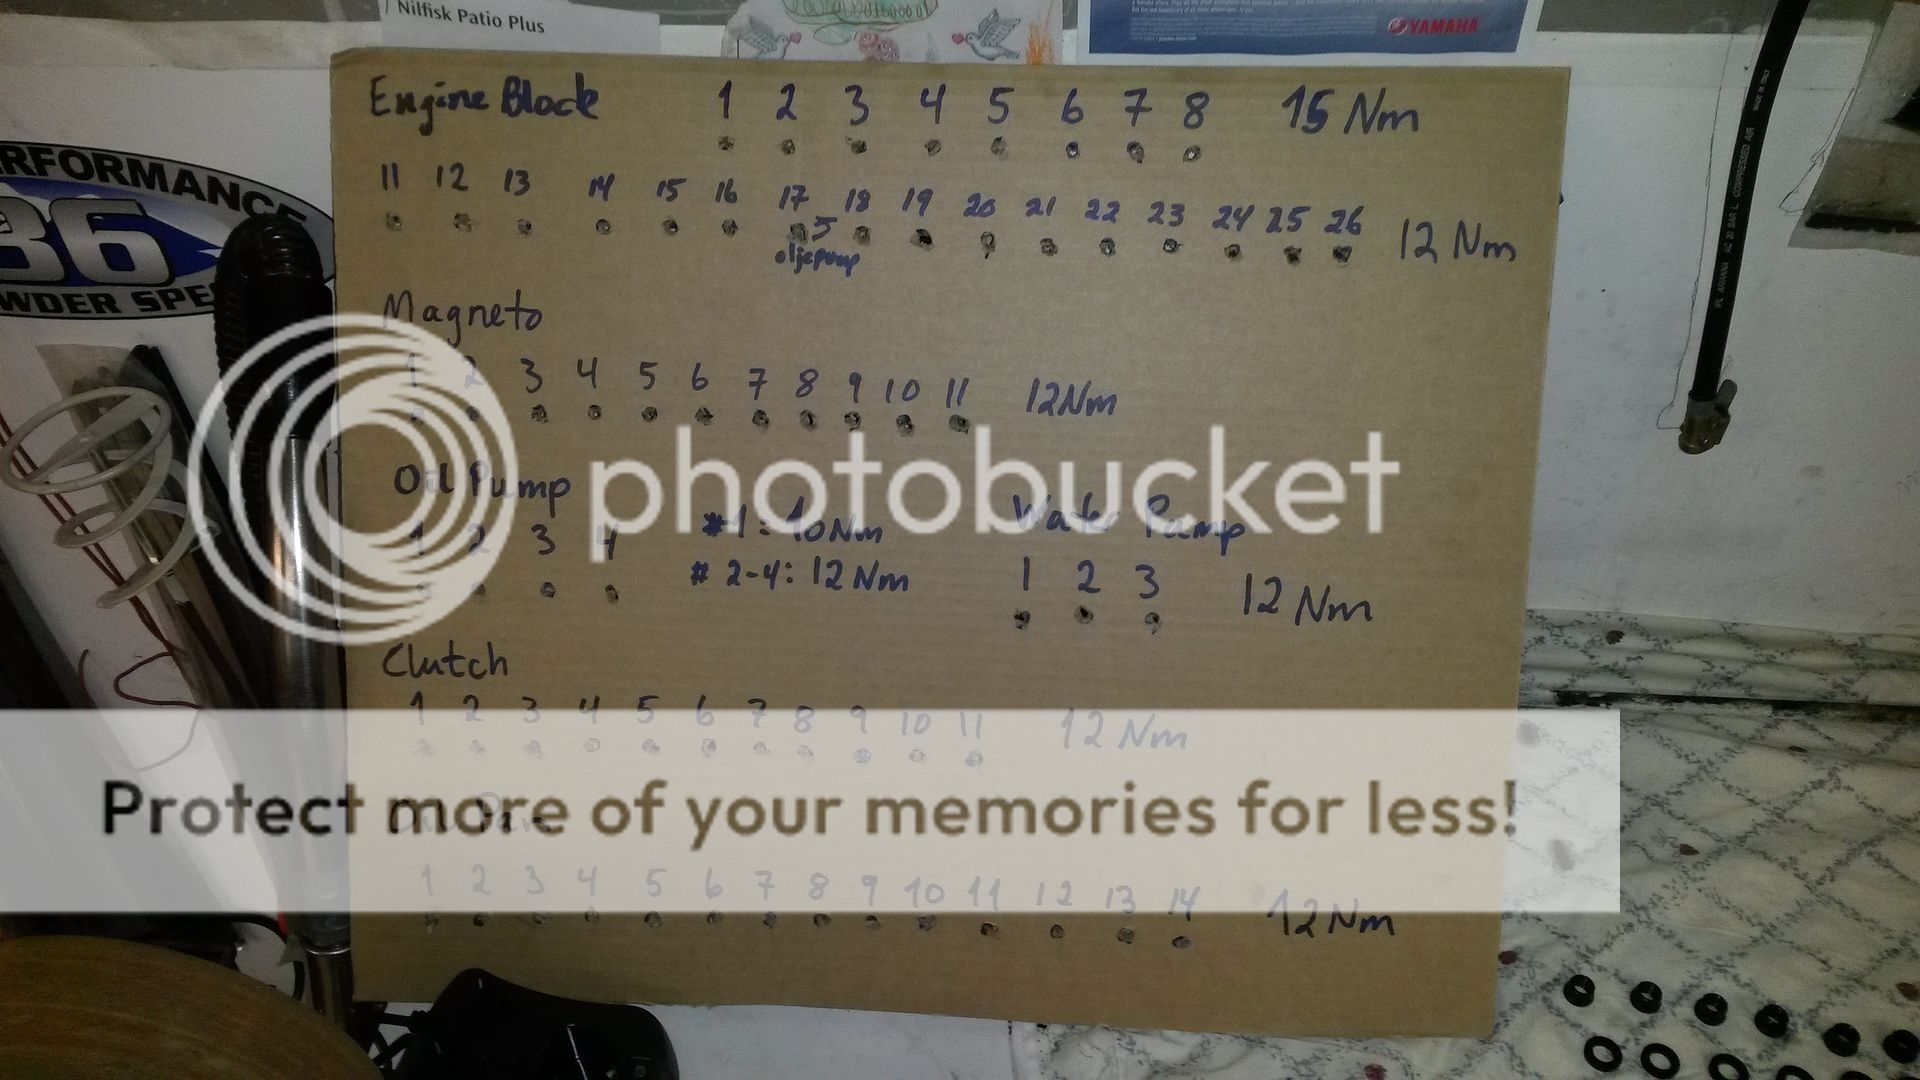
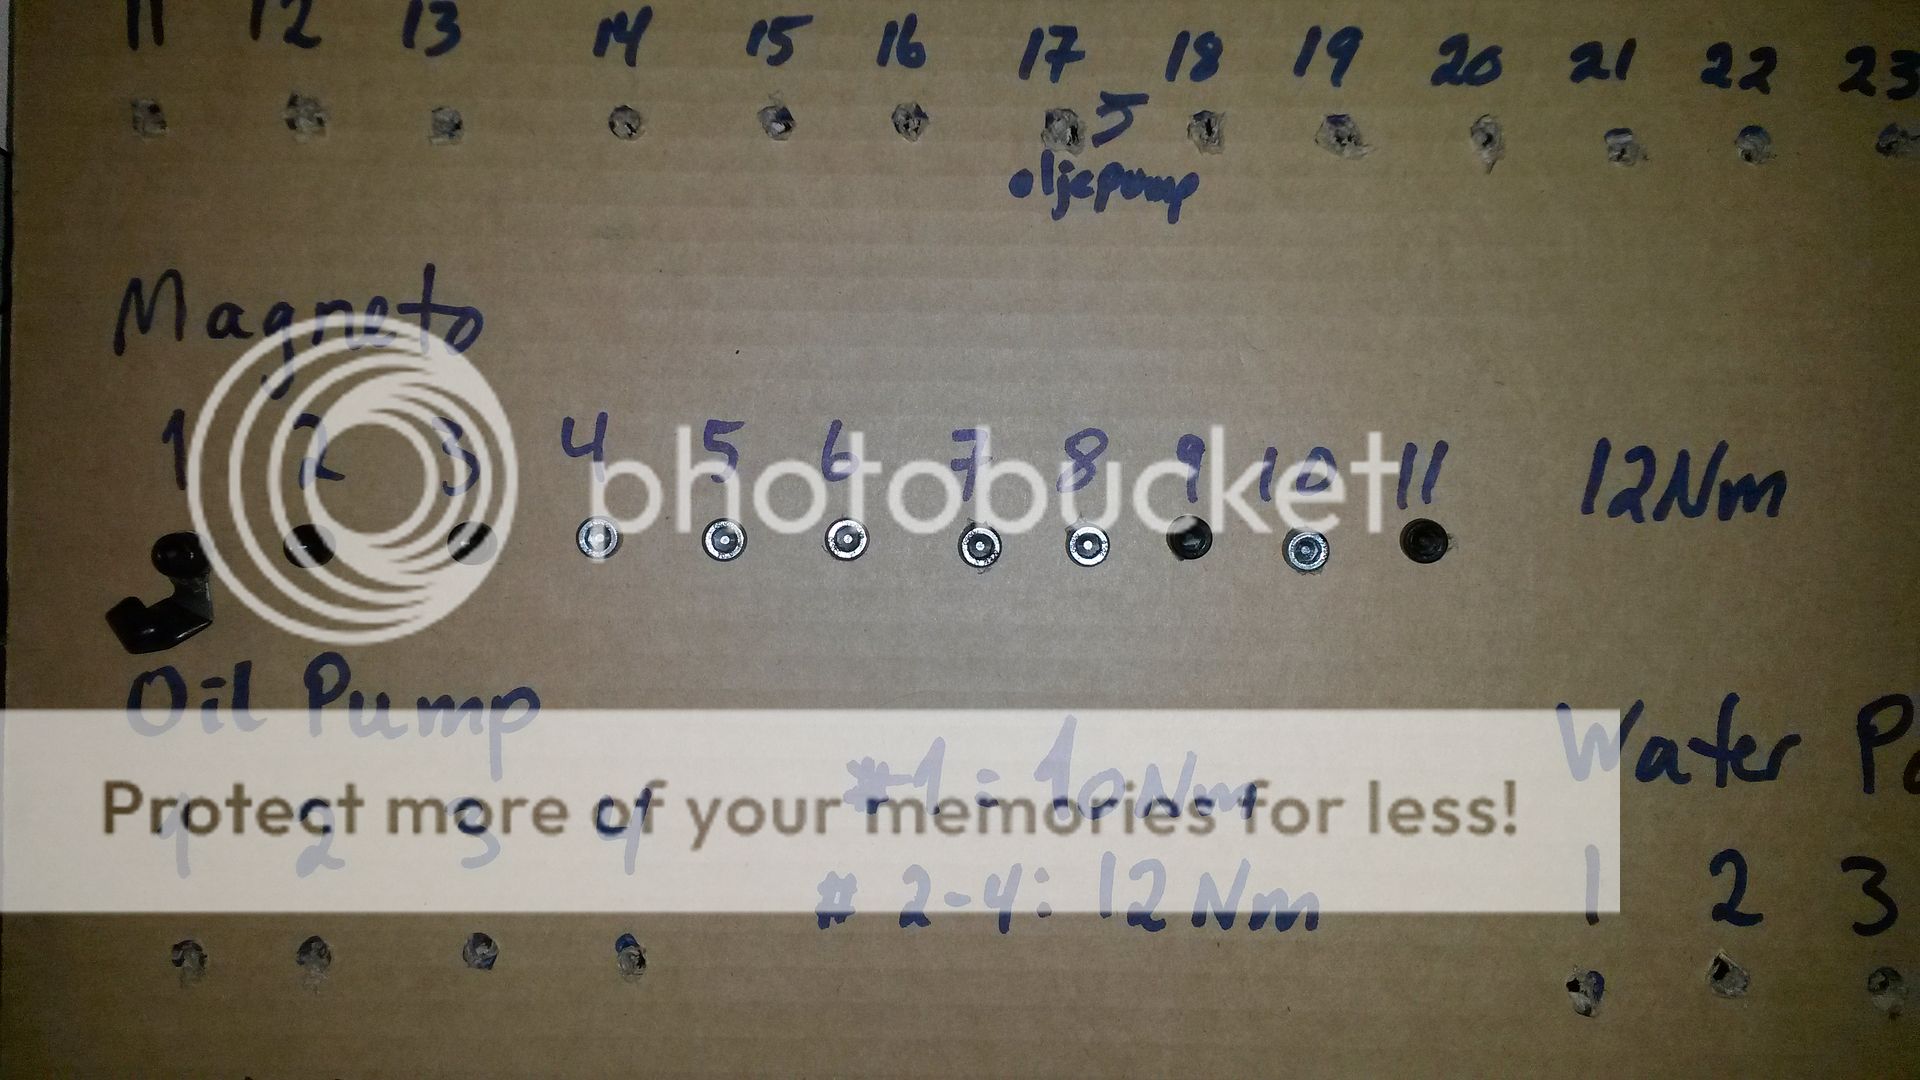
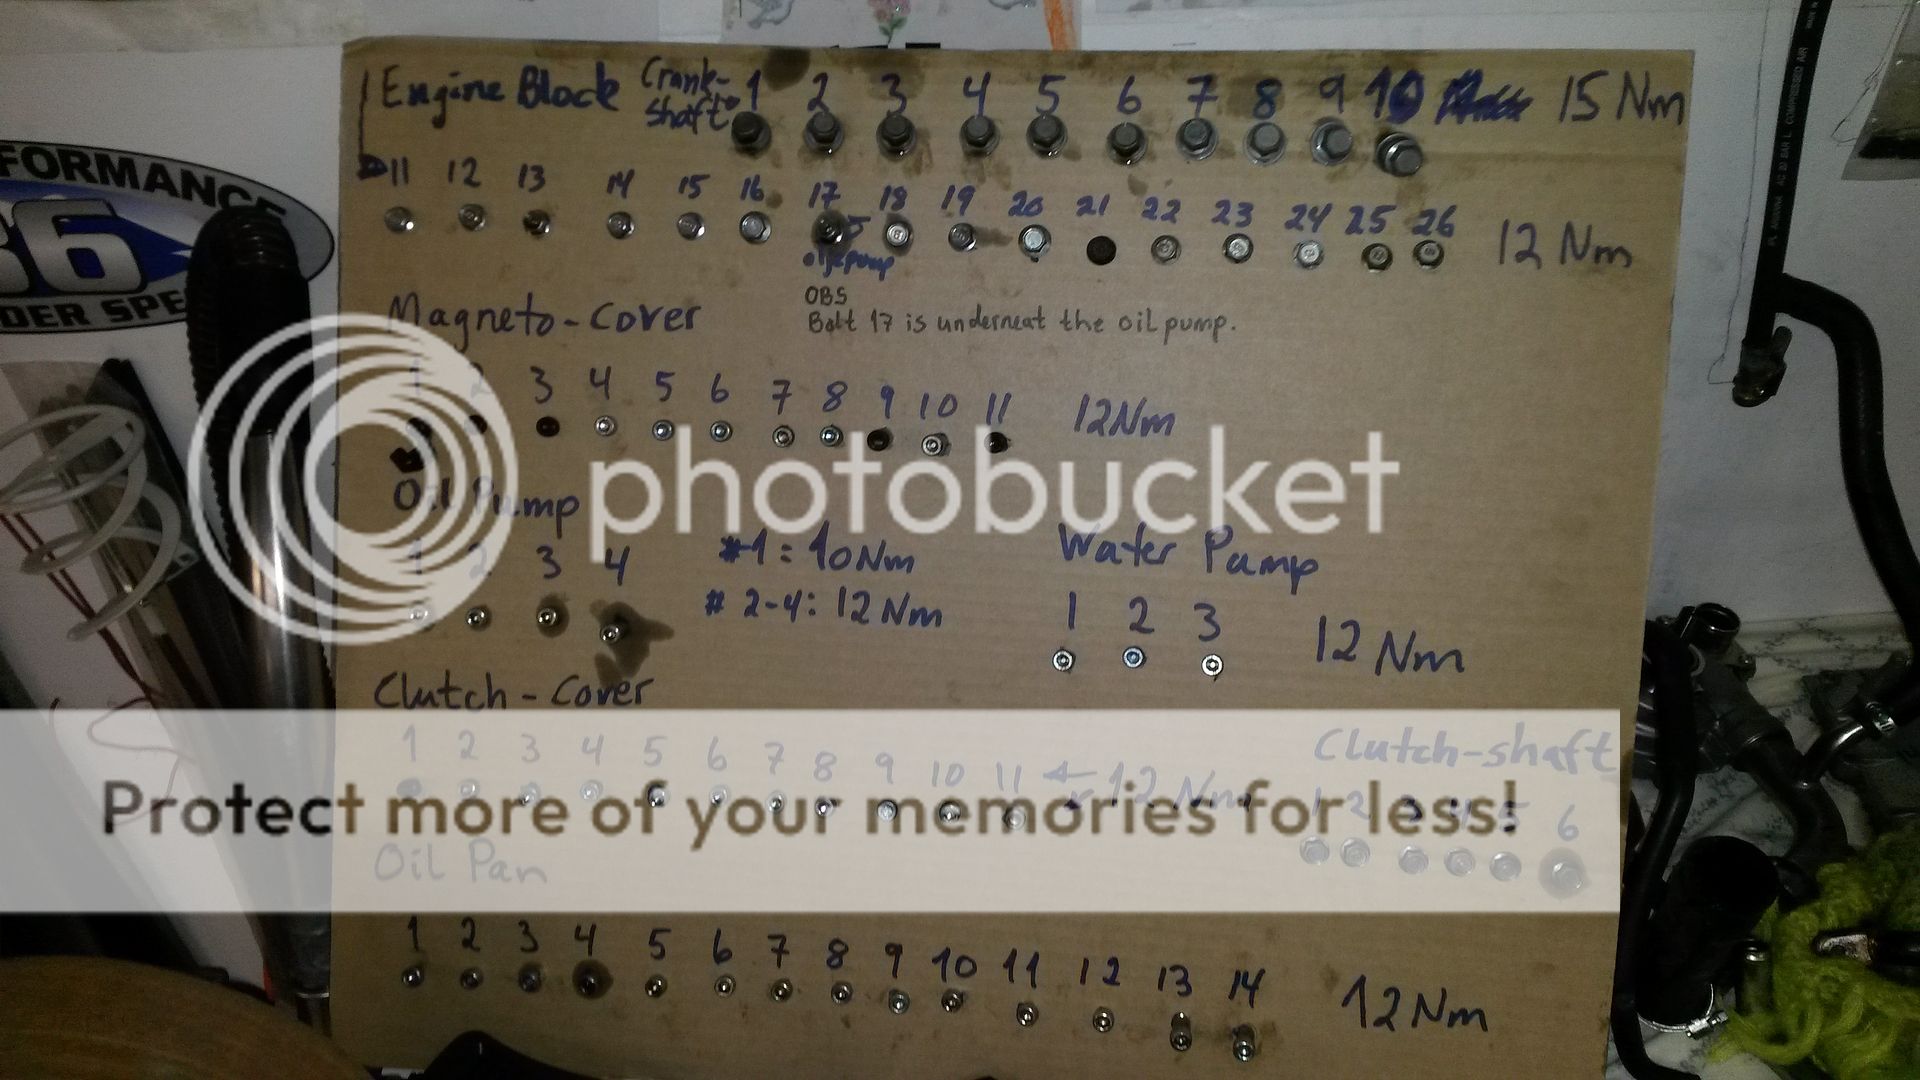
I have made this cardboard plate to collect all bolts coming off the engine to make it easier on the install. I have also put down the torque of all bolts to save me time and make sure everything is torqued down correctly on assembly. (OBS! The plate will be shown later with more information on it, as some of the info here is incorrect)
Engine studs removed.
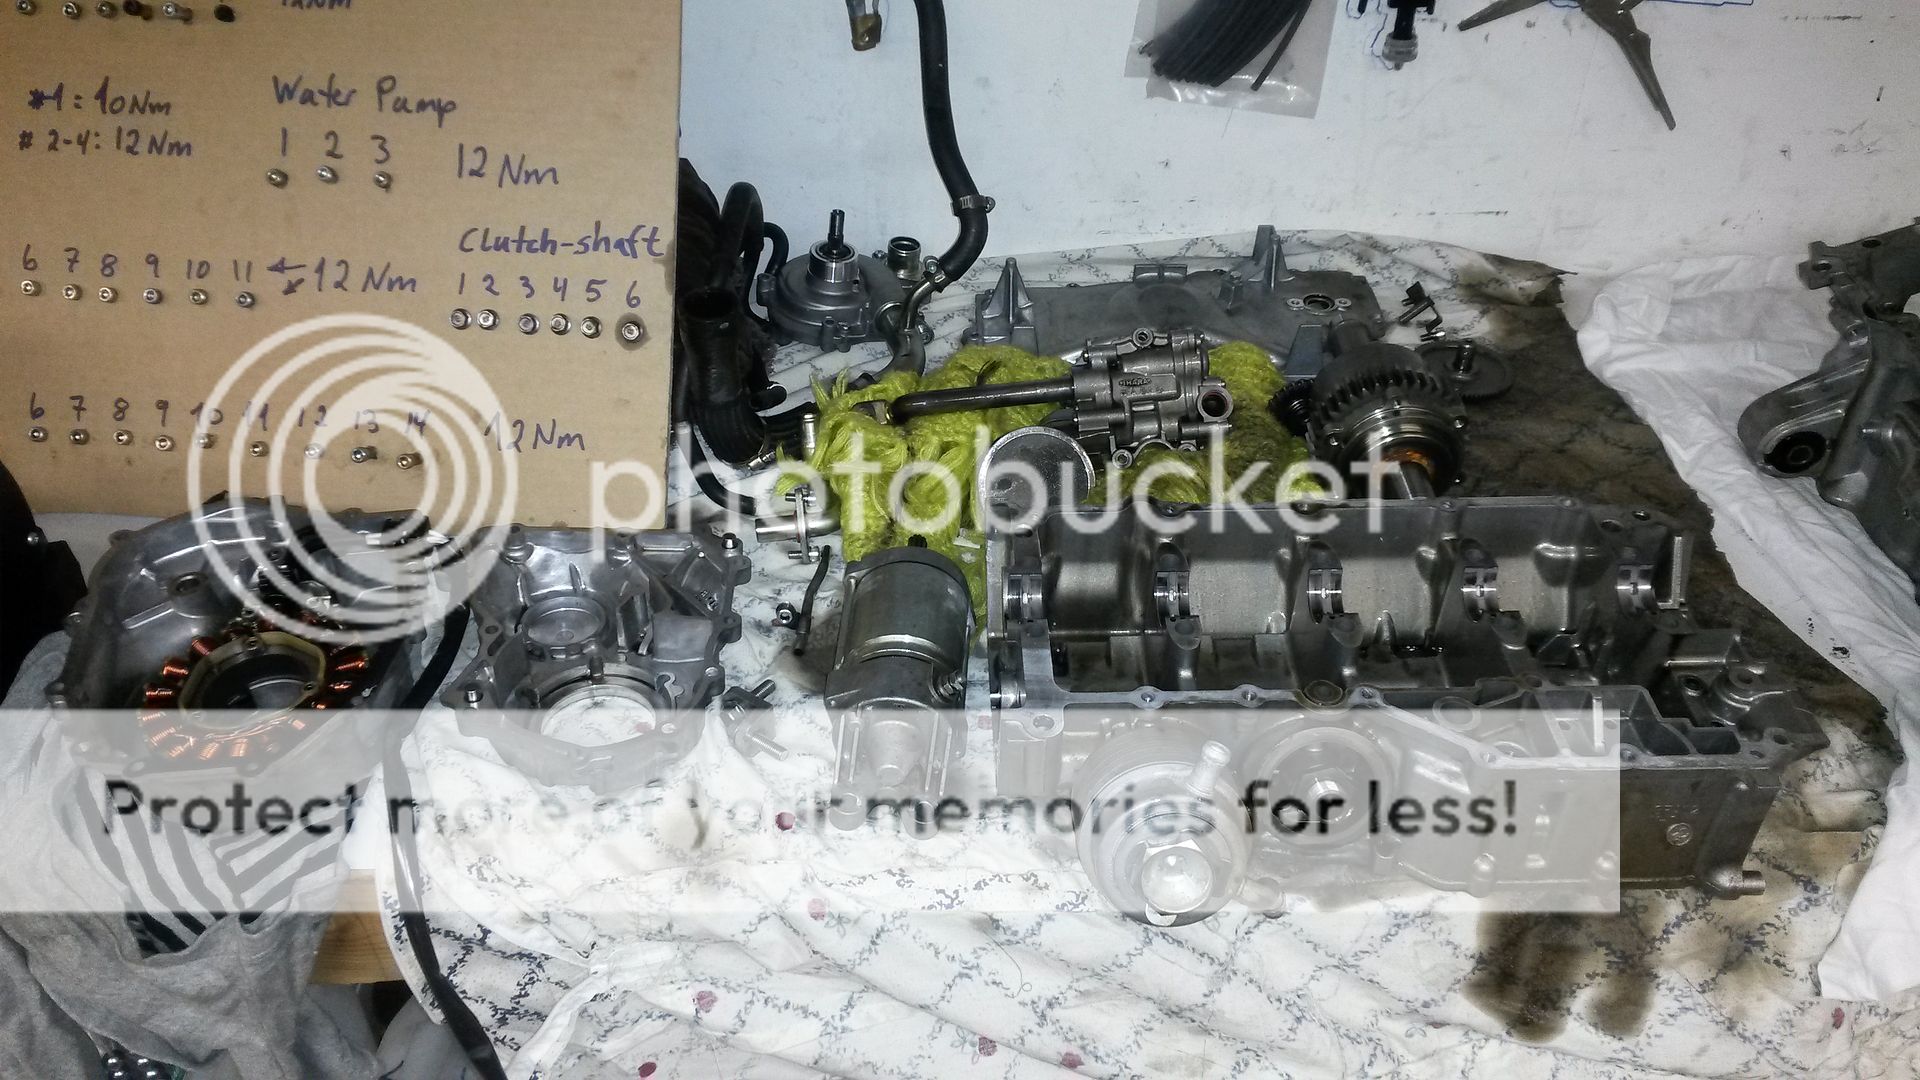
I like to have all engine parts placed on my workbench in an orderly fashion to make the work as easy as possibly and without mixing up parts. All parts need to go in the same way they come out, not mixing up stuff
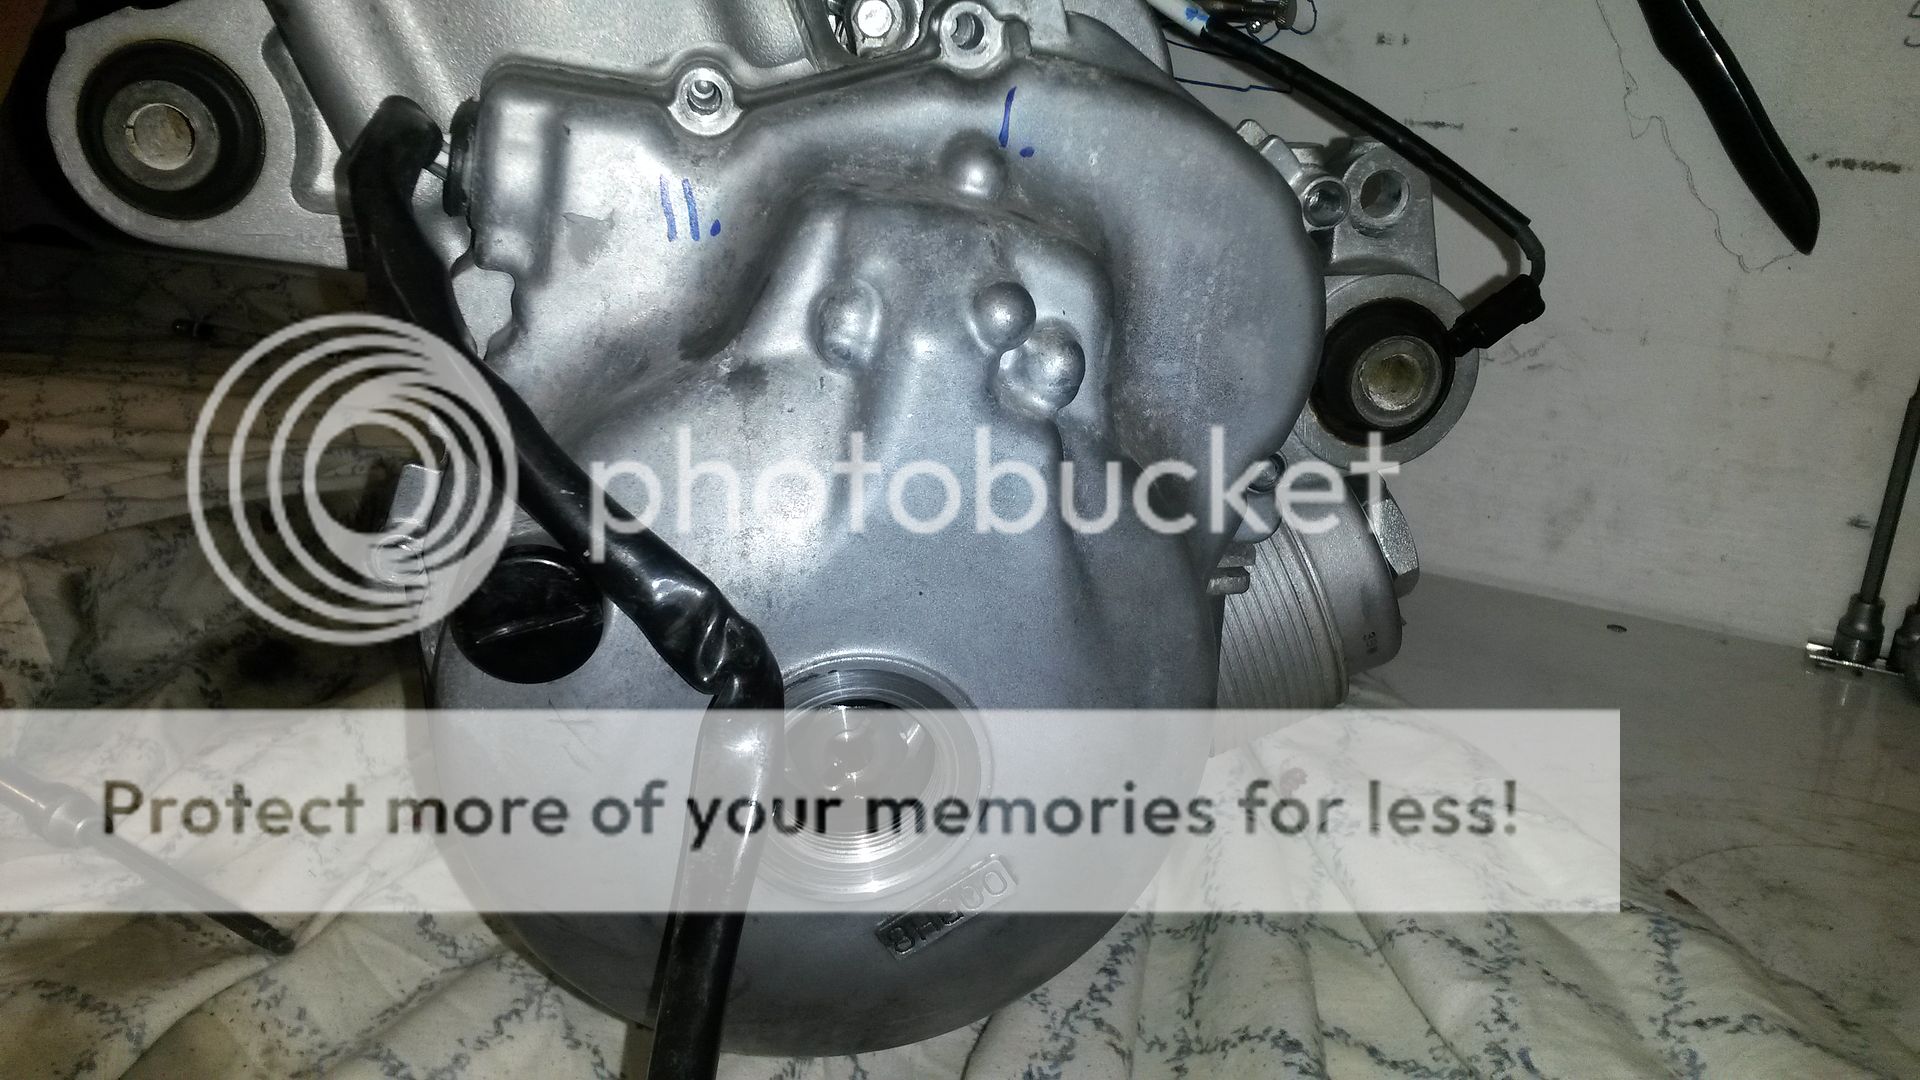
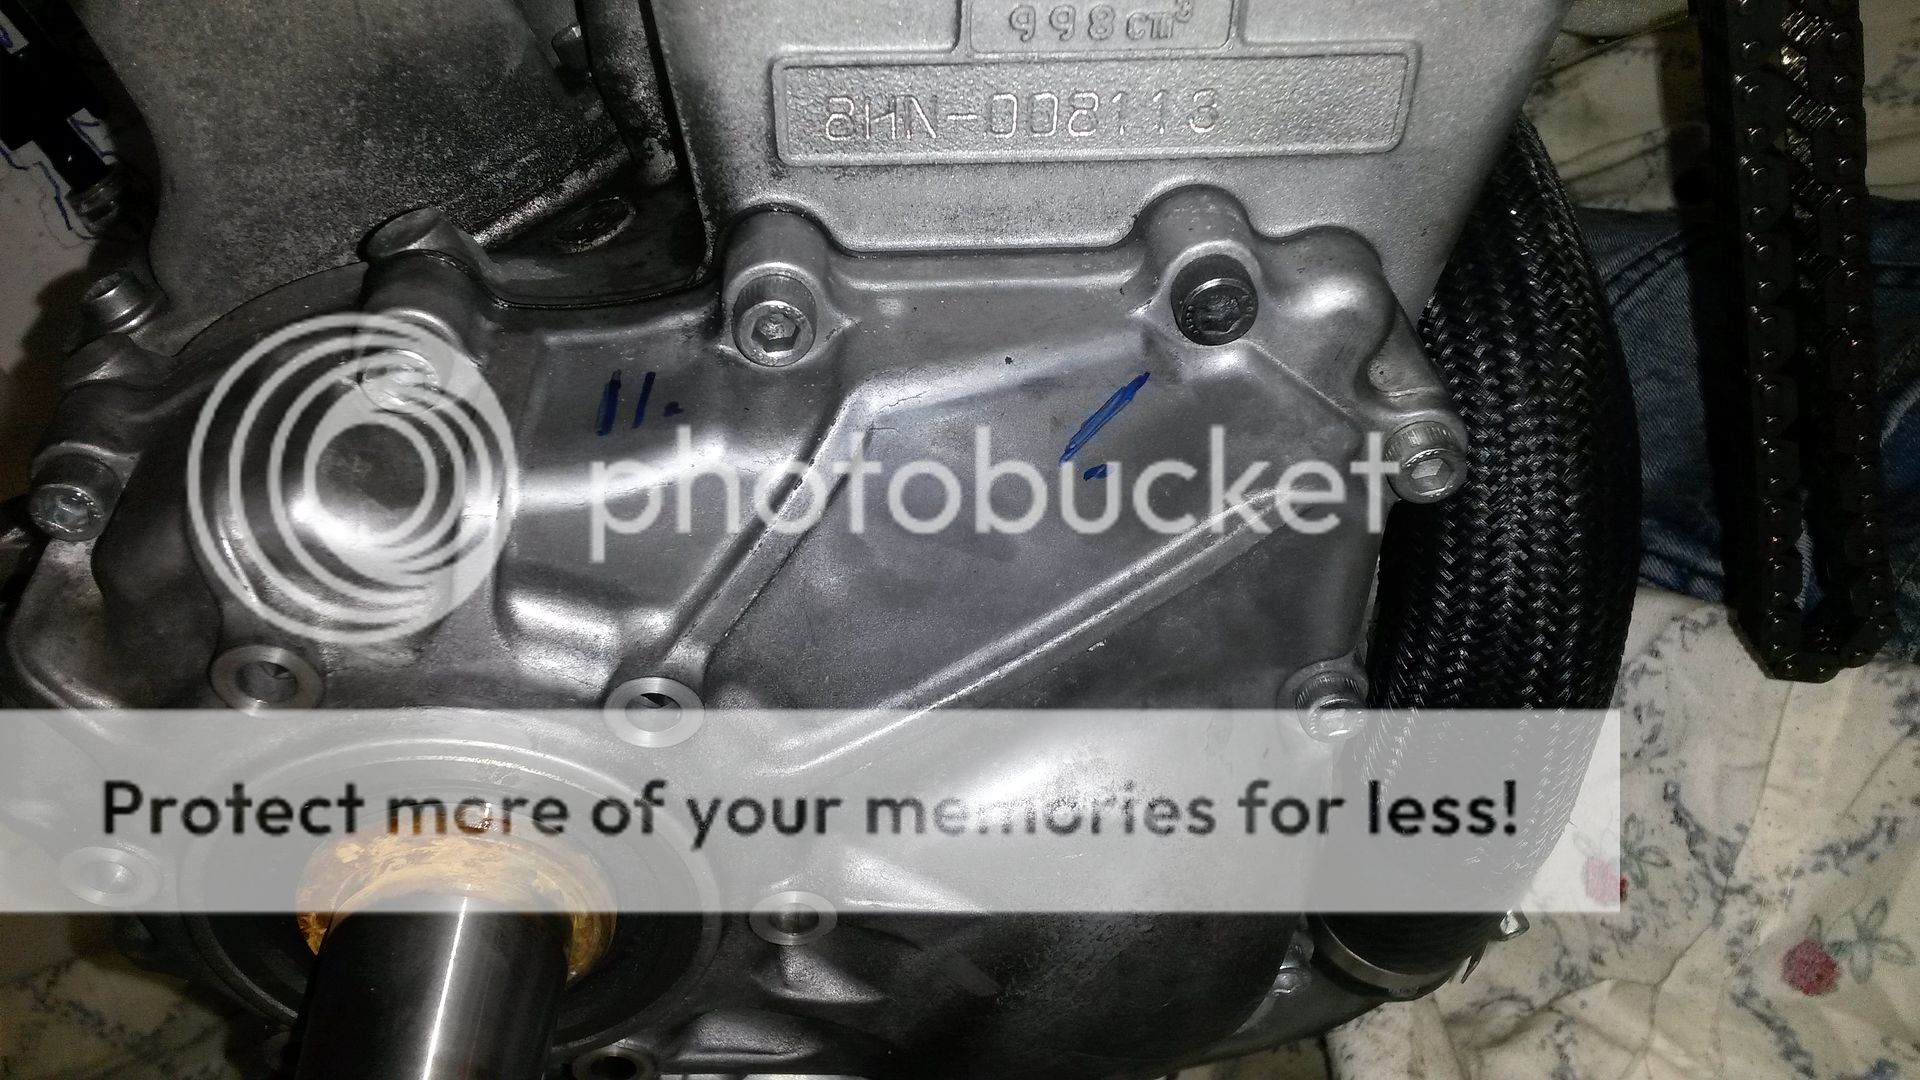
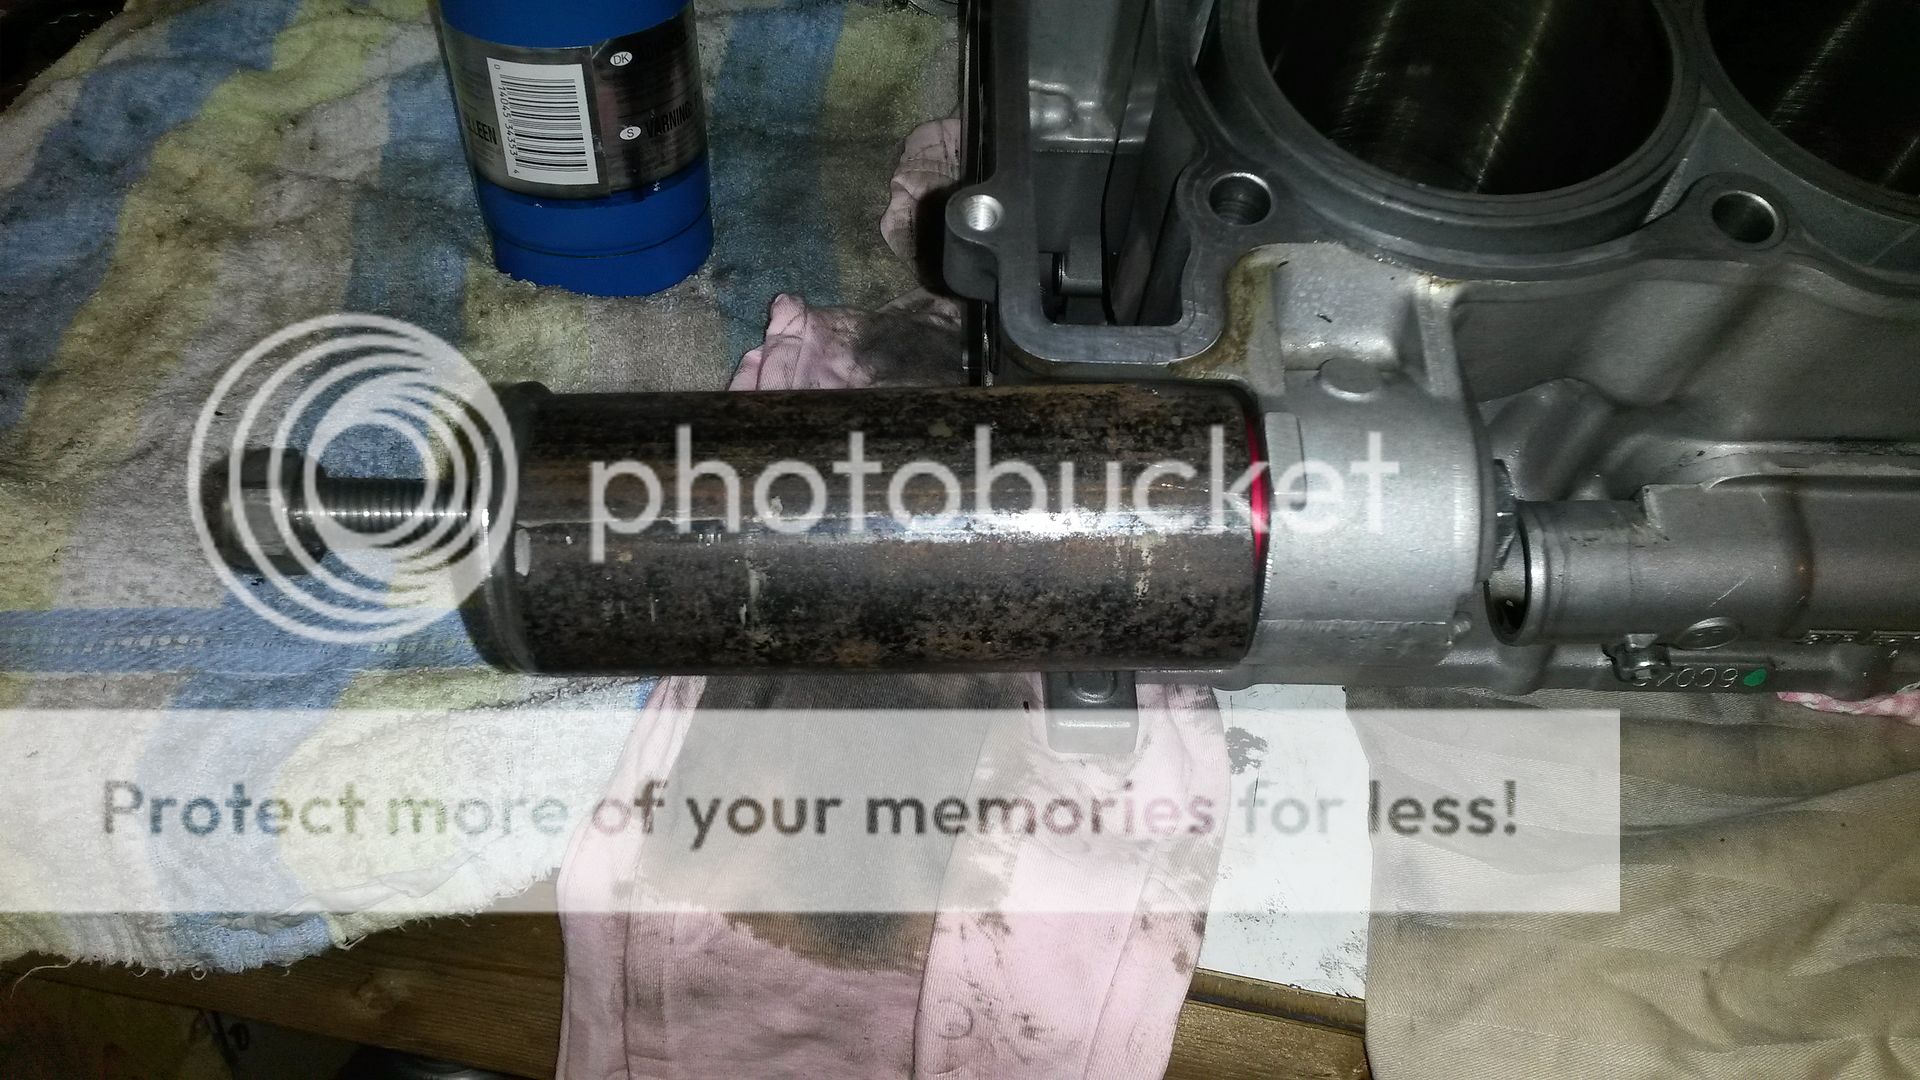
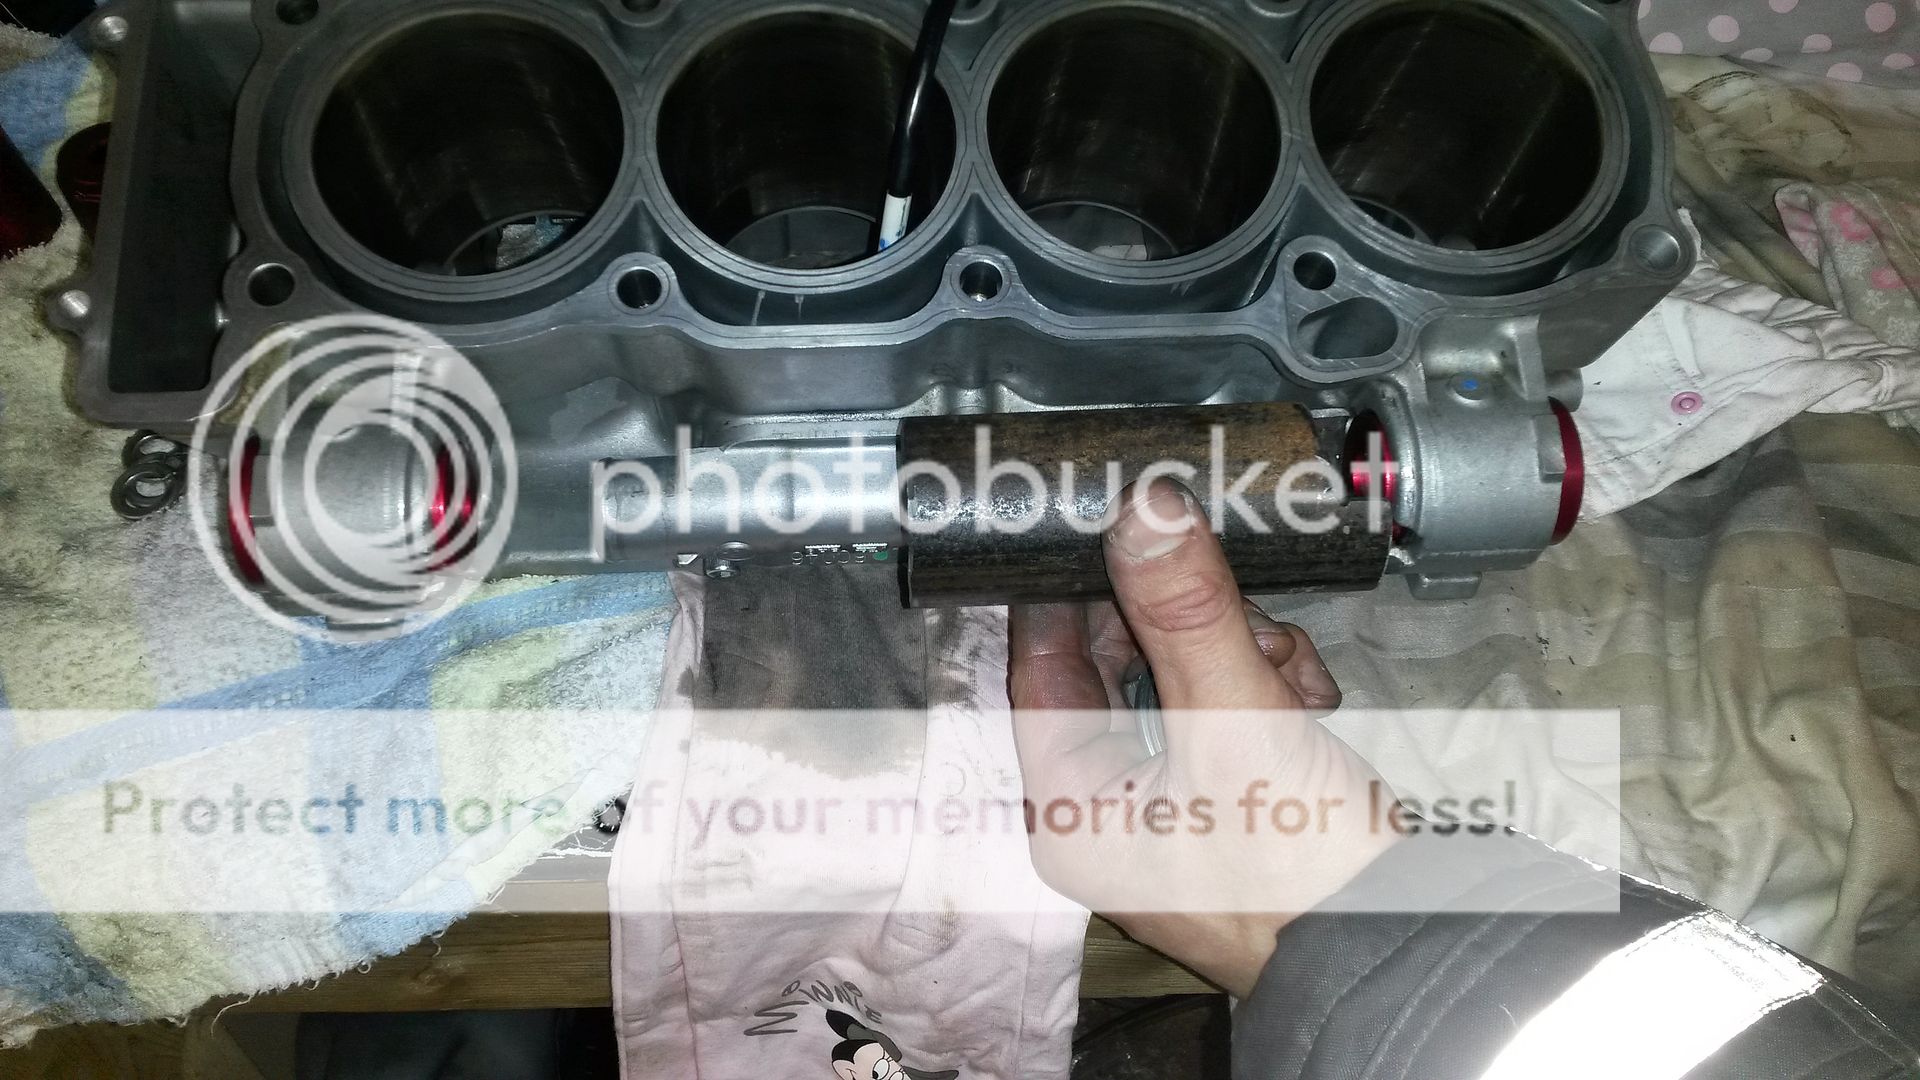
The part number of the magneto cover has touched the MCX oil return pump, stamping the part number onto the oil pump. The oil pump was not seated well as it took little to no effort to remove it.
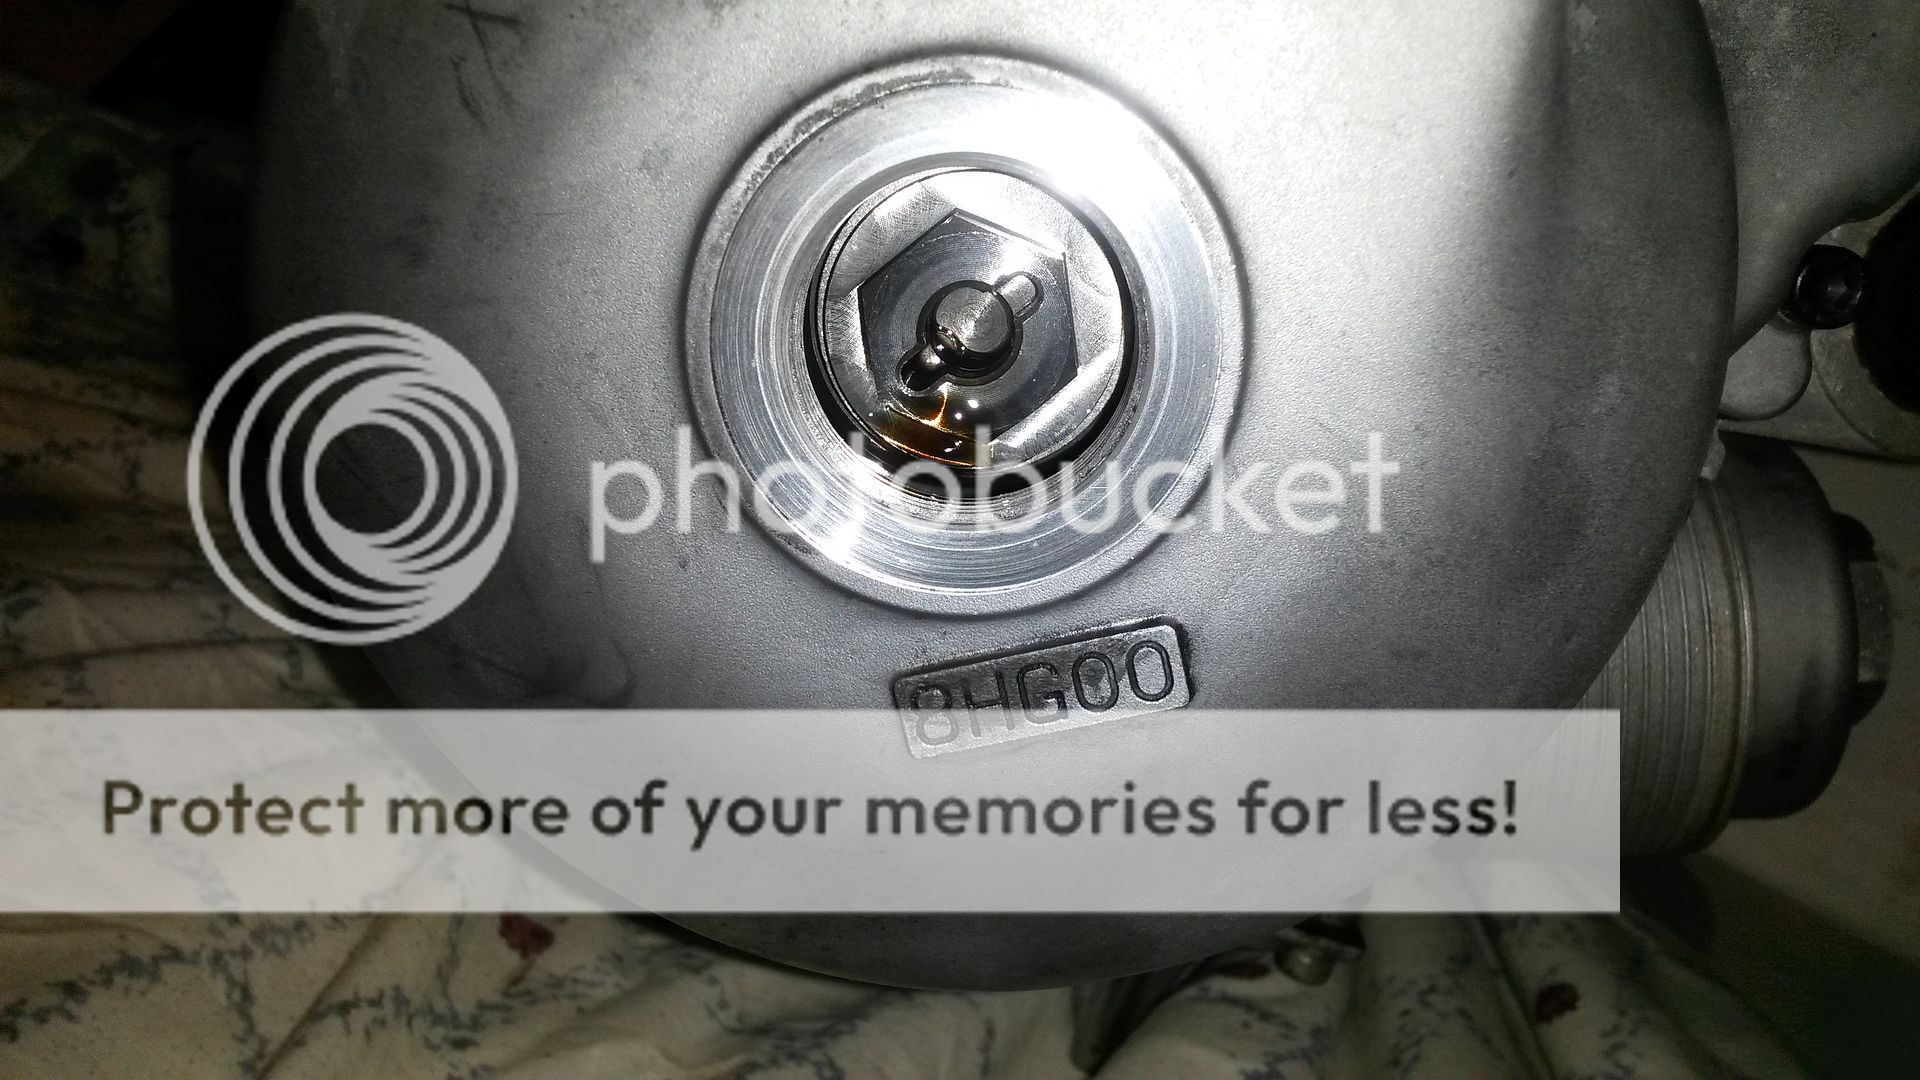
This is why the magneto cover hits the oil pump. It has to be grinded down to keep it from touching the MCX oil pump.
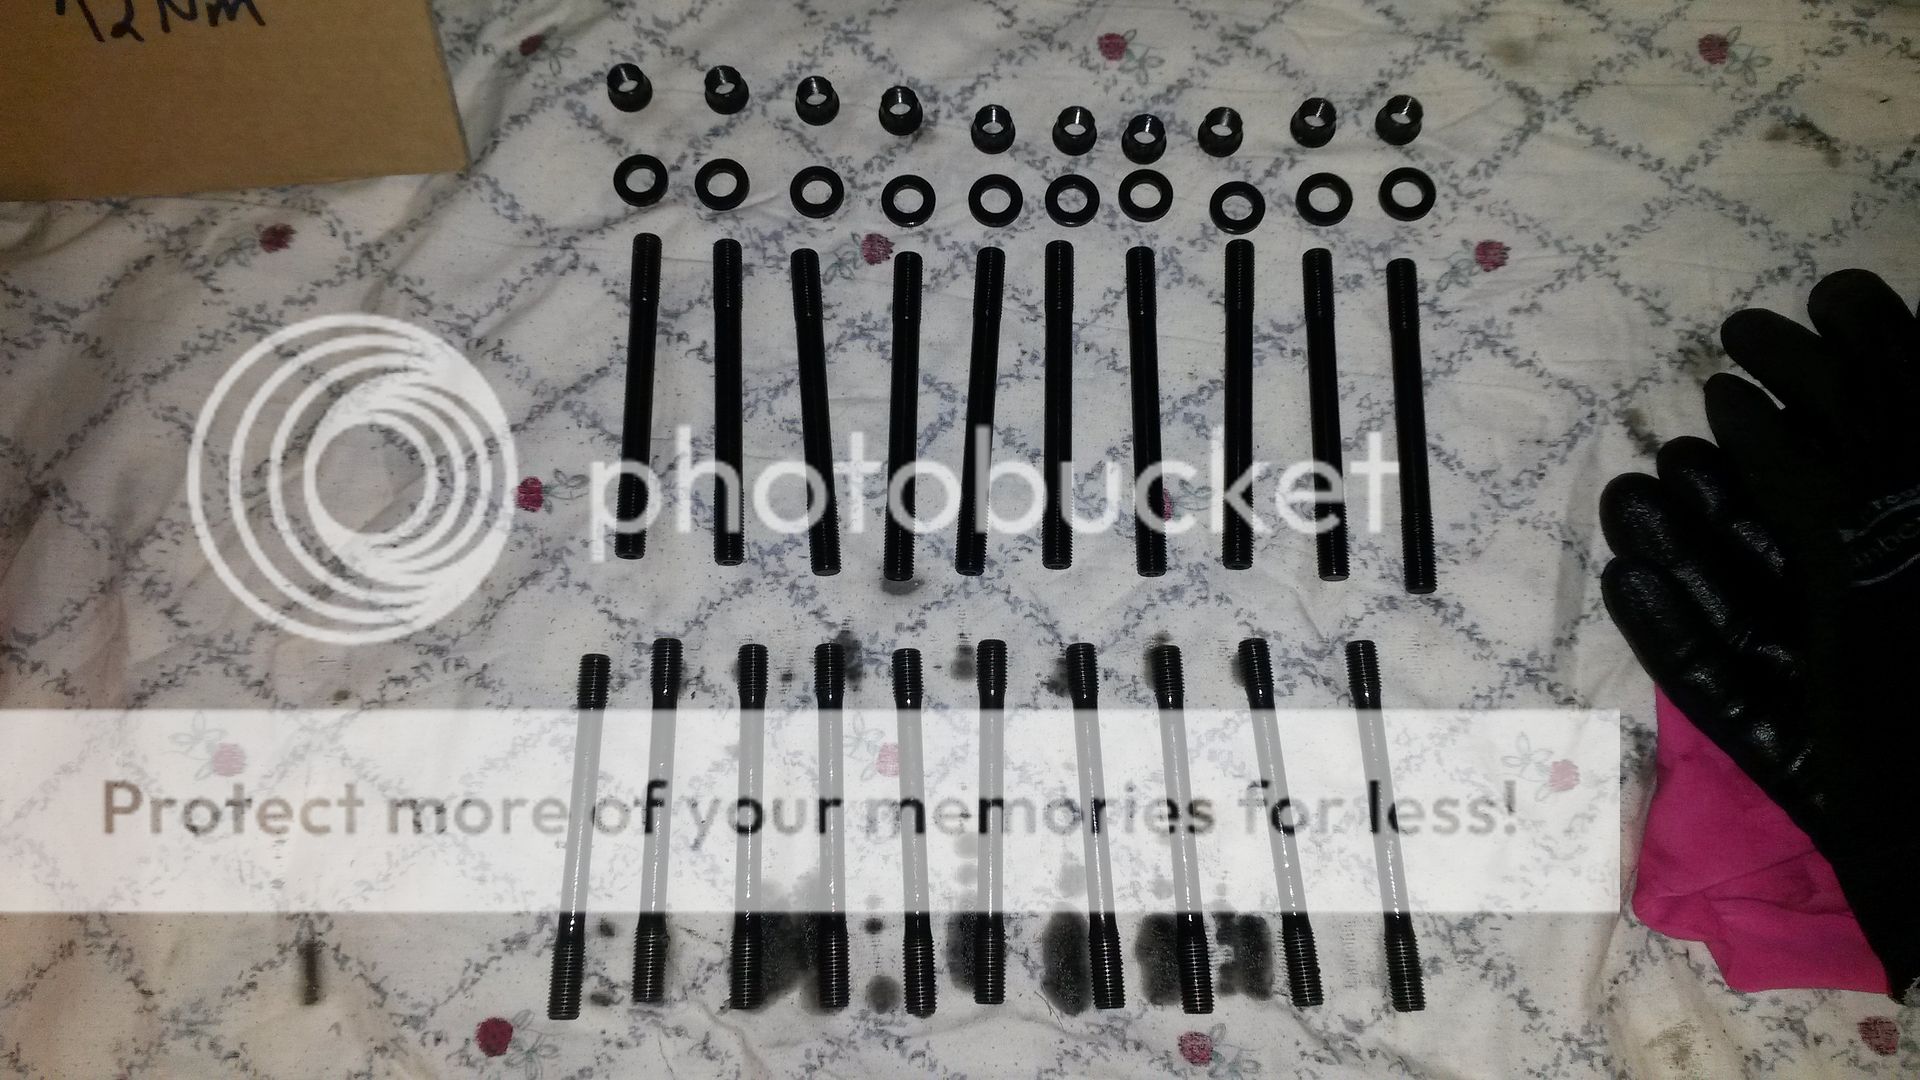
Before removing bolt from the engine I mark up where the first and last bolts is to make sure they go back the same way they came out. Bolts are of different length, saves a lot of time on assembly doing it this way.
The bolts on the card board plate.
Clutch shaft.
Bolts collected on the card board plate. More info is written down on the card board plate. OBS! It's still incomplete.
To be continued in the next post .........
I have started working on a 2014 Apex.
The engine is going to be strengthened to handle 20+ lbs of boost.
Stock pistons are replaced with CP pistions running Yamaha piston rings.
Stock rods are replaced with Carrillo rods.
Stock head gasket is replaced with a 0.036" Cometic steel head gasket.
I have torn down the sled and the engine is on the workbench.
I have not documented the tear down as it's covered numerous times earlier in my thread.
The 2014 Apex is almost the same as the 03-05 RX-1 and the 06-10 Apex.
I will document the engine work from the tear down of the engine, installation of the pistons and rods, and the assembly. The 2014 Apex engine is slightly different from the older engines but not much, hardly detectable unless you look at the engine part numbers.
The engine is out of the chassis and on my workbench.
Disassembling the engine.
Cams out.
Head off.
Headgasket removed.
Block ready to be torn apart.
Removing stock head pin bolts. I'm using two of the ARP head nuts against each other to loosen the pin bolts from the block.
Stock vs ARP 10 mm. head bolts.
ARP head studs vs stock. Remeber to use the ARP washers when running ARP studs.
You will have to use both the ARP and stock washers stacked upon each other or else the nuts will bottom out without clamping down the head. Install the ARP washers first then the stock ones on top.
I have made this cardboard plate to collect all bolts coming off the engine to make it easier on the install. I have also put down the torque of all bolts to save me time and make sure everything is torqued down correctly on assembly. (OBS! The plate will be shown later with more information on it, as some of the info here is incorrect)
Engine studs removed.
I like to have all engine parts placed on my workbench in an orderly fashion to make the work as easy as possibly and without mixing up parts. All parts need to go in the same way they come out, not mixing up stuff
The part number of the magneto cover has touched the MCX oil return pump, stamping the part number onto the oil pump. The oil pump was not seated well as it took little to no effort to remove it.
This is why the magneto cover hits the oil pump. It has to be grinded down to keep it from touching the MCX oil pump.
Before removing bolt from the engine I mark up where the first and last bolts is to make sure they go back the same way they came out. Bolts are of different length, saves a lot of time on assembly doing it this way.
The bolts on the card board plate.
Clutch shaft.
Bolts collected on the card board plate. More info is written down on the card board plate. OBS! It's still incomplete.
To be continued in the next post .........
Last edited:
rxrider
Jan-Ove Pedersen
- Joined
- Apr 25, 2003
- Messages
- 7,355
- Reaction score
- 64
- Points
- 1,753
- Location
- Lakselv - 70N & 25E
- Country
- Norway
- Snowmobile
- 2014 Phazer XTX, 2013 Phazer RTX, 2008 Apex RTX, 2007 Warrior, 2006 Attak
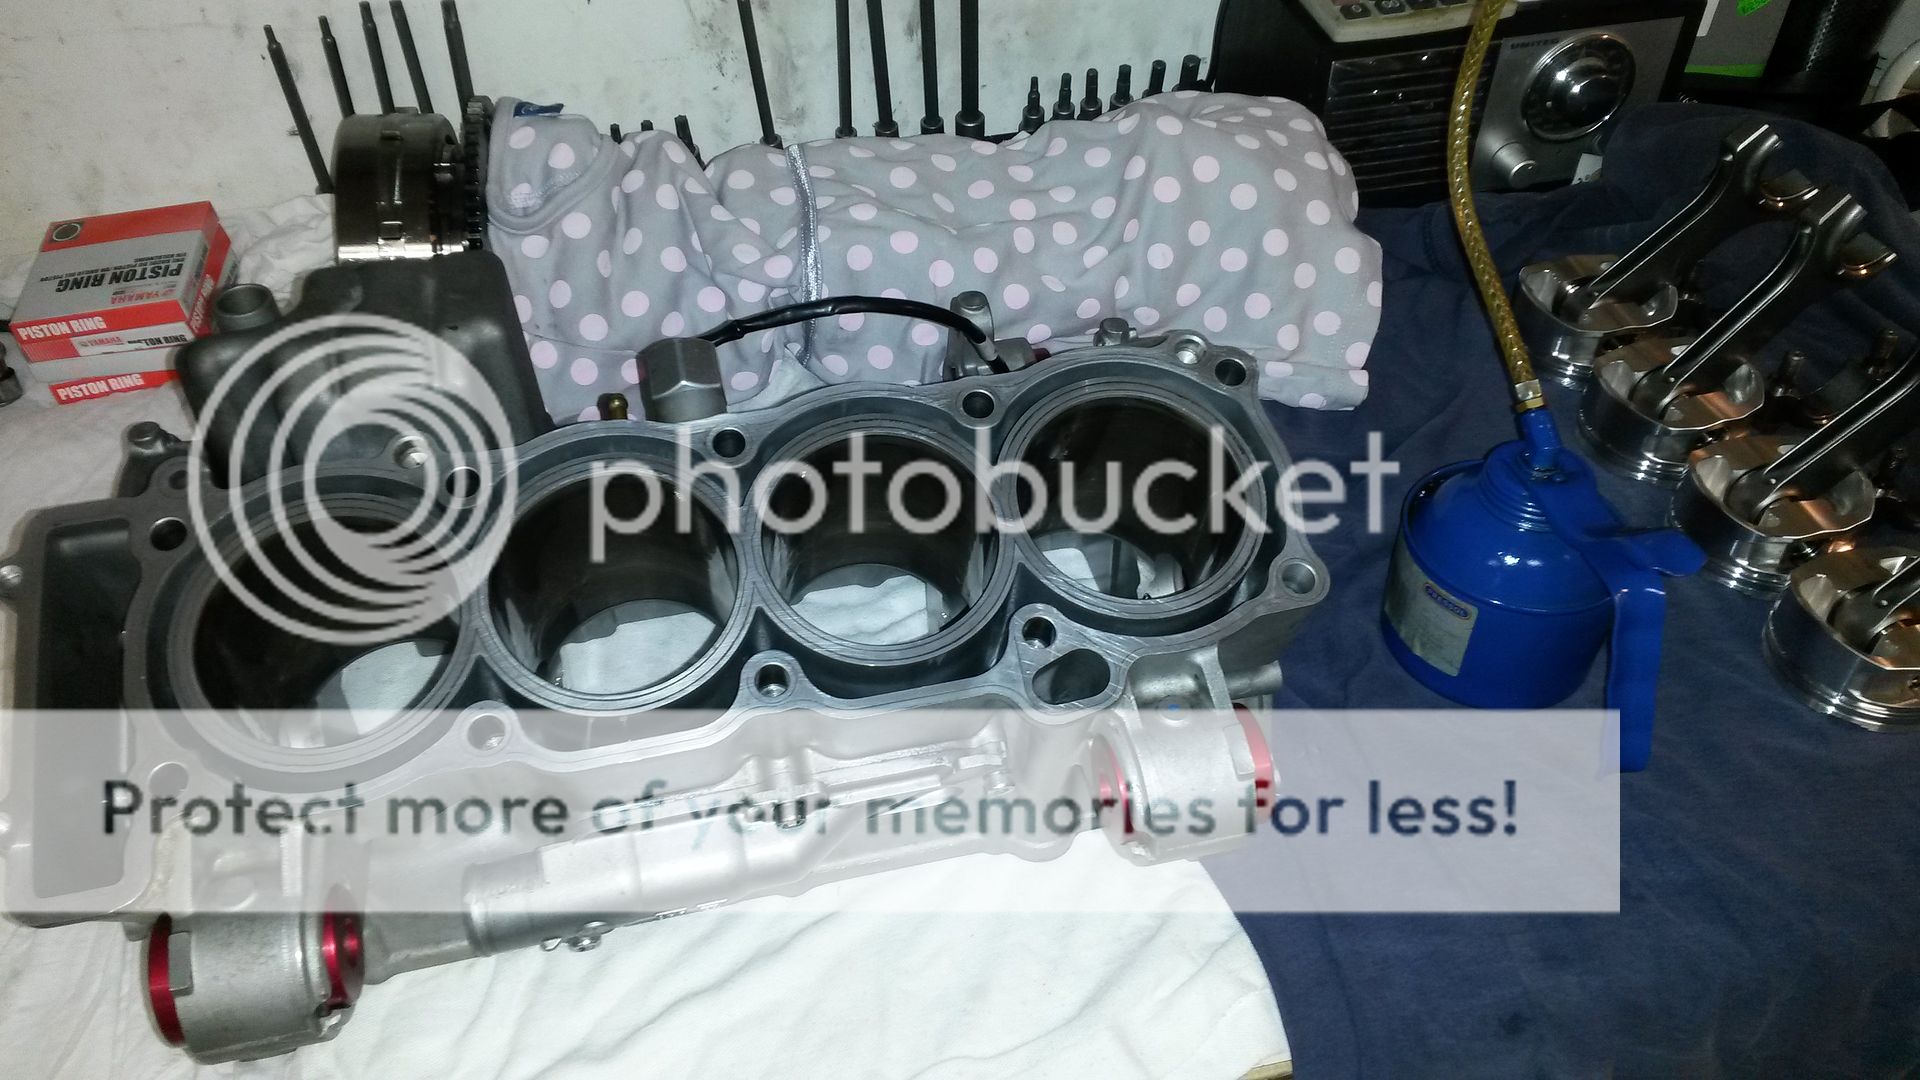
Continued from the last post......
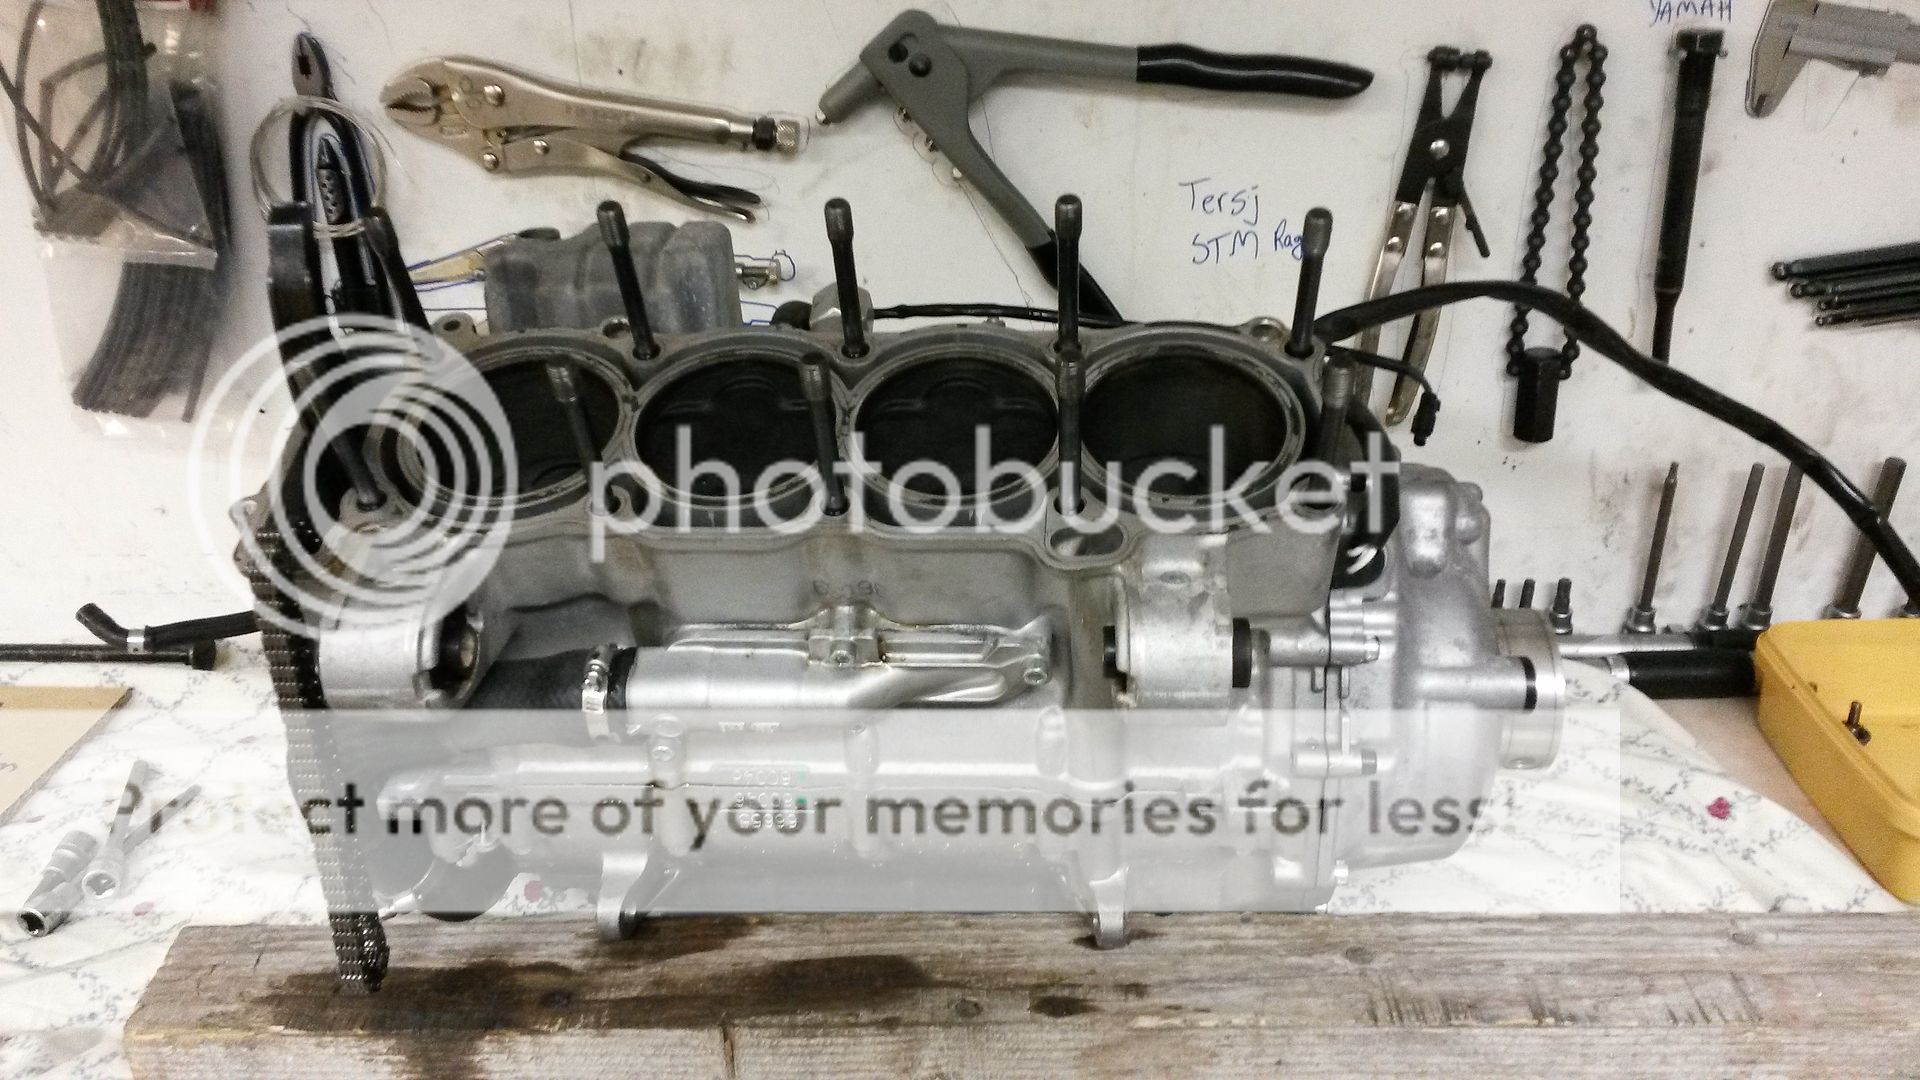
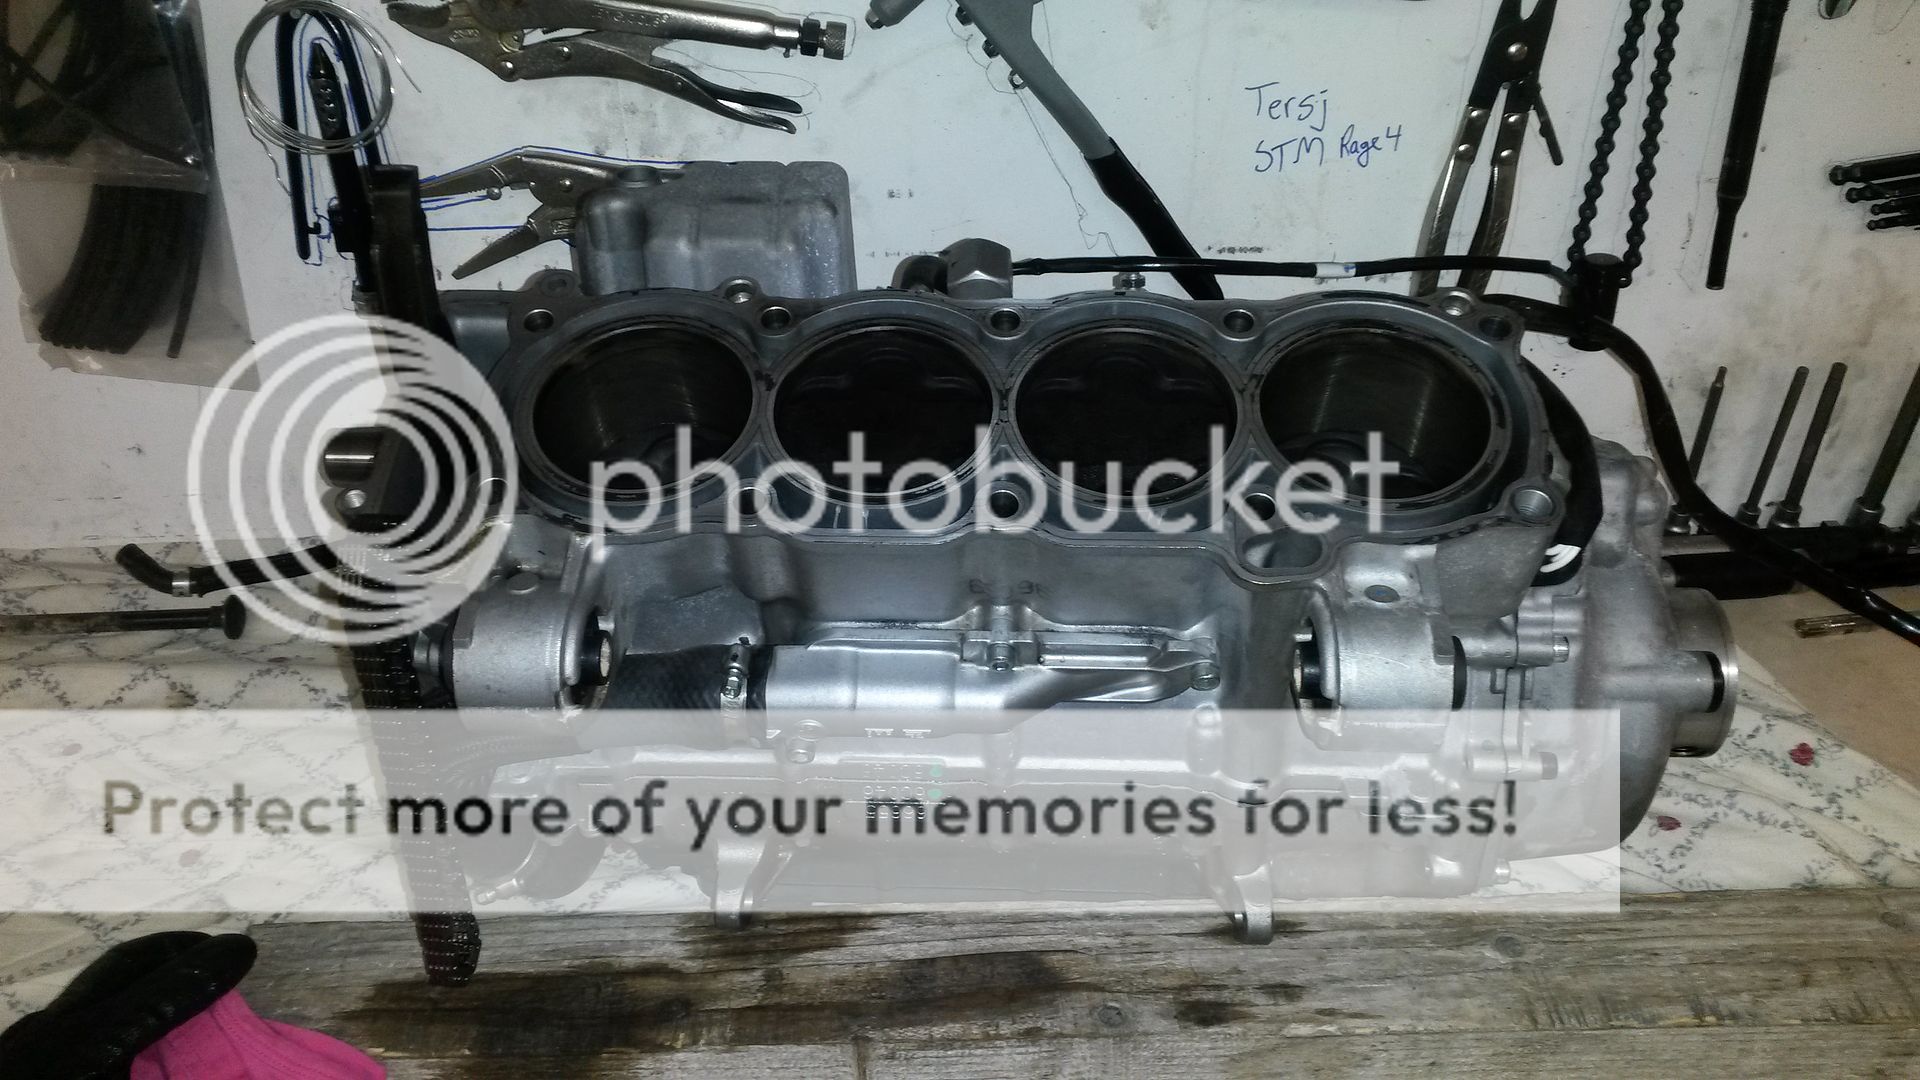
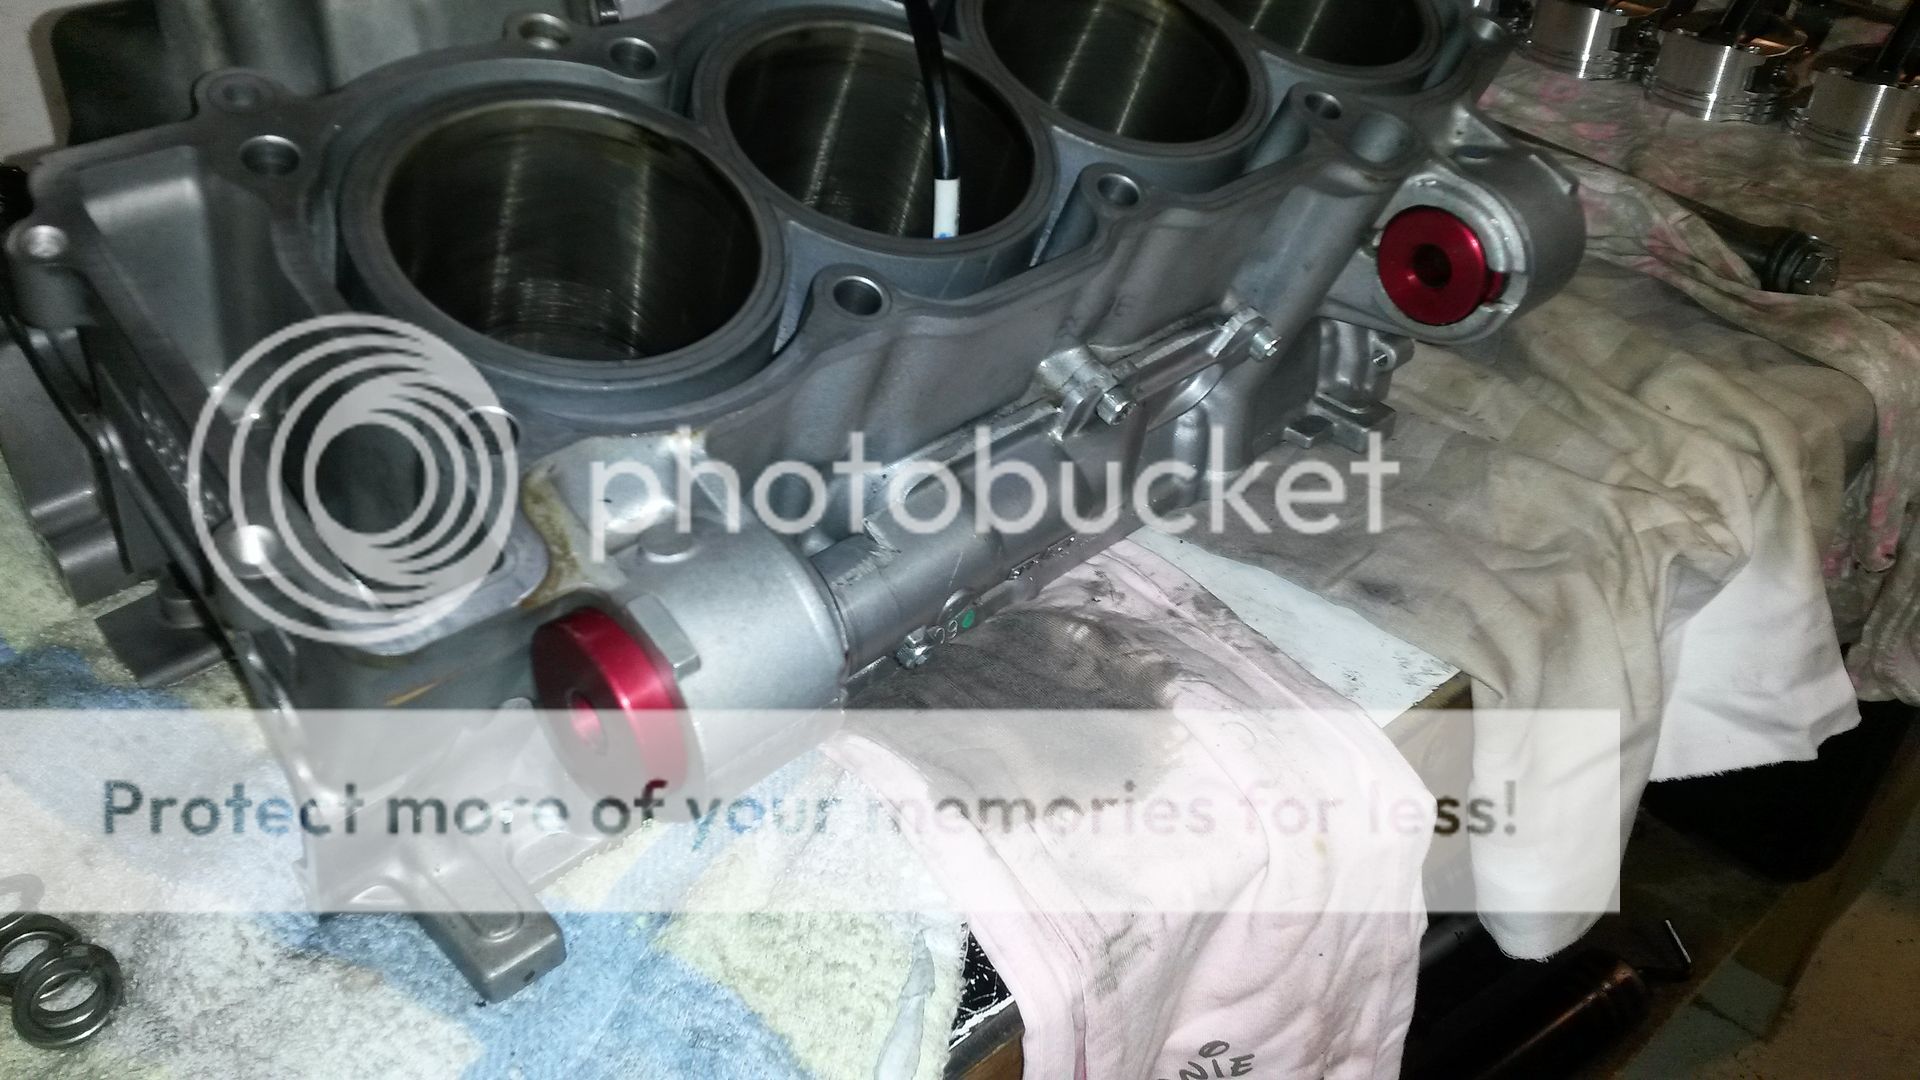
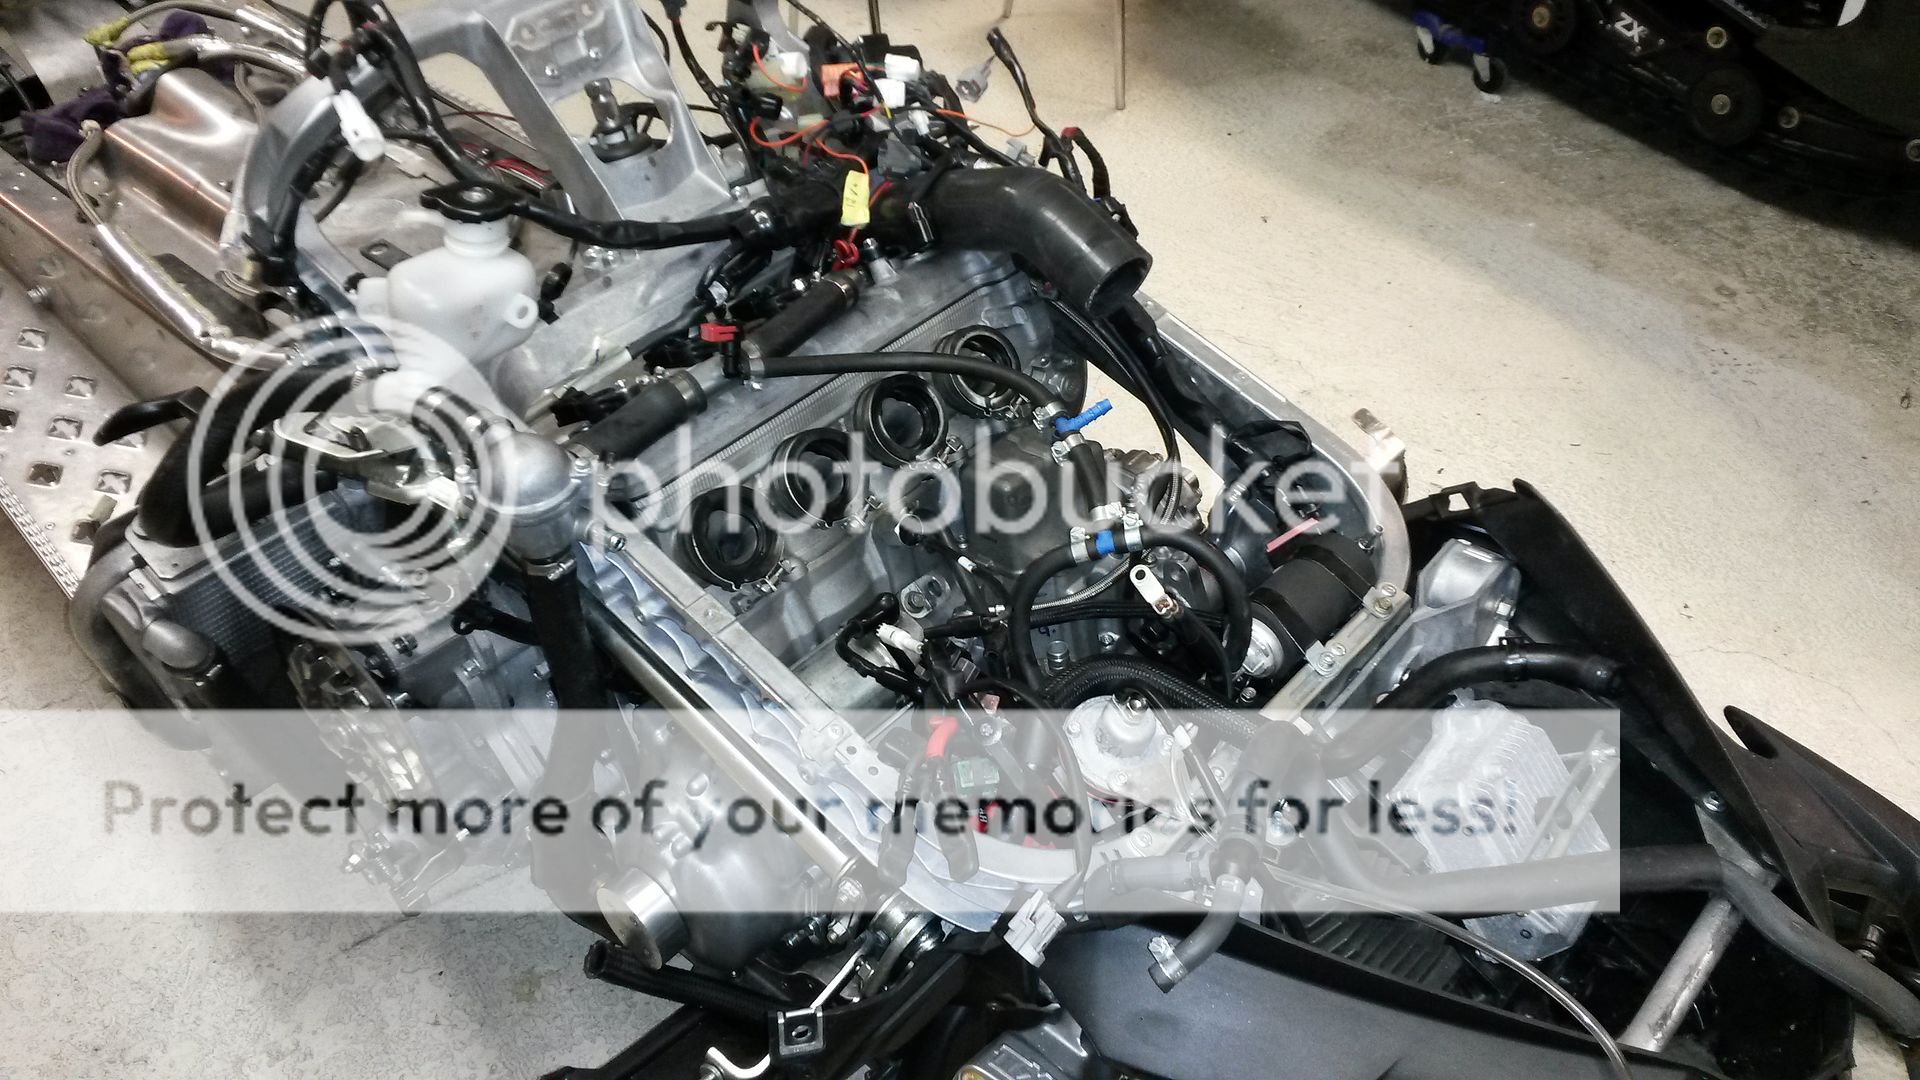
The engine block has been torn apart.
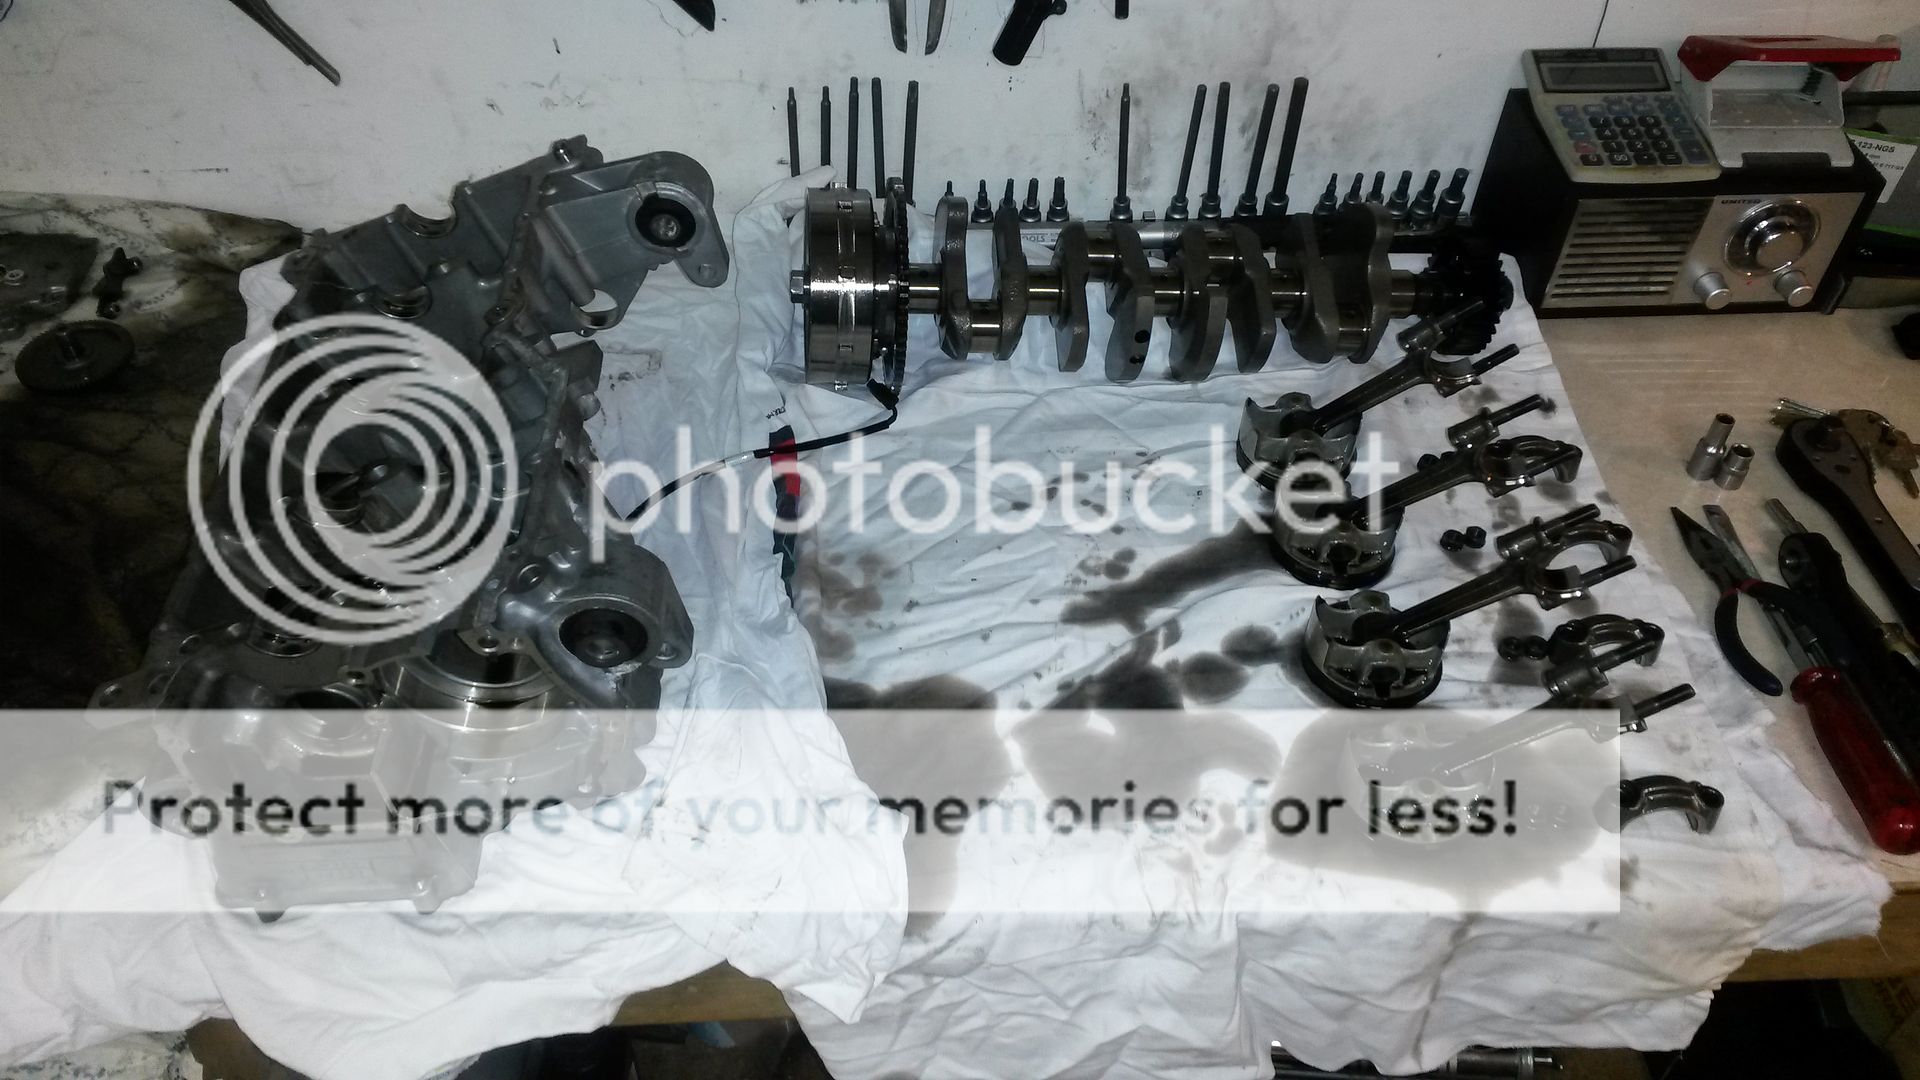
Before starting the assembly I cleaned to outside of the block parts and removed gasket residue from all surfaces.
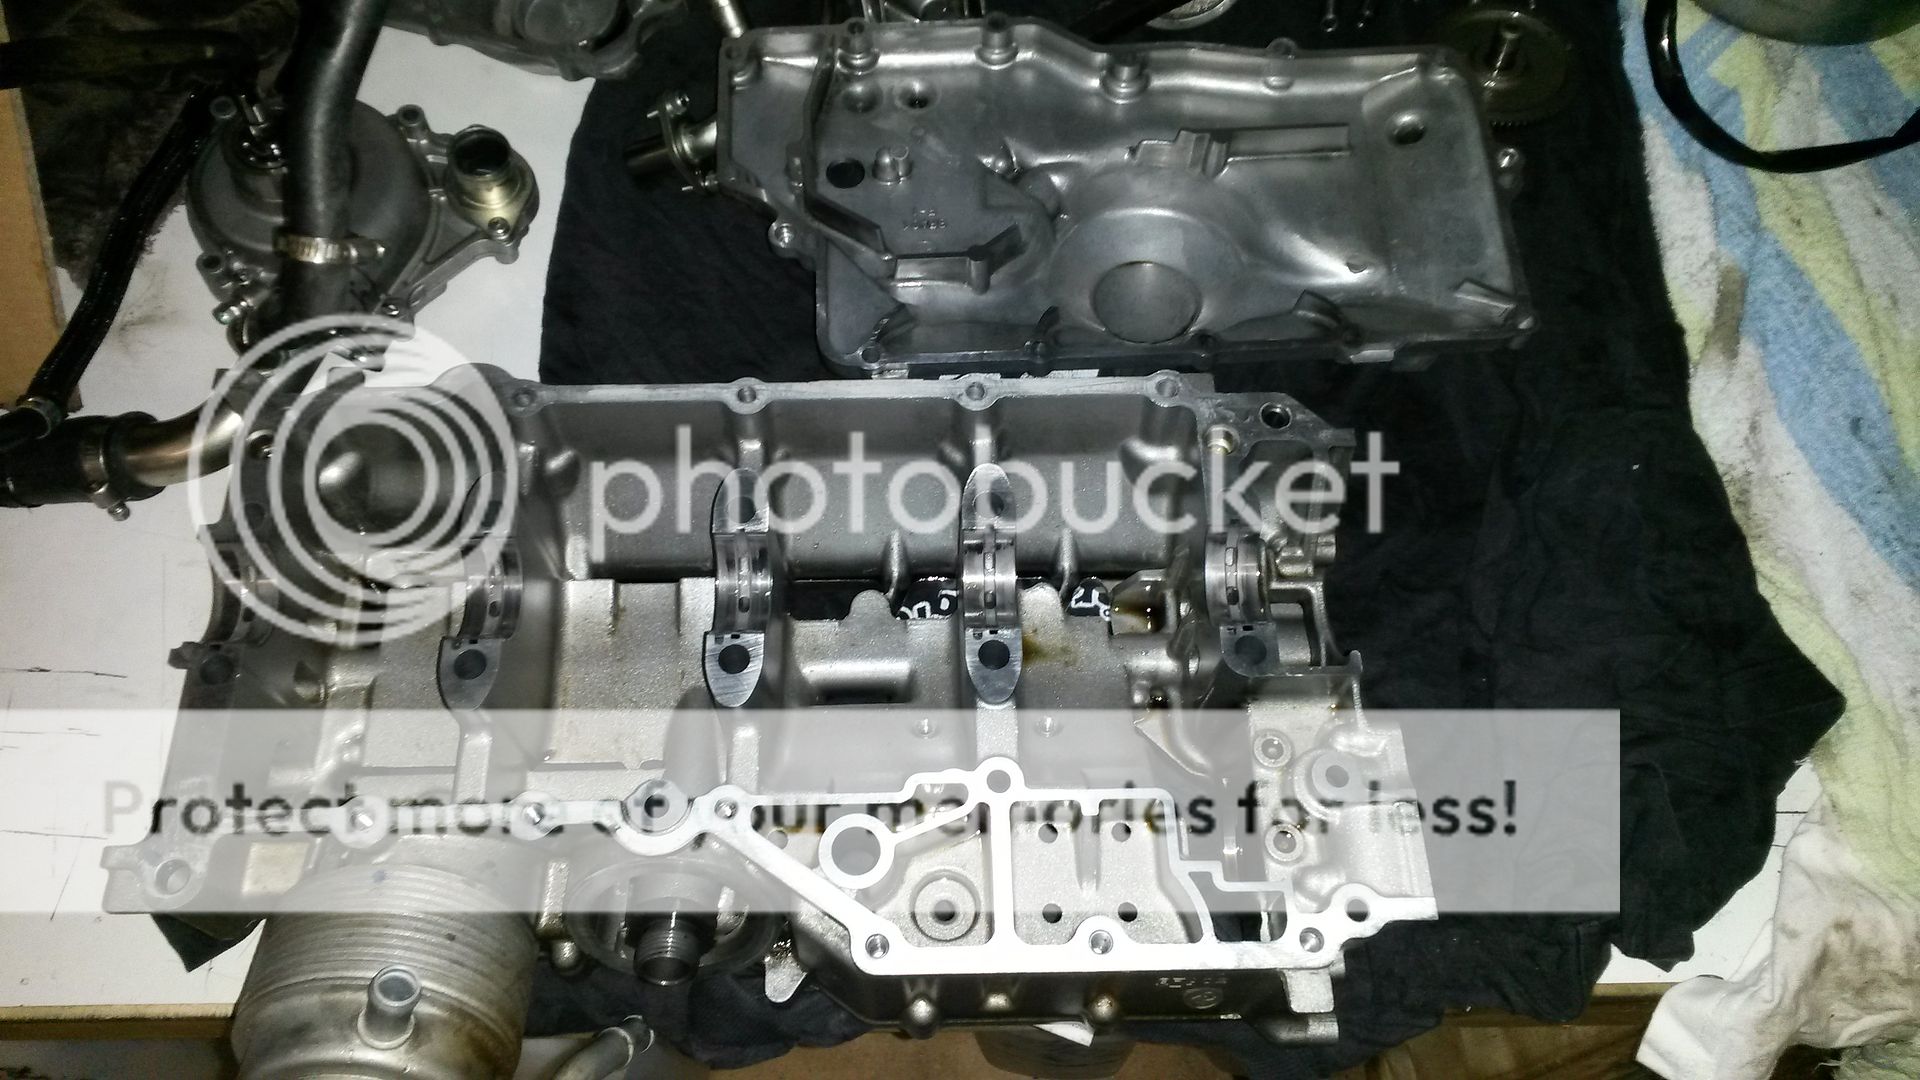

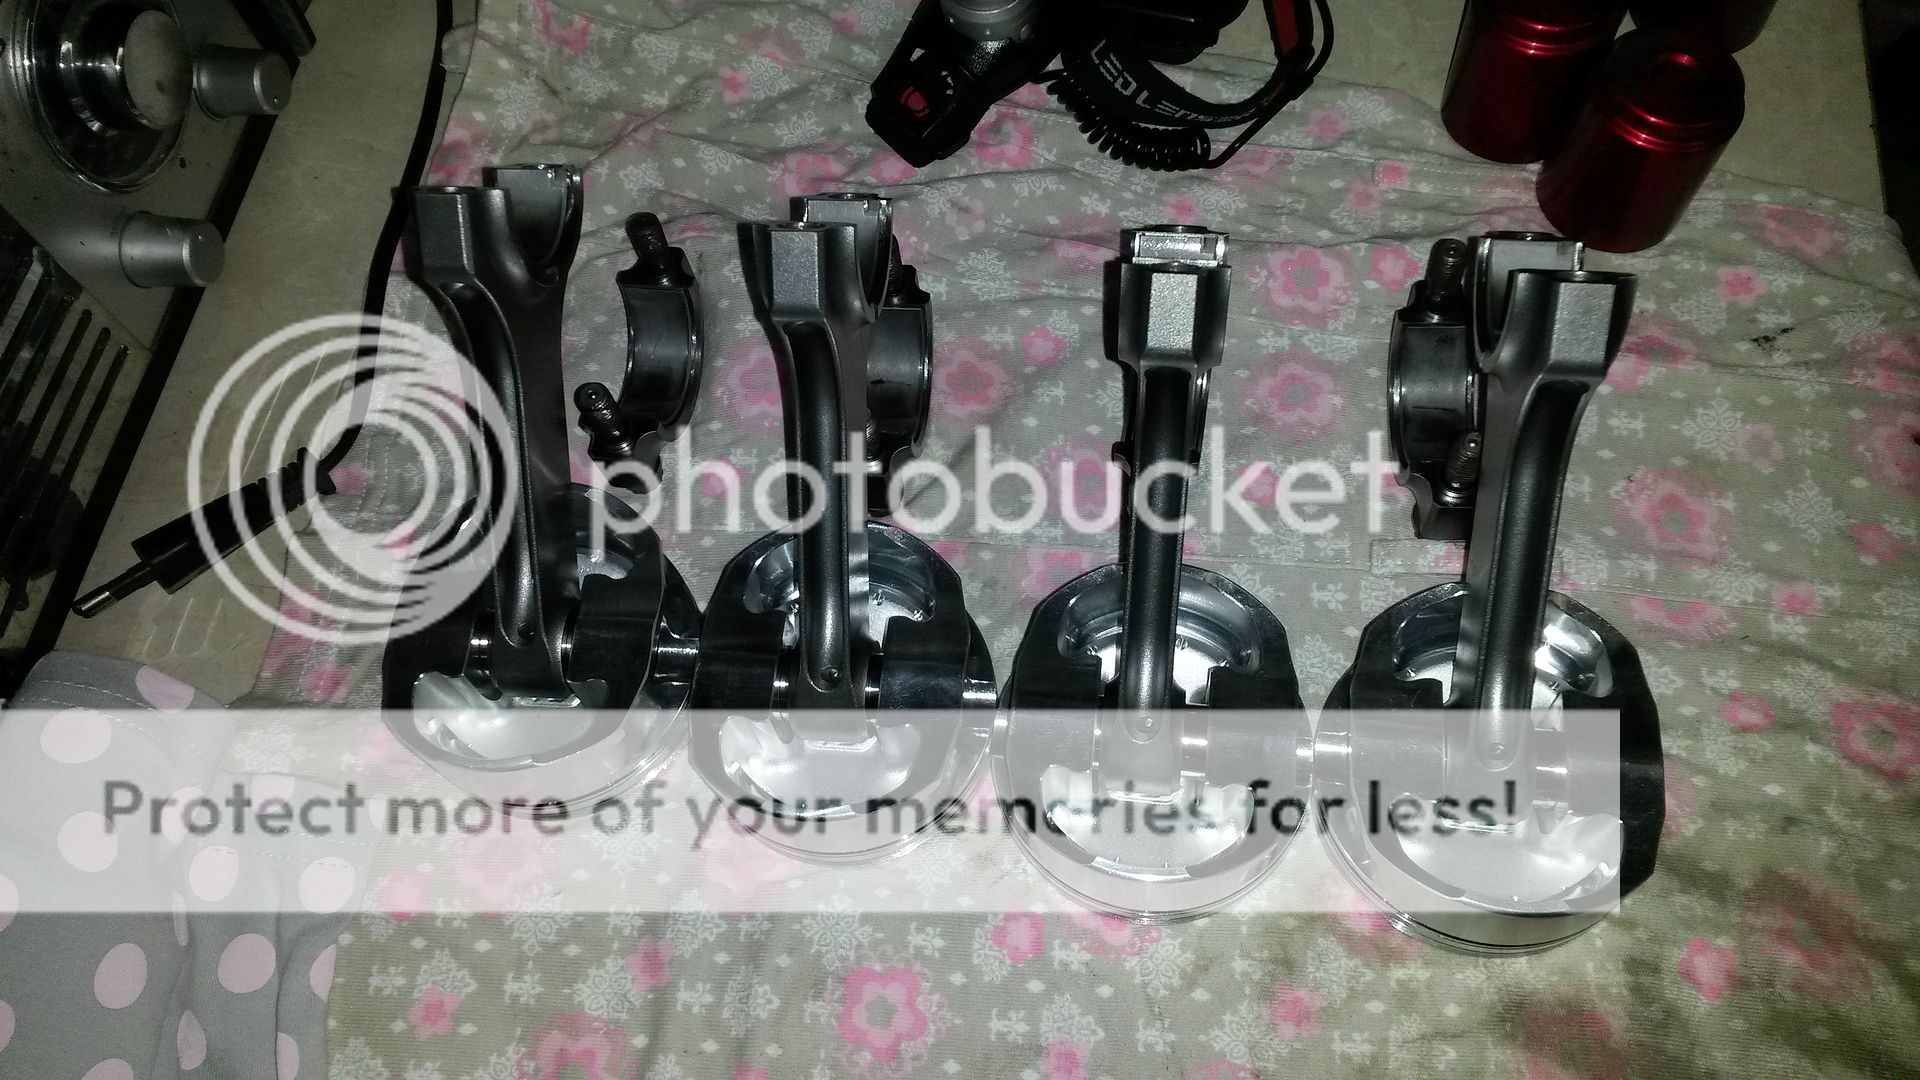
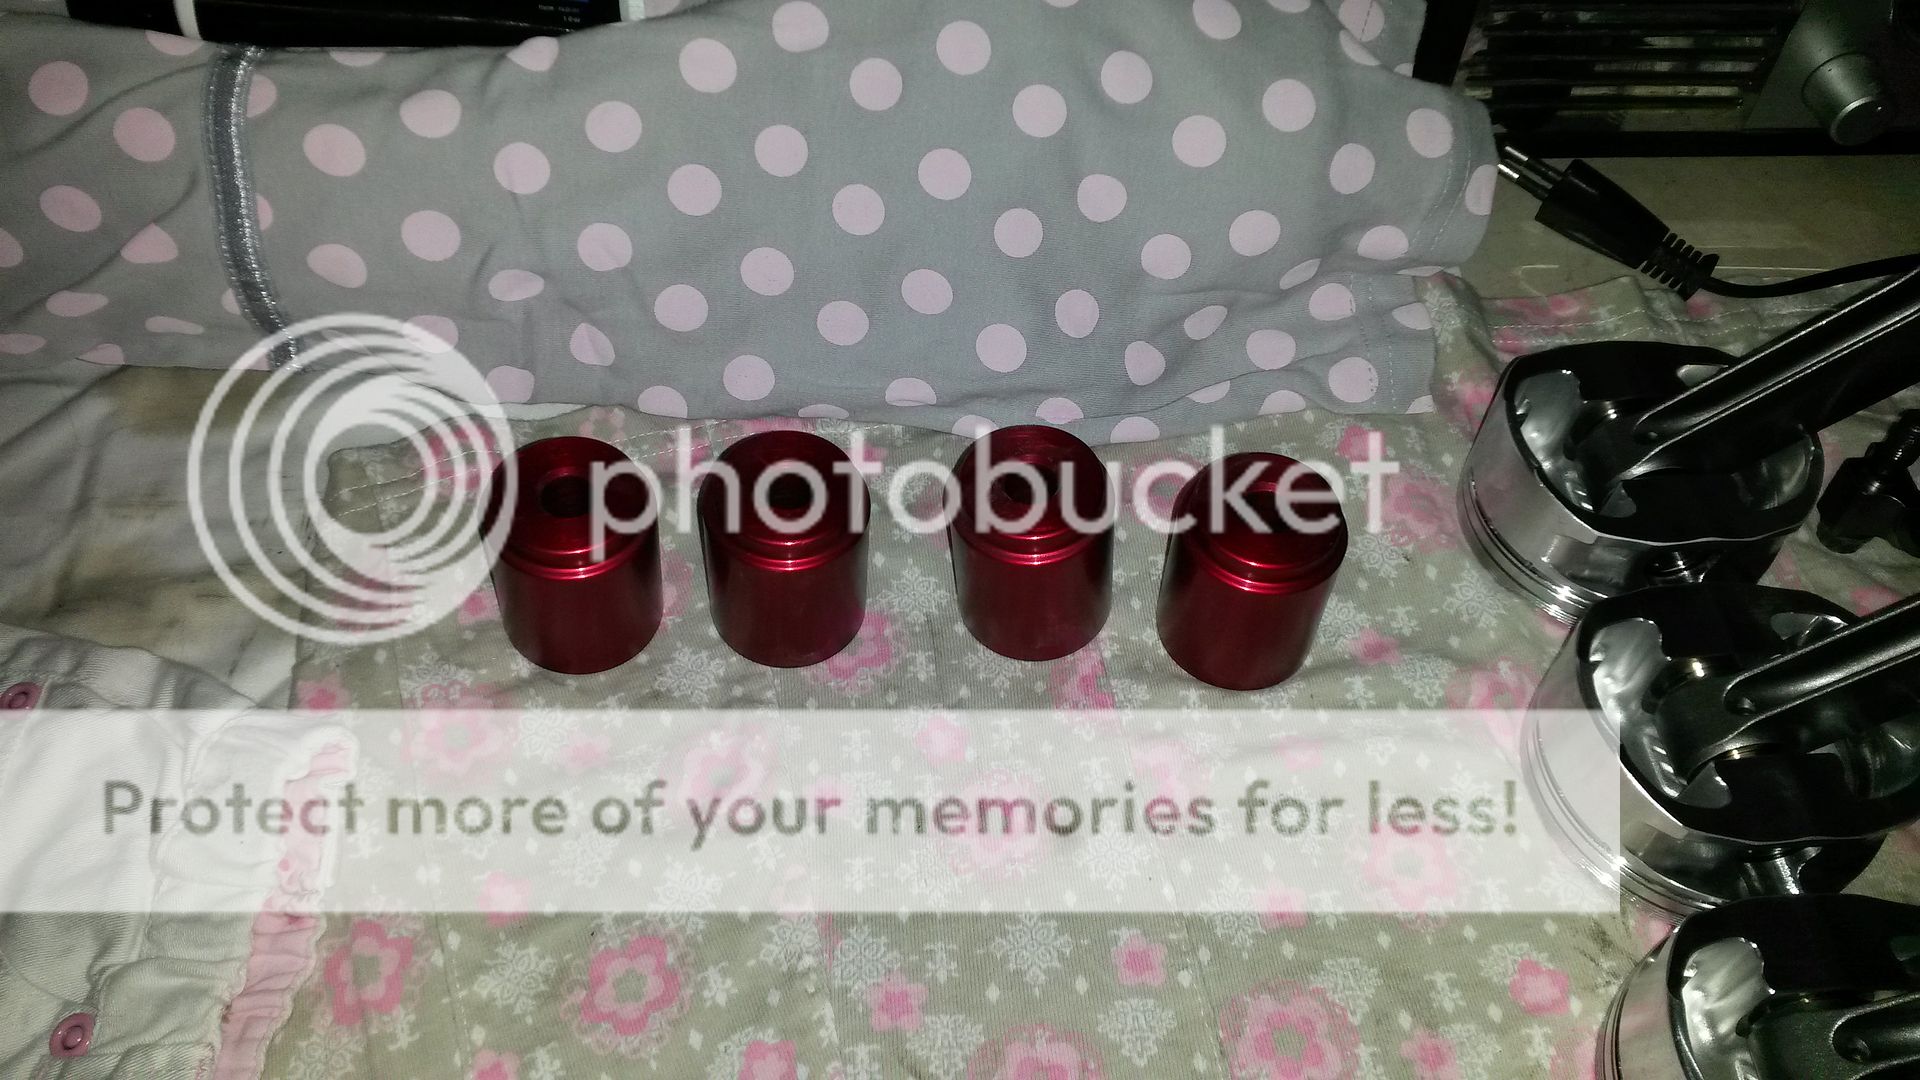
New Carrillo rods and Carrillo pistons with Yamaha piston rings are ready to be mounted into the motor.
Next I will install solid motor mounts......
The engine block has been torn apart.
Before starting the assembly I cleaned to outside of the block parts and removed gasket residue from all surfaces.
New Carrillo rods and Carrillo pistons with Yamaha piston rings are ready to be mounted into the motor.
Next I will install solid motor mounts......
rxrider
Jan-Ove Pedersen
- Joined
- Apr 25, 2003
- Messages
- 7,355
- Reaction score
- 64
- Points
- 1,753
- Location
- Lakselv - 70N & 25E
- Country
- Norway
- Snowmobile
- 2014 Phazer XTX, 2013 Phazer RTX, 2008 Apex RTX, 2007 Warrior, 2006 Attak
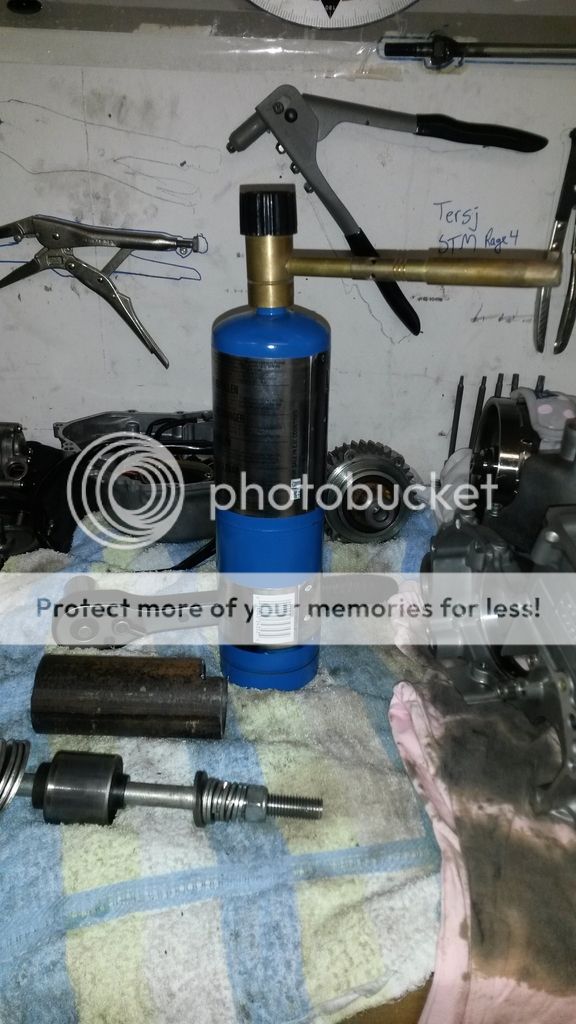
Update - November 17. - Removing stock engine mounts and replacing them with solid motor mounts from Hurricane Racing.
Here's a pic of the solid motor mounts.
Before the removal I had my good friend Mikkel over to help me out.
A few days before I went out to a lokal hardware store and bought heavy duty washers and long bolts and nuts.
With the parts we had at hand we made this tool.
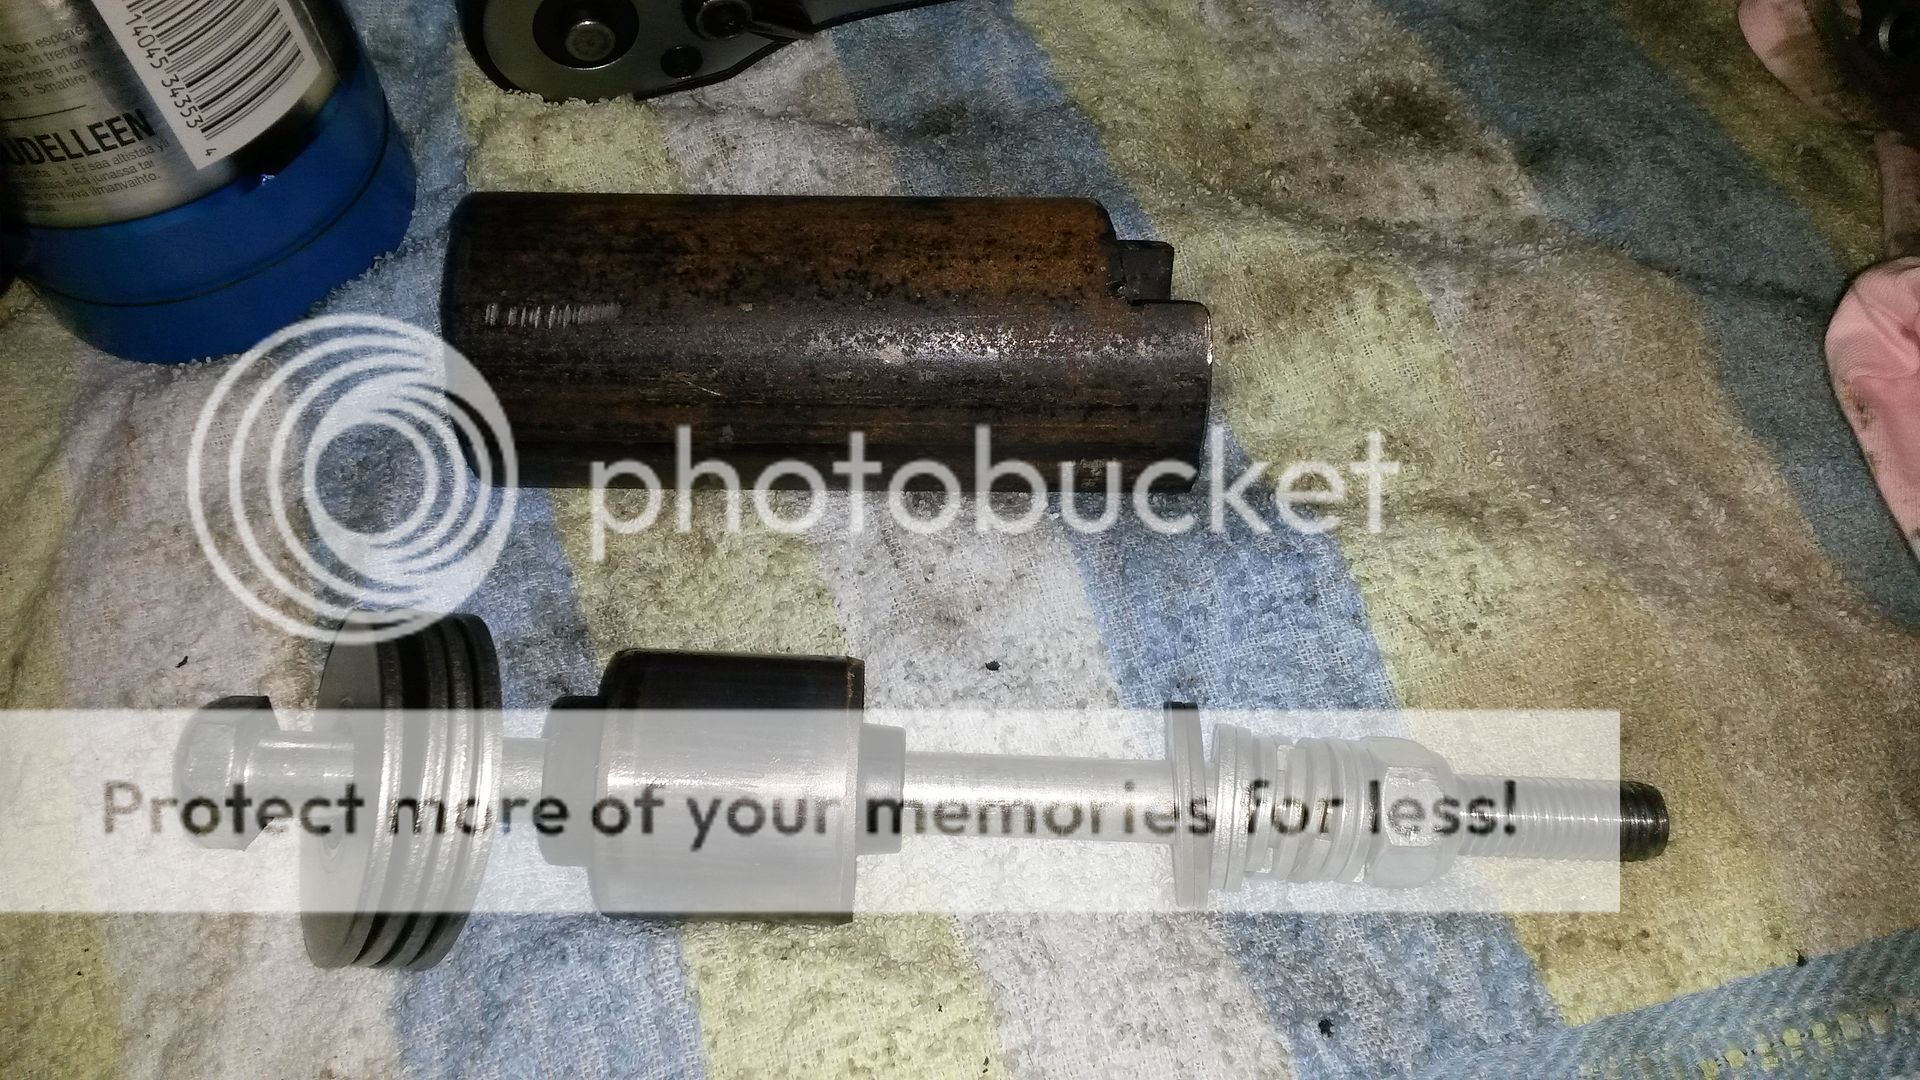
You will need a gas torch blower to heat up the motor mounts when removing them.
With the tool, some heat and some muscle we were able to remove the stock motor mounts.
Next was installing the solid motor mounts.
The new mount ready to be installed.
Applied the tool and some heat.
The first two installed. It took some heat and muscle to get it completely into place.
The last one going in.
The tool in action.

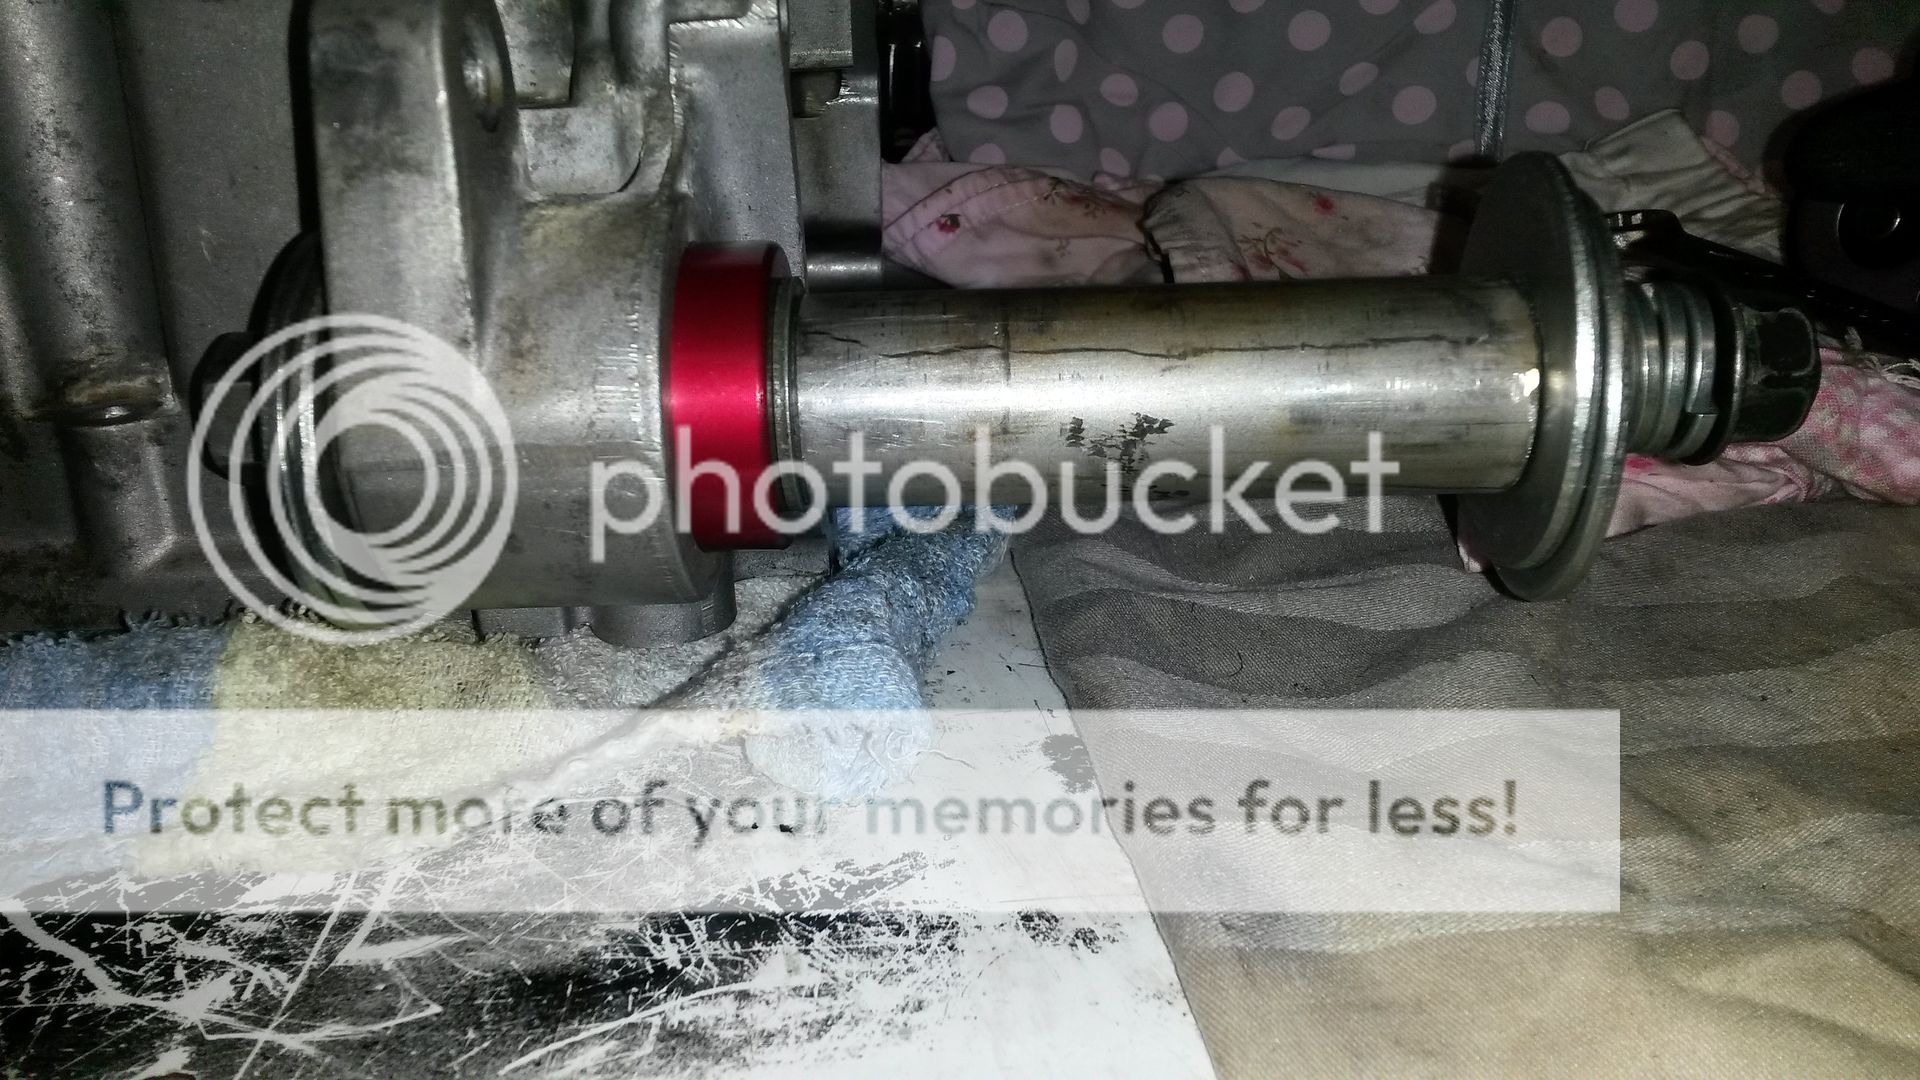
This one was kinda tricky to get into place. We had to make modifications to the tool to make it fit the motor mount.
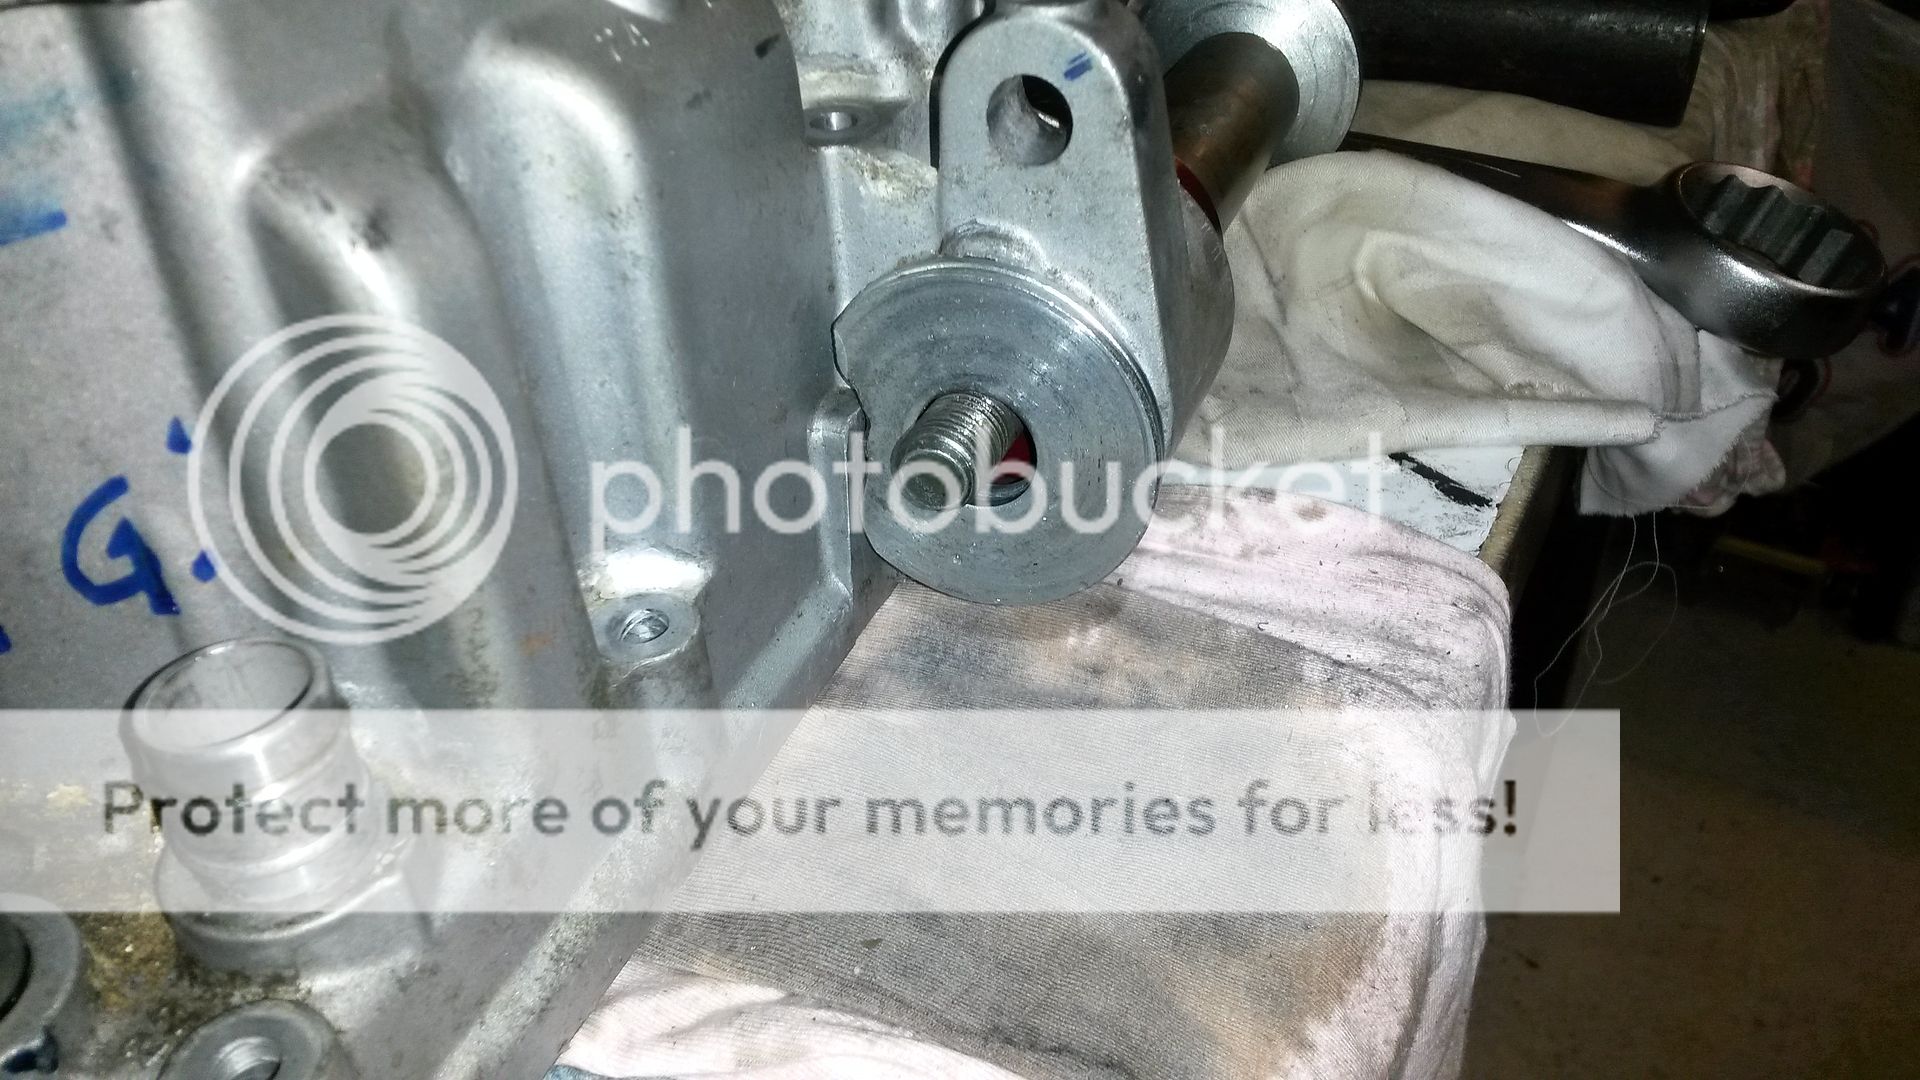
Motor mounts done.
Next time I will start the assembly of the pistons, rods, crank, the works.
Here's a pic of the solid motor mounts.
Before the removal I had my good friend Mikkel over to help me out.
A few days before I went out to a lokal hardware store and bought heavy duty washers and long bolts and nuts.
With the parts we had at hand we made this tool.
You will need a gas torch blower to heat up the motor mounts when removing them.
With the tool, some heat and some muscle we were able to remove the stock motor mounts.
Next was installing the solid motor mounts.
The new mount ready to be installed.
Applied the tool and some heat.
The first two installed. It took some heat and muscle to get it completely into place.
The last one going in.
The tool in action.
This one was kinda tricky to get into place. We had to make modifications to the tool to make it fit the motor mount.
Motor mounts done.
Next time I will start the assembly of the pistons, rods, crank, the works.
rxrider
Jan-Ove Pedersen
- Joined
- Apr 25, 2003
- Messages
- 7,355
- Reaction score
- 64
- Points
- 1,753
- Location
- Lakselv - 70N & 25E
- Country
- Norway
- Snowmobile
- 2014 Phazer XTX, 2013 Phazer RTX, 2008 Apex RTX, 2007 Warrior, 2006 Attak
Update - November 30. - Assembling the pistons, rods, crank, the works.
I did not shoot any pics of the piston and crank assembly.
I was alone and the work is messy with assembly oil all over my hands, no way I could shoot any pics without changing gloves all the time, so I didn't.
When installing the pistons, rings and rods; please carefully read the install instructions, do the measuring and adjust if necessary.
Failing to do so may cause engine damage.
When torqueing down the crank shaft; first torque the bolts in sequence to 15 Nm then torque the bolts an aditional 65-70 degrees also in sequence.
Failing to do so may cause engine damage.
NB! - This work is all covered in earlier posts in this thread.
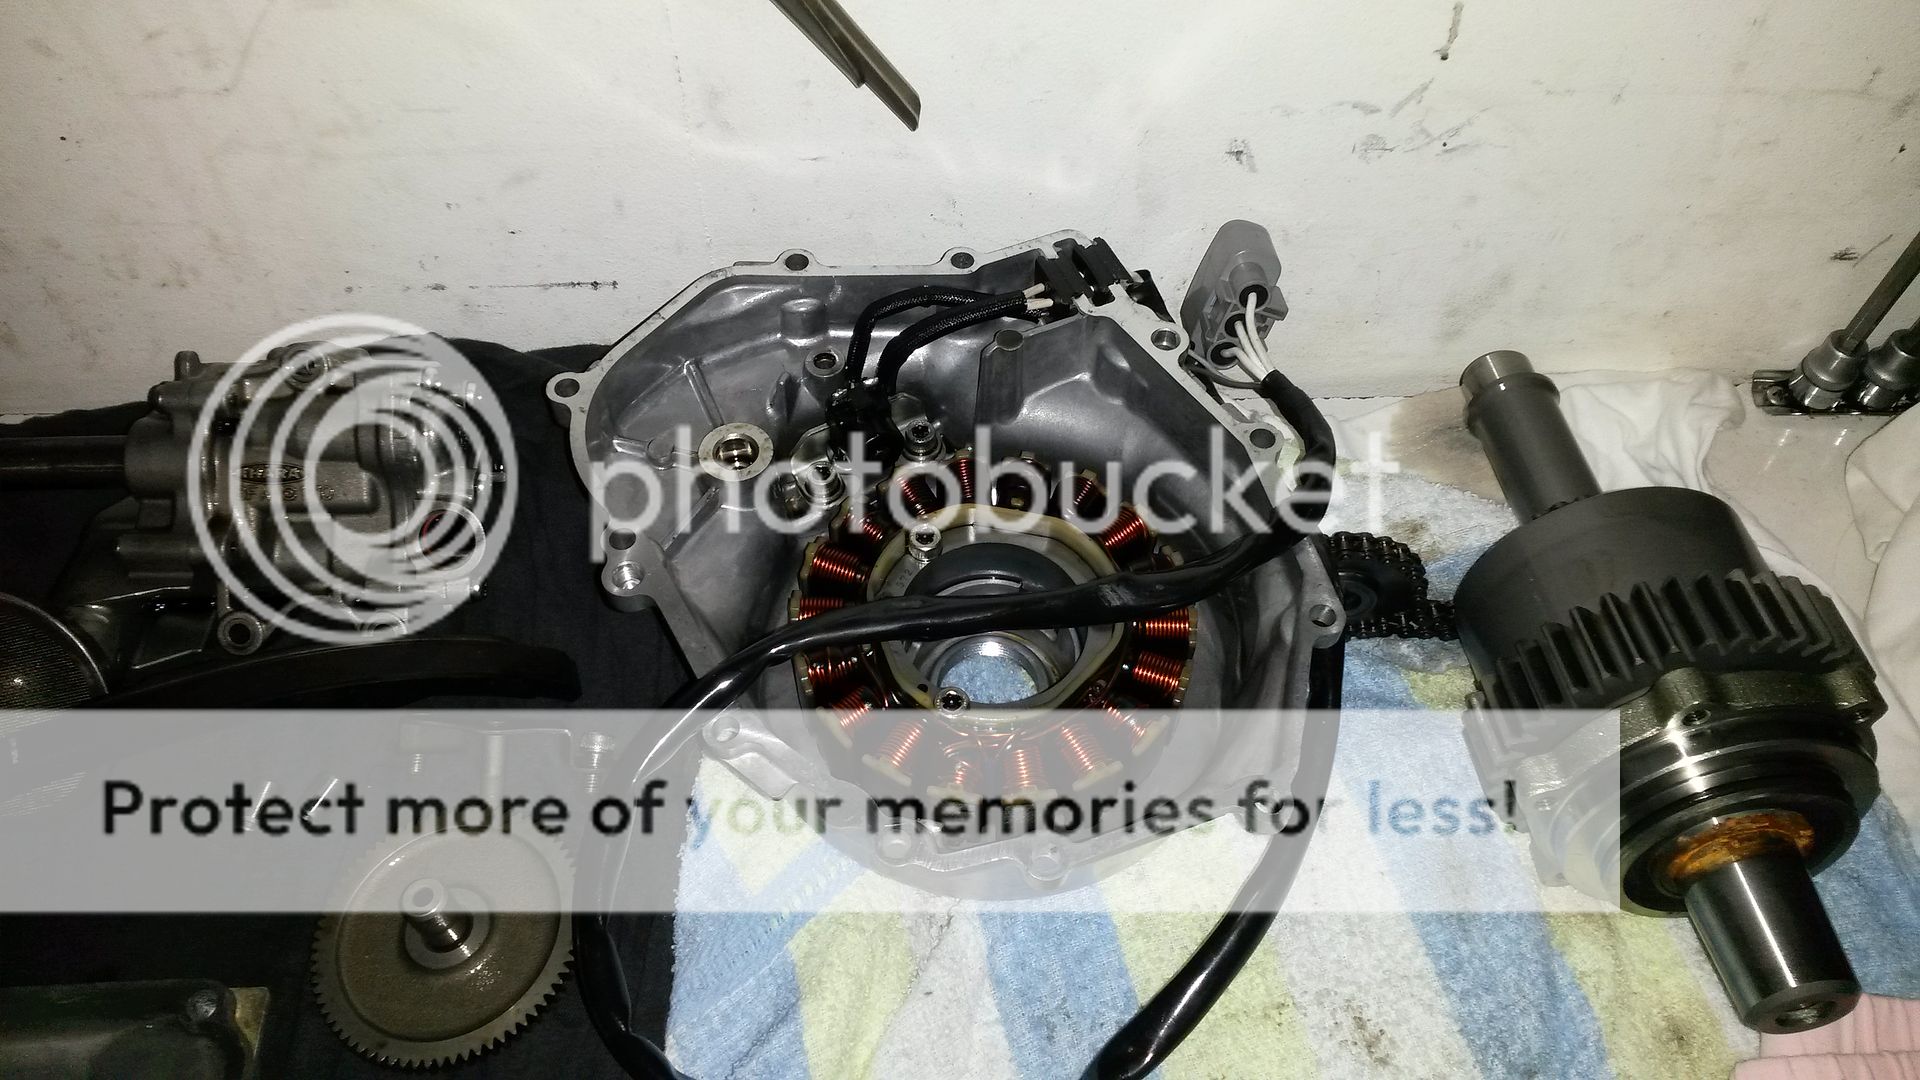
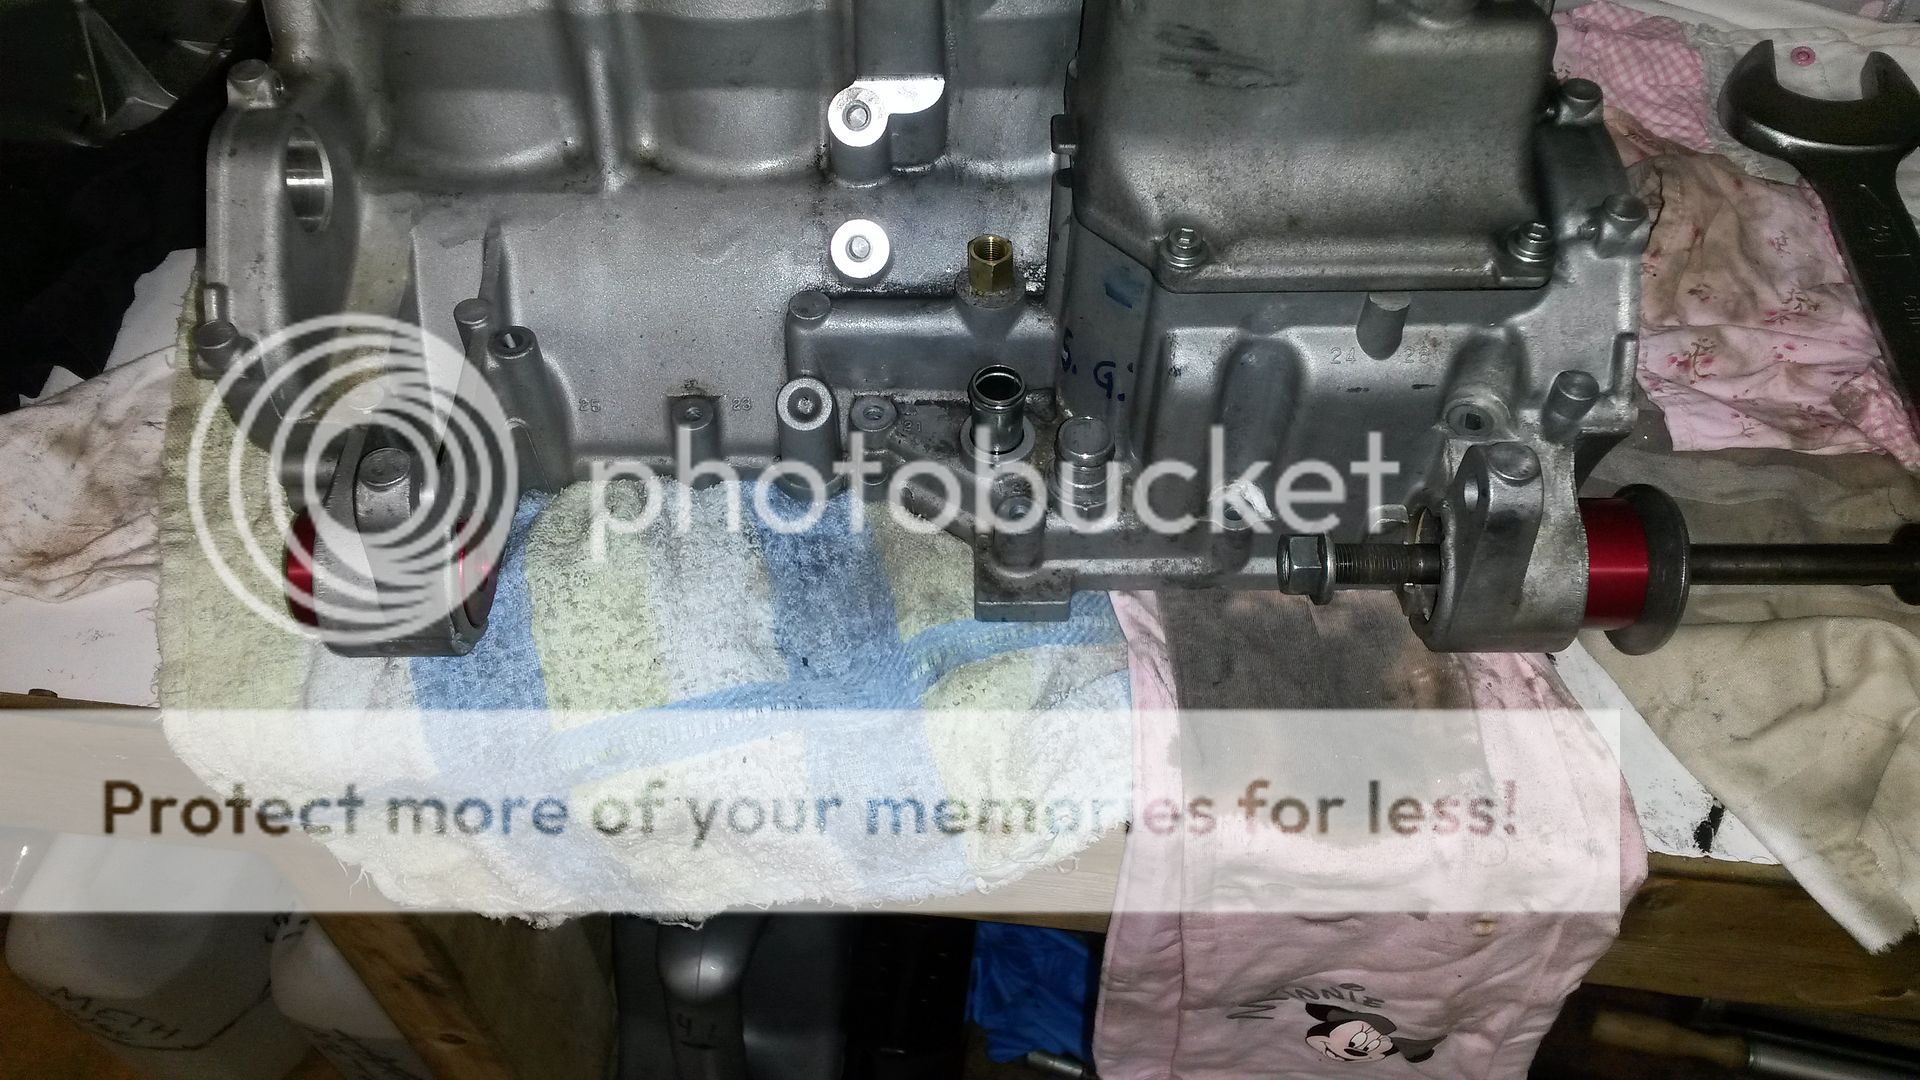
Engine block parts have been joined. I used a sealant similar to Yamabond.
Oil pump installed.
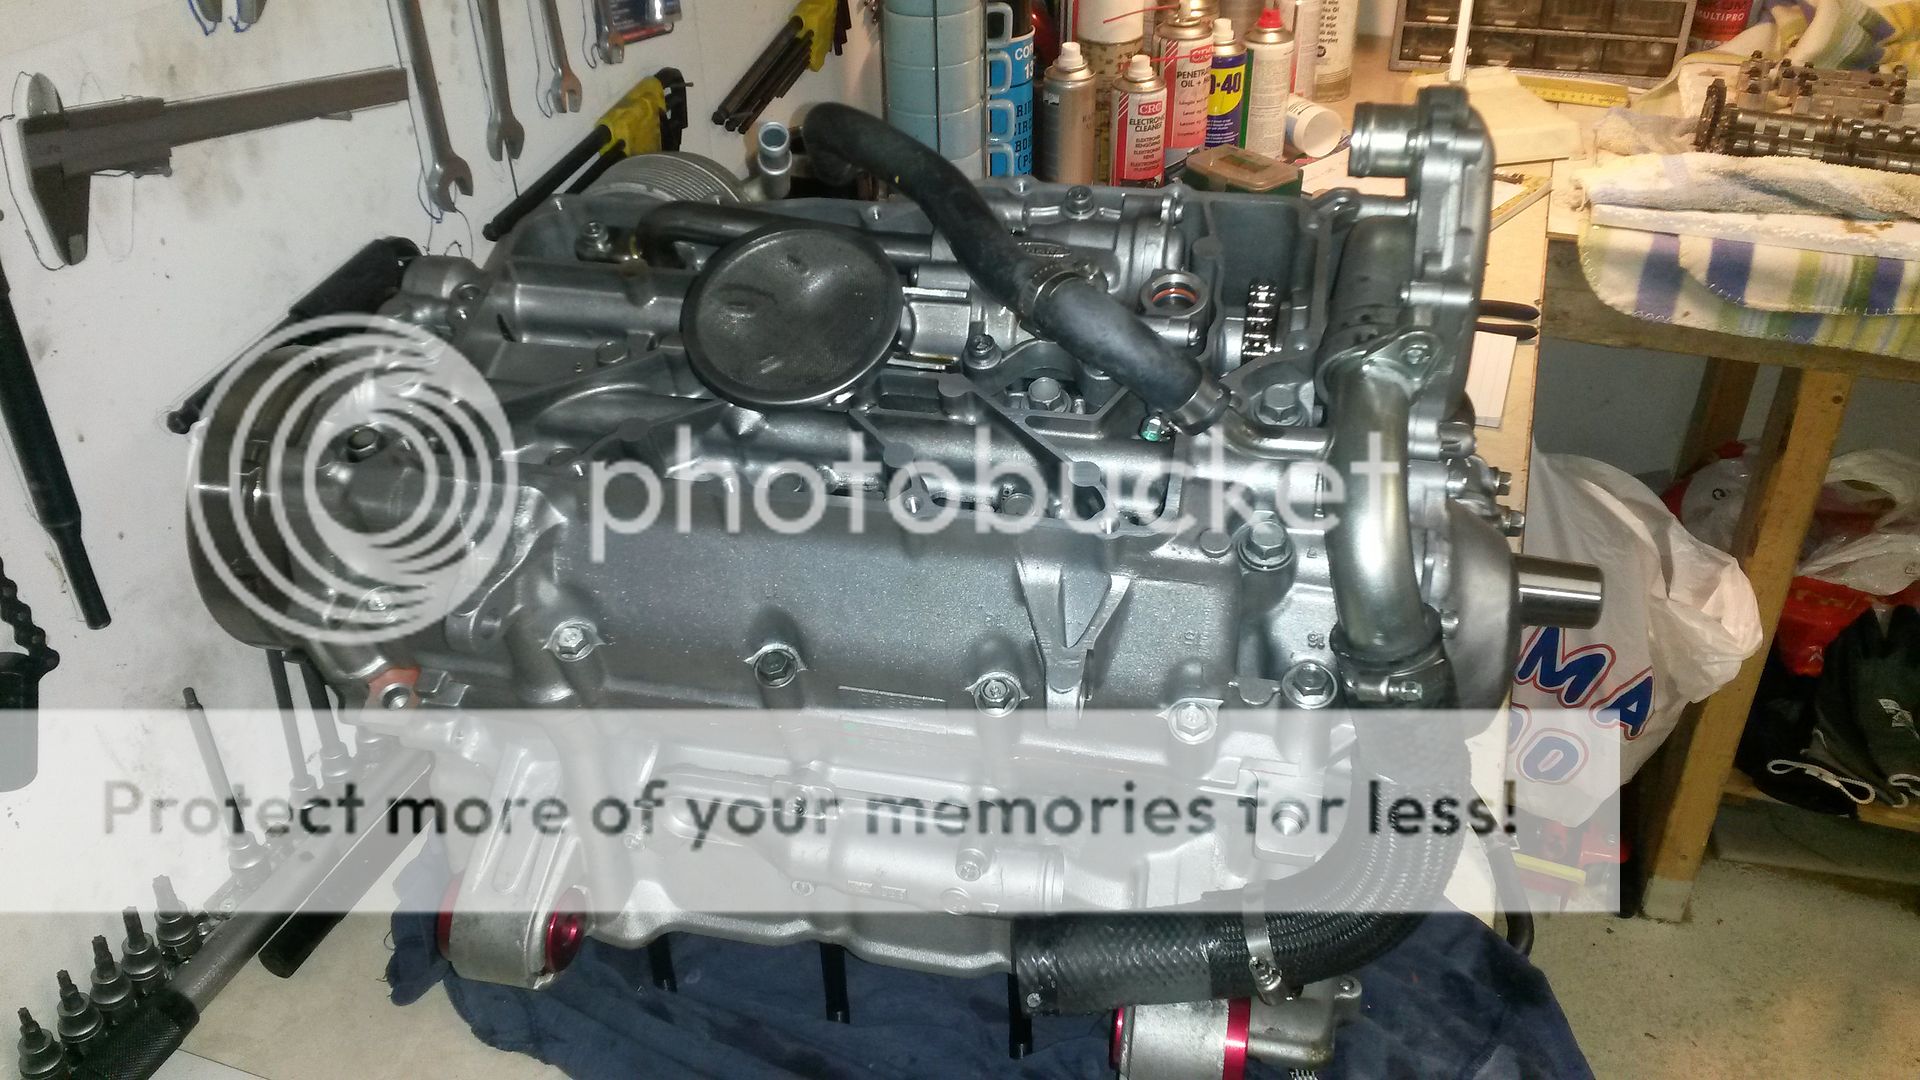
Installed: Water pump sprocket and chain, connected to oil pump. Clutch shaft, and clutch cover, oil pan cover and hoses also installed.

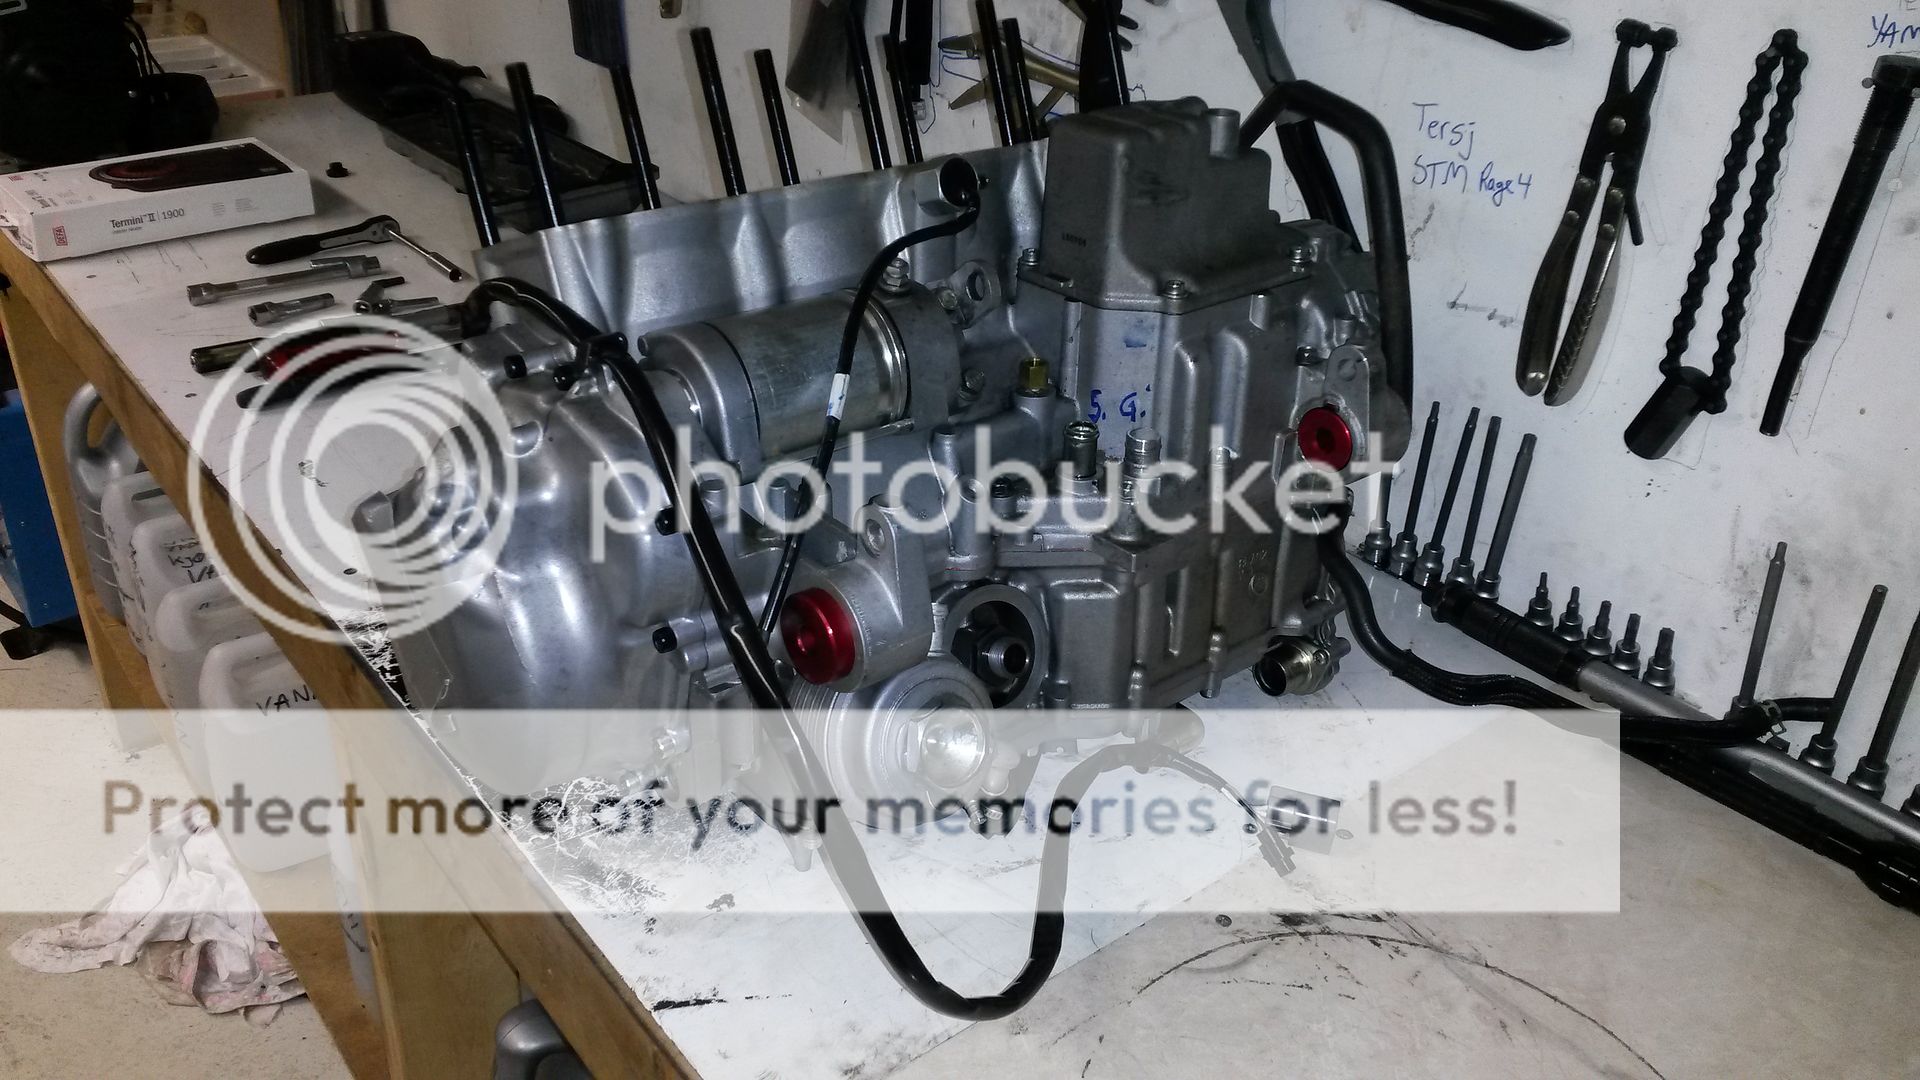
The block work is done.
Next I'm adjusting valve clearance.....
I did not shoot any pics of the piston and crank assembly.
I was alone and the work is messy with assembly oil all over my hands, no way I could shoot any pics without changing gloves all the time, so I didn't.
When installing the pistons, rings and rods; please carefully read the install instructions, do the measuring and adjust if necessary.
Failing to do so may cause engine damage.
When torqueing down the crank shaft; first torque the bolts in sequence to 15 Nm then torque the bolts an aditional 65-70 degrees also in sequence.
Failing to do so may cause engine damage.
NB! - This work is all covered in earlier posts in this thread.
Engine block parts have been joined. I used a sealant similar to Yamabond.
Oil pump installed.
Installed: Water pump sprocket and chain, connected to oil pump. Clutch shaft, and clutch cover, oil pan cover and hoses also installed.
The block work is done.
Next I'm adjusting valve clearance.....
rxrider
Jan-Ove Pedersen
- Joined
- Apr 25, 2003
- Messages
- 7,355
- Reaction score
- 64
- Points
- 1,753
- Location
- Lakselv - 70N & 25E
- Country
- Norway
- Snowmobile
- 2014 Phazer XTX, 2013 Phazer RTX, 2008 Apex RTX, 2007 Warrior, 2006 Attak
Update - December 2. - Adjusting valve clearance.
I use an Excel spread sheet when adjusting valve clearance. It makes the work a lot easier.
I add the measurements and the valve shim thickness into the spread sheet and it does calculate the appropriate valve shim thickness.
Quick and easy. The job now becomes having a lot of 180 and 185 valve shims in stock.
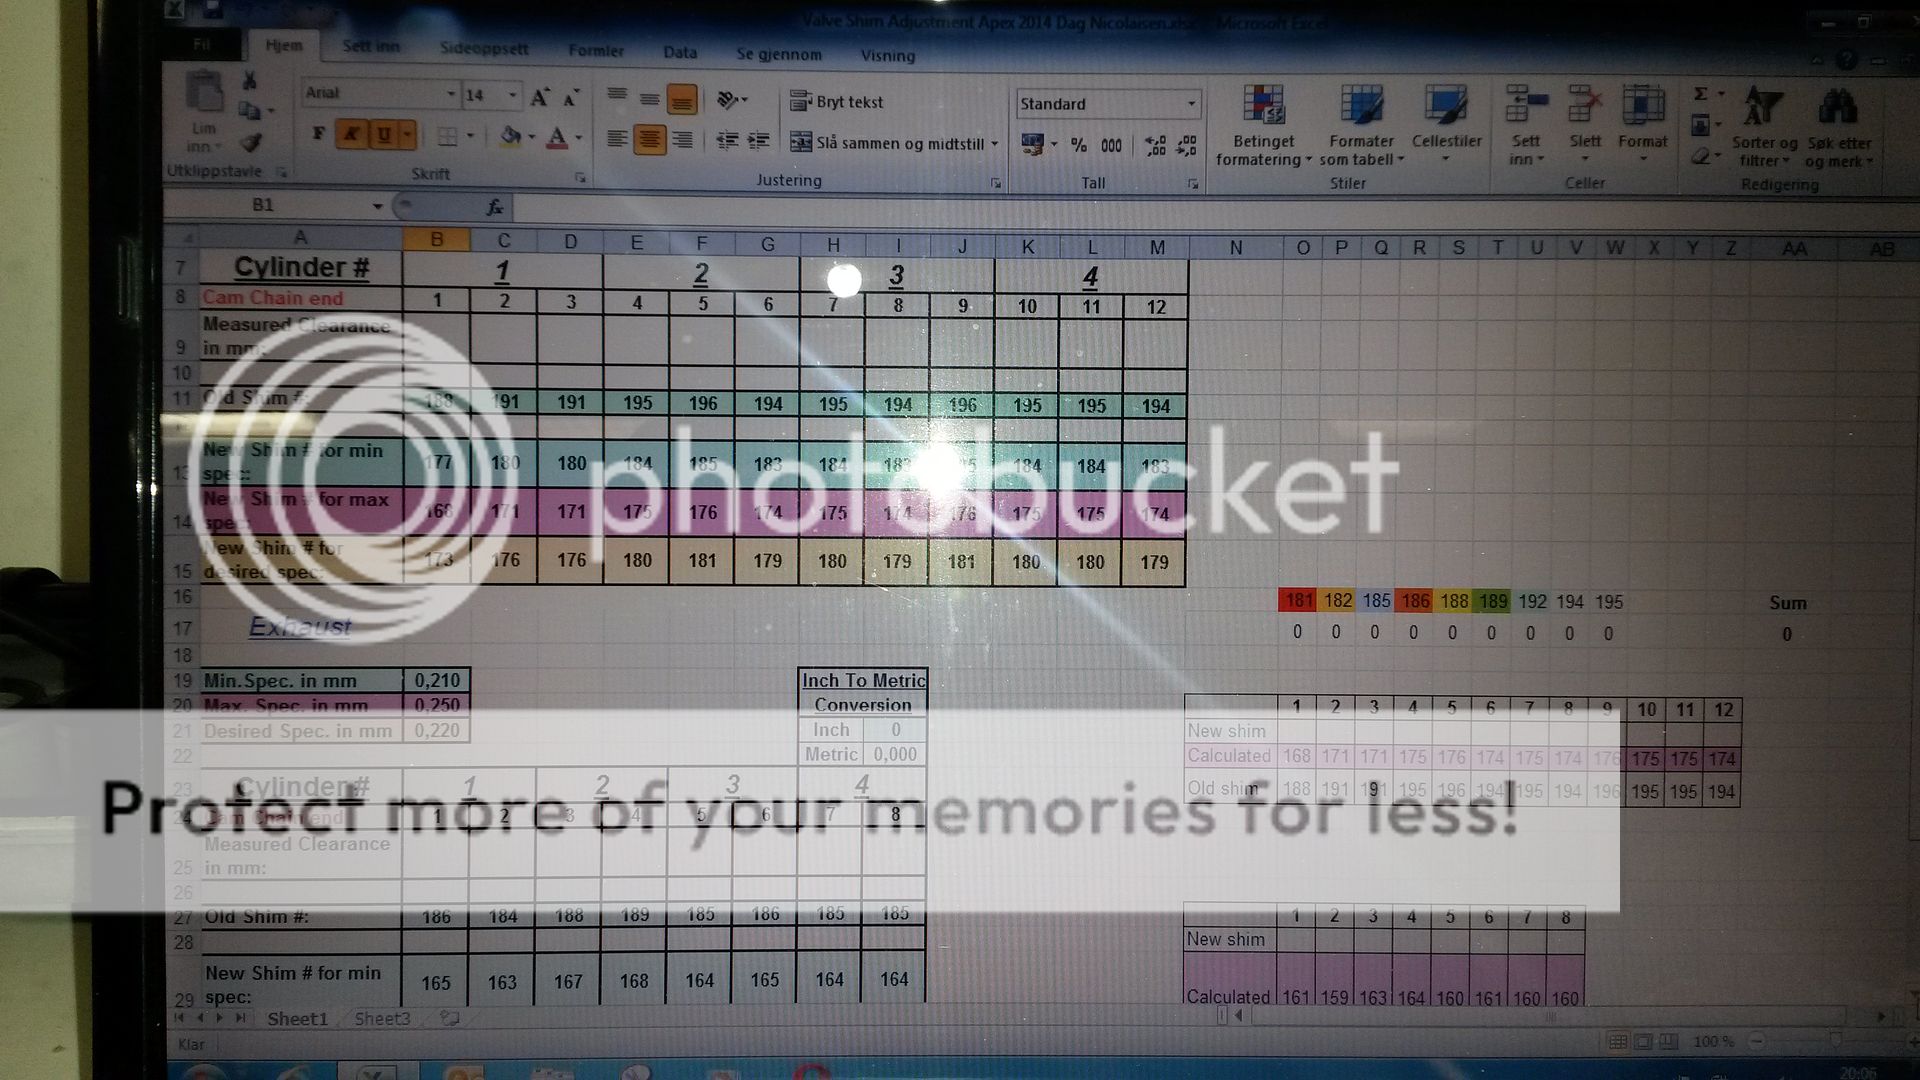
First take, measurements has been done, new shims has been selected and installed, cams are going in before new measurement is done.
I use HotCams shim kits, they are affordable and high quality.
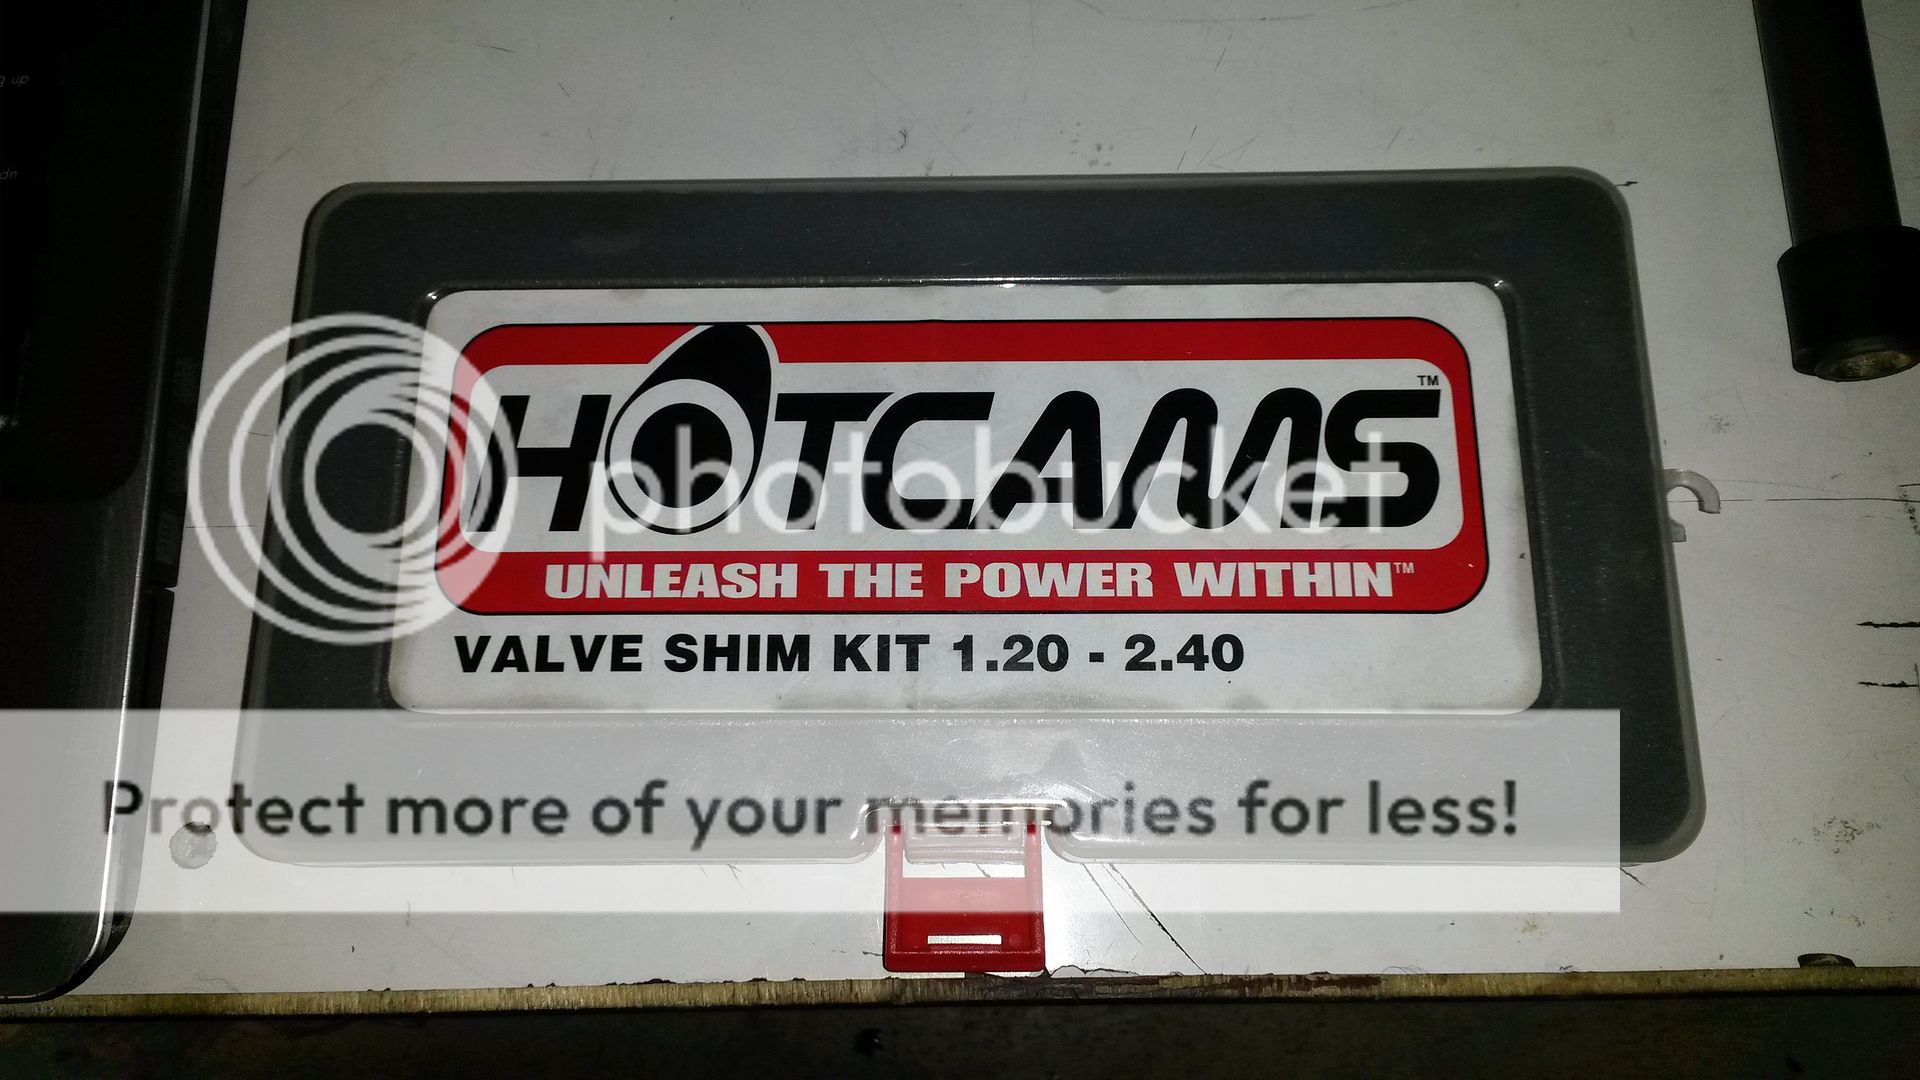
I have not been able to find any refill kit from HotCams or elsewhere, because I typically run out of 180 and 185 shims.
I have a stock pile of 190+ shims, more than I can every use.
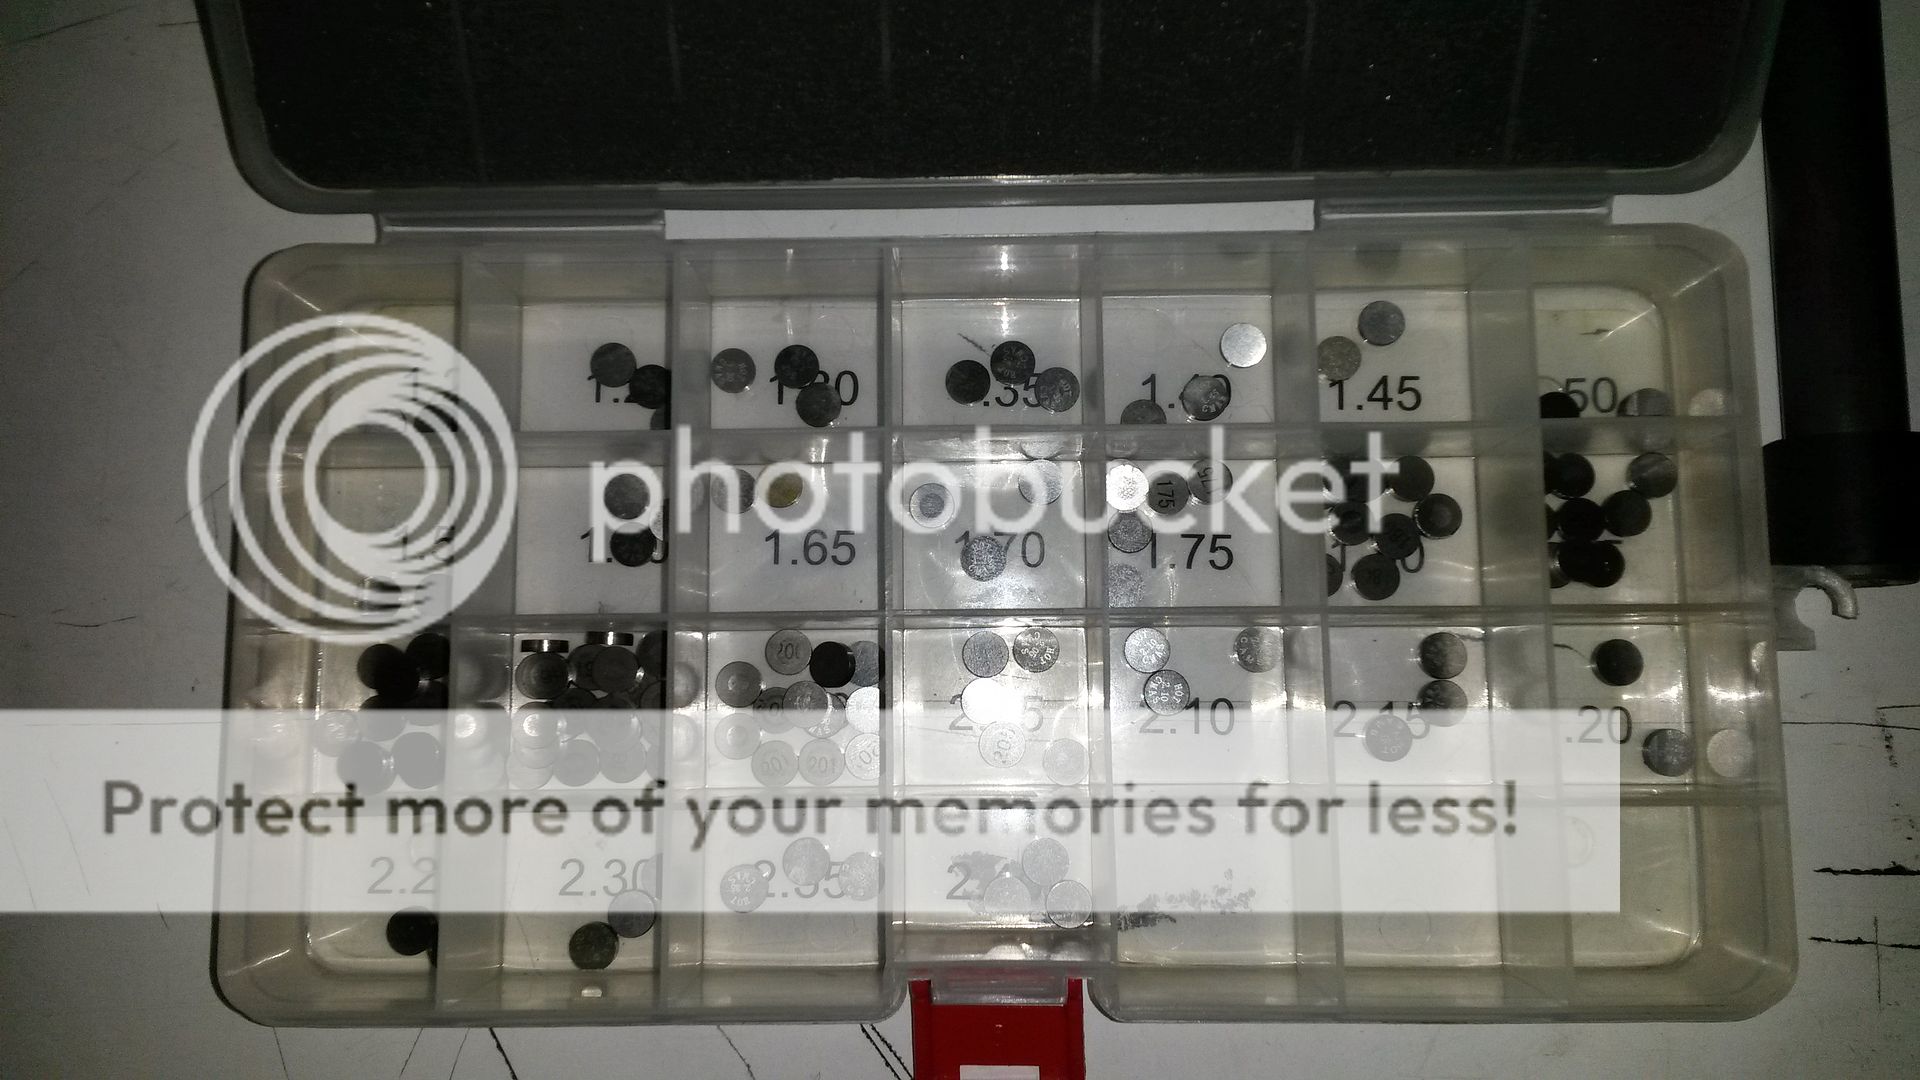
It took a few iterations of the process with minor adjustments to a few valves before I were satisfied with the result.

Work is done
Next is cam shaft install.
I use an Excel spread sheet when adjusting valve clearance. It makes the work a lot easier.
I add the measurements and the valve shim thickness into the spread sheet and it does calculate the appropriate valve shim thickness.
Quick and easy. The job now becomes having a lot of 180 and 185 valve shims in stock.
First take, measurements has been done, new shims has been selected and installed, cams are going in before new measurement is done.
I use HotCams shim kits, they are affordable and high quality.
I have not been able to find any refill kit from HotCams or elsewhere, because I typically run out of 180 and 185 shims.
I have a stock pile of 190+ shims, more than I can every use.
It took a few iterations of the process with minor adjustments to a few valves before I were satisfied with the result.
Work is done
Next is cam shaft install.
rxrider
Jan-Ove Pedersen
- Joined
- Apr 25, 2003
- Messages
- 7,355
- Reaction score
- 64
- Points
- 1,753
- Location
- Lakselv - 70N & 25E
- Country
- Norway
- Snowmobile
- 2014 Phazer XTX, 2013 Phazer RTX, 2008 Apex RTX, 2007 Warrior, 2006 Attak
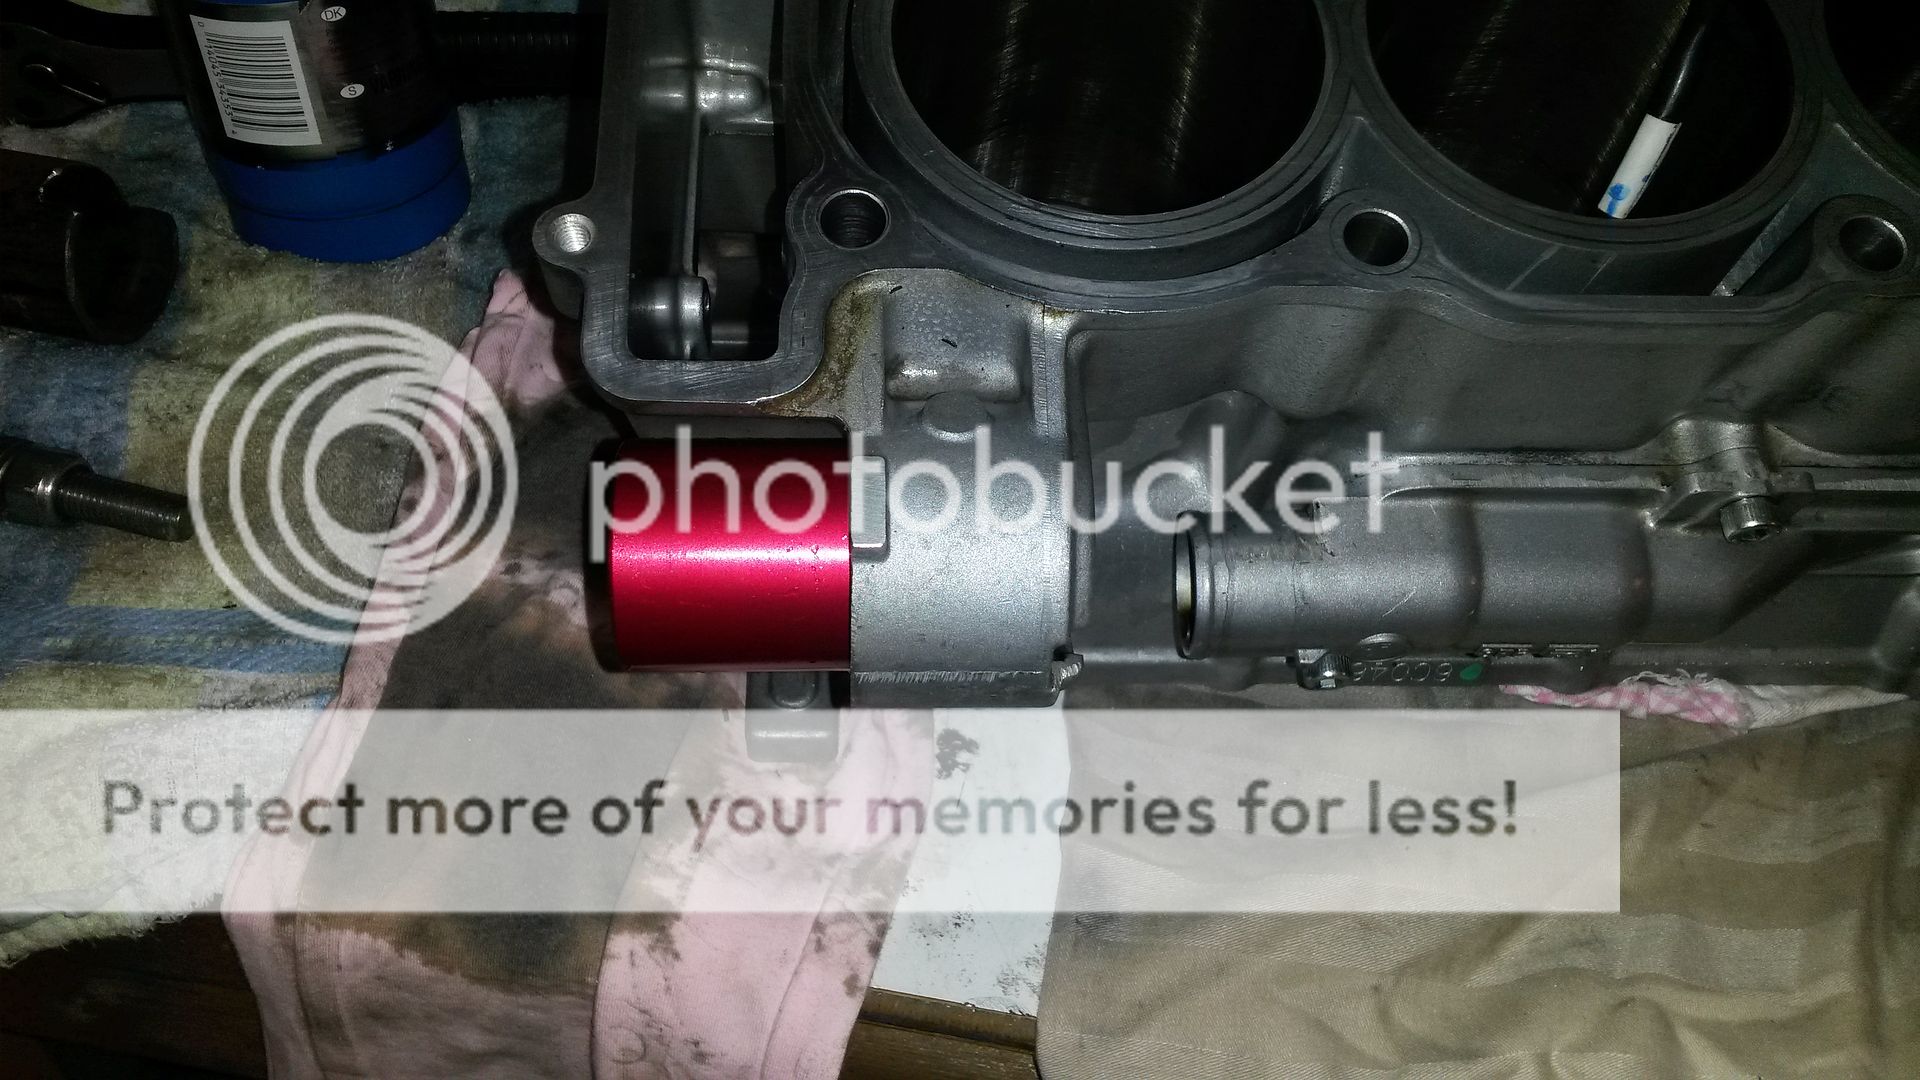
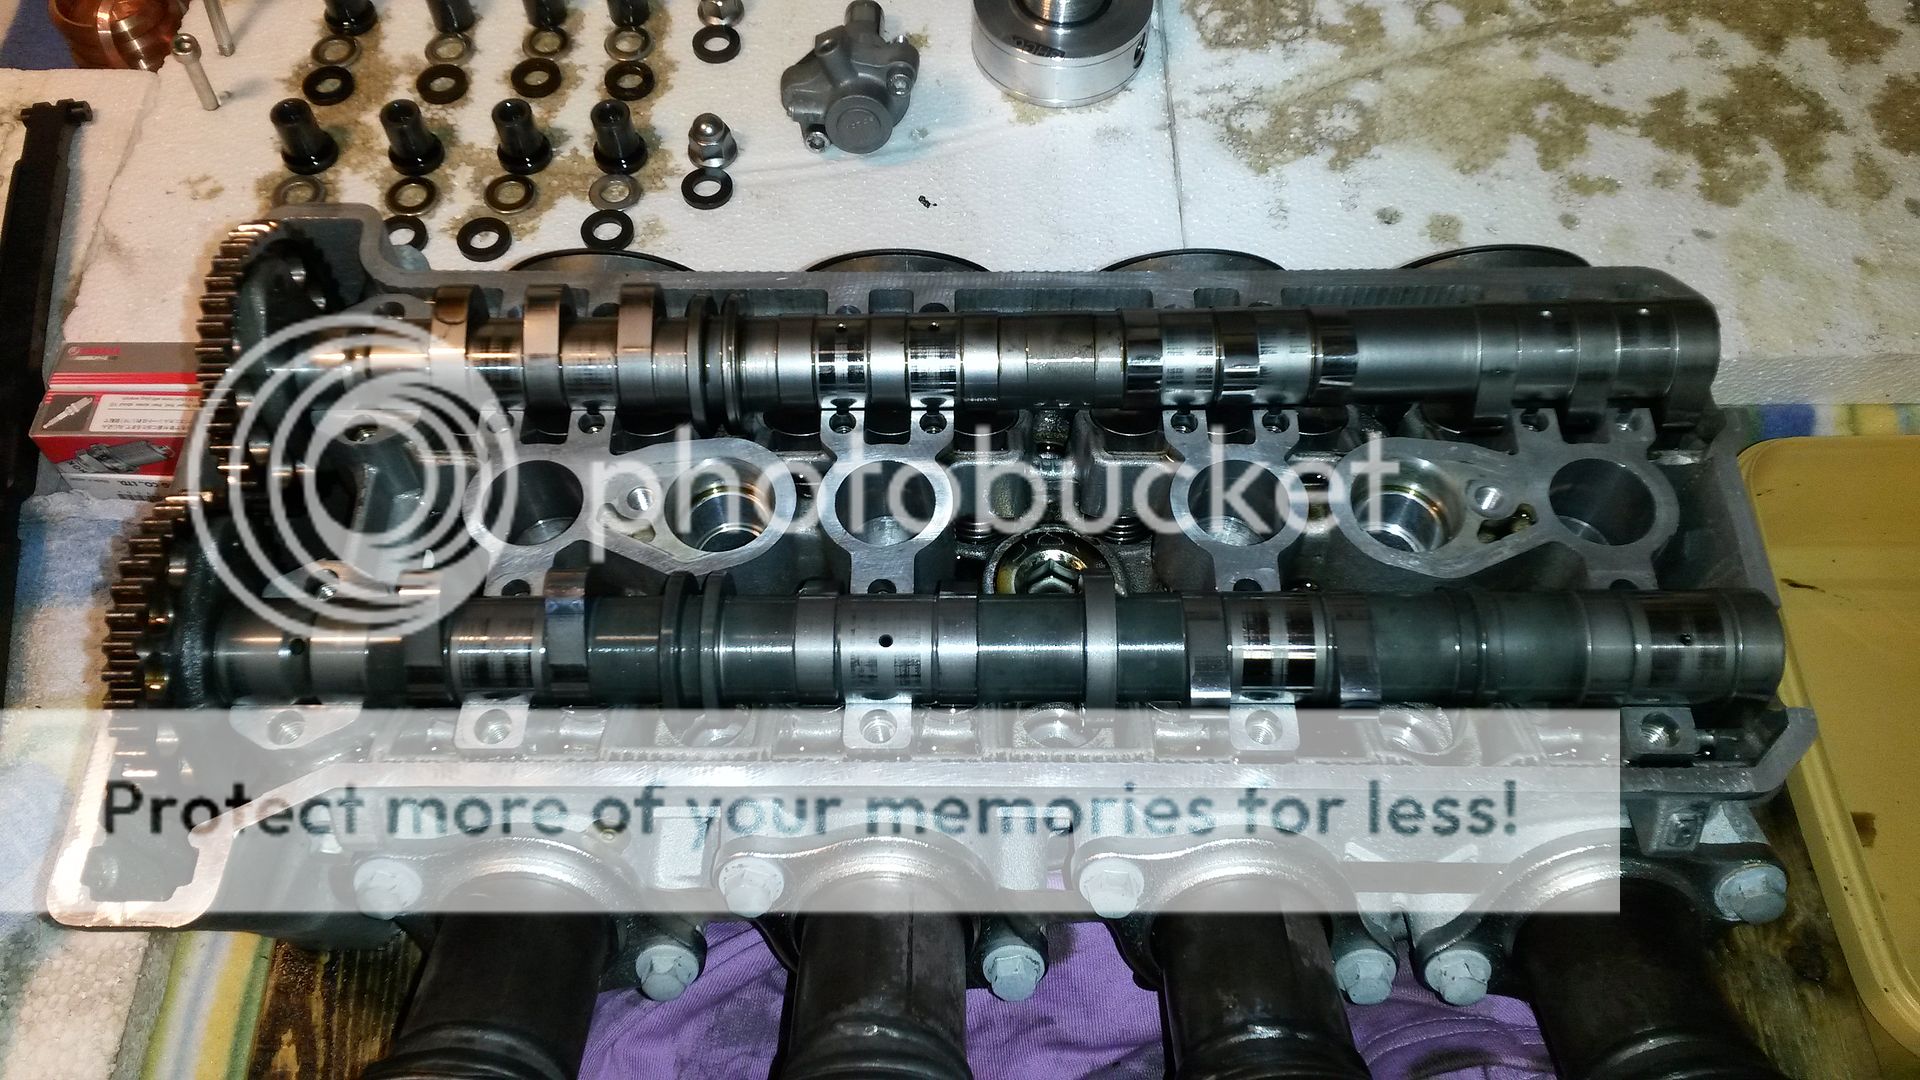
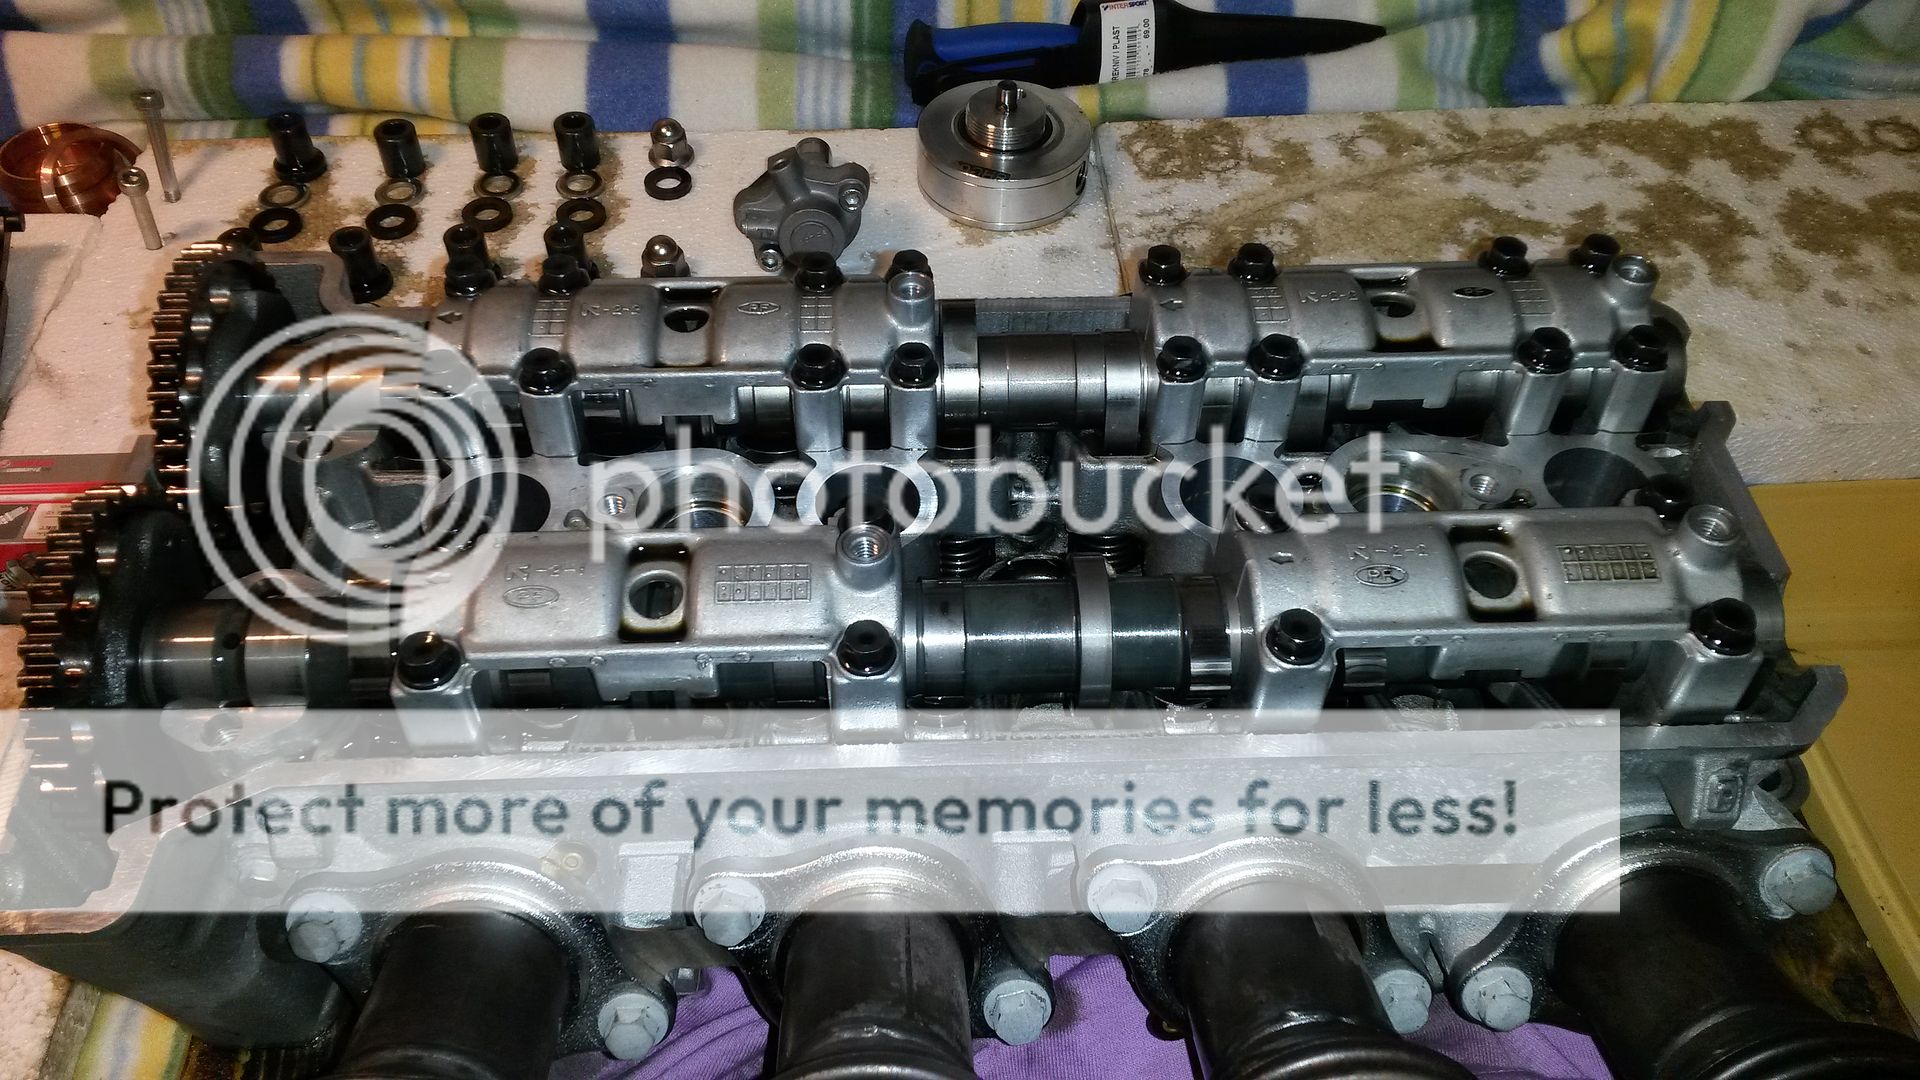
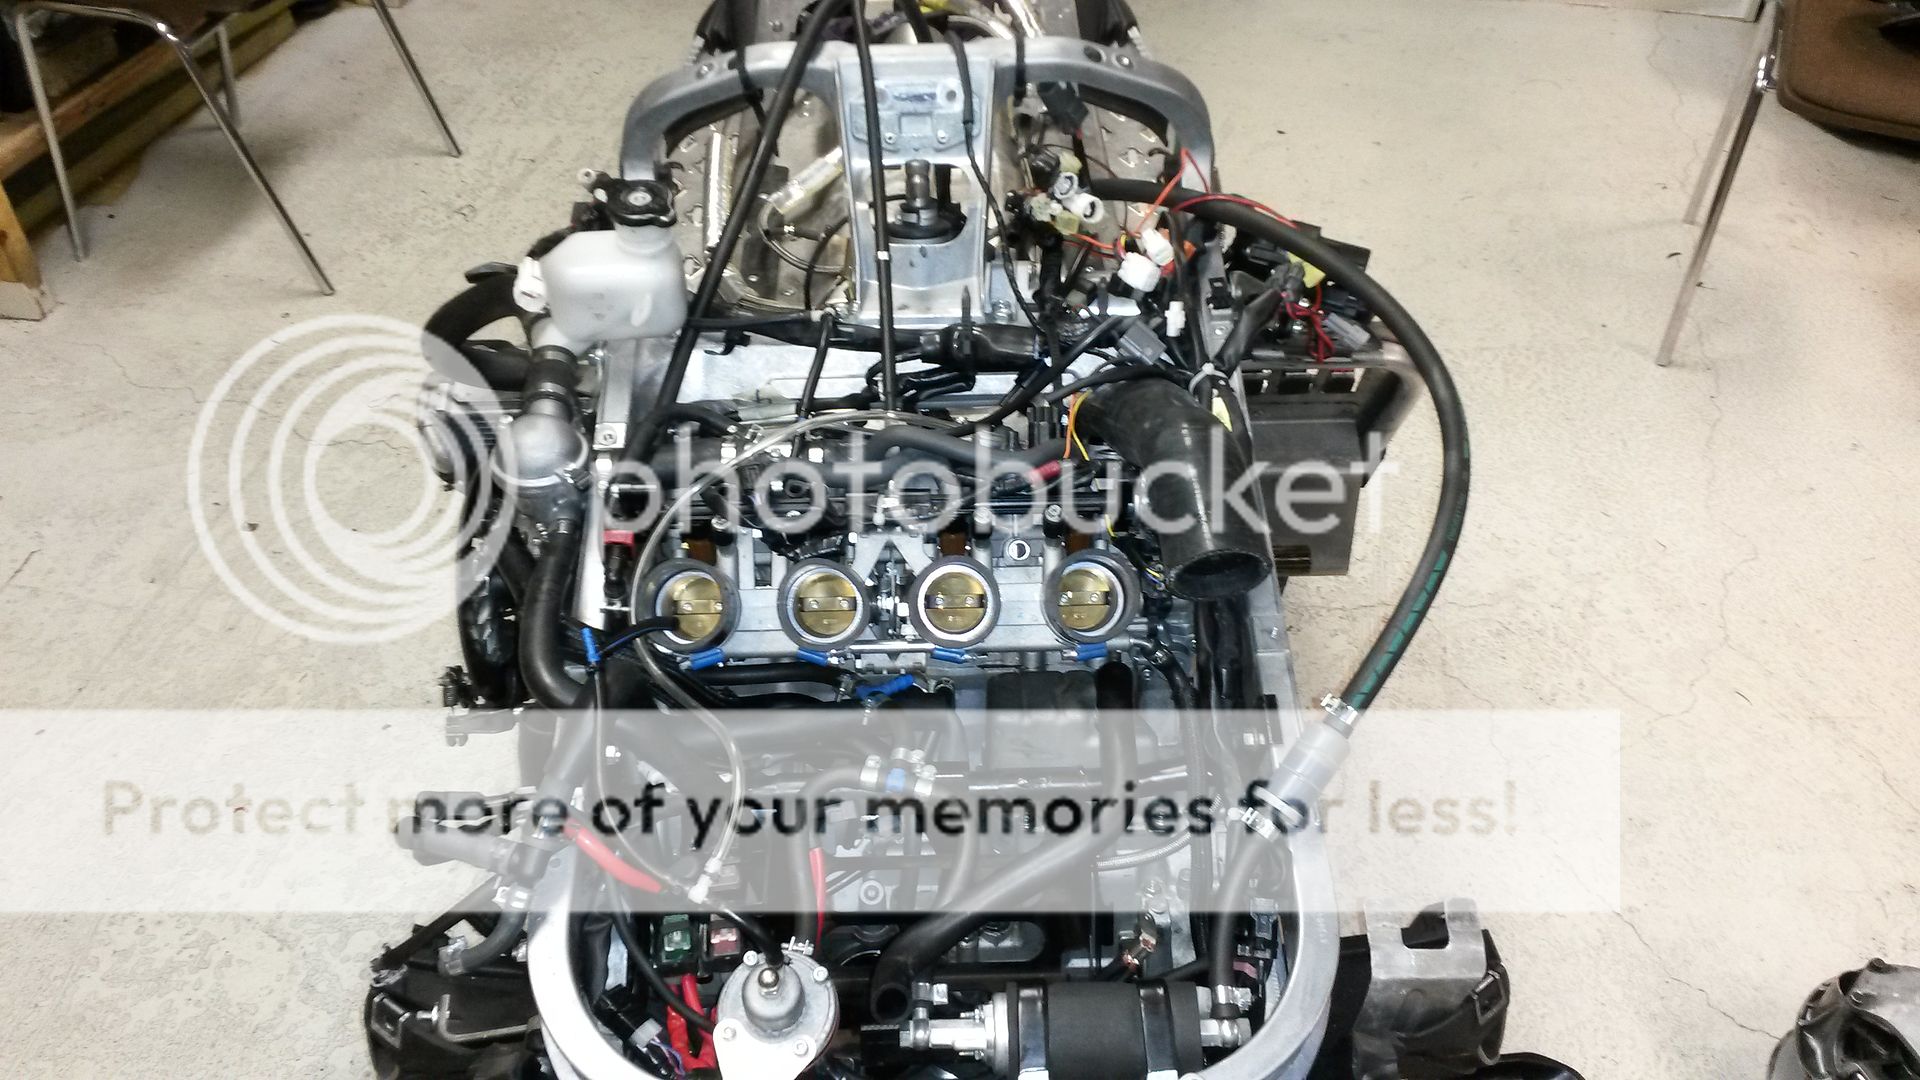
Update - December 3. - Installing cams shafts.
To make sure I get true TDC - Top Dead Center - I use a micrometer and measure within 1/100 of a mm where the TDC is.
Usually TDC is on the mark, but not always.
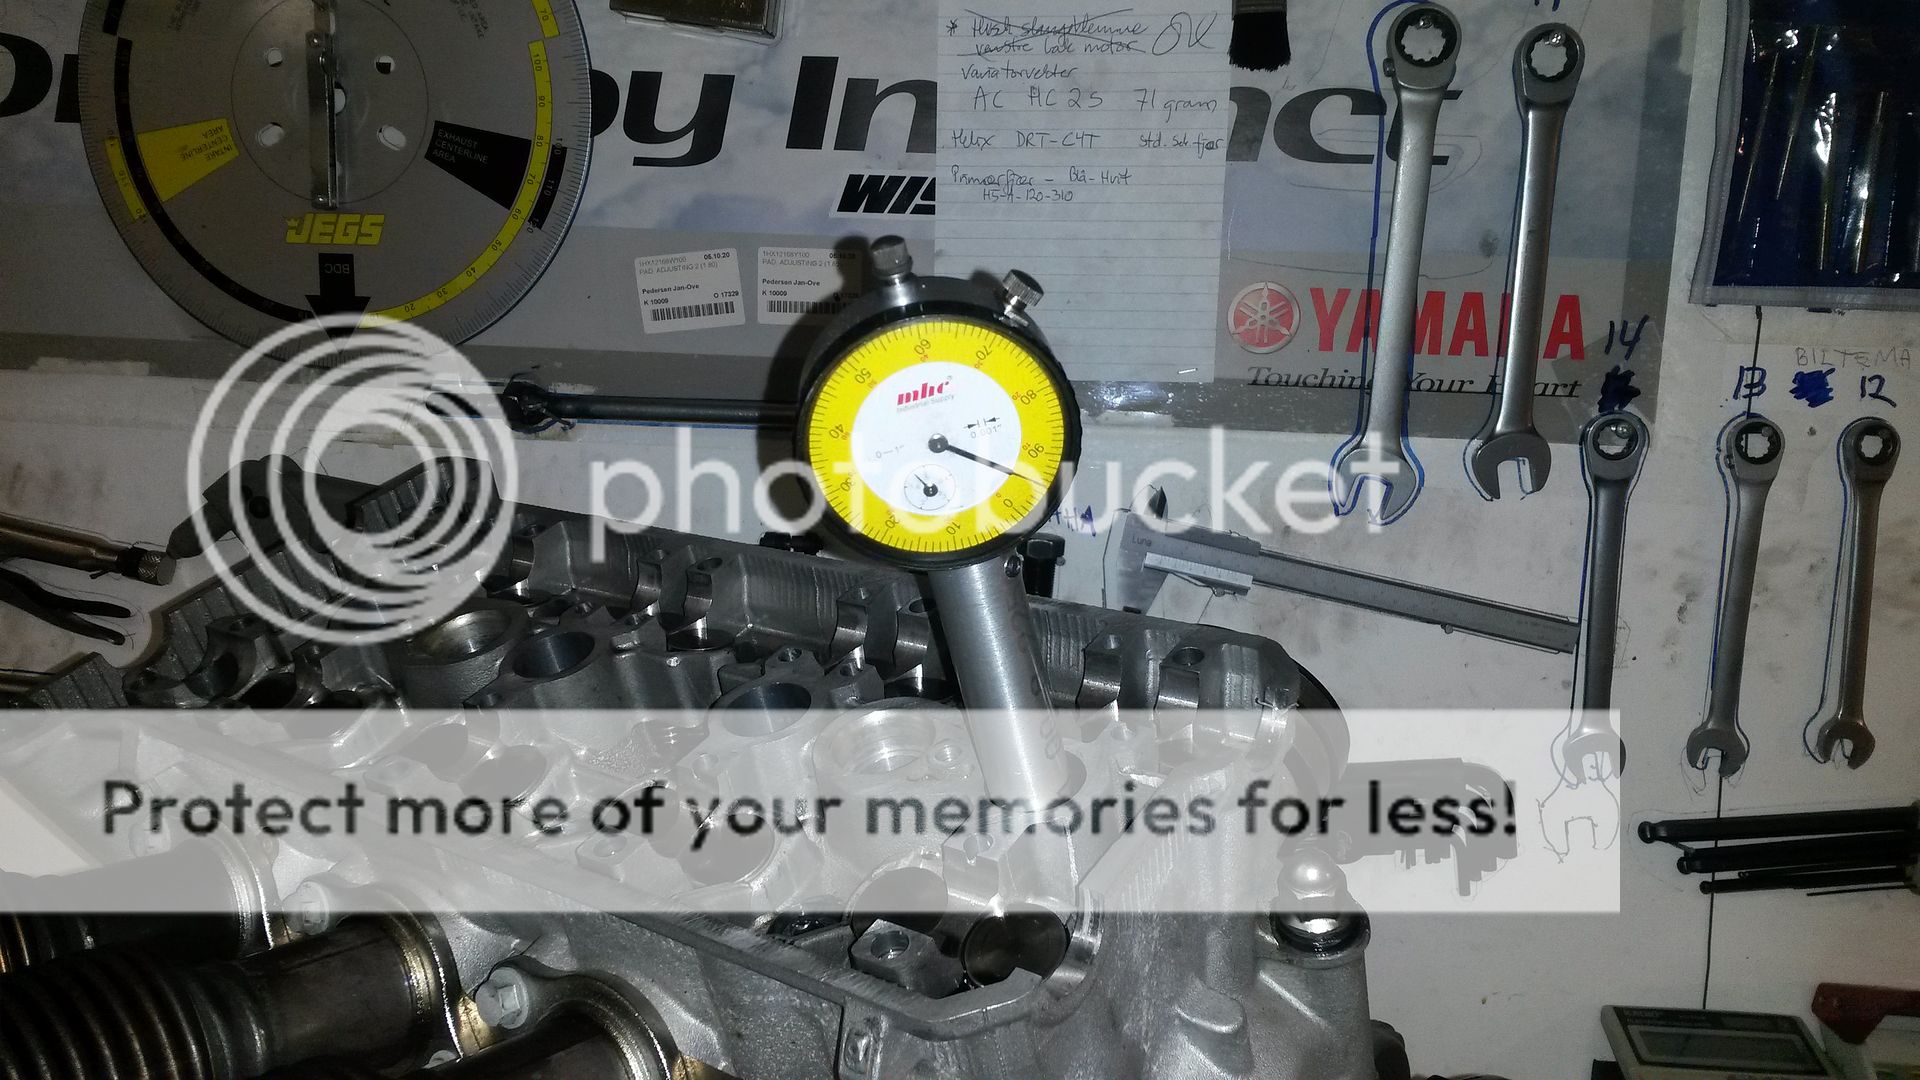
On this sled it was A OK.

Can anyone spot a problem in this pic?
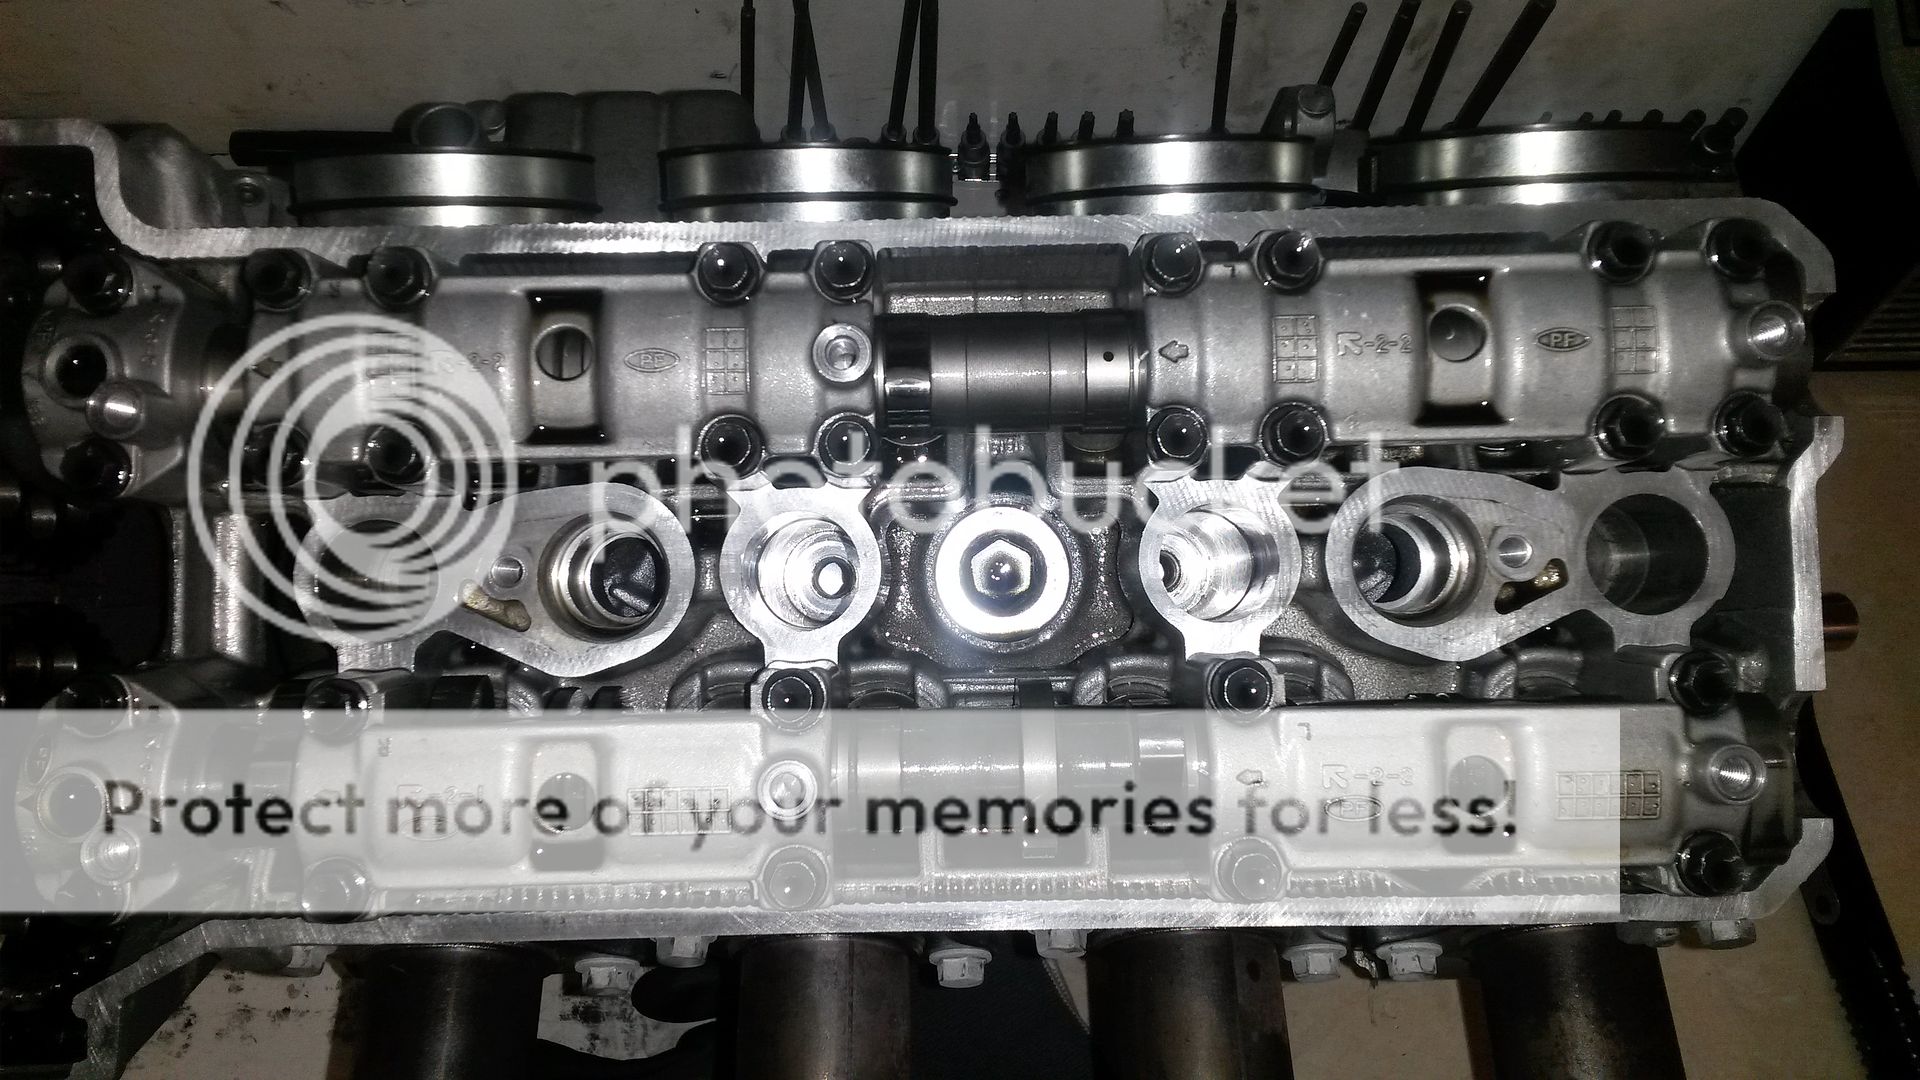
Even it looks like the marks on the cam shafts line up THEY DON'T!!!!
Looks can be deceptive, always check and recheck, then turn the engine one more time and check again, then once more.
When you are 100% sure your eyes haven't deceived you you're done.
To be 100% honest I didn't spot that the cams was off, so I had to open the engine after it was started up.
Needless to say it didn't run right with the cams off a teeth on the intake cam. BUMMER BUT MY BAD.
I can't stress this enough, being lazy (because I have done this so many times I figure I could do this blindfolded, well I can't and so does nobody else) does not save time, it only adds to a project.
The message is: Make sure the marks are spot on or else the sled will not run correctly.
Next work is installing the engine into the chassis.
To make sure I get true TDC - Top Dead Center - I use a micrometer and measure within 1/100 of a mm where the TDC is.
Usually TDC is on the mark, but not always.
On this sled it was A OK.
Can anyone spot a problem in this pic?
Even it looks like the marks on the cam shafts line up THEY DON'T!!!!
Looks can be deceptive, always check and recheck, then turn the engine one more time and check again, then once more.
When you are 100% sure your eyes haven't deceived you you're done.
To be 100% honest I didn't spot that the cams was off, so I had to open the engine after it was started up.
Needless to say it didn't run right with the cams off a teeth on the intake cam. BUMMER BUT MY BAD.
I can't stress this enough, being lazy (because I have done this so many times I figure I could do this blindfolded, well I can't and so does nobody else) does not save time, it only adds to a project.
The message is: Make sure the marks are spot on or else the sled will not run correctly.
Next work is installing the engine into the chassis.
rxrider
Jan-Ove Pedersen
- Joined
- Apr 25, 2003
- Messages
- 7,355
- Reaction score
- 64
- Points
- 1,753
- Location
- Lakselv - 70N & 25E
- Country
- Norway
- Snowmobile
- 2014 Phazer XTX, 2013 Phazer RTX, 2008 Apex RTX, 2007 Warrior, 2006 Attak
Update - December 10. - Installing the engine into chassis.
I have a table on wheels. I rolled the table up to the workbench and lifted the motor onto the table.
I rolled the table over to my chain pulley, it's mounted to the cross beams in my ceiling.
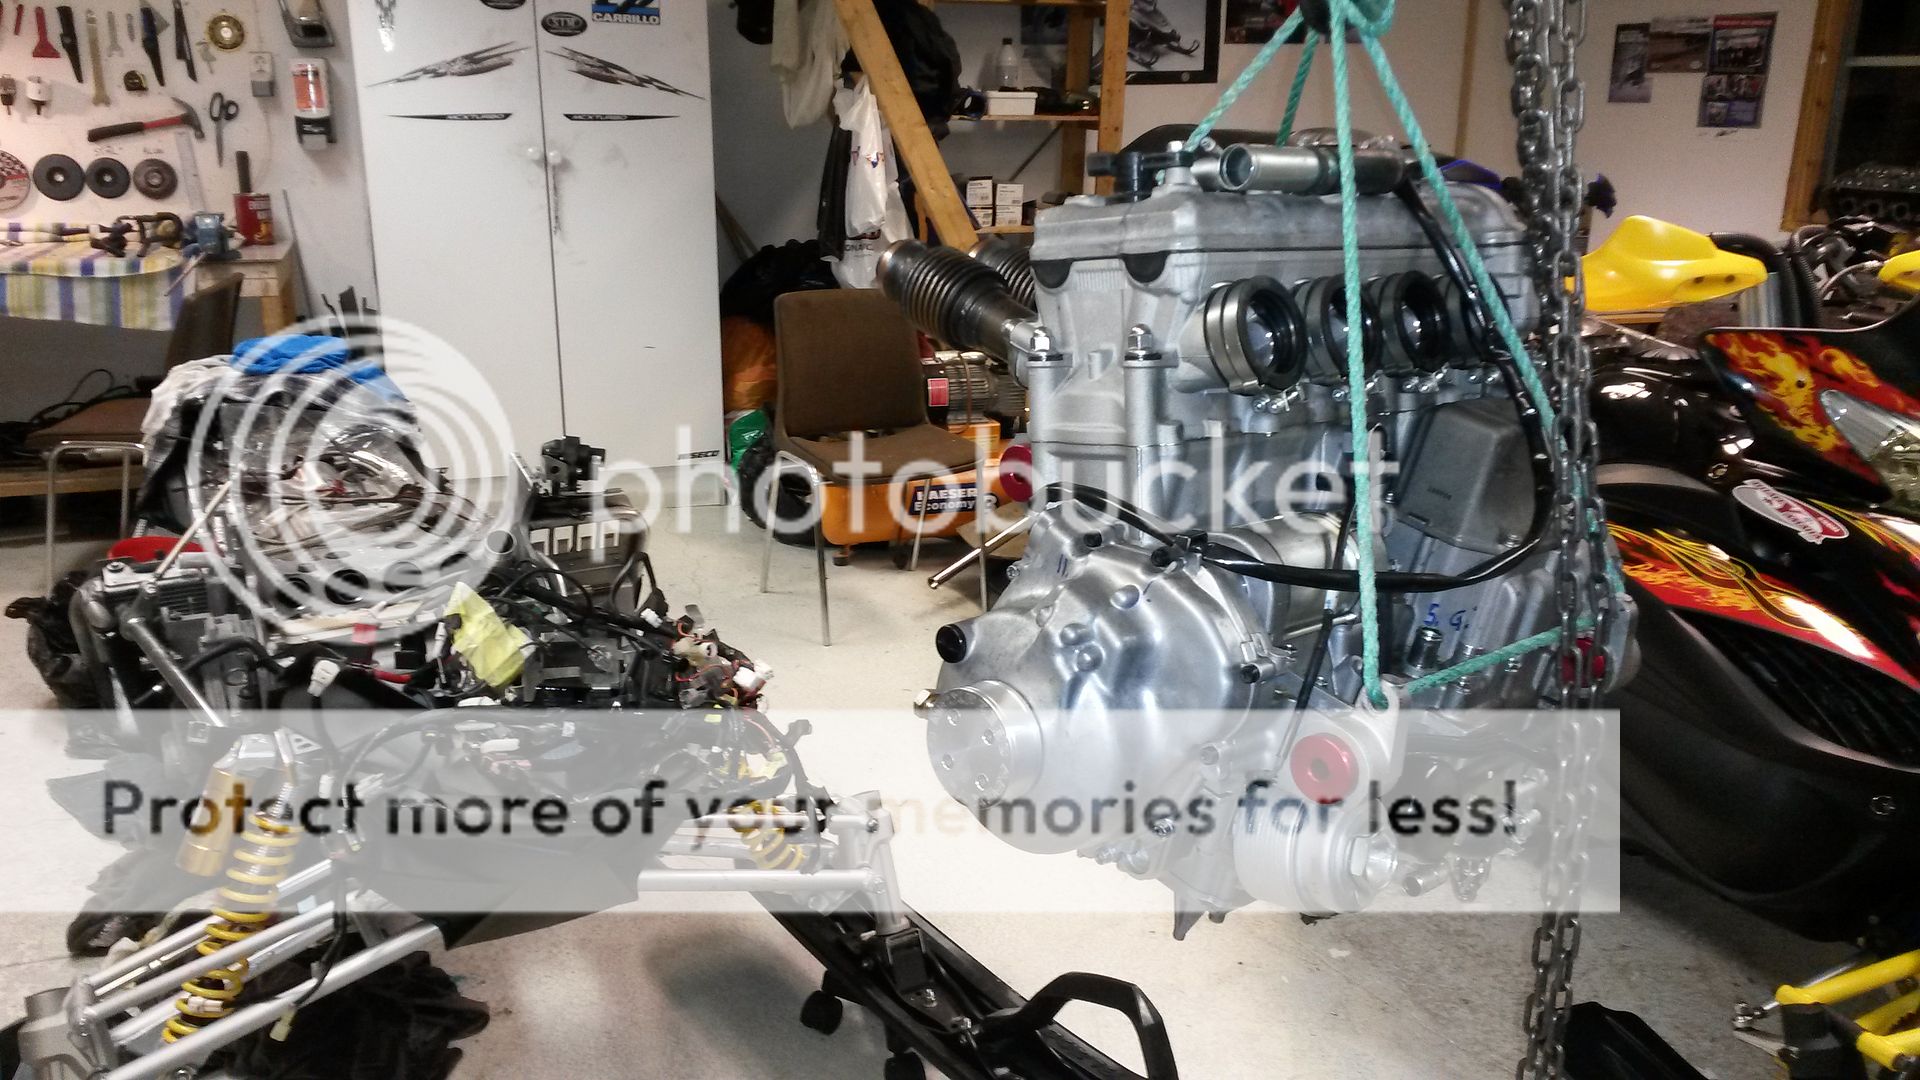
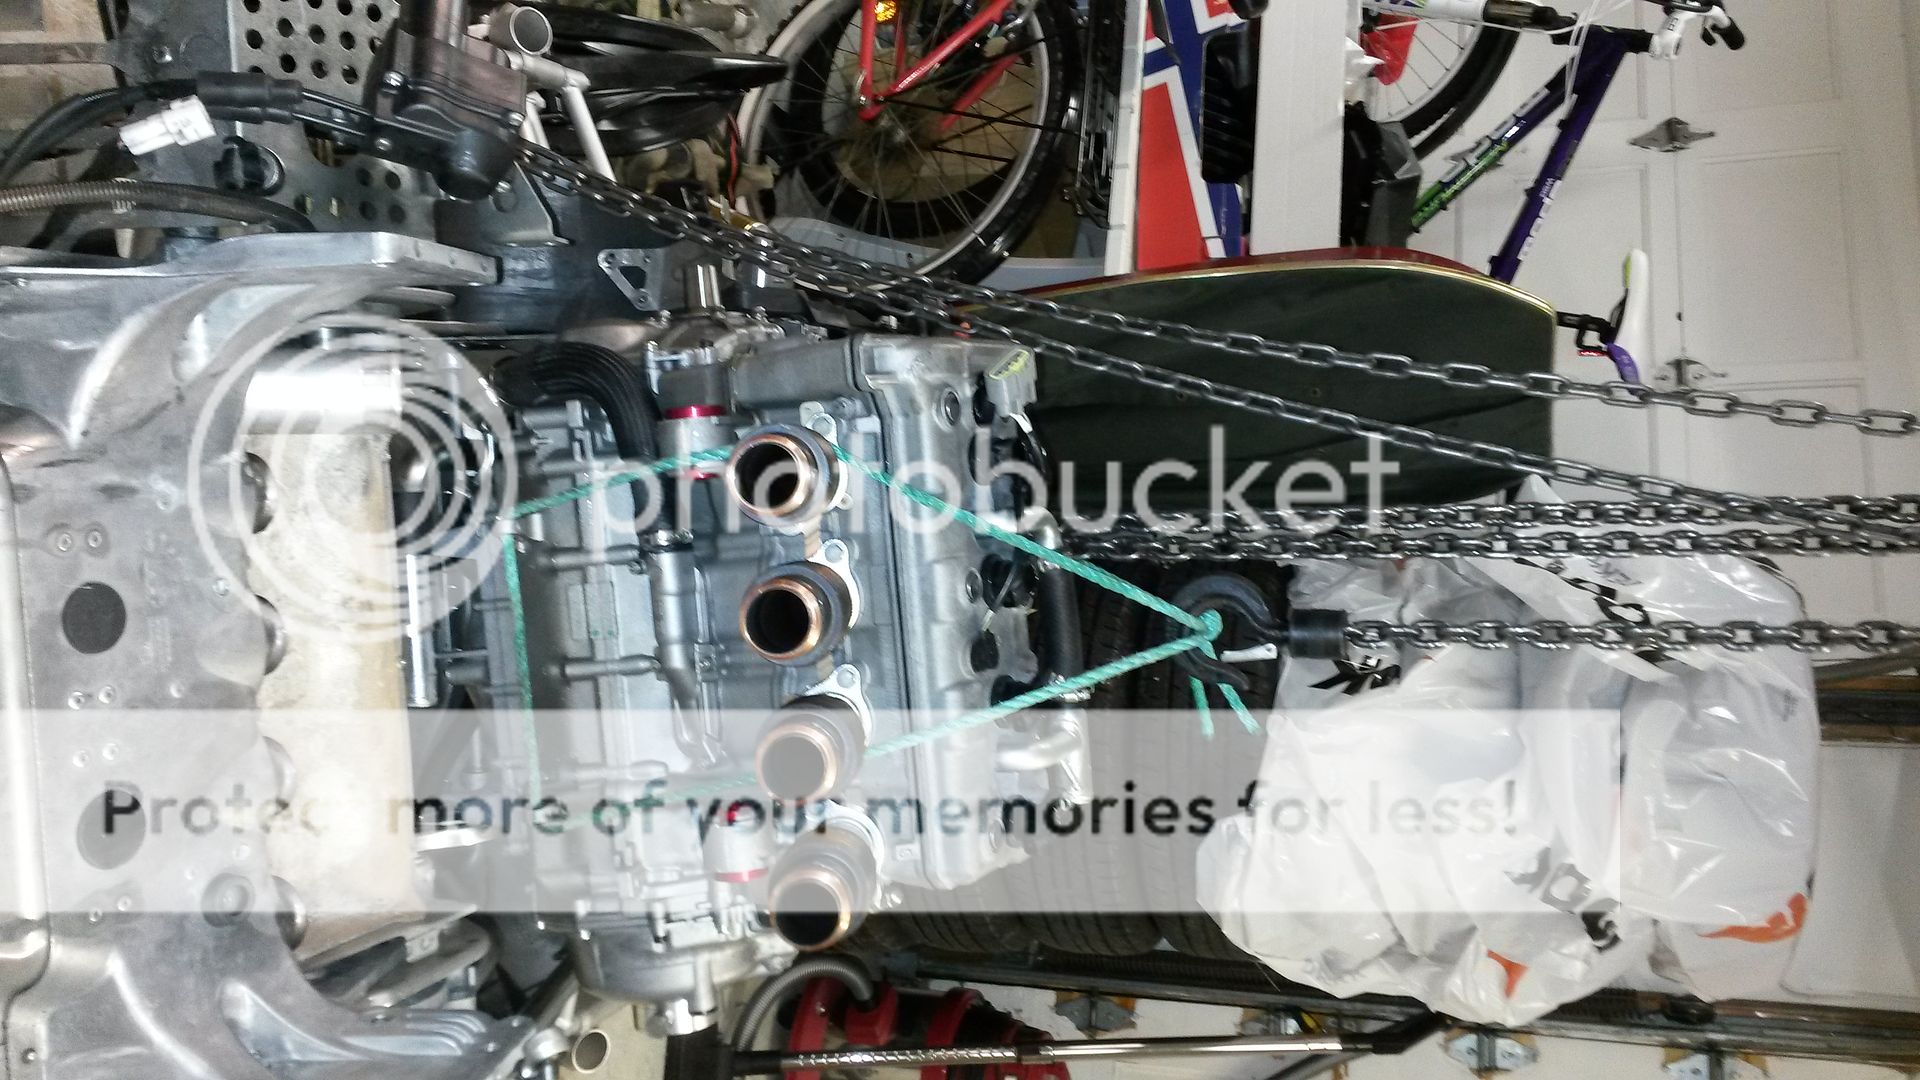
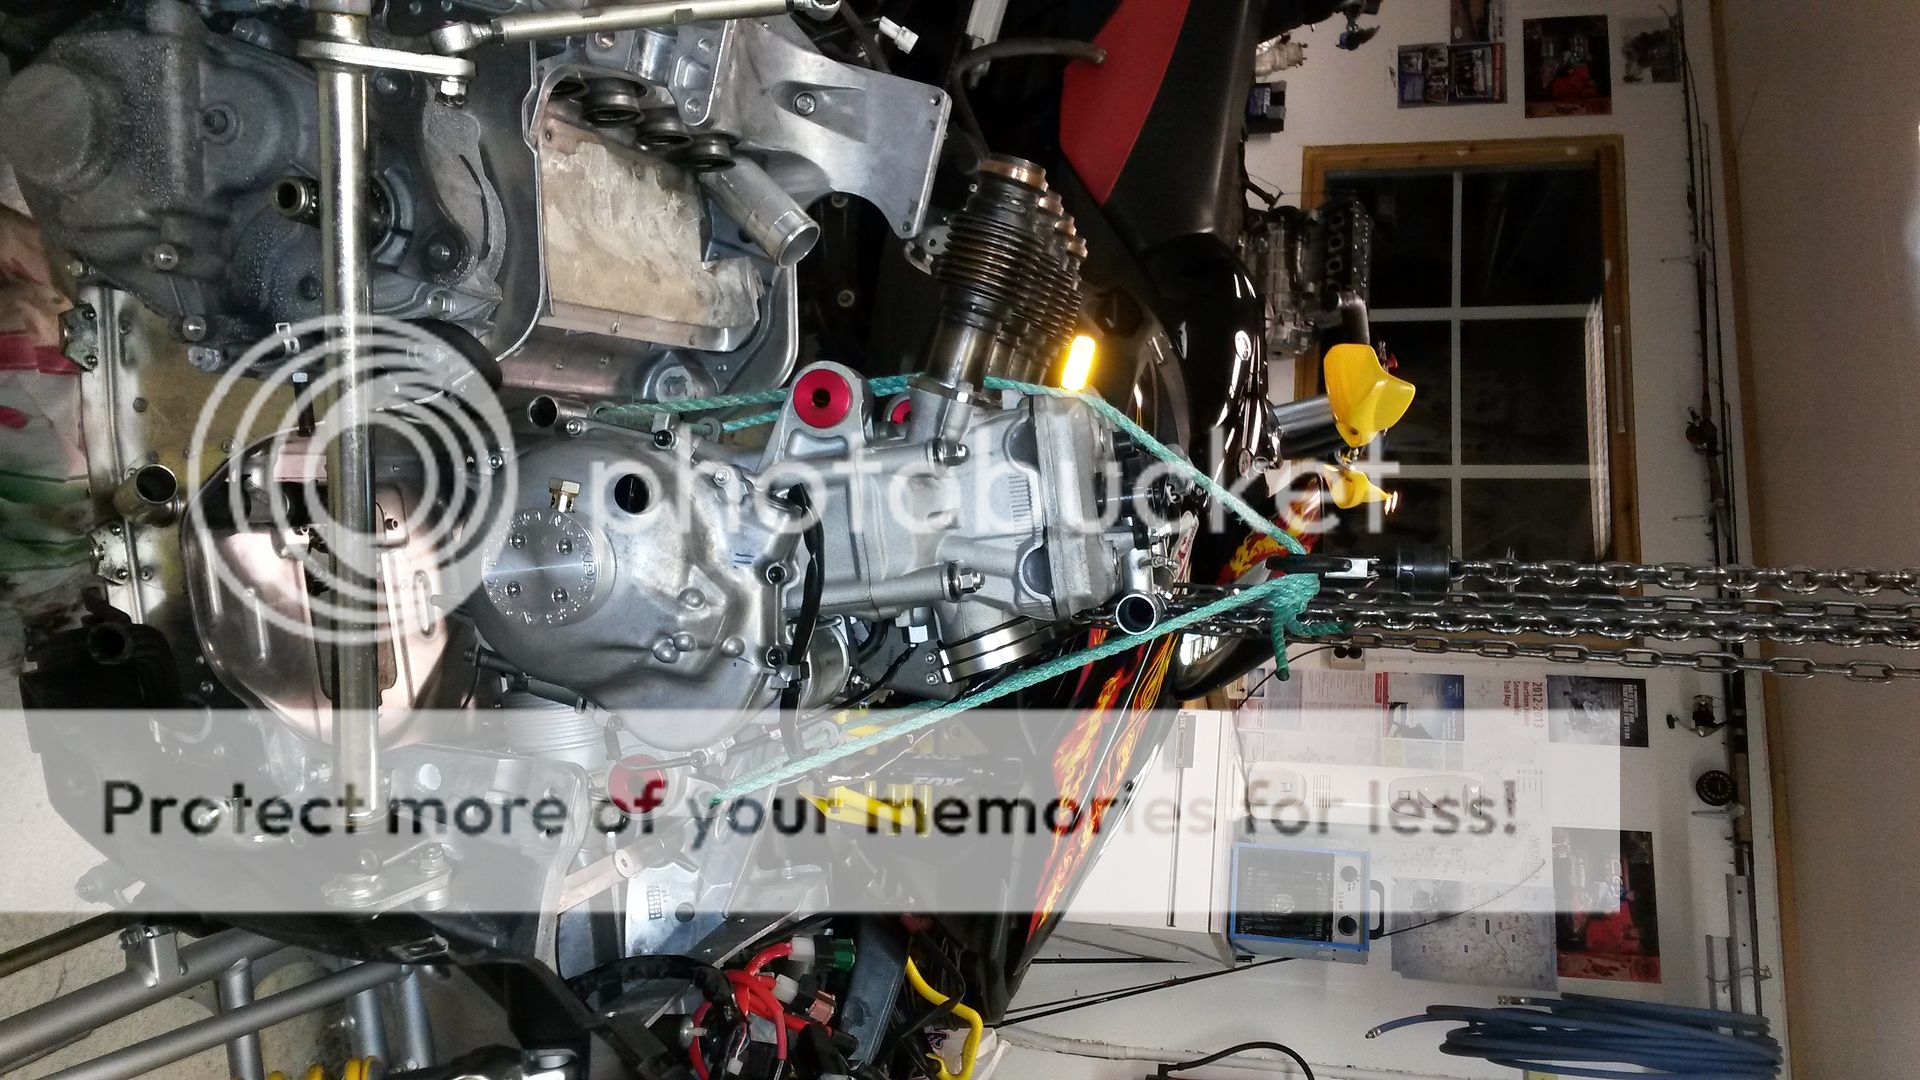
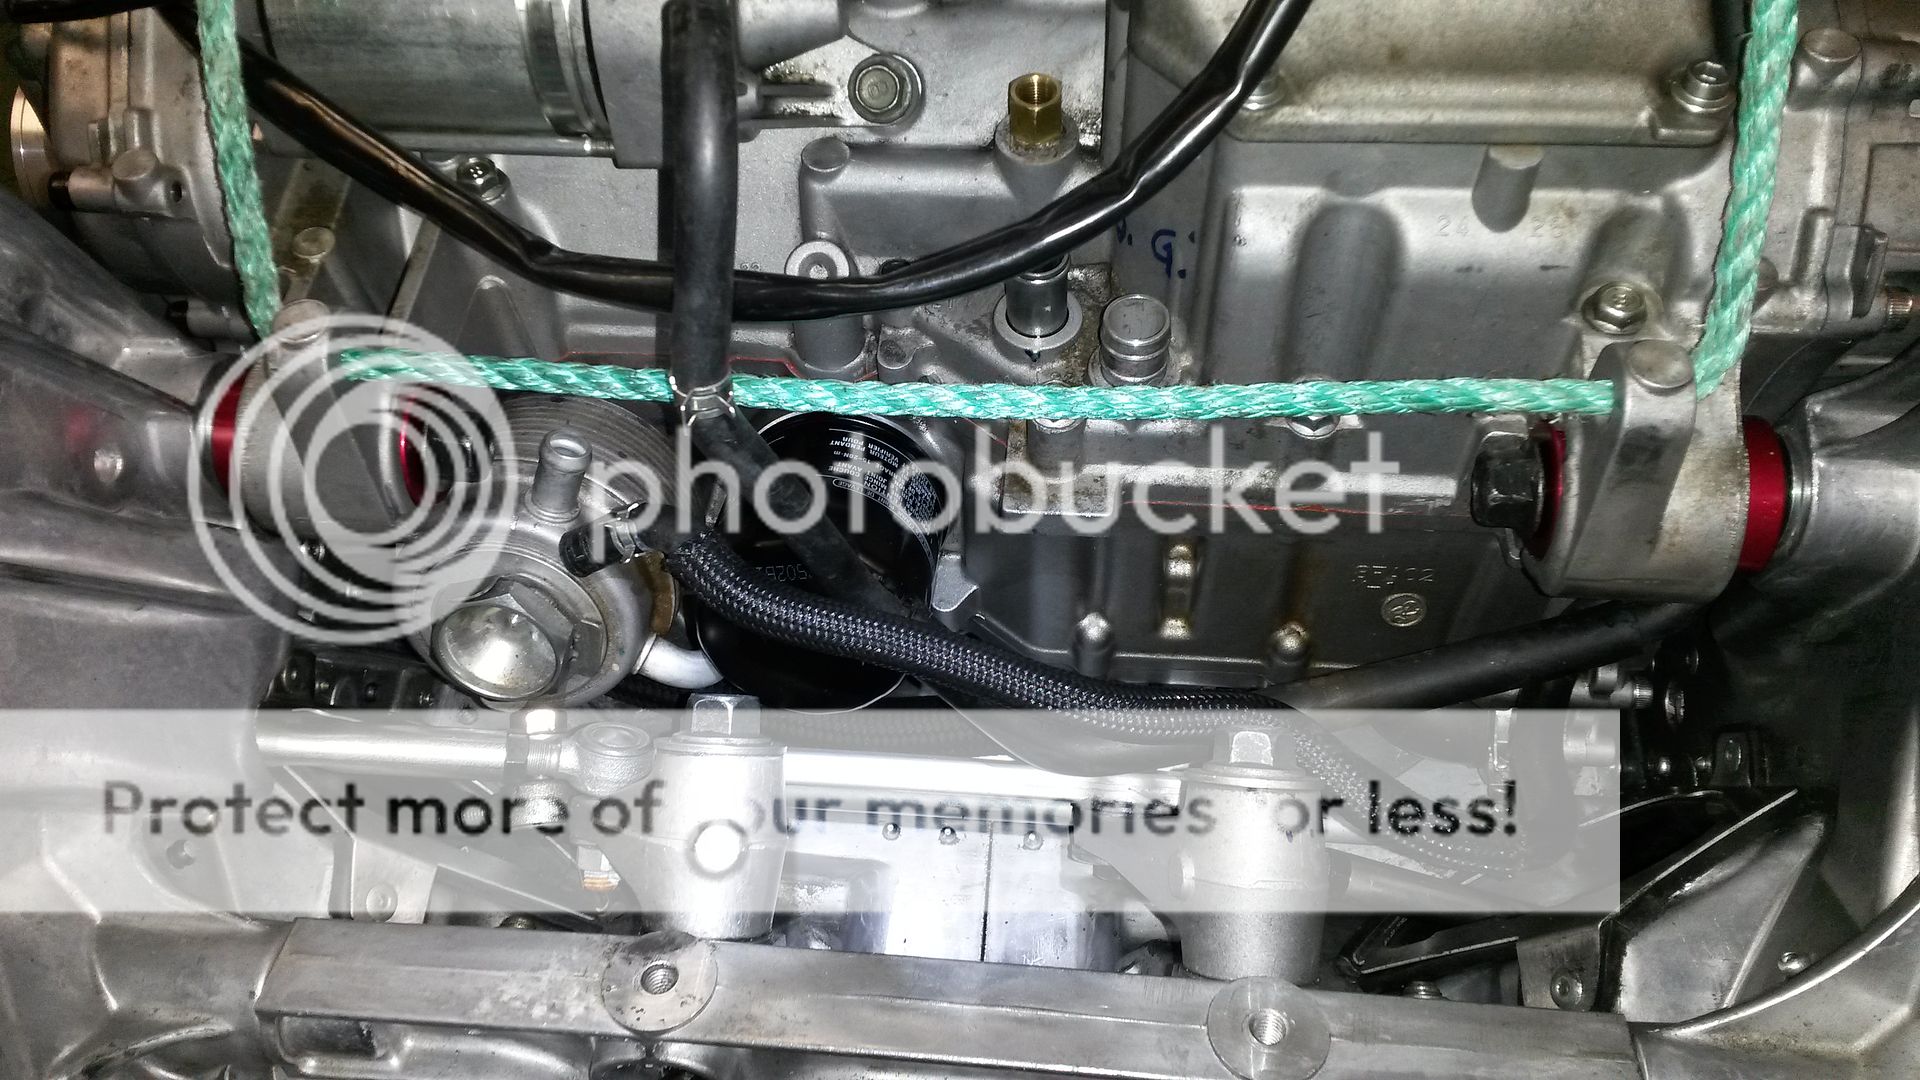
Before lifting the engine I installed a nylon rope like shown in the pics below.
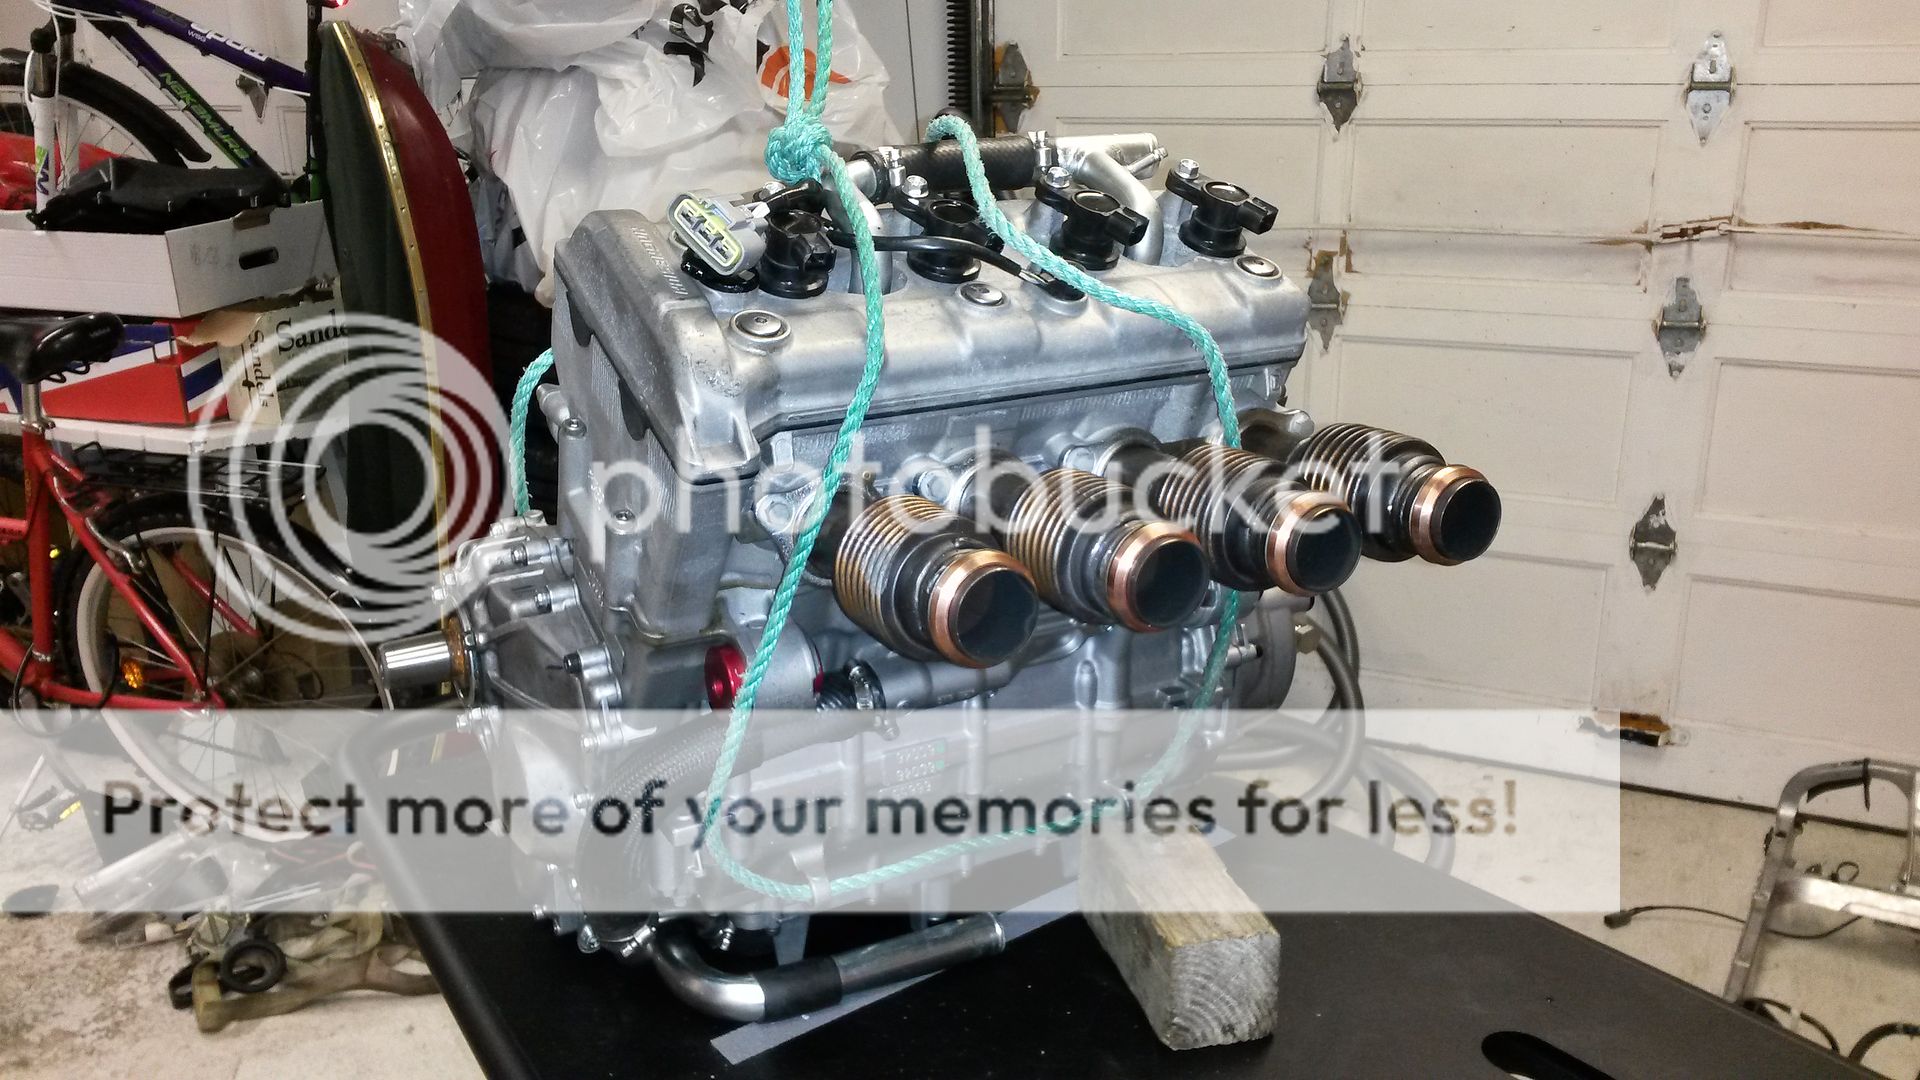
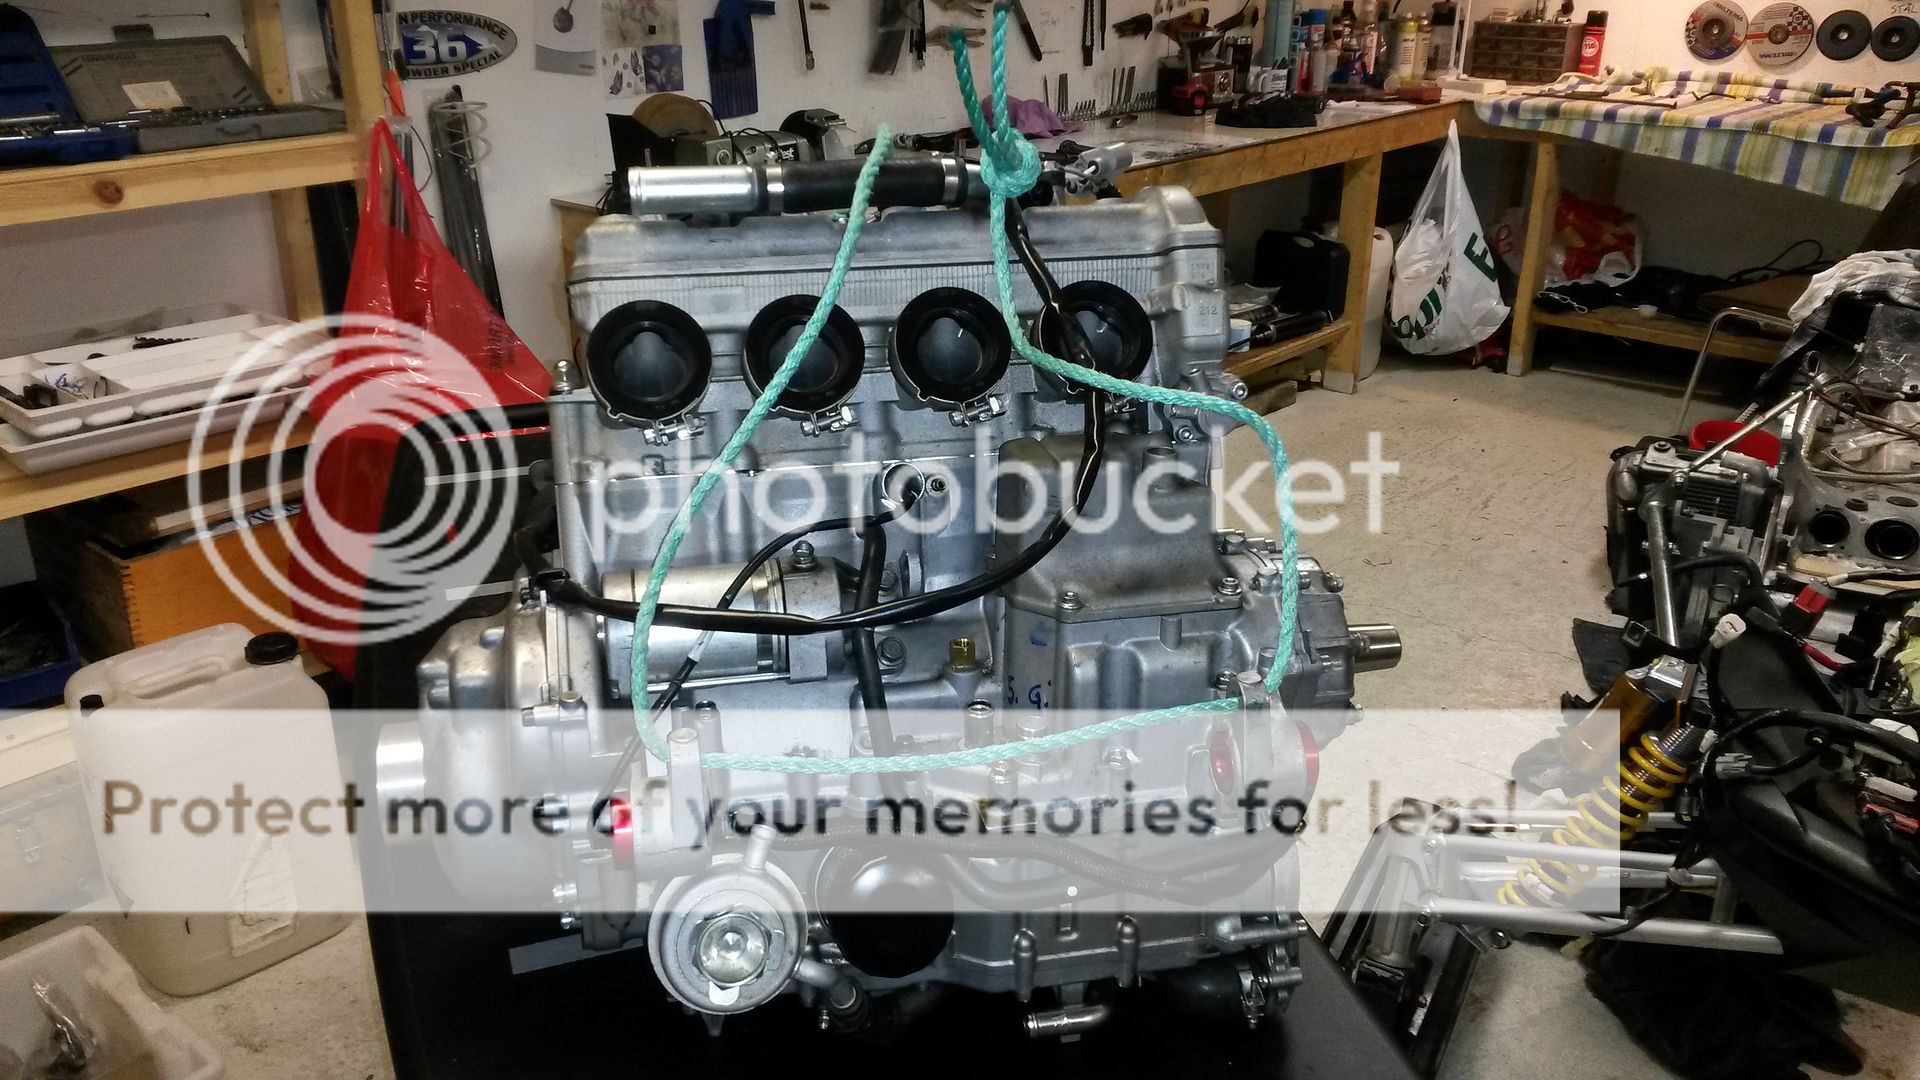
With the engine securely mounted to the pulley I hoisted the motor off the table and removed the table.
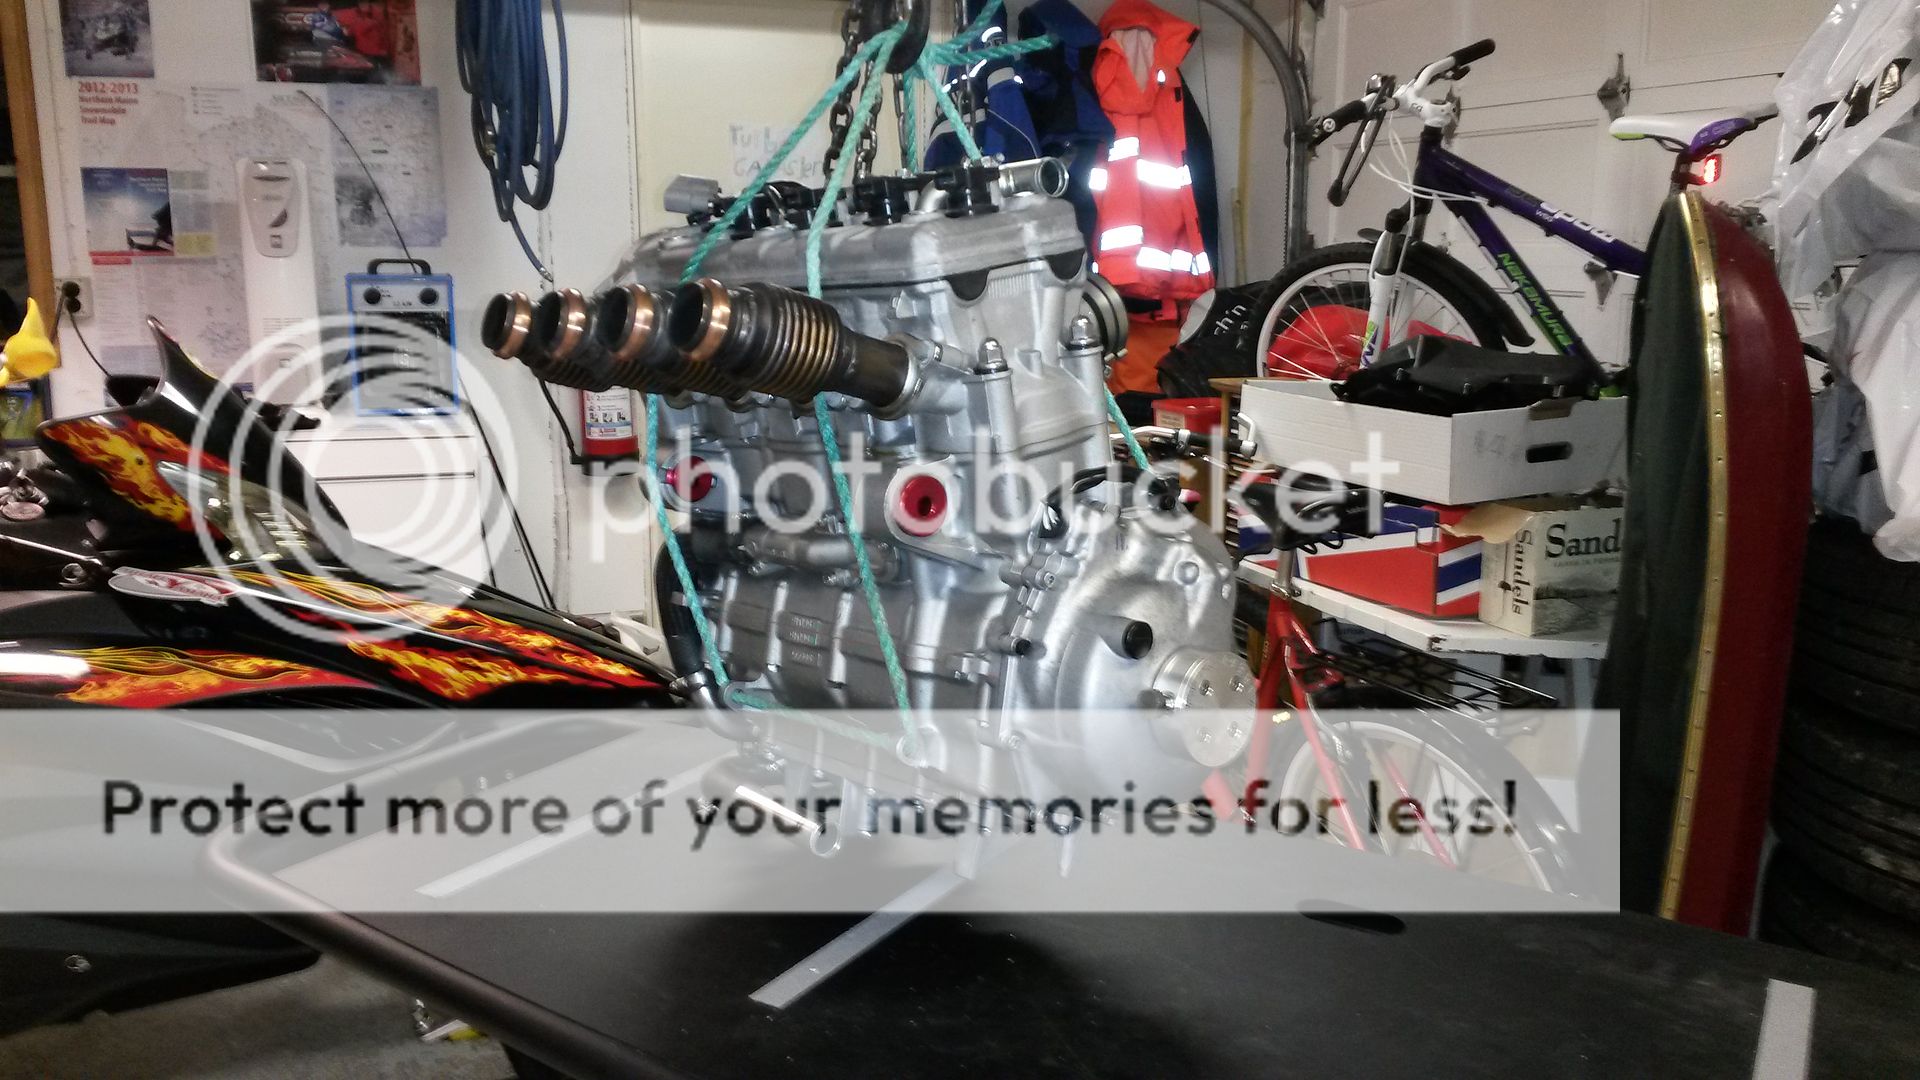
Next is to put the sled directly under the engine and drop it into the chassis.

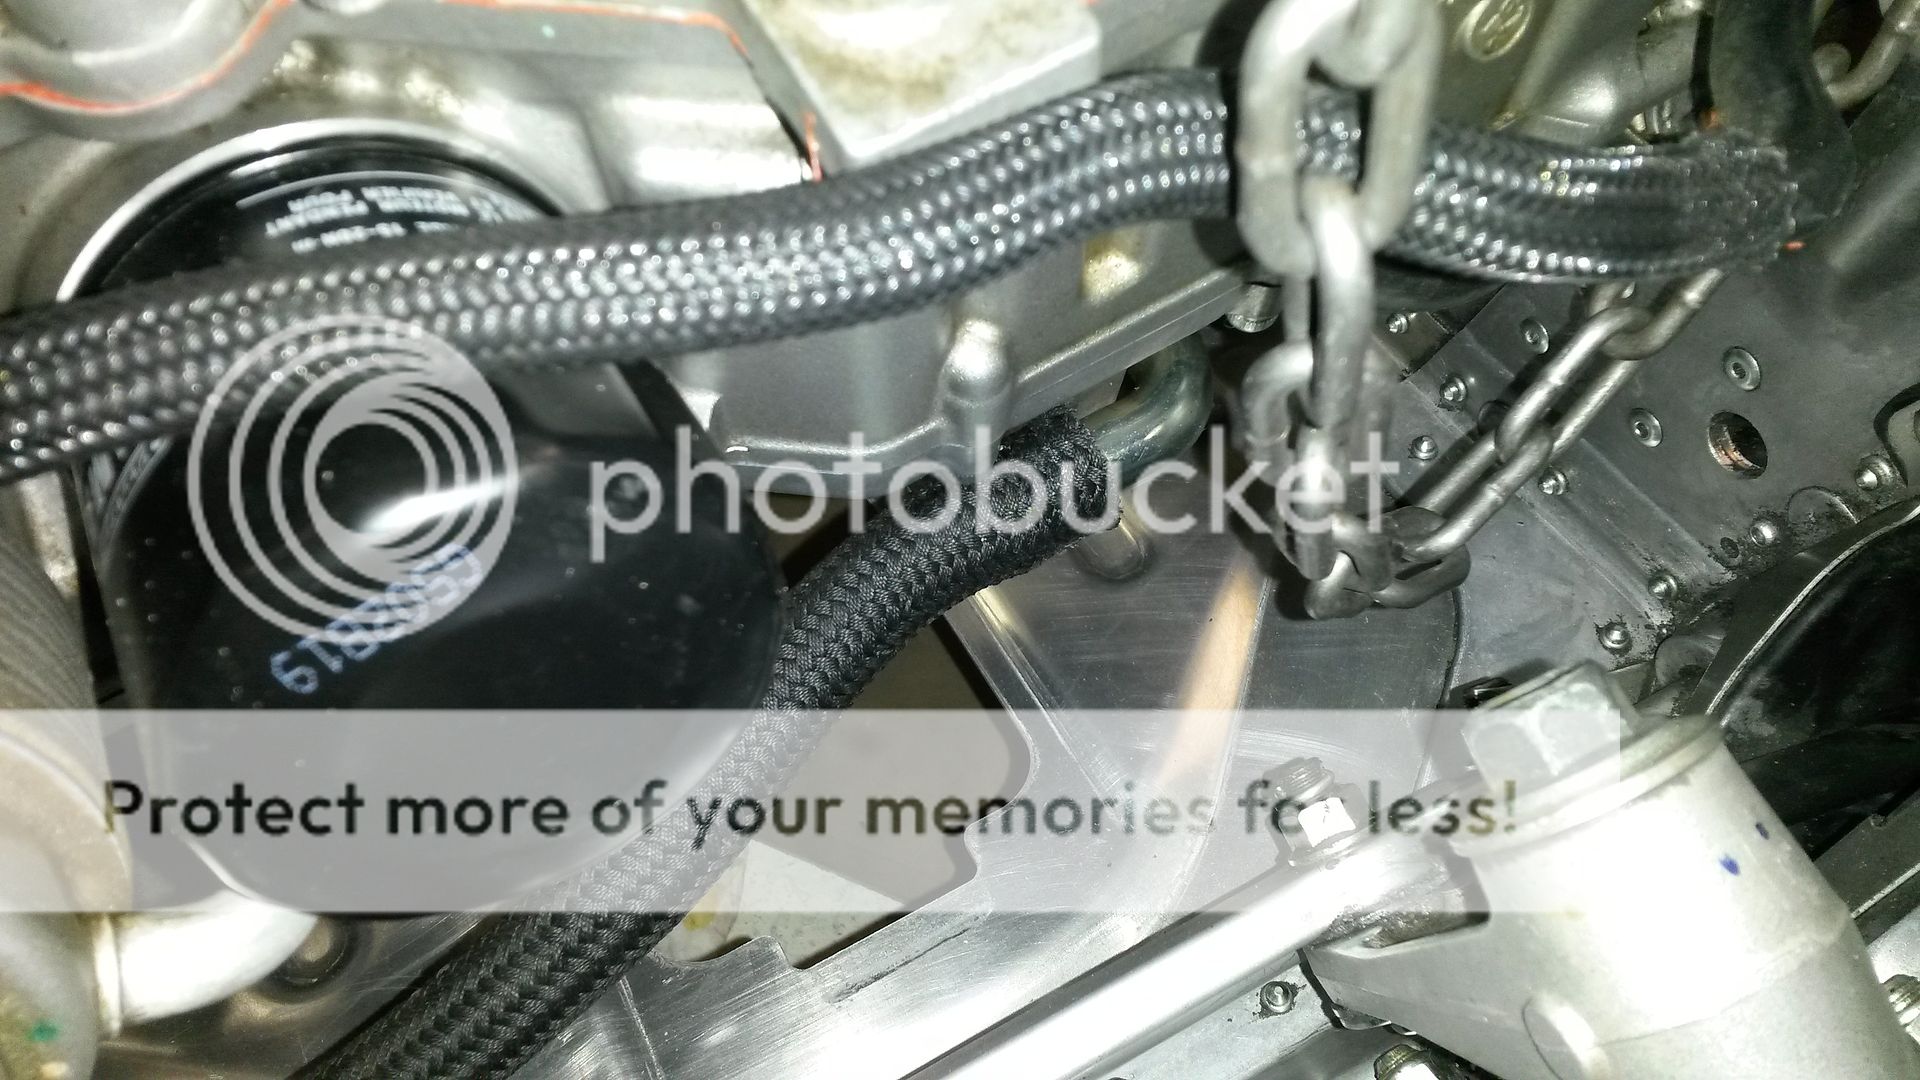
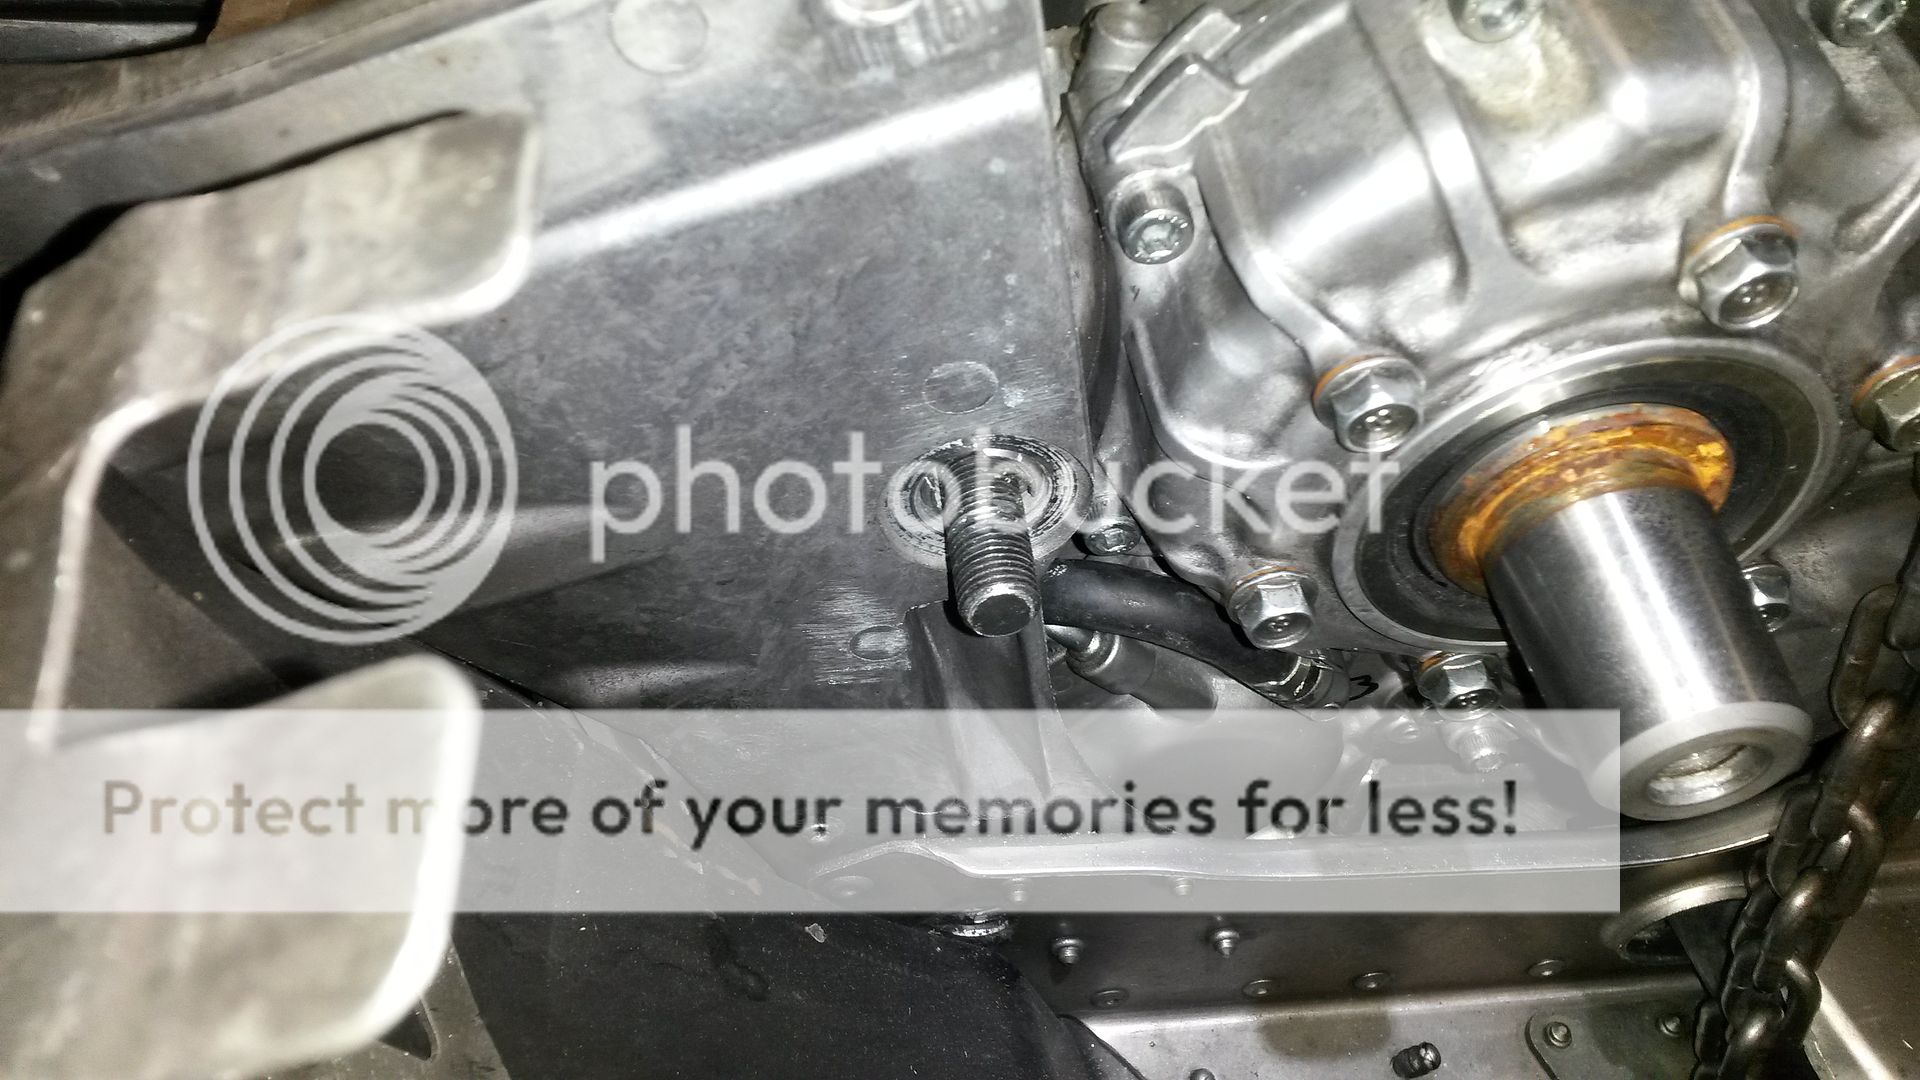
Before you lower the engine all the way doen make sure you install the water hose on the rear of the engine, and the oil hose in front of the engine.
Installing them with the engine in place is hard to almost impossible (not recommended).

You have to install the front bolts first. Completely loosen the engine adjusts to make as much room as possible for the engine.
Install the front bolts first, put the bolts in but do not install the nuts yet.
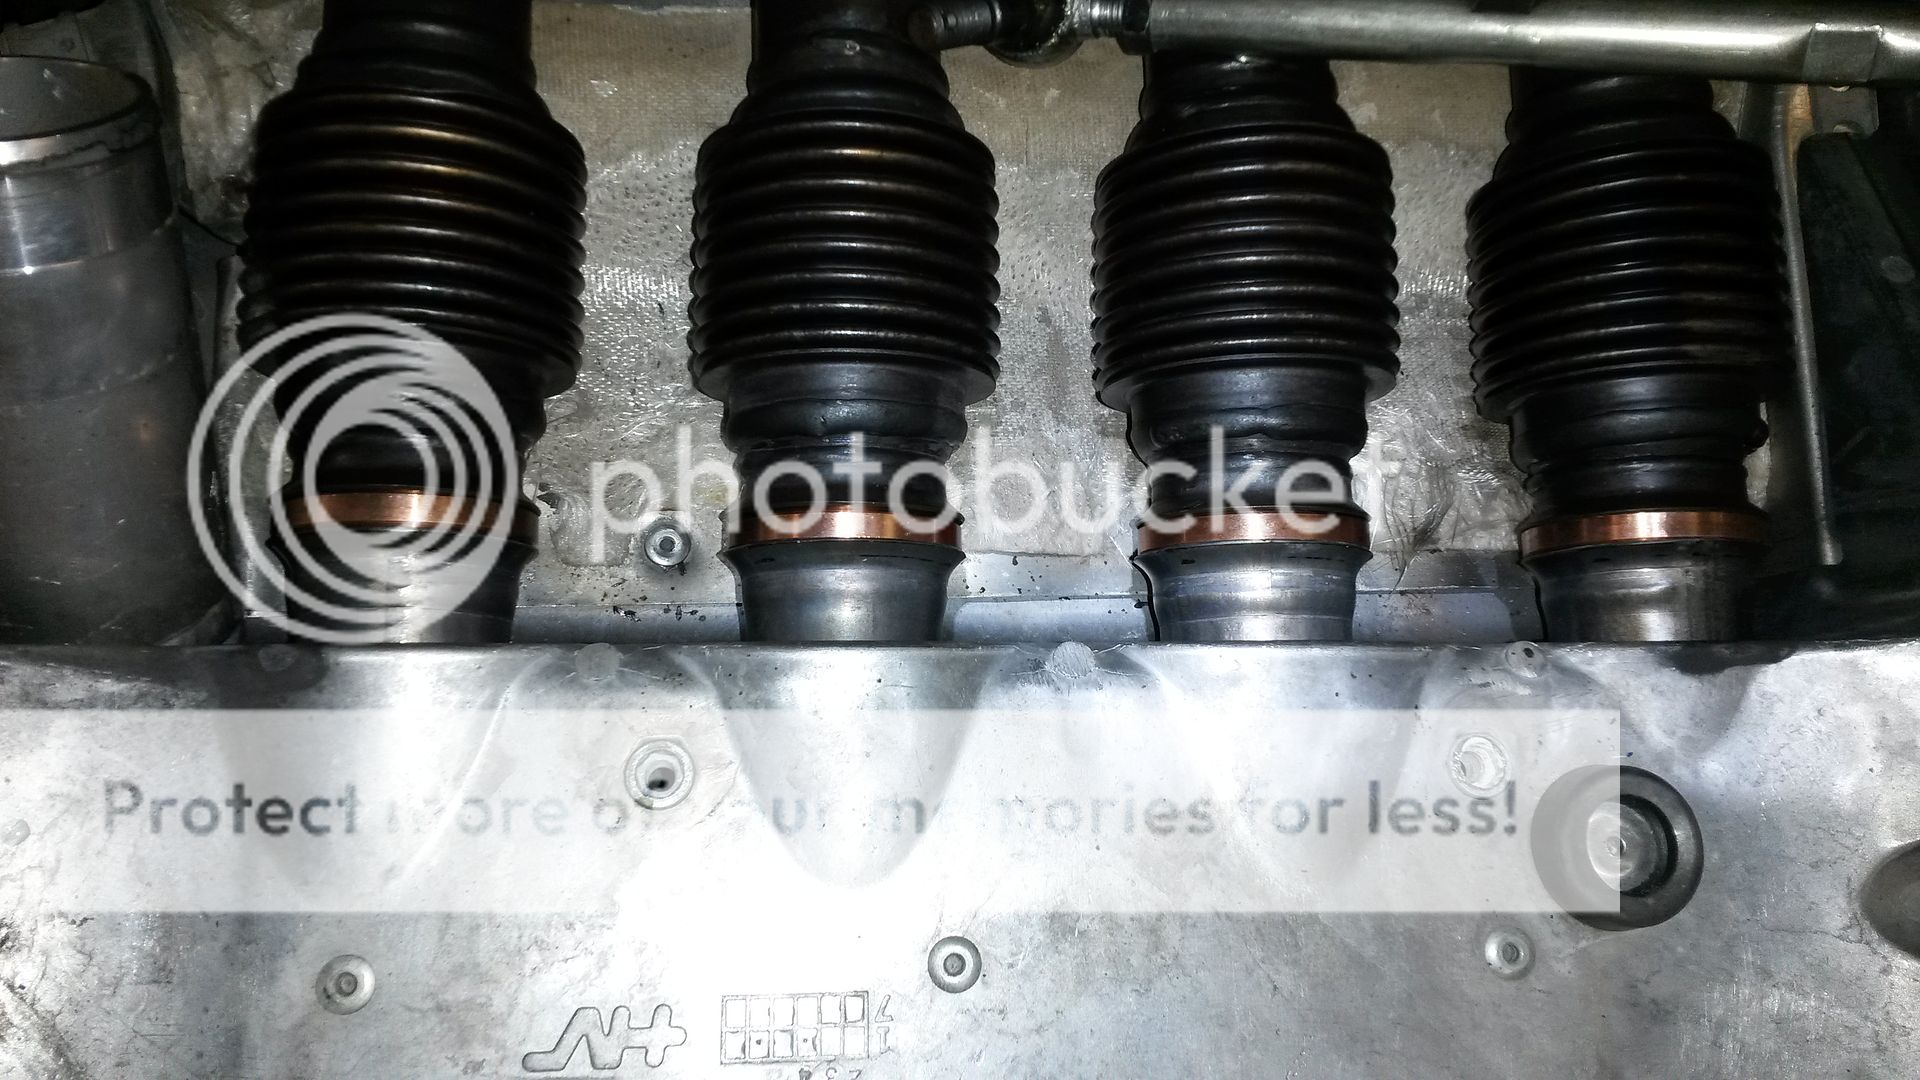
When lowing the engine down after installing the front bolts make sure you get the exhaust header aligned with the exhaust pipes.
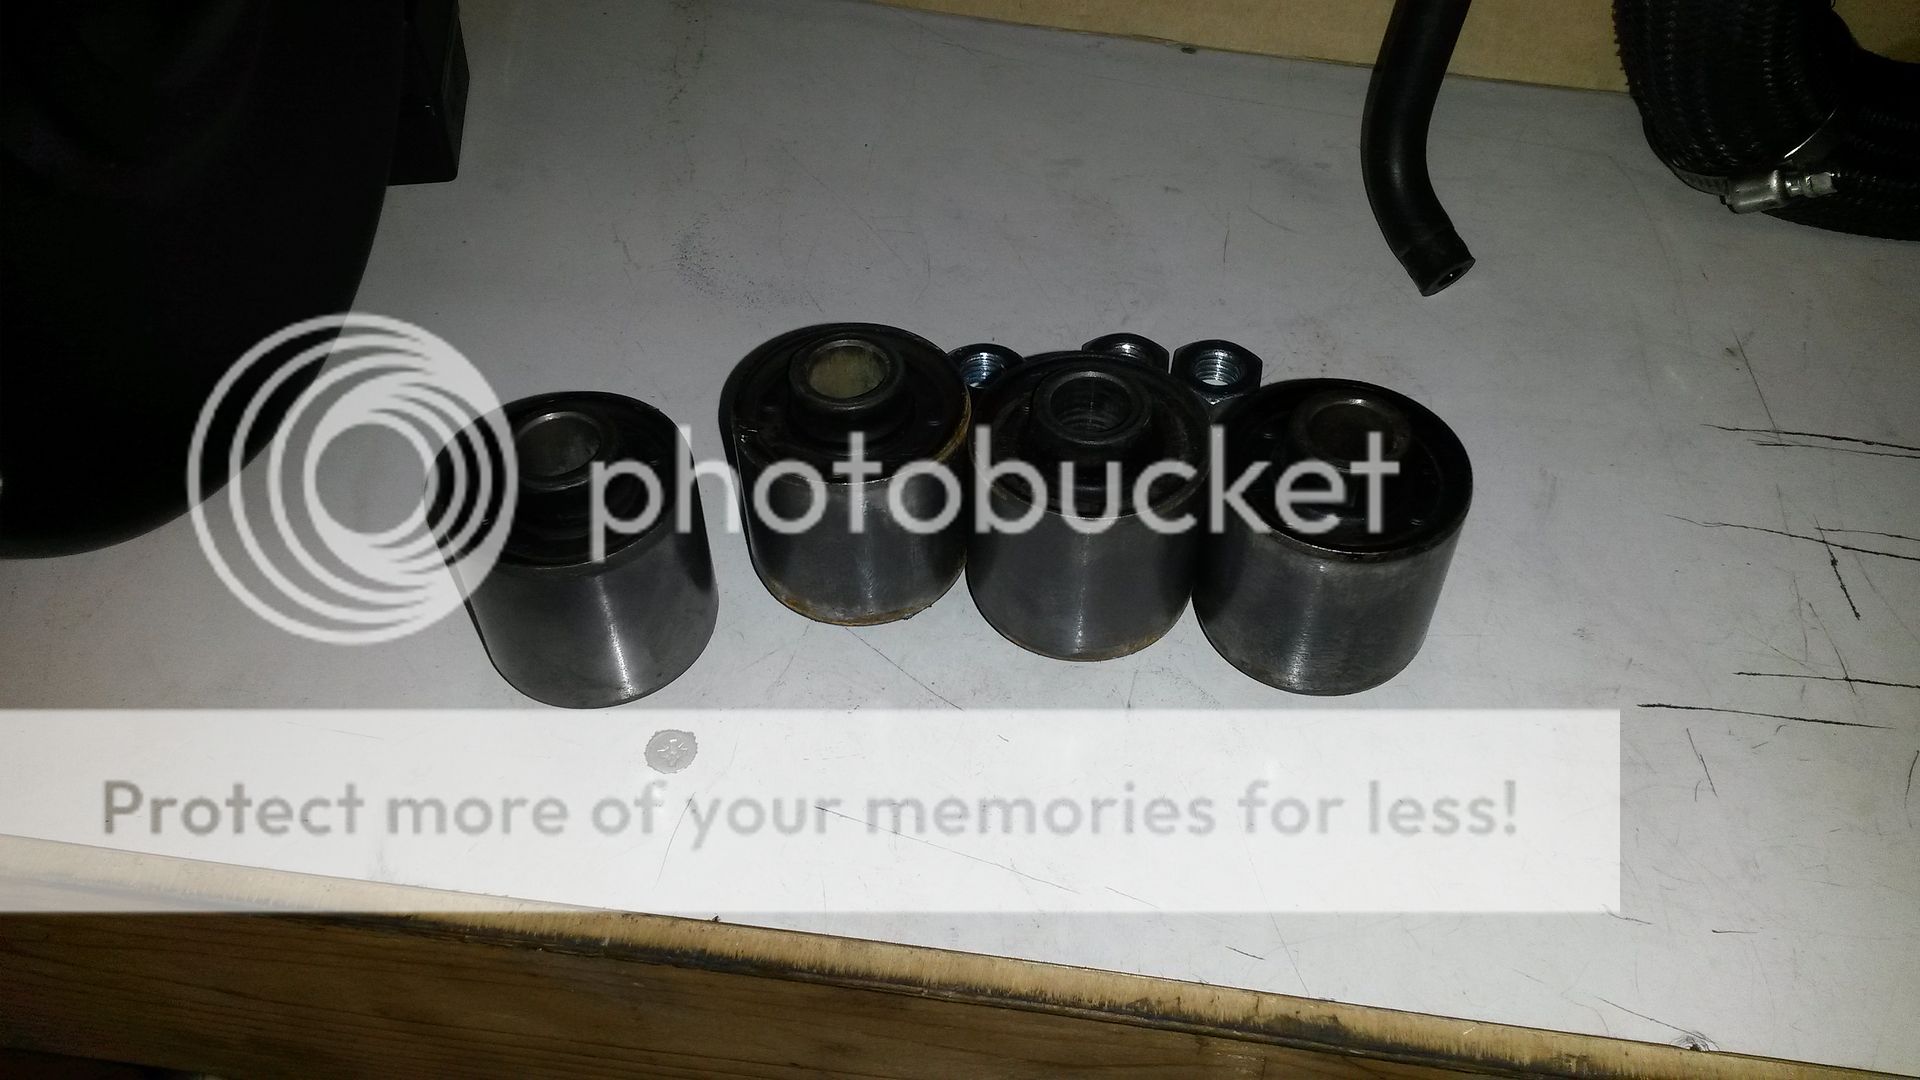
I have changed the stock donuts with a set of copper donuts from Hurricane Performance.
With the front bolts in I installed the rear long bolt.
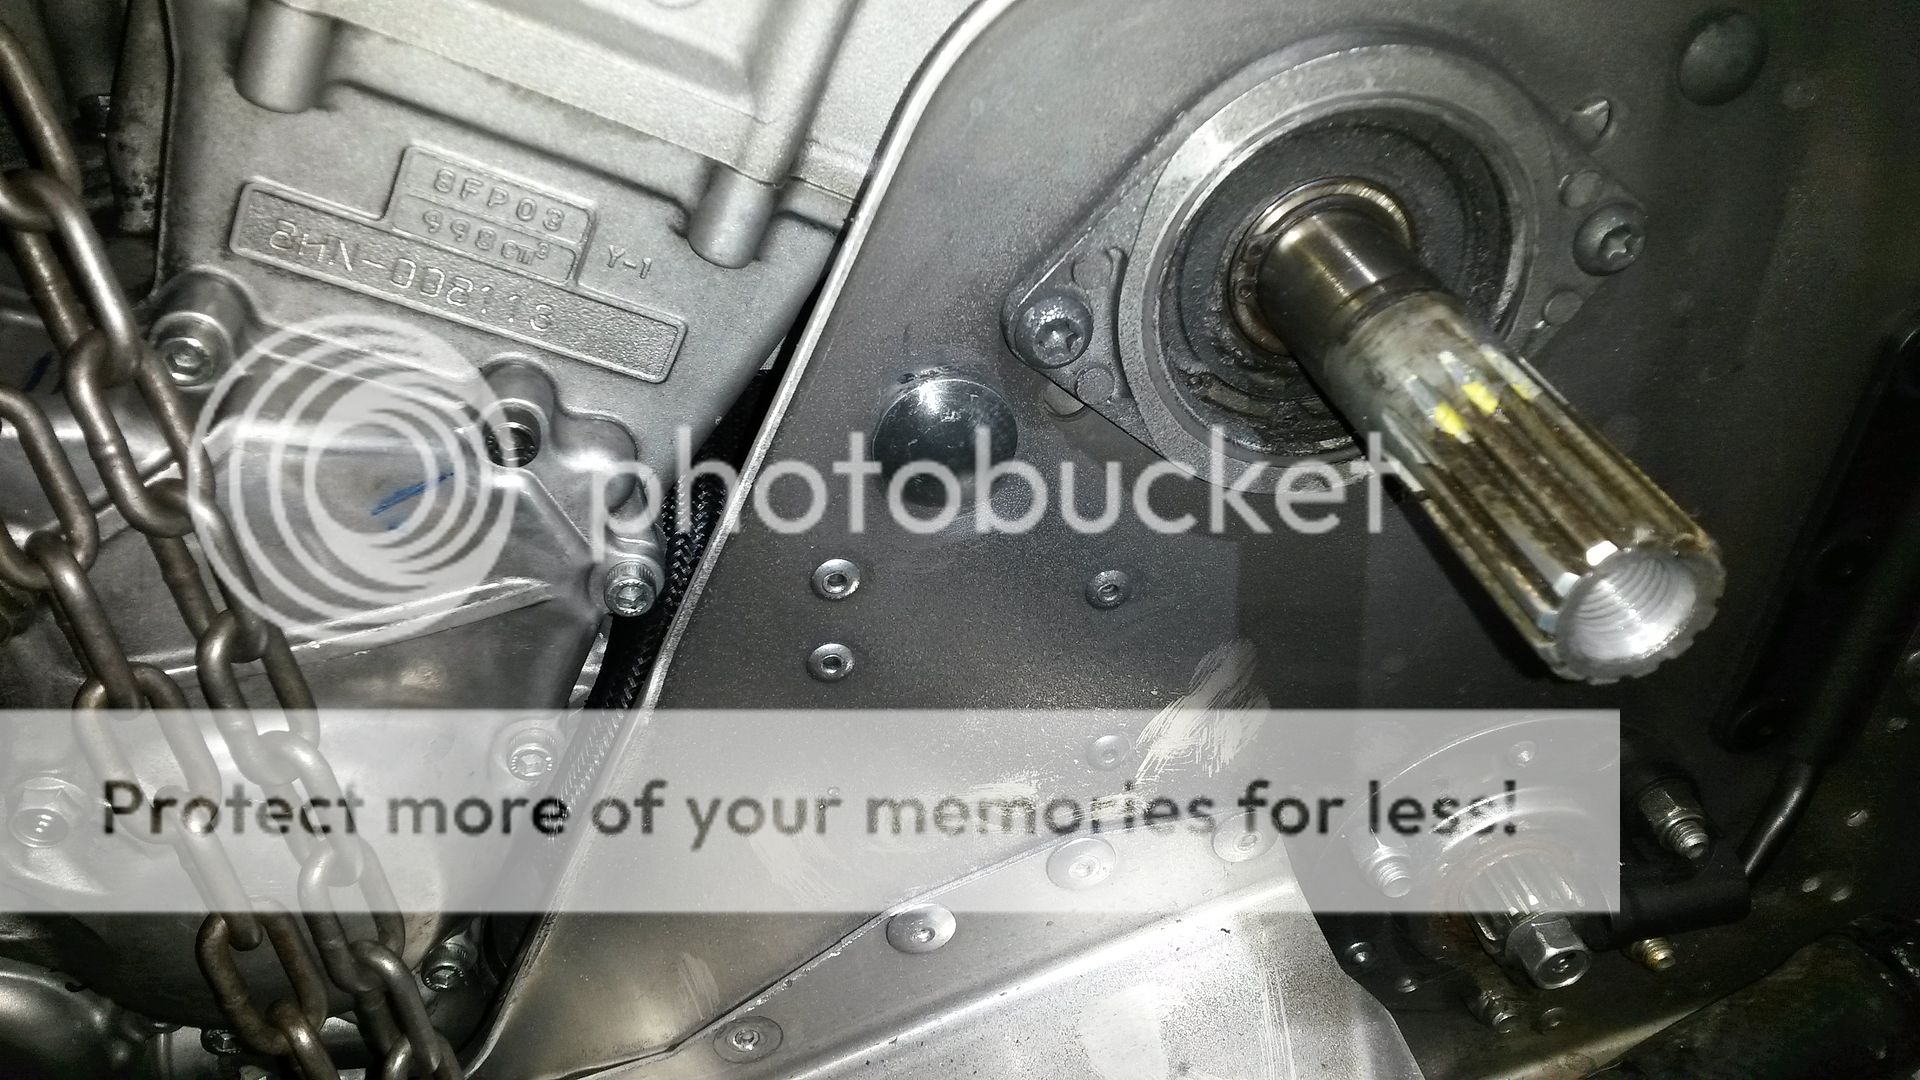
With the engine in place I installed the primary clutch adjusted the engine using a clutch alignment tool.
With the engine perfectly aligned I tightened down the motor mount bolts and nuts.

Next time I finish off the sled, it came in stripped down and it's leaving the same way
I have a table on wheels. I rolled the table up to the workbench and lifted the motor onto the table.
I rolled the table over to my chain pulley, it's mounted to the cross beams in my ceiling.
Before lifting the engine I installed a nylon rope like shown in the pics below.
With the engine securely mounted to the pulley I hoisted the motor off the table and removed the table.
Next is to put the sled directly under the engine and drop it into the chassis.
Before you lower the engine all the way doen make sure you install the water hose on the rear of the engine, and the oil hose in front of the engine.
Installing them with the engine in place is hard to almost impossible (not recommended).
You have to install the front bolts first. Completely loosen the engine adjusts to make as much room as possible for the engine.
Install the front bolts first, put the bolts in but do not install the nuts yet.
When lowing the engine down after installing the front bolts make sure you get the exhaust header aligned with the exhaust pipes.
I have changed the stock donuts with a set of copper donuts from Hurricane Performance.
With the front bolts in I installed the rear long bolt.
With the engine in place I installed the primary clutch adjusted the engine using a clutch alignment tool.
With the engine perfectly aligned I tightened down the motor mount bolts and nuts.
Next time I finish off the sled, it came in stripped down and it's leaving the same way
rxrider
Jan-Ove Pedersen
- Joined
- Apr 25, 2003
- Messages
- 7,355
- Reaction score
- 64
- Points
- 1,753
- Location
- Lakselv - 70N & 25E
- Country
- Norway
- Snowmobile
- 2014 Phazer XTX, 2013 Phazer RTX, 2008 Apex RTX, 2007 Warrior, 2006 Attak
Update - December 15. - Installing the deltabox frame.
The deltabox frame is installed and the sled is ready to leave my shop.
Project done.
Update - I had to visit my customer in his garage to redo the cam timing as it was one tooth off (like said earlier in the posts). The problem was fixed and the sled finally ran as it should.
The deltabox frame is installed and the sled is ready to leave my shop.
Project done.
Update - I had to visit my customer in his garage to redo the cam timing as it was one tooth off (like said earlier in the posts). The problem was fixed and the sled finally ran as it should.

- Joined
- Mar 1, 2004
- Messages
- 4,868
- Reaction score
- 502
- Points
- 1,663
- Location
- WINTERPEG / MANITOBA / CANADA
Ooooooooooh Look @ That.......400,000 Plus Views
SHOULD SEE 1/2 Million this year

SHOULD SEE 1/2 Million this year
rxrider
Jan-Ove Pedersen
- Joined
- Apr 25, 2003
- Messages
- 7,355
- Reaction score
- 64
- Points
- 1,753
- Location
- Lakselv - 70N & 25E
- Country
- Norway
- Snowmobile
- 2014 Phazer XTX, 2013 Phazer RTX, 2008 Apex RTX, 2007 Warrior, 2006 Attak
Sorry, I have not been on here for a while.
Pretty damn cool to have reached 400000 views.
Is this the most viewed post on TY?
I don't know but it's way cool.
I hope many of you have been inspired to work on you own sleds and that my posts have been helpful.
I have shut down the rxrider's turbogarage business after talking to the Norwegian Tax Authority (similar to the IRS in the USA), my business was not considered big enough to qualify as a business and I had to shut it down. I also had to send over my books for the year 2014 and figured I would follow their recommendation. In order to stay in business they wanted me to send in my books for all the years of operation.... I do not have the books for all years and opted to close the business for that reason, don't want any trouble the the Tax Authority that's for sure.
On the bright side, I am allowed to run it as before but I will not get the tax cuts anymore for the business. They said that I could still run it as a hobby project
I'm now 51 years old and have a full time job as head of computer department at the local county government. I feel that it's ok to work a bit less and have decided to slow down the sled business.
I will only take on a few projects, maybe only one a year. But I will of course still work on my own sled projects as I have a 2006 Apex with a custom built turbo system in pieces that I have planned to build into a 375+ HP monster on pump gas running Hurricane's water/meth injection kit.
The cylinders are hurt and need to be repaired, nicasil plating has holes in it in cylinder 2 and 3.
It may happen next year.
Last edited:
kinger
VIP Member
- Joined
- Jan 17, 2005
- Messages
- 7,422
- Reaction score
- 1,556
- Points
- 1,963
- Location
- Clear Lake, IA
- Website
- www.piergenius.com
Good move! I think it gets more fun when working on your own stuff anyway! My family asks me why didn't you become a professional mechanic because that is your passion, I keep telling them its my HOBBY not my job that is why its fun. I'm a masters level engineer and that work is really a drain on the brain, working on or thinking about working on my sled helps me cope LOL.
I am excited to see what comes out of your garage when you can take that time you were spending on others sleds and put it into your own beast! I want to see 400hp pump fuel!! HAHA
I am excited to see what comes out of your garage when you can take that time you were spending on others sleds and put it into your own beast! I want to see 400hp pump fuel!! HAHA
Similar threads
- Replies
- 3
- Views
- 2K
- Replies
- 3
- Views
- 2K
- Replies
- 46
- Views
- 155K
-
This site uses cookies to help personalise content, tailor your experience and to keep you logged in if you register.
By continuing to use this site, you are consenting to our use of cookies.