
- Joined
- Apr 13, 2003
- Messages
- 21,786
- Reaction score
- 9,351
- Points
- 2,103
- Location
- Schofield, WI
- Website
- www.totallyamaha.com
- Country
- USA
- Snowmobile
- 2020 Sidewinder SRX
smoothride said:are you moving the skid back an inch so you can get 9 tooth antiratchets in there. I put 8 tooth in to get the clearance because the front arm is so far forward.
I have very little adjustment with my new track and it wont hurt to have it back to allow for more rap on the 8 tooths that I have in there now.
I talk to gerald at the novi show an said if there is a problem with a justment to go to a 7 inch wheel on the top of the skid for more adjustment.


- Joined
- Apr 13, 2003
- Messages
- 21,786
- Reaction score
- 9,351
- Points
- 2,103
- Location
- Schofield, WI
- Website
- www.totallyamaha.com
- Country
- USA
- Snowmobile
- 2020 Sidewinder SRX
smoothride said:I talk to gerald at the novi show an said if there is a problem with a justment to go to a 7 inch wheel on the top of the skid for more adjustment.
I have 8" rear wheels already and under power I can still jump the drivers if the track gets a little out of spec.... I would rather have the rap and I am tired of buying stuff from them...lol
I took the double nut off the adjustment bolts an put a single nut an have lots adjustment now. give that a try.


- Joined
- Apr 13, 2003
- Messages
- 21,786
- Reaction score
- 9,351
- Points
- 2,103
- Location
- Schofield, WI
- Website
- www.totallyamaha.com
- Country
- USA
- Snowmobile
- 2020 Sidewinder SRX
smoothride said:I took the double nut off the adjustment bolts an put a single nut an have lots adjustment now. give that a try.
I have a billet rear offset axle can do much with it ..

- Joined
- Apr 17, 2003
- Messages
- 5,529
- Reaction score
- 1,393
- Points
- 2,003
- Location
- Menno, SD
- Website
- www.ulmerracing.com
- Country
- USA
- Snowmobile
- 2014 Yamaha SR Viper LTX, 2014 Yamaha SR Viper RTX SE, 2015 Yamaha SR Viper MTX SE 162 (turbo), 2015 Yamaha SR Viper MTX SE 153
- LOCATION
- Menno, SD
- WEBSITE
- www.ulmerracing.com
Re: More progress
Nice job! Now hopefully with this combination you will change the oil more often than a motor! LOL!


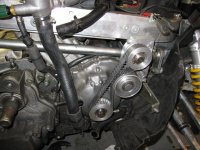
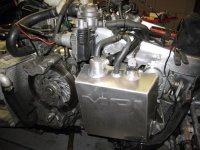
MrSled said:I finally have the motor in place. I added the new exhaust gaskets from Sledtoys.com, put the super charger in place after routing all the wiring. I added the Ulmer Oil Filter relocation kit and found the only reasonable place to mount the bastard ...LOL... even though it up high it tucks nicely in place. Once the oil is drained you will have to put a cloth under the filter and be very careful when changing.... way better then taking the Supercharger out to get to the filter.
Nice job! Now hopefully with this combination you will change the oil more often than a motor! LOL!


- Joined
- Apr 13, 2003
- Messages
- 21,786
- Reaction score
- 9,351
- Points
- 2,103
- Location
- Schofield, WI
- Website
- www.totallyamaha.com
- Country
- USA
- Snowmobile
- 2020 Sidewinder SRX
Re: More progress
LOL, Right!! I never had to change the oil before...LOL
Srxspec said:MrSled said:I finally have the motor in place. I added the new exhaust gaskets from Sledtoys.com, put the super charger in place after routing all the wiring. I added the Ulmer Oil Filter relocation kit and found the only reasonable place to mount the bastard ...LOL... even though it up high it tucks nicely in place. Once the oil is drained you will have to put a cloth under the filter and be very careful when changing.... way better then taking the Supercharger out to get to the filter.
Nice job! Now hopefully with this combination you will change the oil more often than a motor! LOL!


LOL, Right!! I never had to change the oil before...LOL


- Joined
- Apr 13, 2003
- Messages
- 21,786
- Reaction score
- 9,351
- Points
- 2,103
- Location
- Schofield, WI
- Website
- www.totallyamaha.com
- Country
- USA
- Snowmobile
- 2020 Sidewinder SRX


- Joined
- Apr 13, 2003
- Messages
- 21,786
- Reaction score
- 9,351
- Points
- 2,103
- Location
- Schofield, WI
- Website
- www.totallyamaha.com
- Country
- USA
- Snowmobile
- 2020 Sidewinder SRX


- Joined
- Apr 13, 2003
- Messages
- 21,786
- Reaction score
- 9,351
- Points
- 2,103
- Location
- Schofield, WI
- Website
- www.totallyamaha.com
- Country
- USA
- Snowmobile
- 2020 Sidewinder SRX
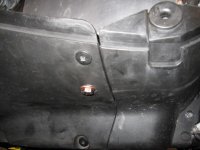
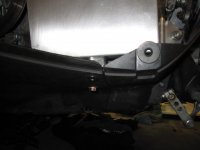
I needed a oil tank drain and this is what I decided to do. TIG weld a nut to the main tank elbow. But after I install it I did not realize that it would be to tall so now I modded the plastic lower so its even easier to drain the tank and you dont have to remove the lower plastic to do so....LOL
You can also see that I have the brake back on and the air ride compressor in place as well.
You can also see that I have the brake back on and the air ride compressor in place as well.
Attachments


- Joined
- Apr 13, 2003
- Messages
- 21,786
- Reaction score
- 9,351
- Points
- 2,103
- Location
- Schofield, WI
- Website
- www.totallyamaha.com
- Country
- USA
- Snowmobile
- 2020 Sidewinder SRX
subaru2006
TY 4 Stroke Junkie
- Joined
- Nov 1, 2008
- Messages
- 734
- Reaction score
- 41
- Points
- 738
- Location
- Minooka, IL
- Country
- USA
- Snowmobile
- 2016 Polaris SBA
I like the oil drain idea... looking Good on the rest of the project. Hopefully ill be going through this process soon..
Keep it up.
Subaru2006
Keep it up.
Subaru2006

kinger
VIP Member
- Joined
- Jan 17, 2005
- Messages
- 7,414
- Reaction score
- 1,553
- Points
- 1,963
- Location
- Clear Lake, IA
- Website
- www.piergenius.com
Good idea on all the maint parts so you can quickly and easily change the oil, filter, etc.
Looks good it should run mint for you this year.
Looks good it should run mint for you this year.


- Joined
- Apr 13, 2003
- Messages
- 21,786
- Reaction score
- 9,351
- Points
- 2,103
- Location
- Schofield, WI
- Website
- www.totallyamaha.com
- Country
- USA
- Snowmobile
- 2020 Sidewinder SRX
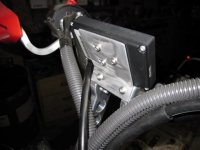
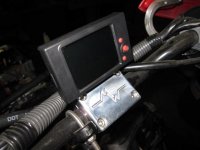
*Update the M20 to Air Assault Package
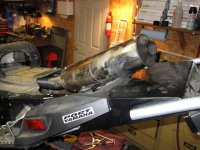
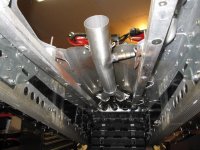
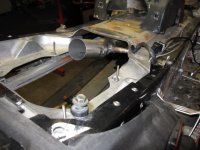
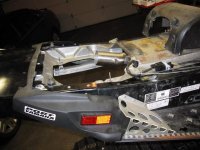
*Added the new mid pipe and O2 Sensor, slipped the exhaust on....
*Added the new mid pipe and O2 Sensor, slipped the exhaust on....
Attachments
Looking good.
Similar threads
- Replies
- 11
- Views
- 9K
-
This site uses cookies to help personalise content, tailor your experience and to keep you logged in if you register.
By continuing to use this site, you are consenting to our use of cookies.


