rxrider
Jan-Ove Pedersen
- Joined
- Apr 25, 2003
- Messages
- 7,355
- Reaction score
- 64
- Points
- 1,753
- Location
- Lakselv - 70N & 25E
- Country
- Norway
- Snowmobile
- 2014 Phazer XTX, 2013 Phazer RTX, 2008 Apex RTX, 2007 Warrior, 2006 Attak
sxr70001 - I Guess you will find anything you want for the Nytro.
Go to http://www.hurricaneperformance.ca for Your go fast needs:
A quick searh for Nytro go fast parts gave me these links:
http://www.hurricaneperformance.ca/product-category/power-sports-performance/page/4/
http://www.hurricaneperformance.ca/product-category/power-sports-performance/page/10/
http://www.hurricaneperformance.ca/product-category/power-sports-performance/page/11/
http://www.hurricaneperformance.ca/product-category/power-sports-performance/page/13/
http://www.hurricaneperformance.ca/product-category/power-sports-performance/page/14/
If you can't find what you are looking for on their web shop give them a Call or send them an e-mail.
If the parts exist they will get it for you.


Steiner - it's in the correct way
It's an Optical illusion. The eased edges point upward, away from the hose.
The blue marking is from the factory, says the bolt has been torked to spec
Ah! Them darn Optical Illusions. Next time I will look at the pics with my beer goggles on.
I notice the blue mark now after you pointed it out. Should have seen that the first time.

rxrider
Jan-Ove Pedersen
- Joined
- Apr 25, 2003
- Messages
- 7,355
- Reaction score
- 64
- Points
- 1,753
- Location
- Lakselv - 70N & 25E
- Country
- Norway
- Snowmobile
- 2014 Phazer XTX, 2013 Phazer RTX, 2008 Apex RTX, 2007 Warrior, 2006 Attak
Update - March 12. - Engine Rebuild, Apex 2006, taking the cylinder head apart, preparing to change valves.
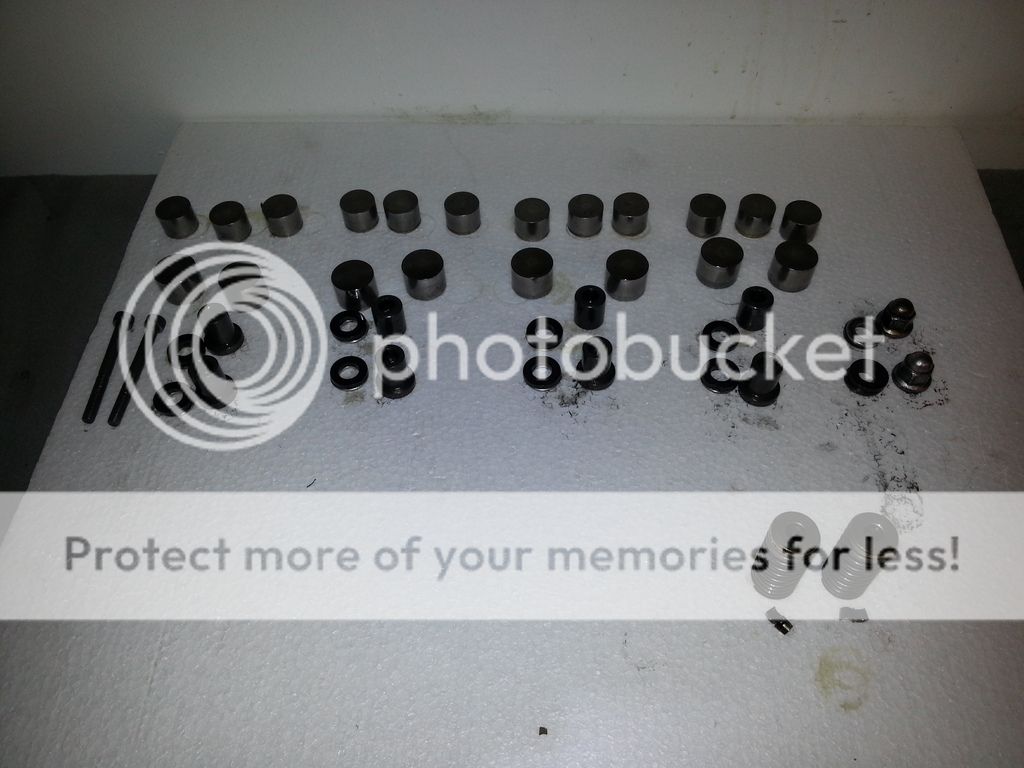
Before starting to remove the valves I first removed all valve shims and buckets.
I placed them in the same order they are going back in.
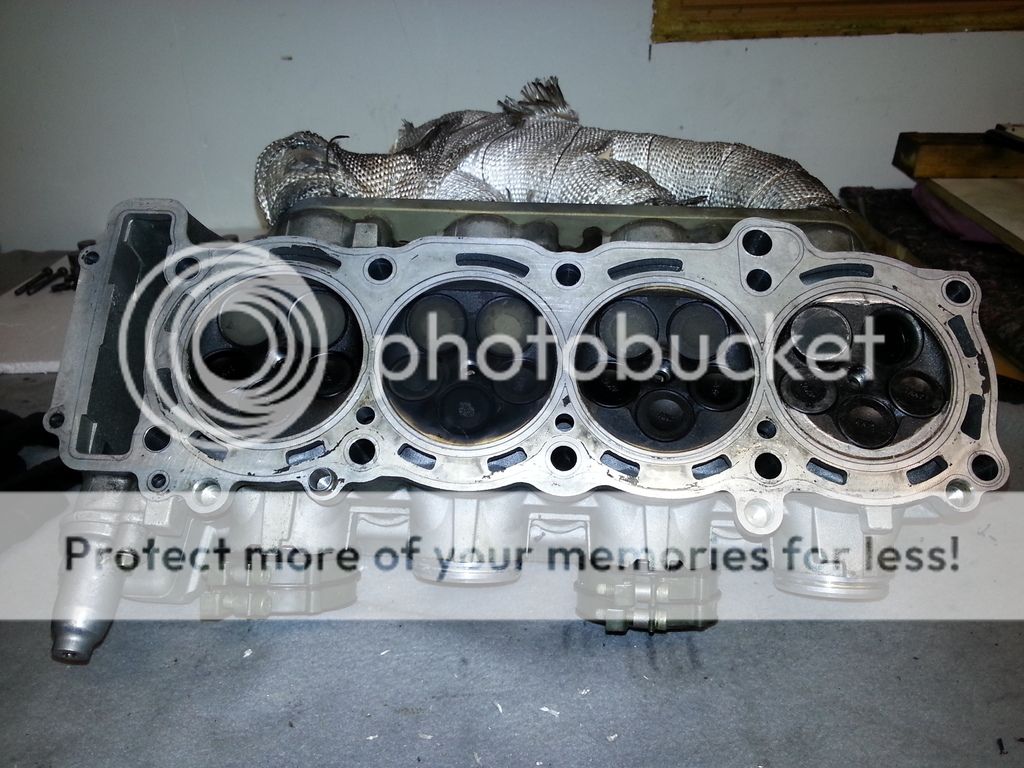
I have bent valves on cylinder #4 due to wrist pin failure.
The valves on #4 will have to be replaced.
I will use the good valves from my RX-1 head that got destroyed when the RX-1 motor went Down.
The valves are the same part#s and fits both the Apex and the RX-1 cylinder head.
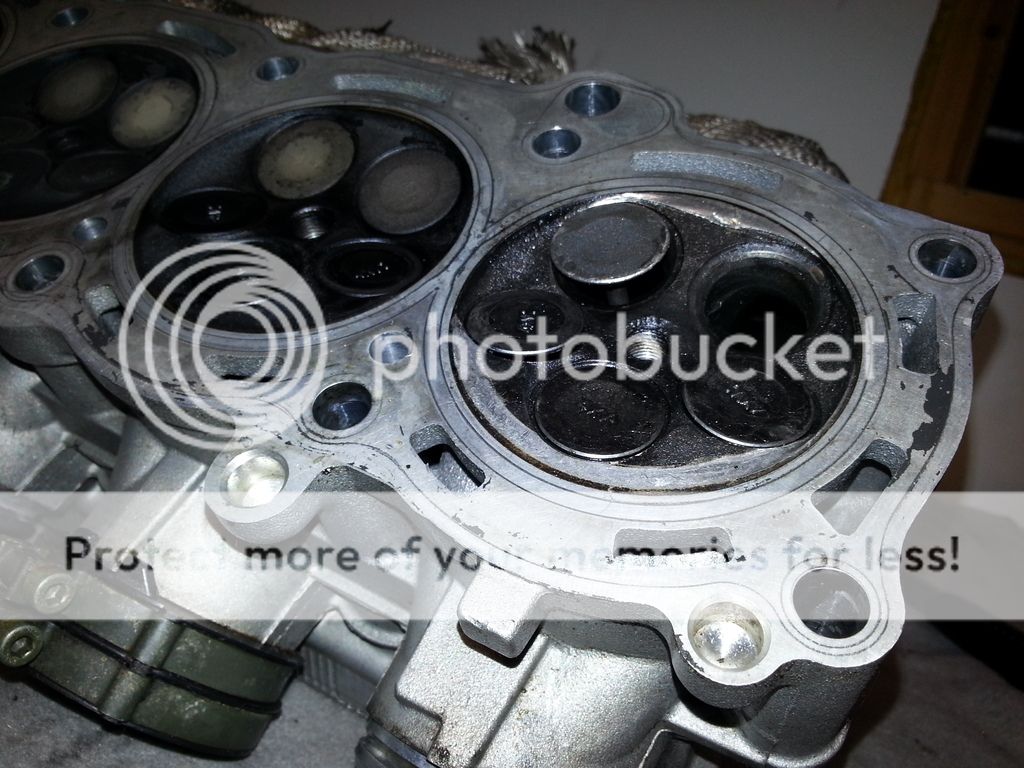
I have removed one of the exhaust valves.
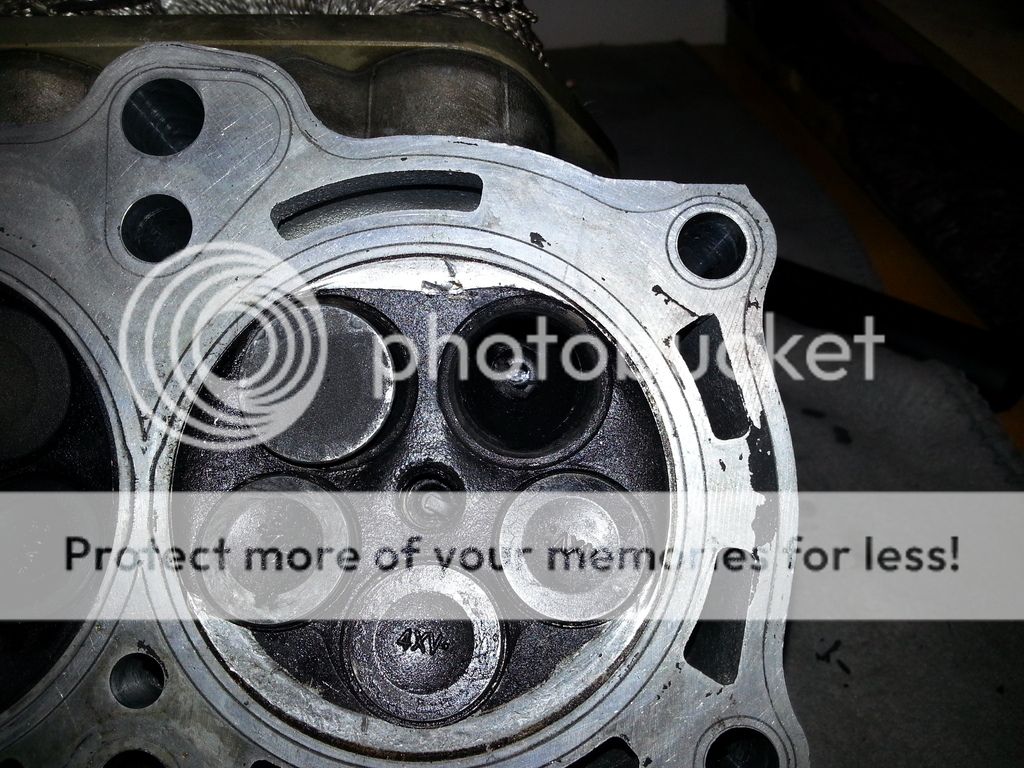
As you can se the remaining valves are all bent.
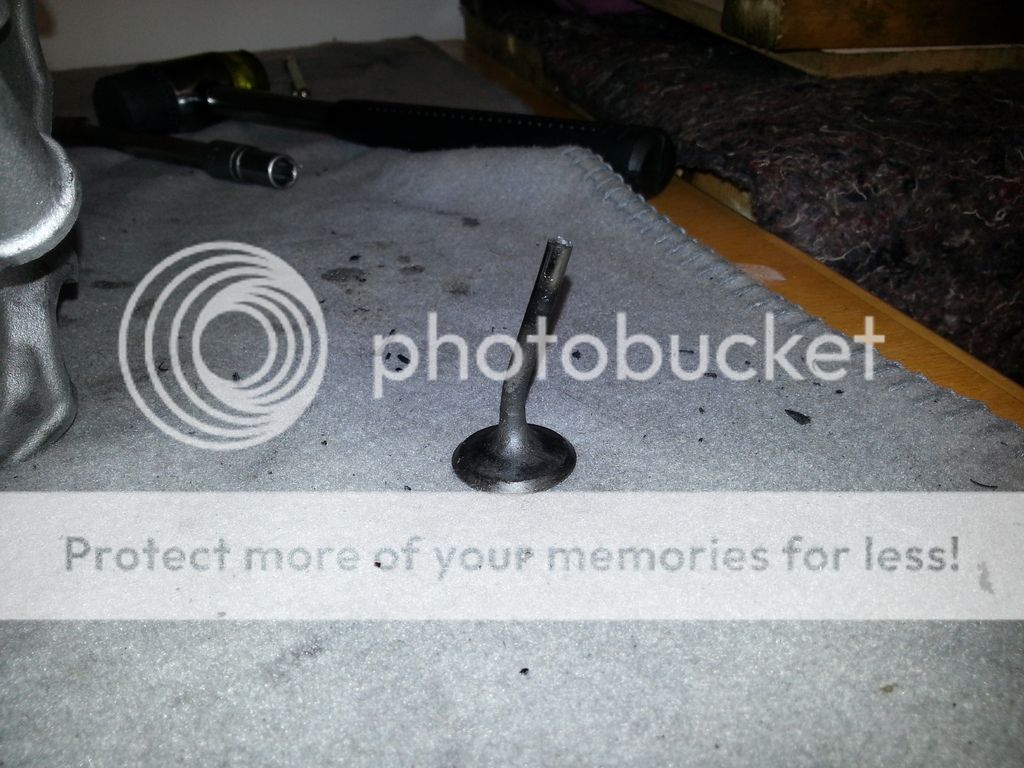
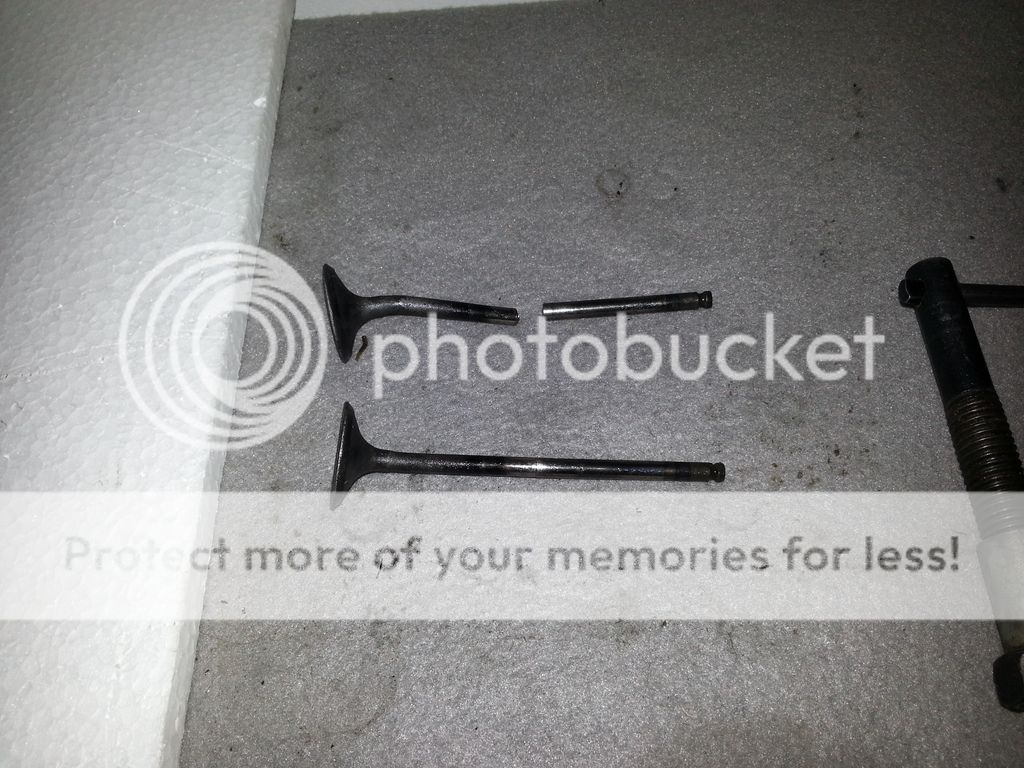
The exhaust valve I removed looks like this, it' broken in two.
To remove the valves I use a valve spring compression tool.
This one is for automobile use which have way larger valves than the RX-1 and Apex "tiny" Block motors.
I have borrowed it from my friend Mikkel who is an automobile mechanic.
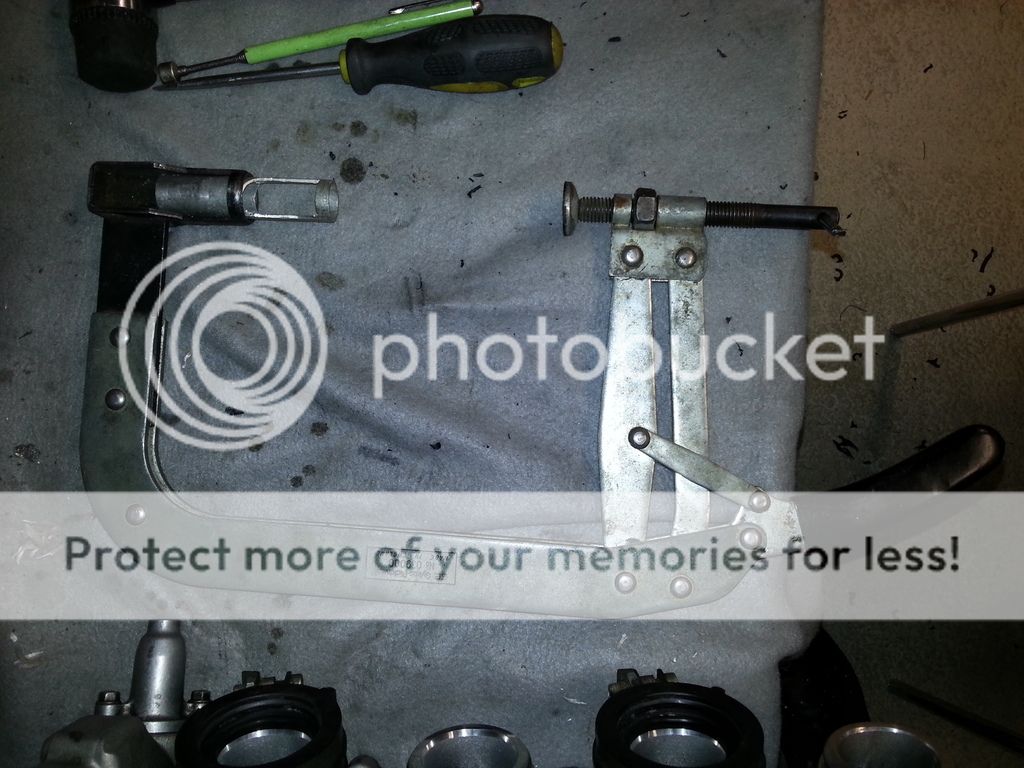
He made a Conversion to make it fit the Apex valves.
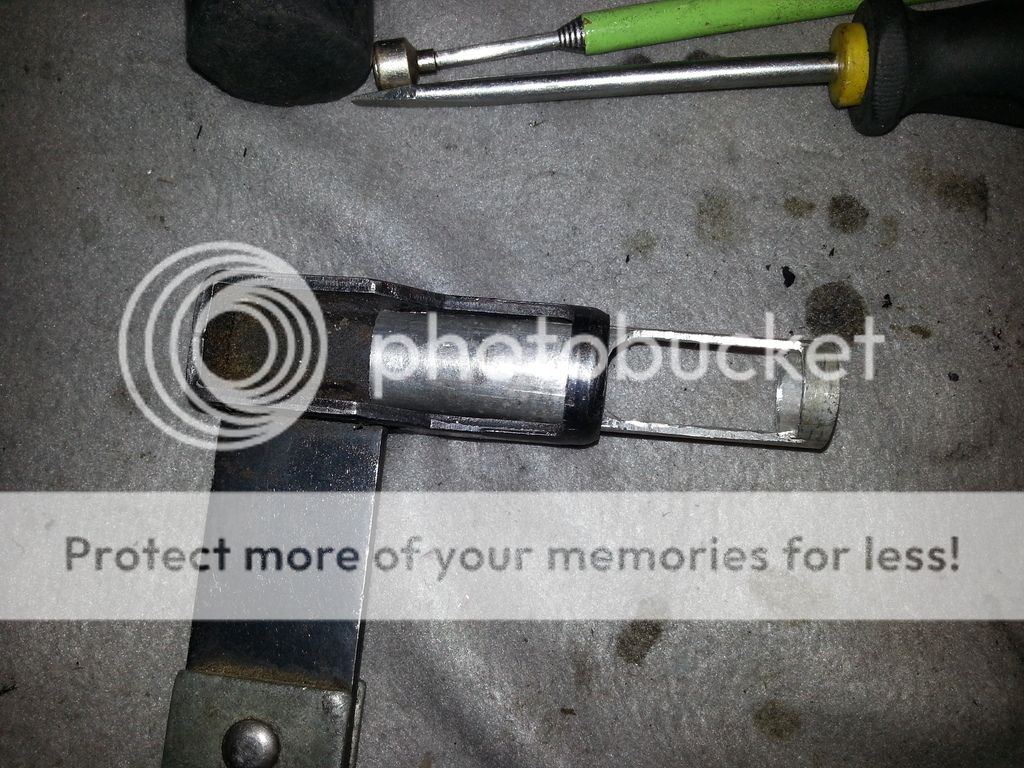
Here's how you use it.
Install the pipe on top of the valve spring.
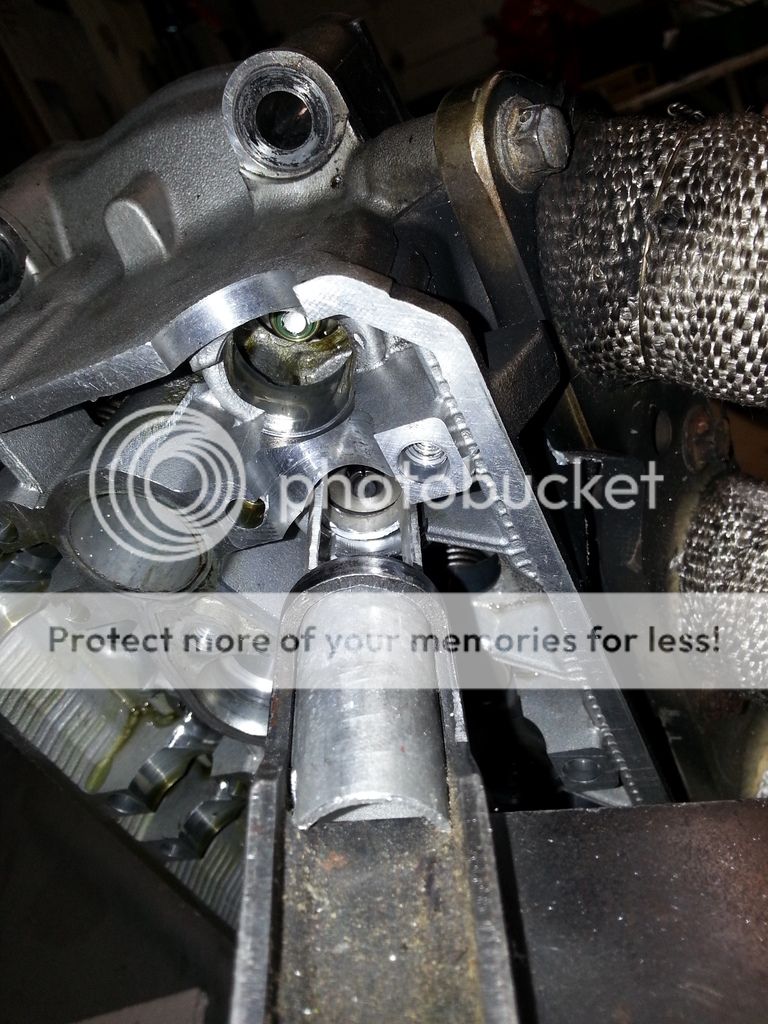
Install the bottom end on the valve itself.
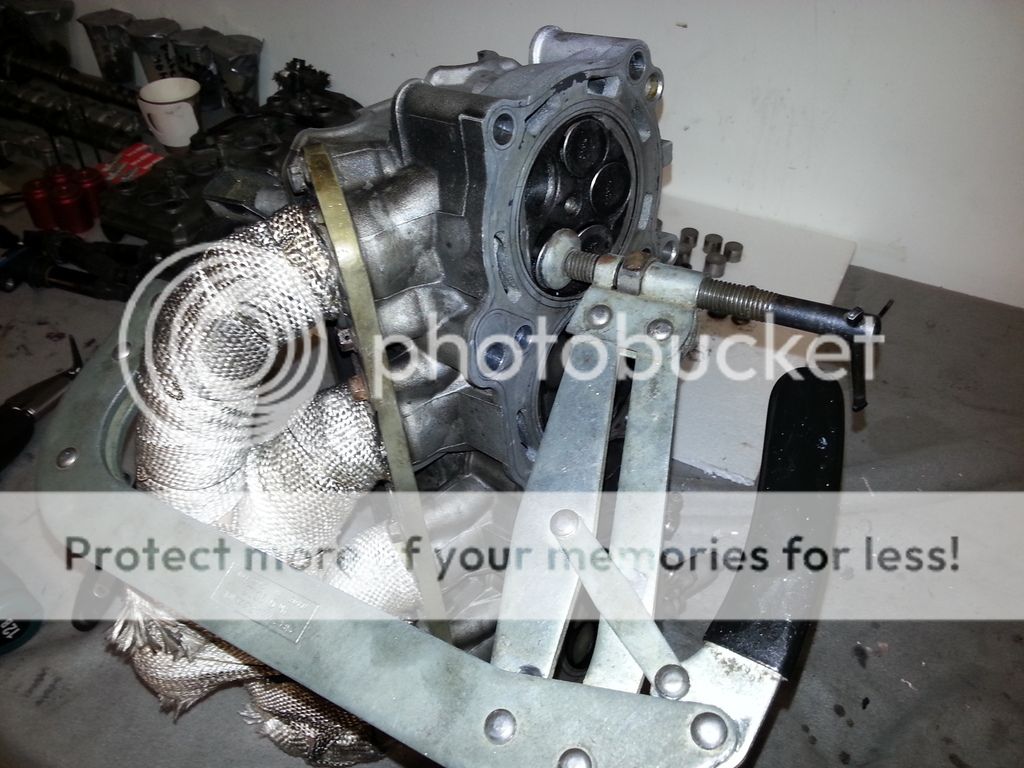
Close the tool handle and the tool will compress the valve spring leaving the Lock halves open for removal.

The exhaust valves removed.
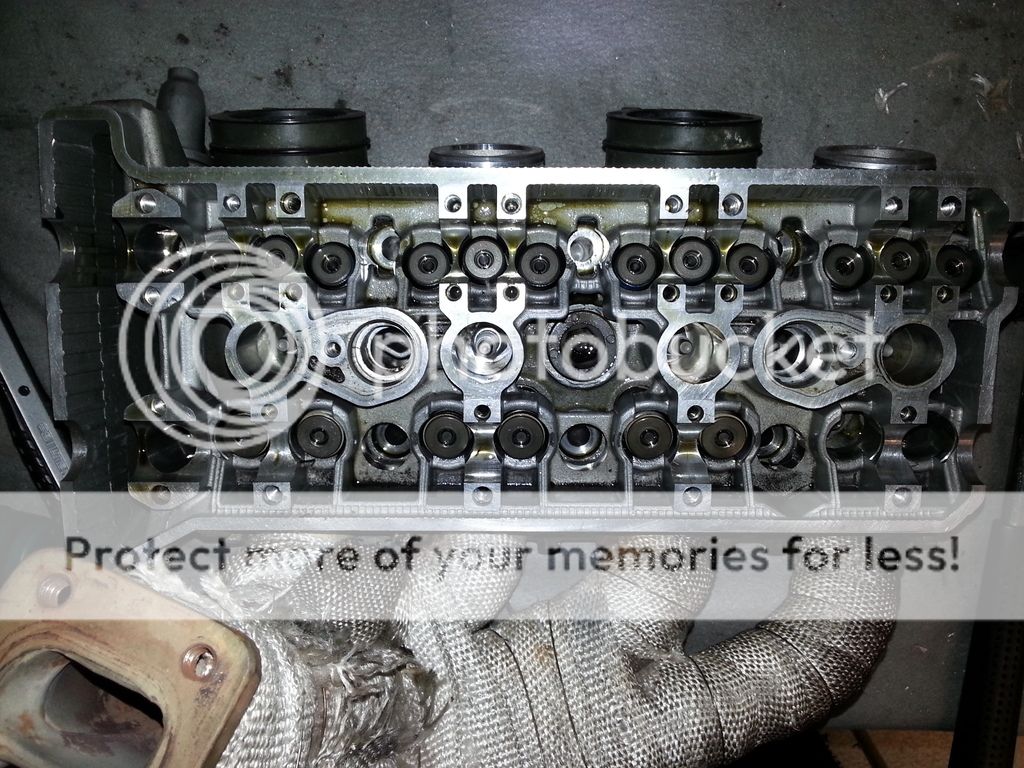
One broken and one bent.
The valve springs and Locks removed.
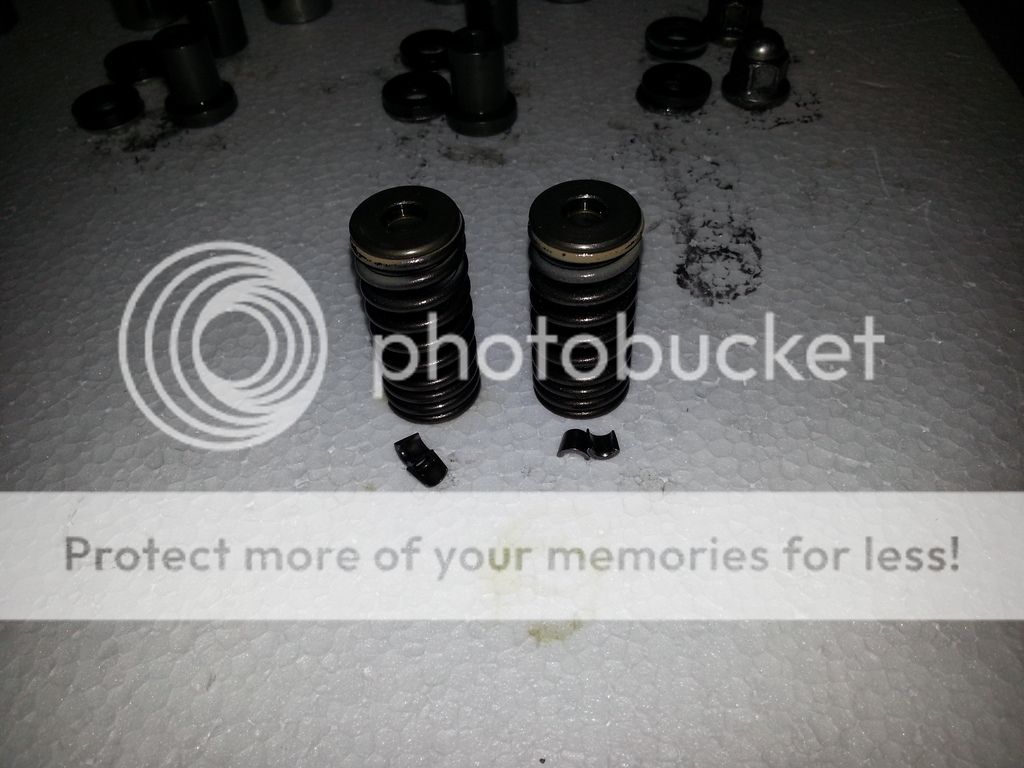
The tool Conversion did not fit the intake valves as they are a bit narrower than the exhaust side.
I didn't have the correct pipe to make a New Conversion so I did it the old fashion way using a socket wrench extensioner.
Put the square end over the valve spring and knocked gently at the extensioner, had a look and nothing happened.
Knocked a bit harder and one of the Locks came loose, removed it With a magnet.
Had to knock a few times to get the second Lock out.
Repeated the procedure on the last two intake valves.
Next work is installing the valves.
More to come ...
Before starting to remove the valves I first removed all valve shims and buckets.
I placed them in the same order they are going back in.

I have bent valves on cylinder #4 due to wrist pin failure.
The valves on #4 will have to be replaced.

I will use the good valves from my RX-1 head that got destroyed when the RX-1 motor went Down.
The valves are the same part#s and fits both the Apex and the RX-1 cylinder head.
I have removed one of the exhaust valves.

As you can se the remaining valves are all bent.

The exhaust valve I removed looks like this, it' broken in two.

To remove the valves I use a valve spring compression tool.
This one is for automobile use which have way larger valves than the RX-1 and Apex "tiny" Block motors.
I have borrowed it from my friend Mikkel who is an automobile mechanic.

He made a Conversion to make it fit the Apex valves.

Here's how you use it.
Install the pipe on top of the valve spring.

Install the bottom end on the valve itself.

Close the tool handle and the tool will compress the valve spring leaving the Lock halves open for removal.

The exhaust valves removed.

One broken and one bent.

The valve springs and Locks removed.

The tool Conversion did not fit the intake valves as they are a bit narrower than the exhaust side.
I didn't have the correct pipe to make a New Conversion so I did it the old fashion way using a socket wrench extensioner.
Put the square end over the valve spring and knocked gently at the extensioner, had a look and nothing happened.
Knocked a bit harder and one of the Locks came loose, removed it With a magnet.
Had to knock a few times to get the second Lock out.
Repeated the procedure on the last two intake valves.
Next work is installing the valves.
More to come ...


Wow. That was quite the hit on the valves. Are the valve guides still in good shape?
I've done lots of V8 head work back in the day. Never seen a valve break midway on the stem. Its amazing it never fell and created havoc in the cylinder.
I've done lots of V8 head work back in the day. Never seen a valve break midway on the stem. Its amazing it never fell and created havoc in the cylinder.
rxrider
Jan-Ove Pedersen
- Joined
- Apr 25, 2003
- Messages
- 7,355
- Reaction score
- 64
- Points
- 1,753
- Location
- Lakselv - 70N & 25E
- Country
- Norway
- Snowmobile
- 2014 Phazer XTX, 2013 Phazer RTX, 2008 Apex RTX, 2007 Warrior, 2006 Attak
Update - March 13. - Engine Rebuild, Apex 2006, installing exhaust valves.
Before installing the exhaust valves i cleaned the cylinder head surface and valve seats.
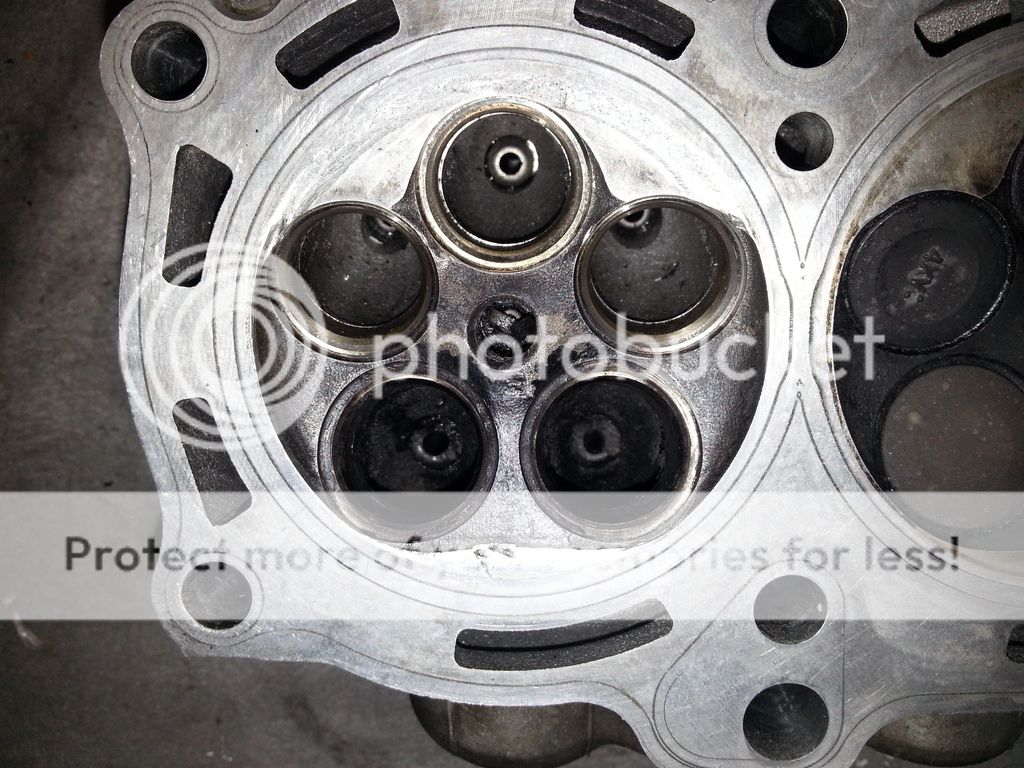
New valves from my RX-1 cylinder head are going in.
They are the same part#s as on the Apex.
The Three valves on the intake are a bit different.
Two of them are longer, the outside ones.
The one in the middle are Shorter than the others.
I measured all valves for length to make sure I would not run into trouble.
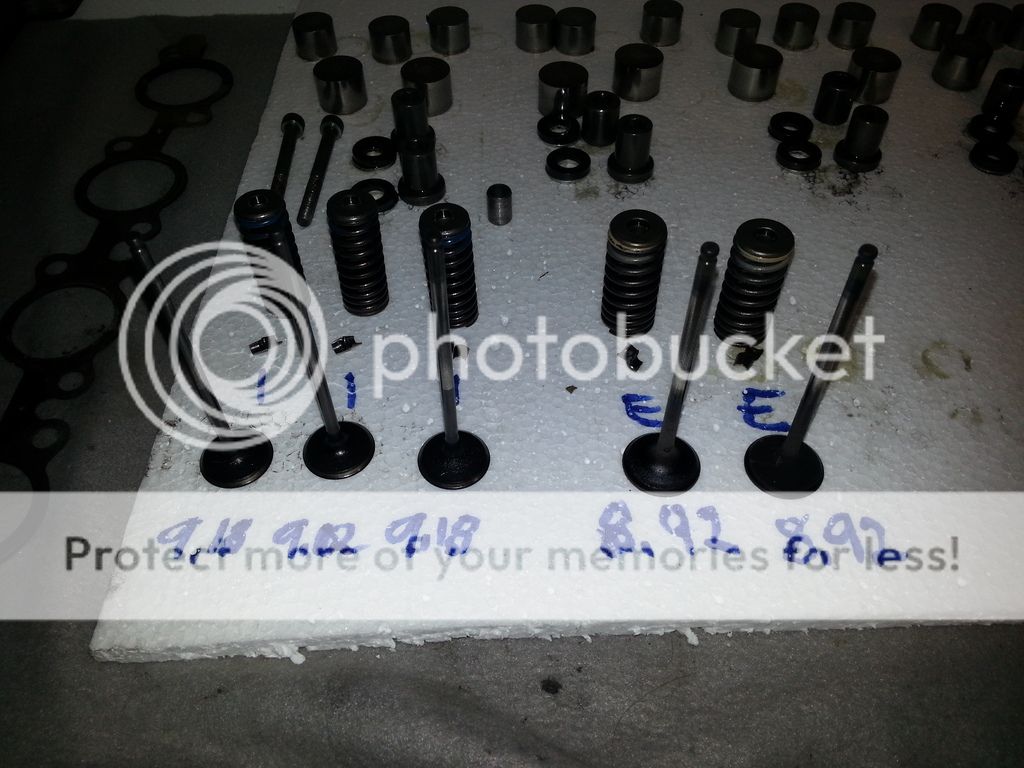
The Intake valves measured: 9.18 cm, 9.02 cm, 9.18 cm
The exhaust valves measured: 8.92 cm, 8.92 cm
By measuring them I have made sure they go in the correct way.
I checked With a engine Builder if I had to change the valve guides because they had bits broken off.
He said that in order to change the valve guides you need a machine shop With presision Tools to be able to install New valve guildes correctly.
And even then it was not an easy job. He told me I was better off leaving them as they were, and to make sure the valves did go in and out without resistance.
He told me to make sure the surfaces that were broken off were free of metal shavings then to oil the guides and valves well With motor oil before installing them.
Before I installed the exhaust valves I used on of the old valves to push out possible metal shavings.
Then I used a 1200 grit sand paper to shave off possible metal shavings where the guide broke off.
I Applied motor oil on the guides and valves and installed them.
Put in the exhaust valves to make sure they would go in and out without resistance.
They did
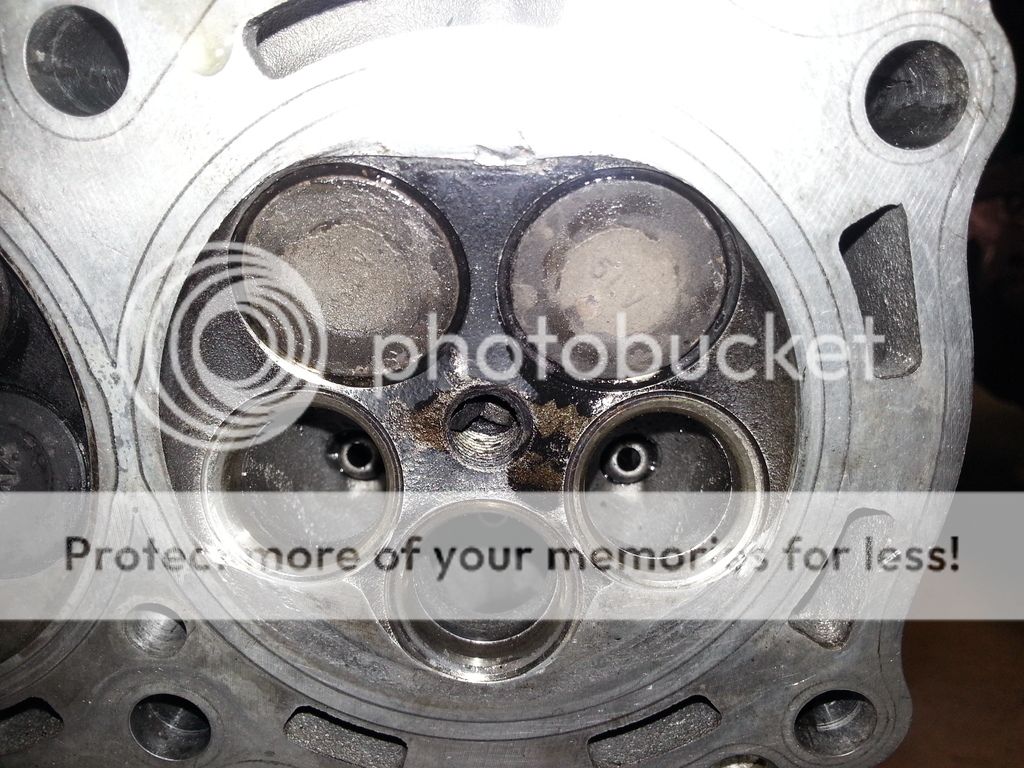
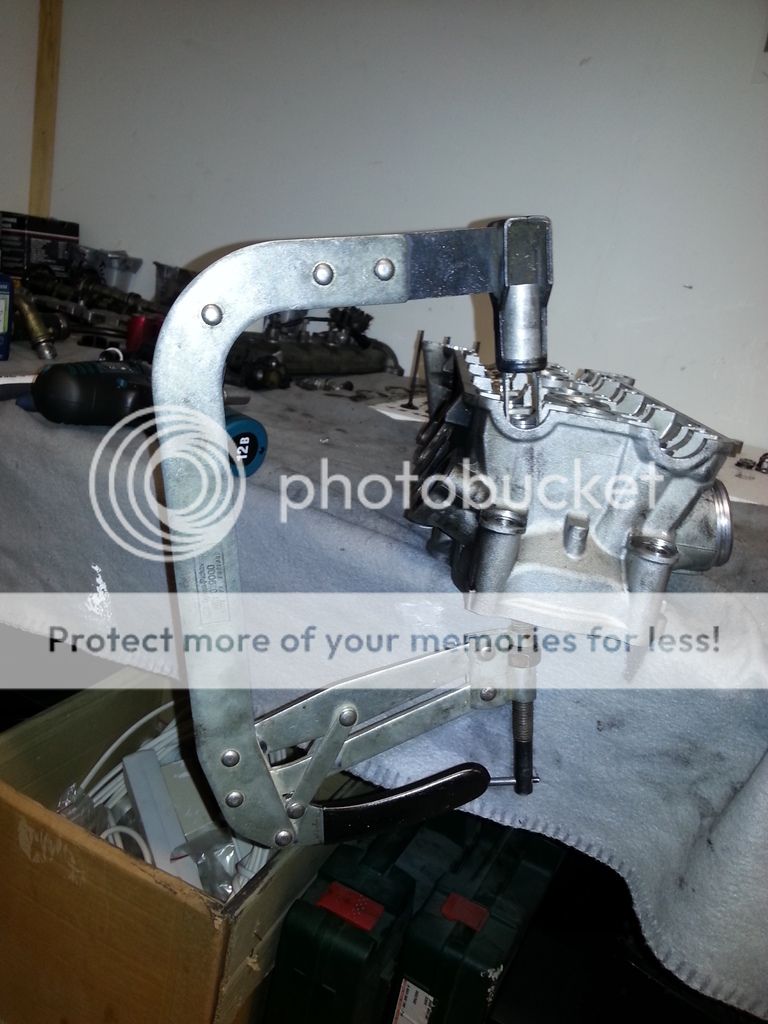
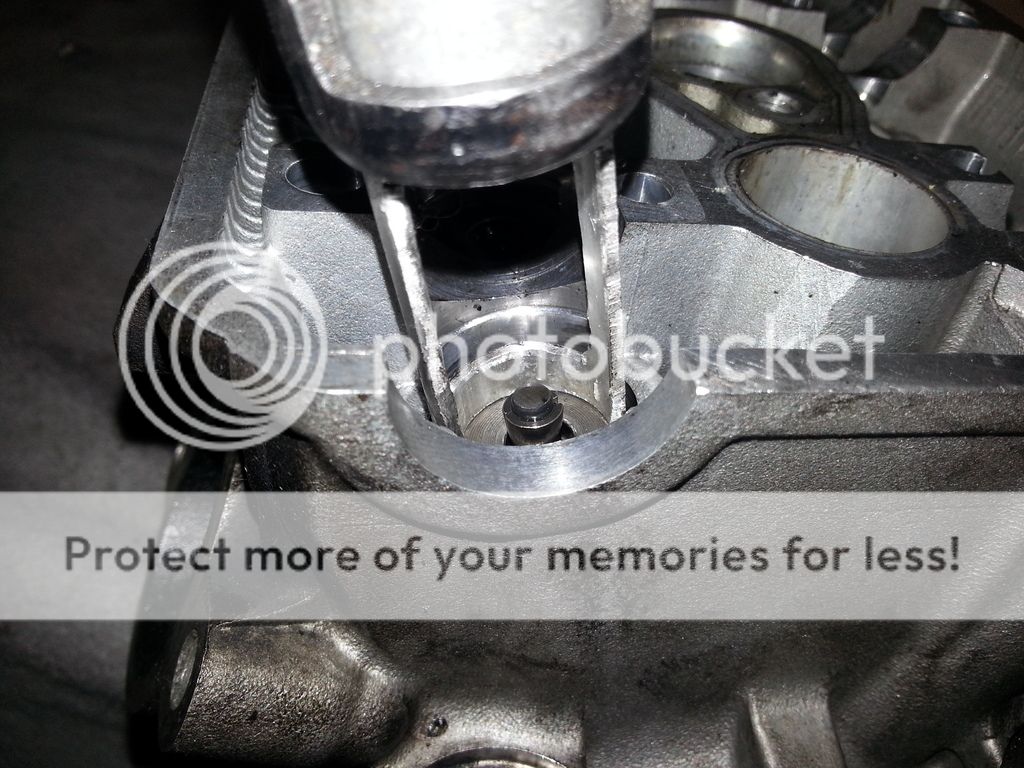
Used the valve spring compression tool to install the exhaust valves.
One exhaust valve in, one to go.
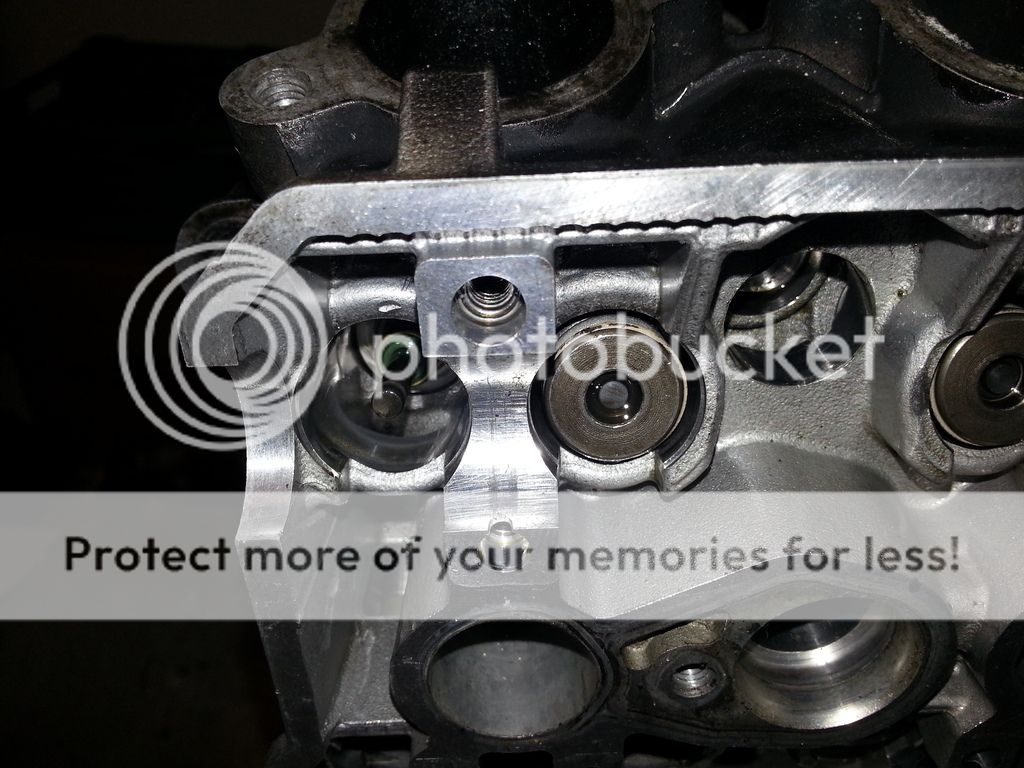
Installed the second valve and valve spring.
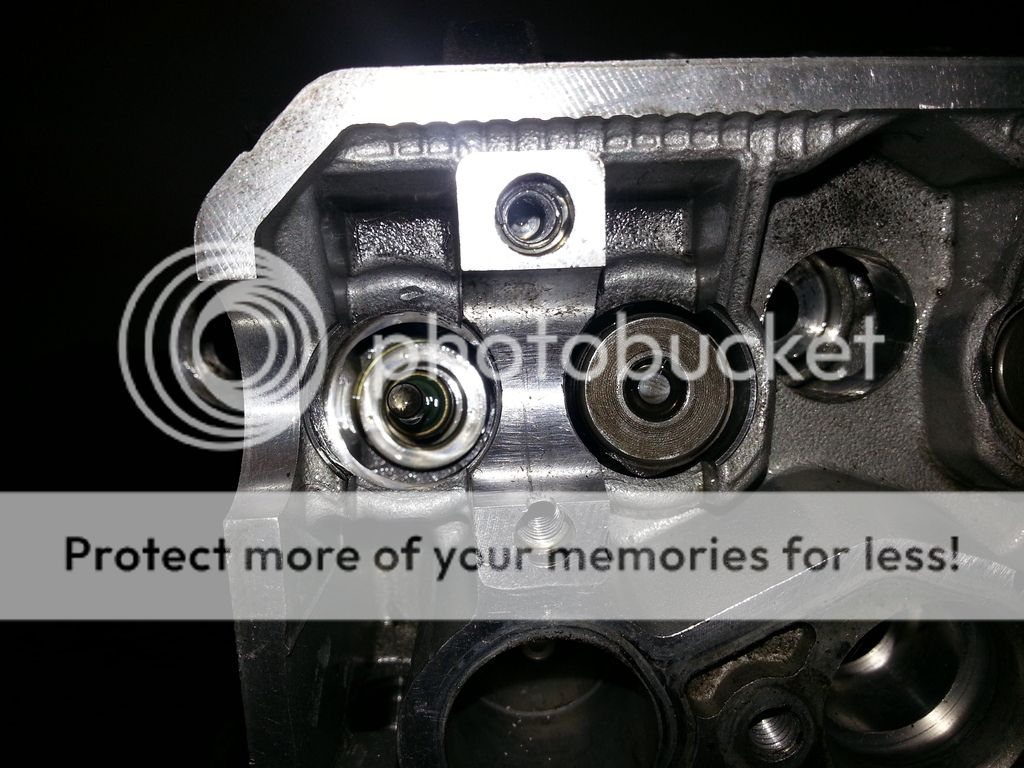
Ready to apply the valve spring compression tool.
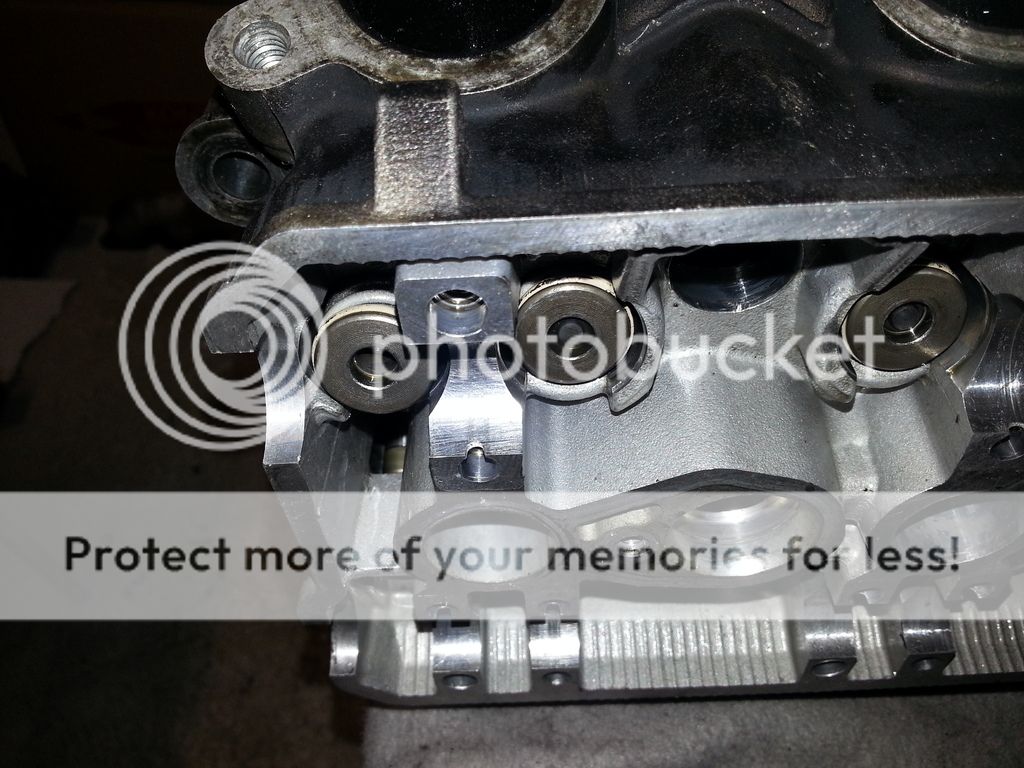
Applied the tool and compressed the valve spring.
The Lock halves are installed.
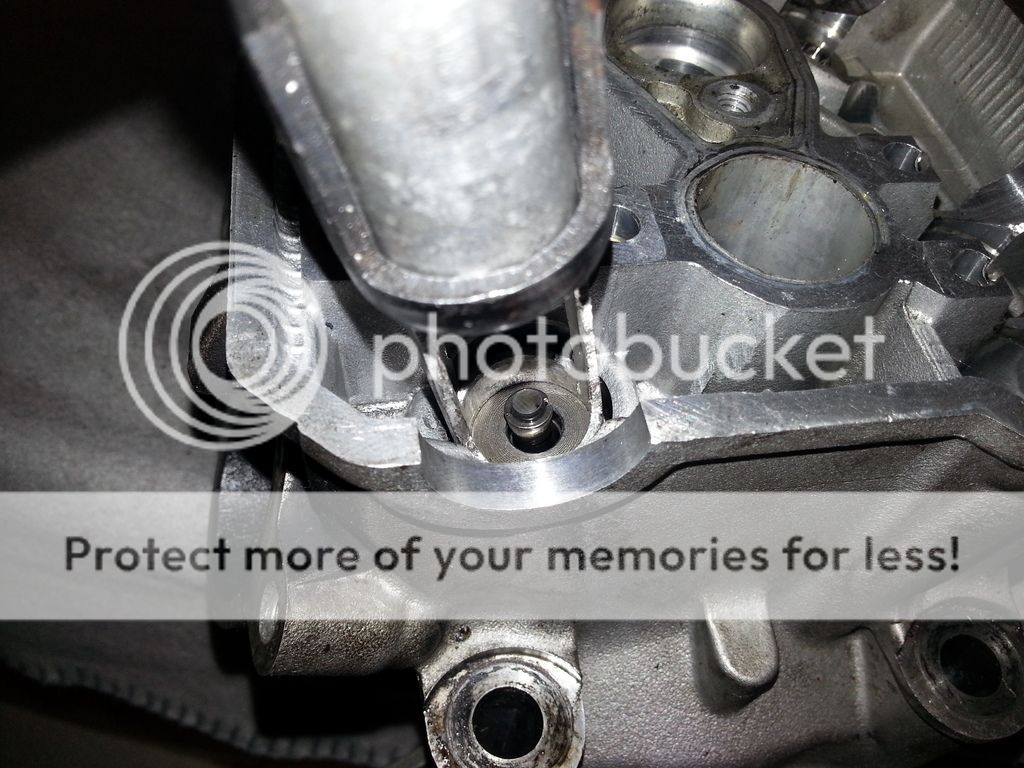
Released the compression tool-
The valve are installed
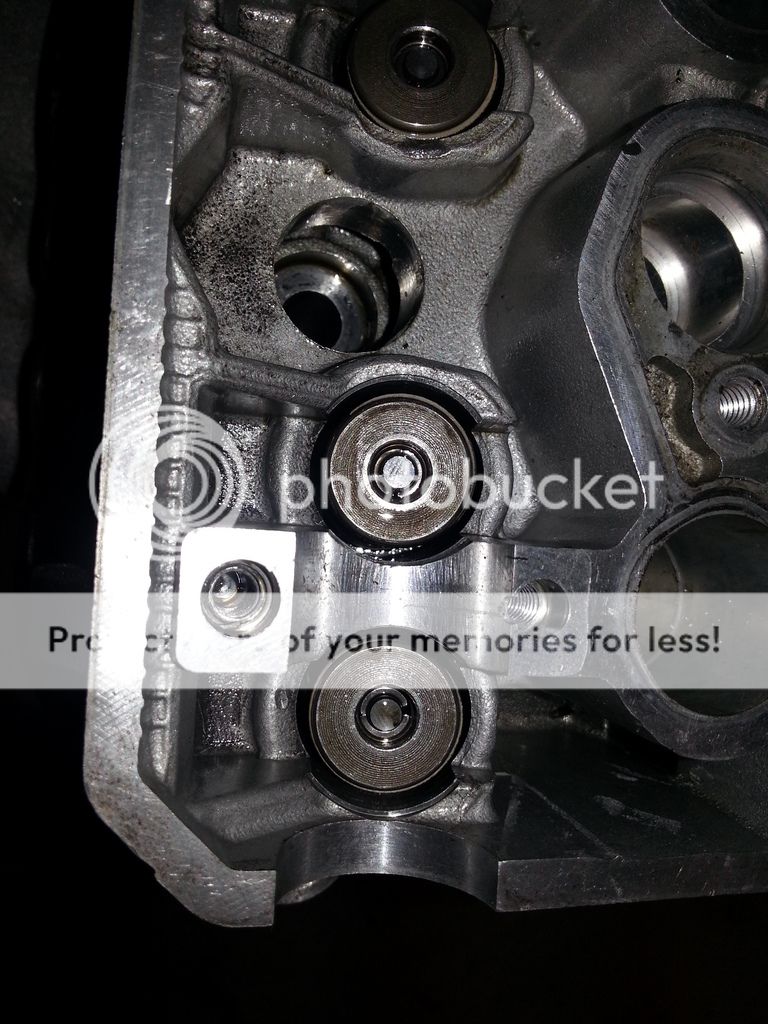
I need to make a New Conversion for the intake valves,
With the correct diameter pipe it's a 15 minutes work to make the Conversion.
Will have to put my Apex Project on hold.
Got a AC M7000 in for a MCX270 install, will document the work on the AC.
Before installing the exhaust valves i cleaned the cylinder head surface and valve seats.

New valves from my RX-1 cylinder head are going in.
They are the same part#s as on the Apex.
The Three valves on the intake are a bit different.
Two of them are longer, the outside ones.
The one in the middle are Shorter than the others.
I measured all valves for length to make sure I would not run into trouble.

The Intake valves measured: 9.18 cm, 9.02 cm, 9.18 cm
The exhaust valves measured: 8.92 cm, 8.92 cm
By measuring them I have made sure they go in the correct way.
I checked With a engine Builder if I had to change the valve guides because they had bits broken off.
He said that in order to change the valve guides you need a machine shop With presision Tools to be able to install New valve guildes correctly.
And even then it was not an easy job. He told me I was better off leaving them as they were, and to make sure the valves did go in and out without resistance.
He told me to make sure the surfaces that were broken off were free of metal shavings then to oil the guides and valves well With motor oil before installing them.
Before I installed the exhaust valves I used on of the old valves to push out possible metal shavings.
Then I used a 1200 grit sand paper to shave off possible metal shavings where the guide broke off.
I Applied motor oil on the guides and valves and installed them.
Put in the exhaust valves to make sure they would go in and out without resistance.
They did

Used the valve spring compression tool to install the exhaust valves.
One exhaust valve in, one to go.

Installed the second valve and valve spring.

Ready to apply the valve spring compression tool.

Applied the tool and compressed the valve spring.

The Lock halves are installed.


Released the compression tool-
The valve are installed

I need to make a New Conversion for the intake valves,
With the correct diameter pipe it's a 15 minutes work to make the Conversion.
Will have to put my Apex Project on hold.
Got a AC M7000 in for a MCX270 install, will document the work on the AC.
rxrider
Jan-Ove Pedersen
- Joined
- Apr 25, 2003
- Messages
- 7,355
- Reaction score
- 64
- Points
- 1,753
- Location
- Lakselv - 70N & 25E
- Country
- Norway
- Snowmobile
- 2014 Phazer XTX, 2013 Phazer RTX, 2008 Apex RTX, 2007 Warrior, 2006 Attak
Update - March 18. - Installing AC M7000 MCX270. The turbo kit.
Got in a MCX270 turbokit for a customers Arctic Cat M7000.
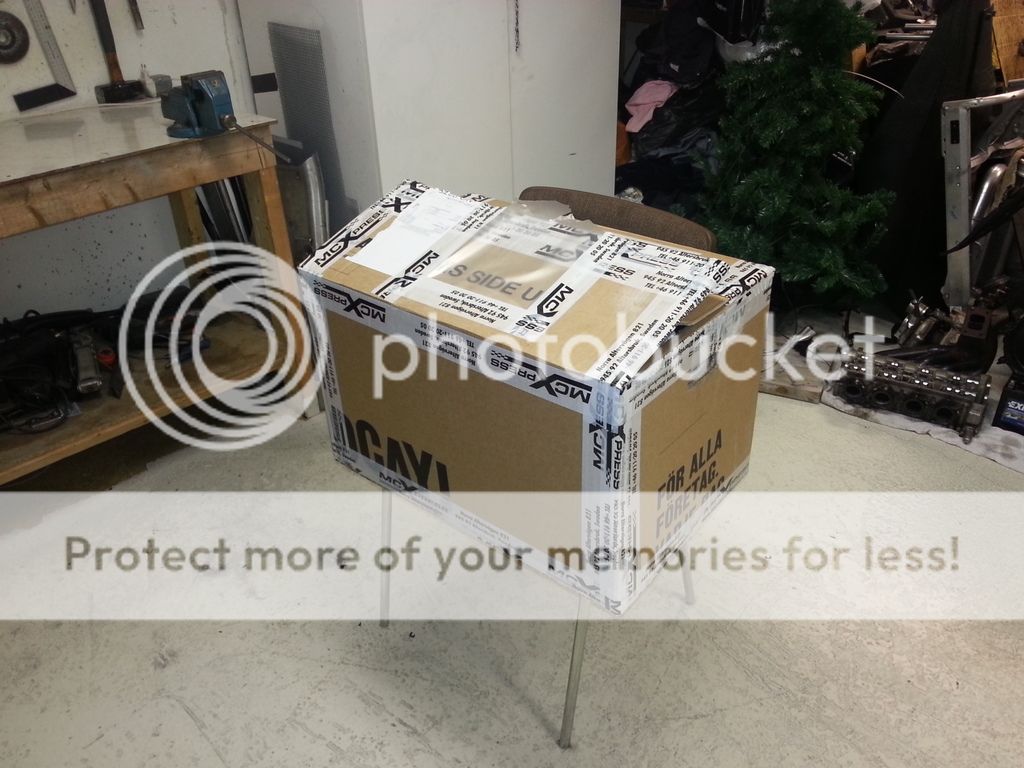
Unpacking the turbo kit.
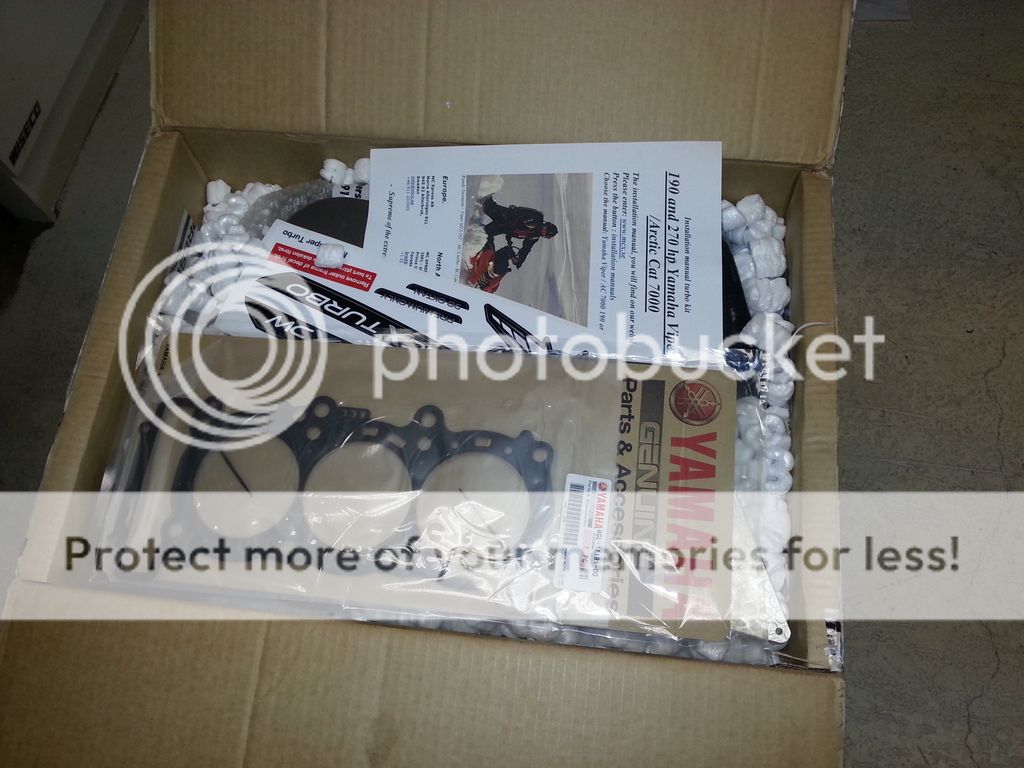
All parts on the work bench.
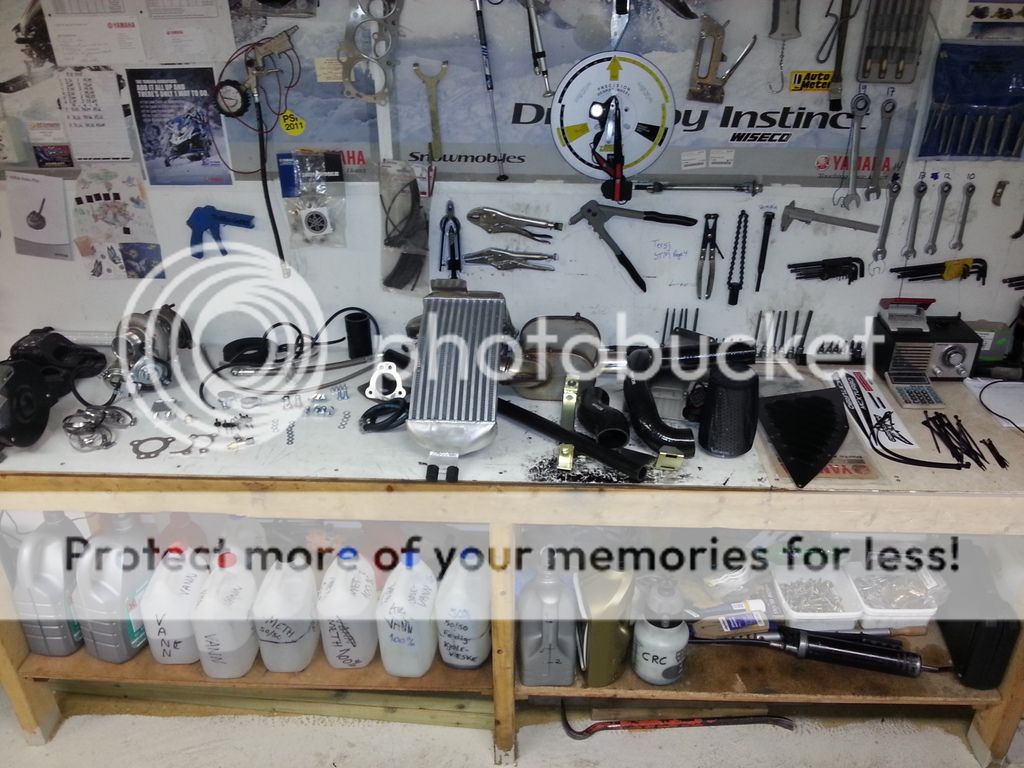
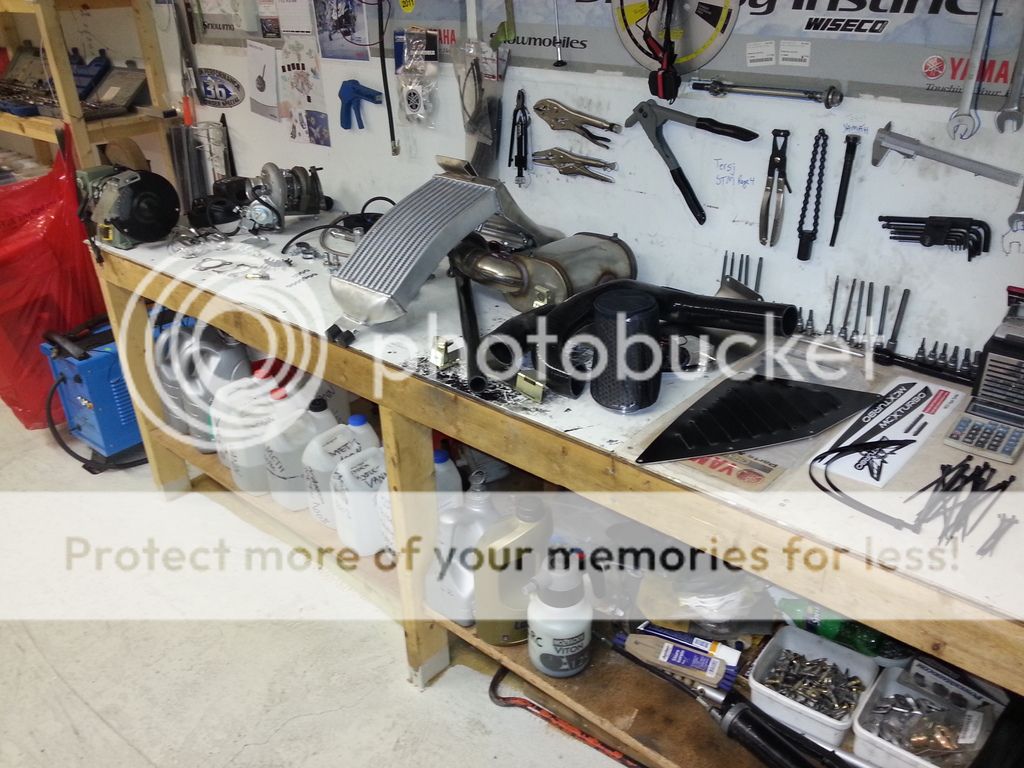
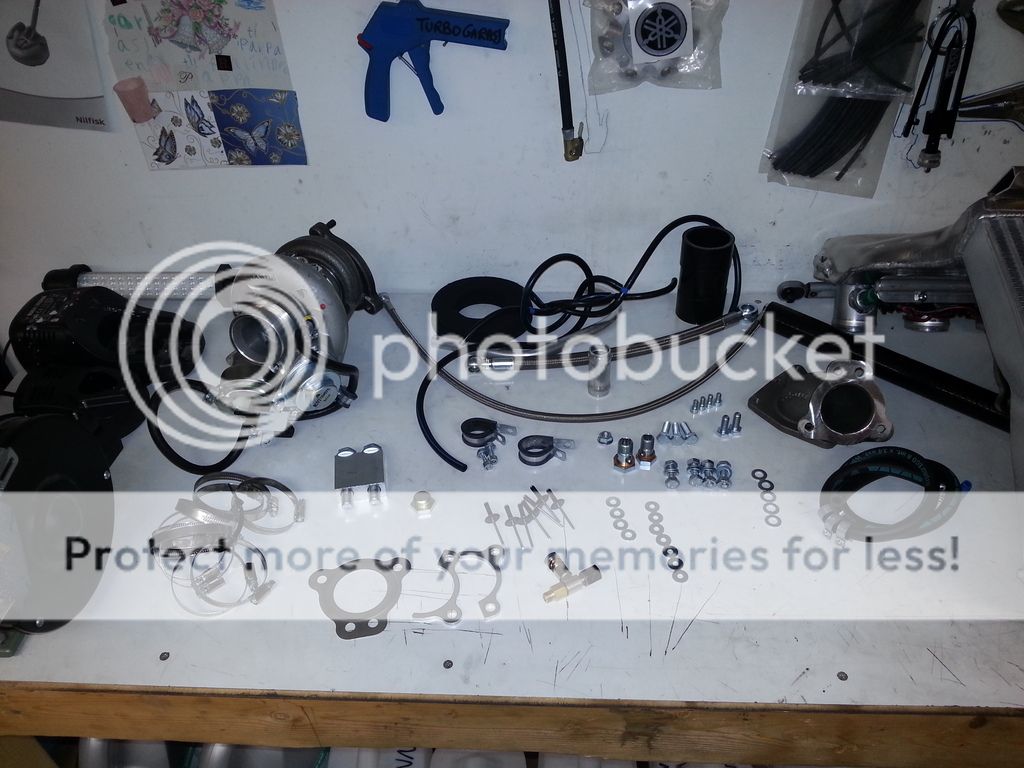
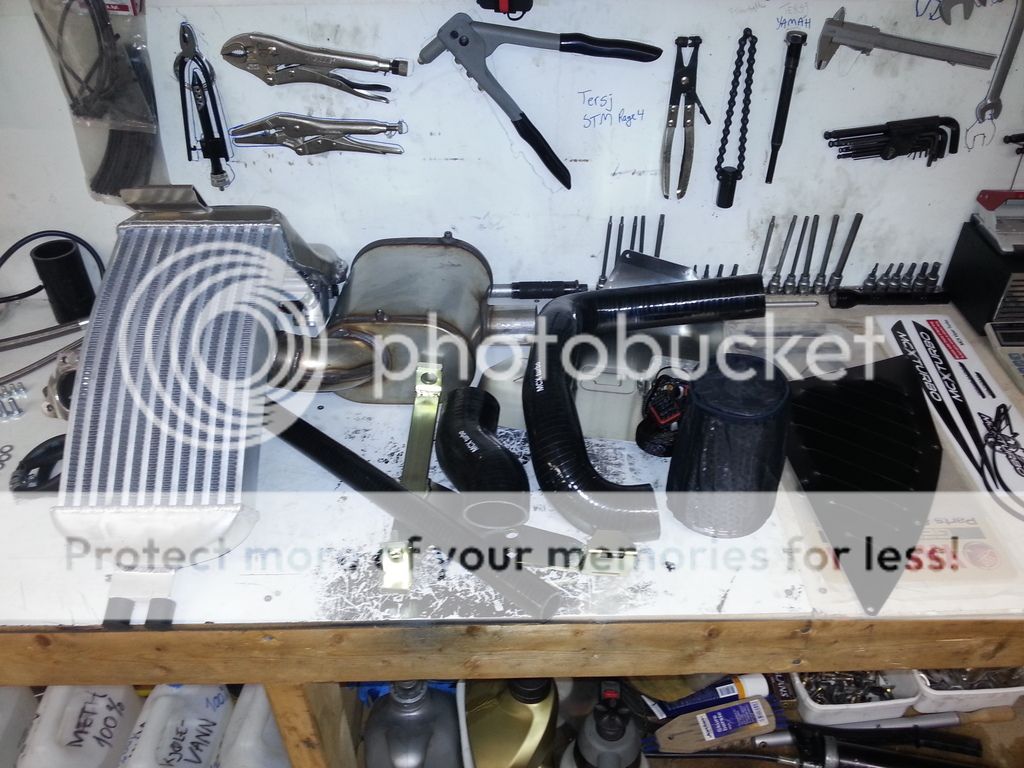
The sled will be in this evening.
Got in a MCX270 turbokit for a customers Arctic Cat M7000.

Unpacking the turbo kit.

All parts on the work bench.


The sled will be in this evening.
Last edited:
le700
Expert
Wow, good work as always. It´s a real joy to read your updates.
One question though, did you find what was blocking the oil return line on the 06 apex?
One question though, did you find what was blocking the oil return line on the 06 apex?
rxrider
Jan-Ove Pedersen
- Joined
- Apr 25, 2003
- Messages
- 7,355
- Reaction score
- 64
- Points
- 1,753
- Location
- Lakselv - 70N & 25E
- Country
- Norway
- Snowmobile
- 2014 Phazer XTX, 2013 Phazer RTX, 2008 Apex RTX, 2007 Warrior, 2006 Attak
Update - March 18. - Installing AC M7000 MCX270. The tear Down.
Removed the seat.
The battery and cables have to come off.
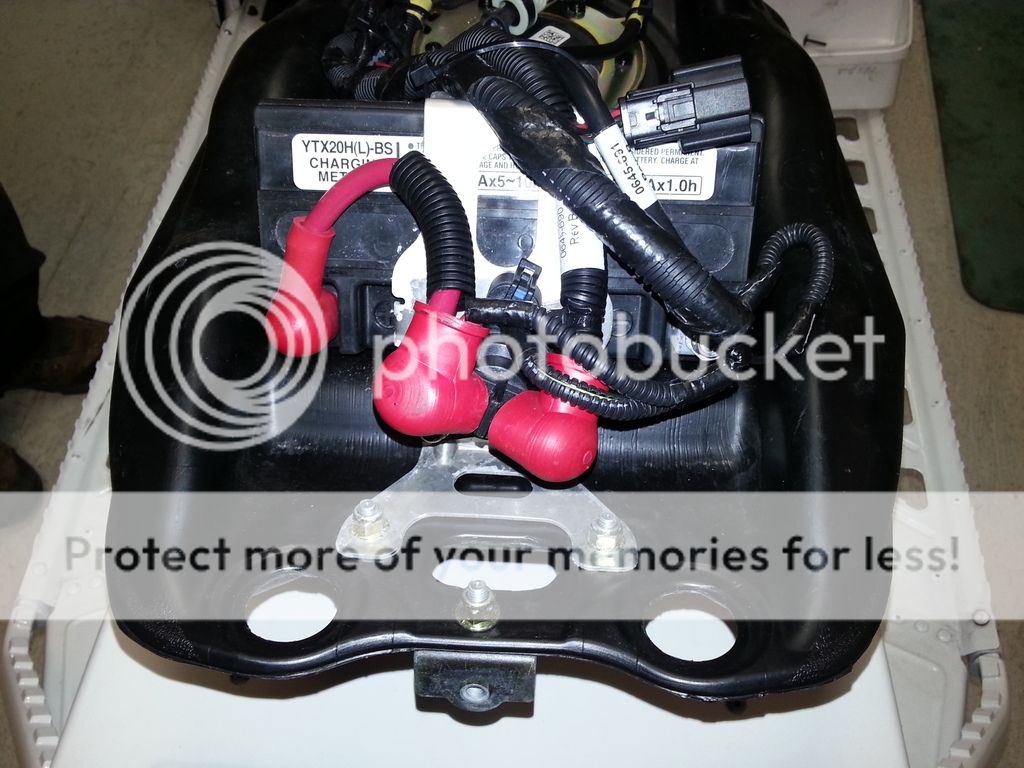
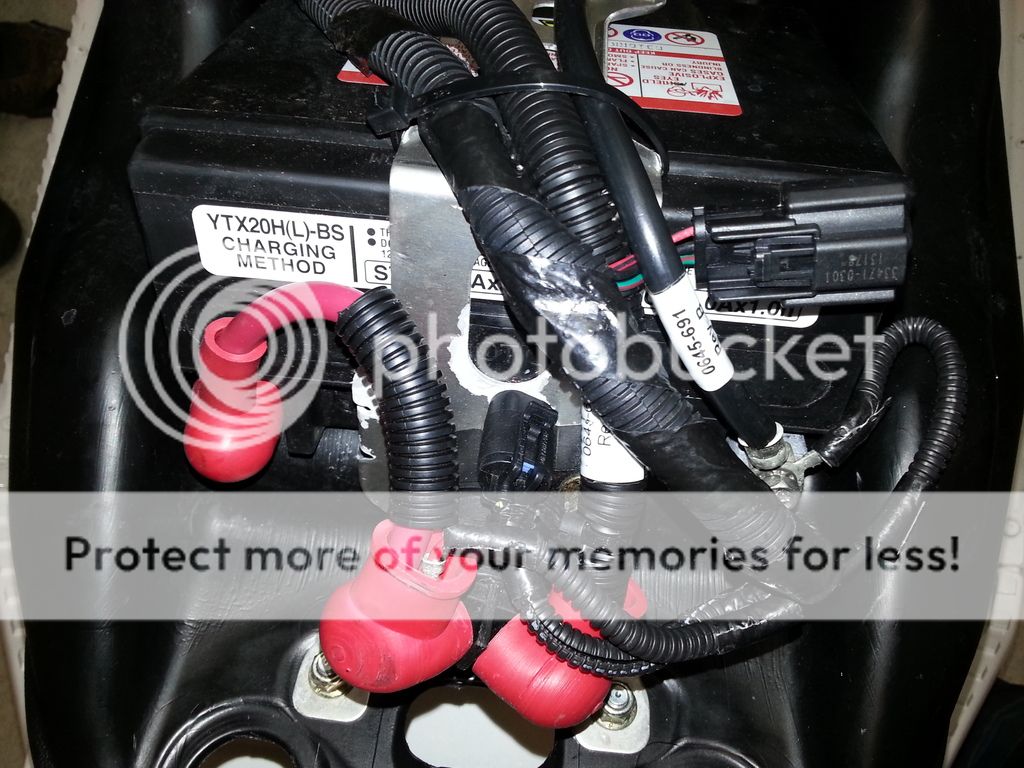
Removed all of the placstics up front, the battery and fuel tank.
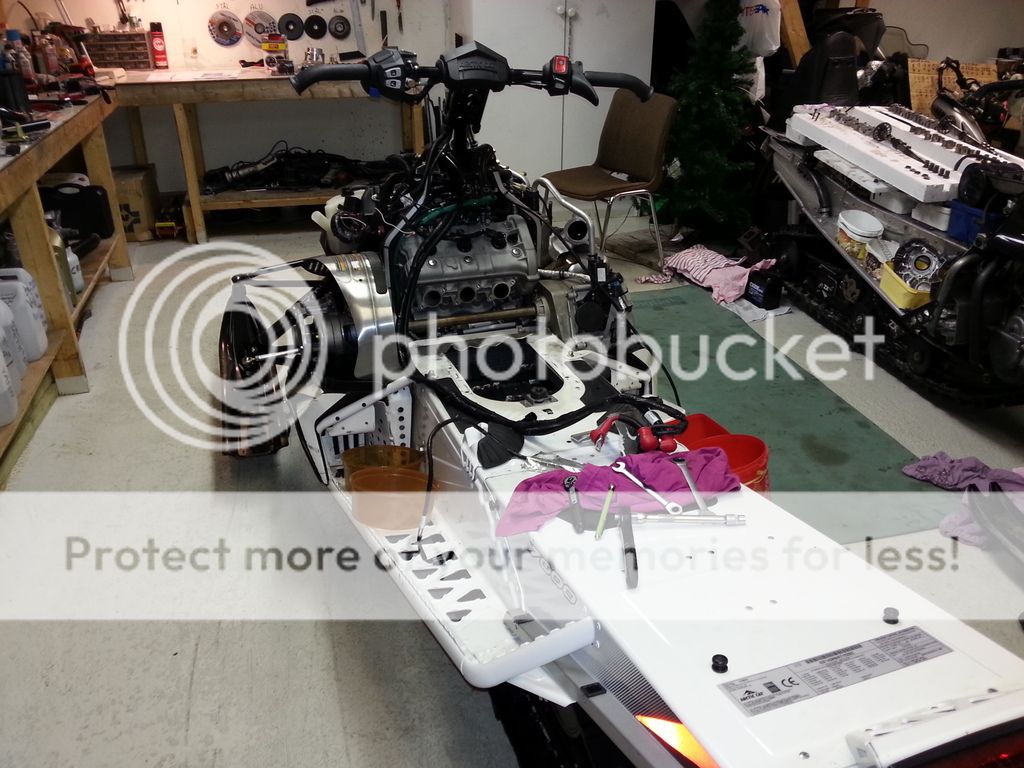
Next is removing the radiator.
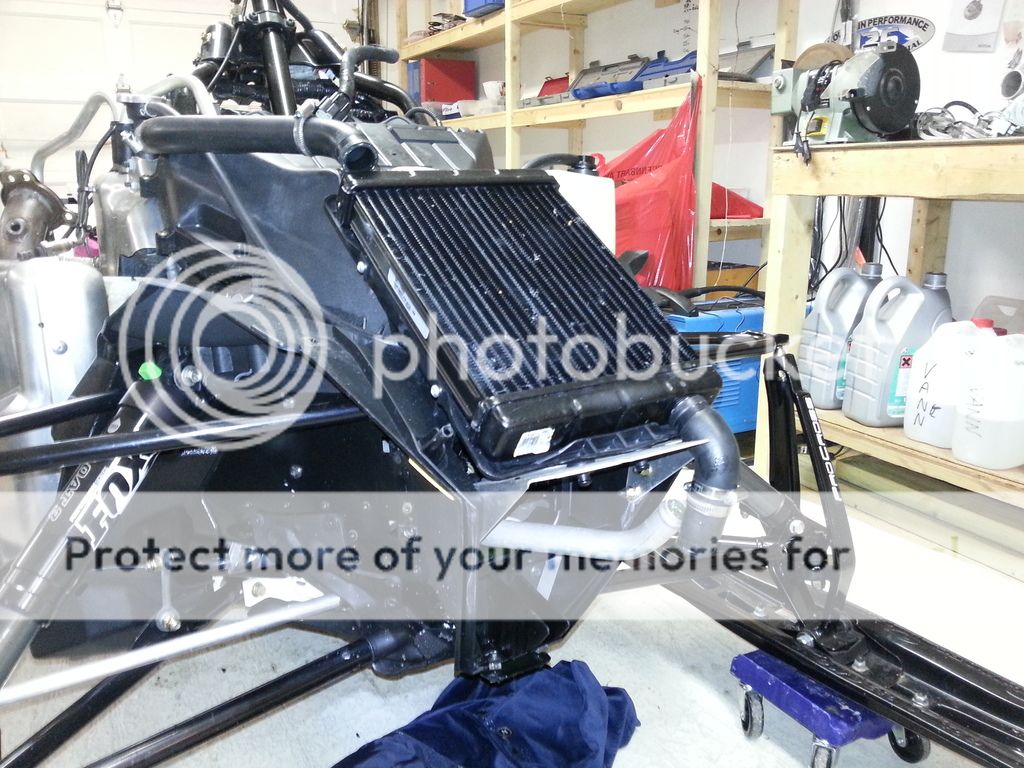
Loosened up the bolts on the front motor Mount and removed the bolts on the rear motor Mounts.
Lifted up the engine at the rear and placed a piece of Wood to keep it up.
Moved the steering post out of the way.
Removed the exhaust and cylinder head cover.
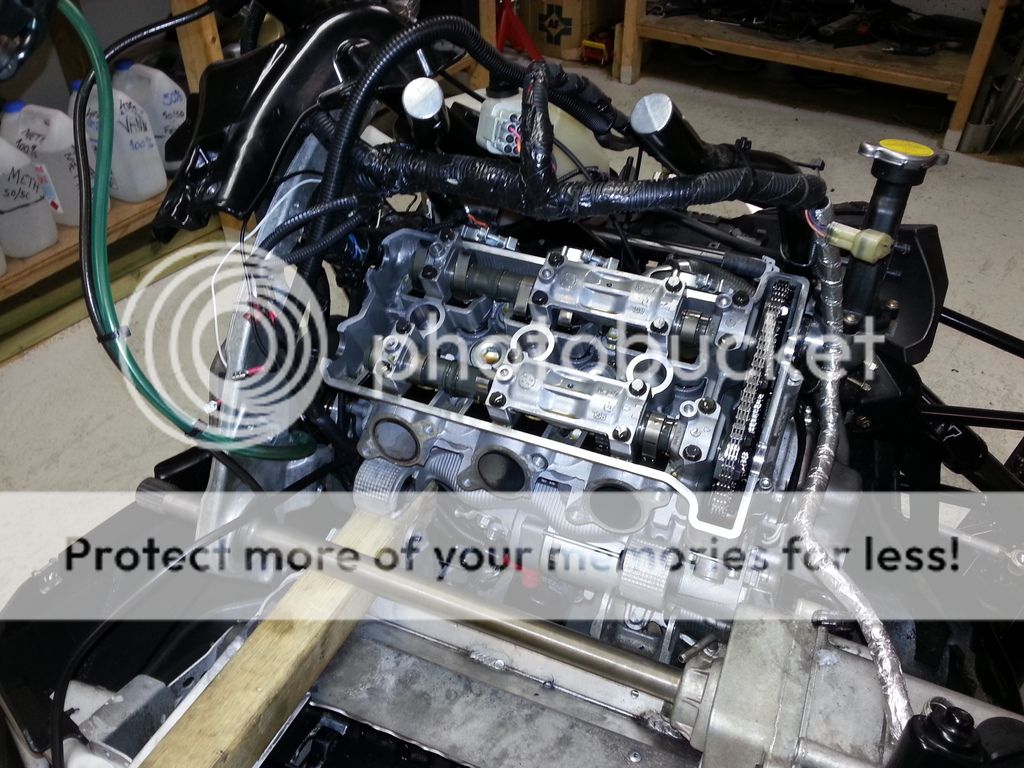
Now it's possible to get to the oil pressure sensor.
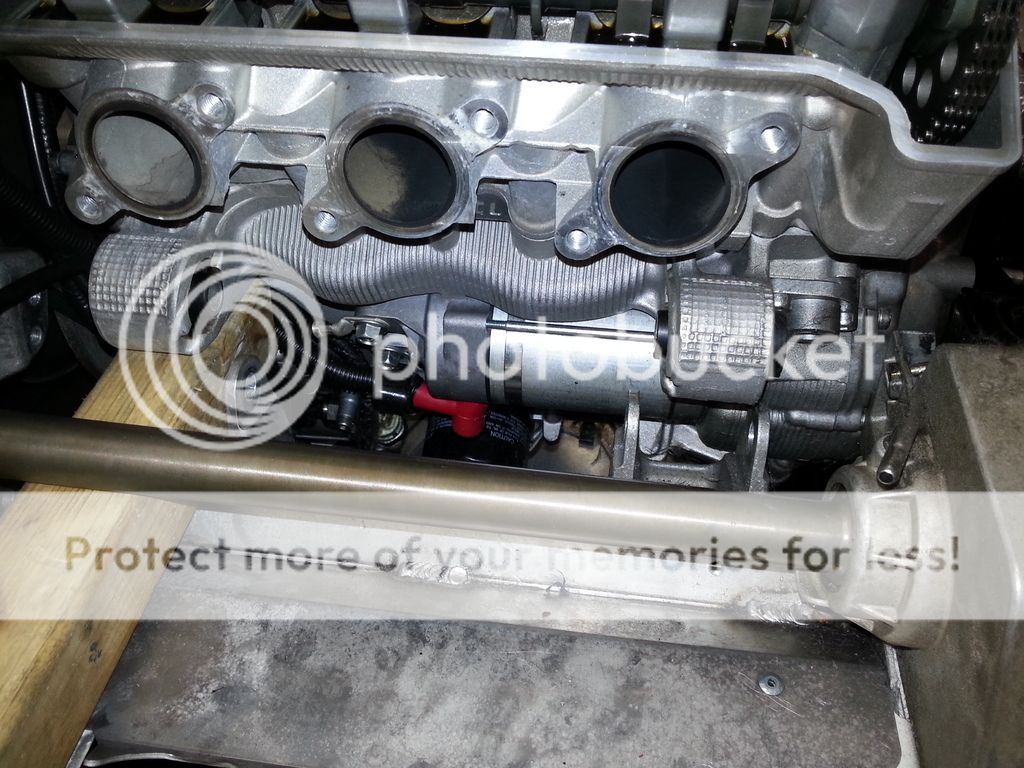
Removed the airbox and fuel rail.
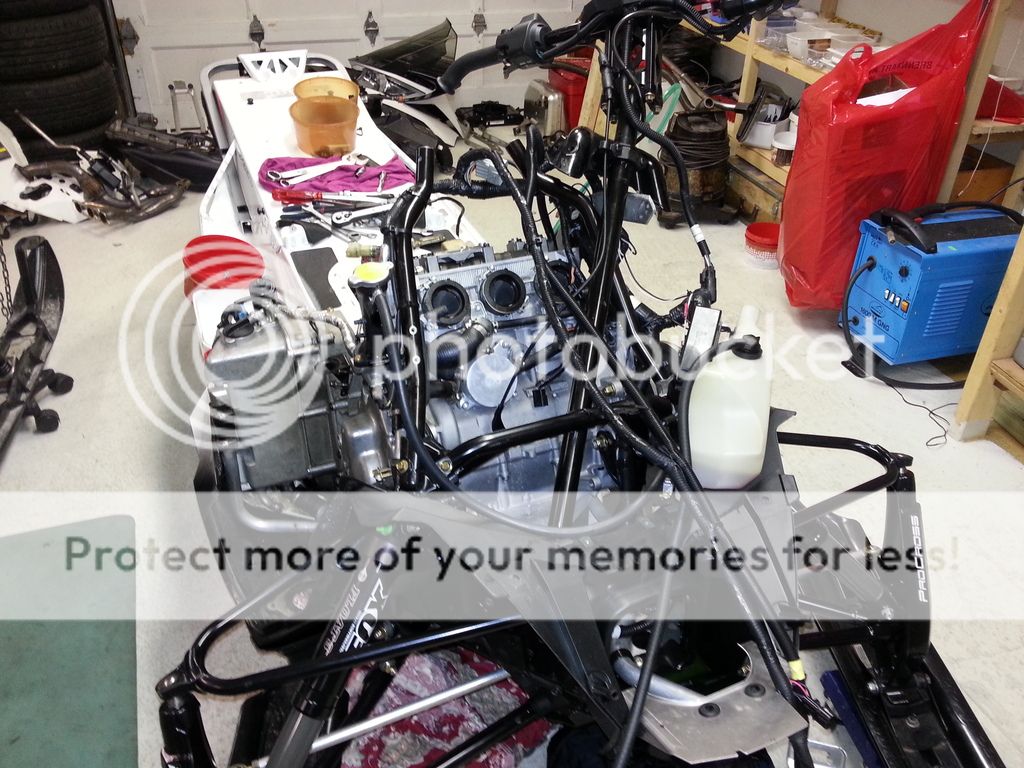
Removed the cylinder head.
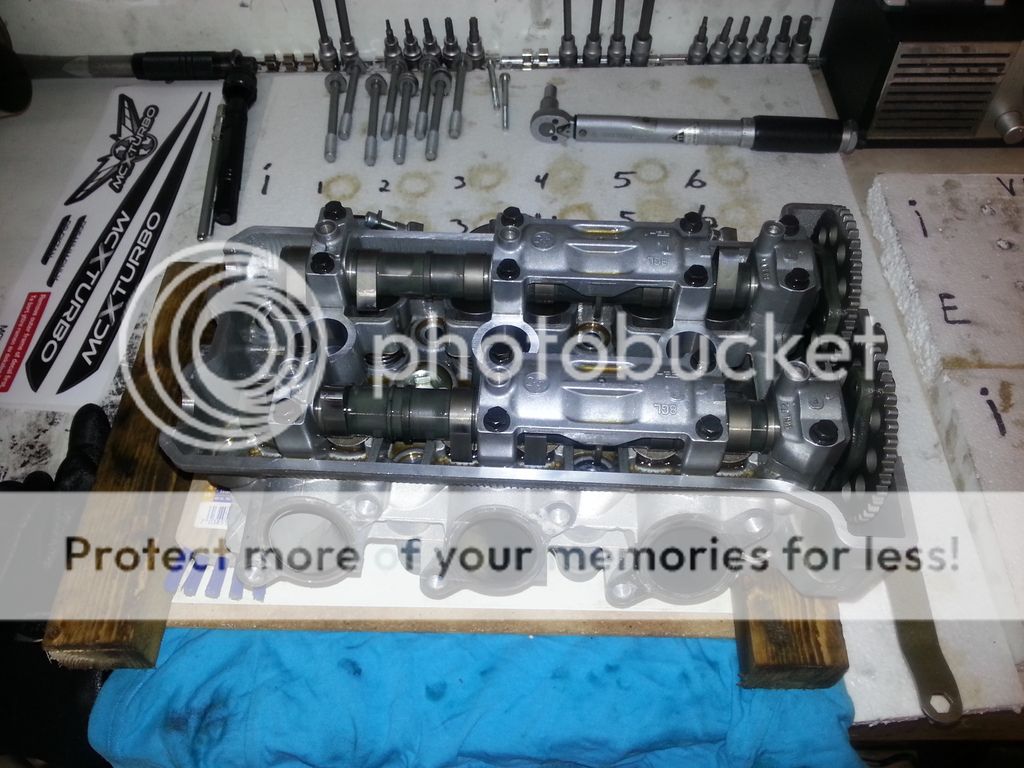
Removed the seat.
The battery and cables have to come off.


Removed all of the placstics up front, the battery and fuel tank.

Next is removing the radiator.

Loosened up the bolts on the front motor Mount and removed the bolts on the rear motor Mounts.
Lifted up the engine at the rear and placed a piece of Wood to keep it up.
Moved the steering post out of the way.
Removed the exhaust and cylinder head cover.

Now it's possible to get to the oil pressure sensor.

Removed the airbox and fuel rail.

Removed the cylinder head.

rxrider
Jan-Ove Pedersen
- Joined
- Apr 25, 2003
- Messages
- 7,355
- Reaction score
- 64
- Points
- 1,753
- Location
- Lakselv - 70N & 25E
- Country
- Norway
- Snowmobile
- 2014 Phazer XTX, 2013 Phazer RTX, 2008 Apex RTX, 2007 Warrior, 2006 Attak
Update - March 26. - Installing AC M7000 MCX270. The build. Done.
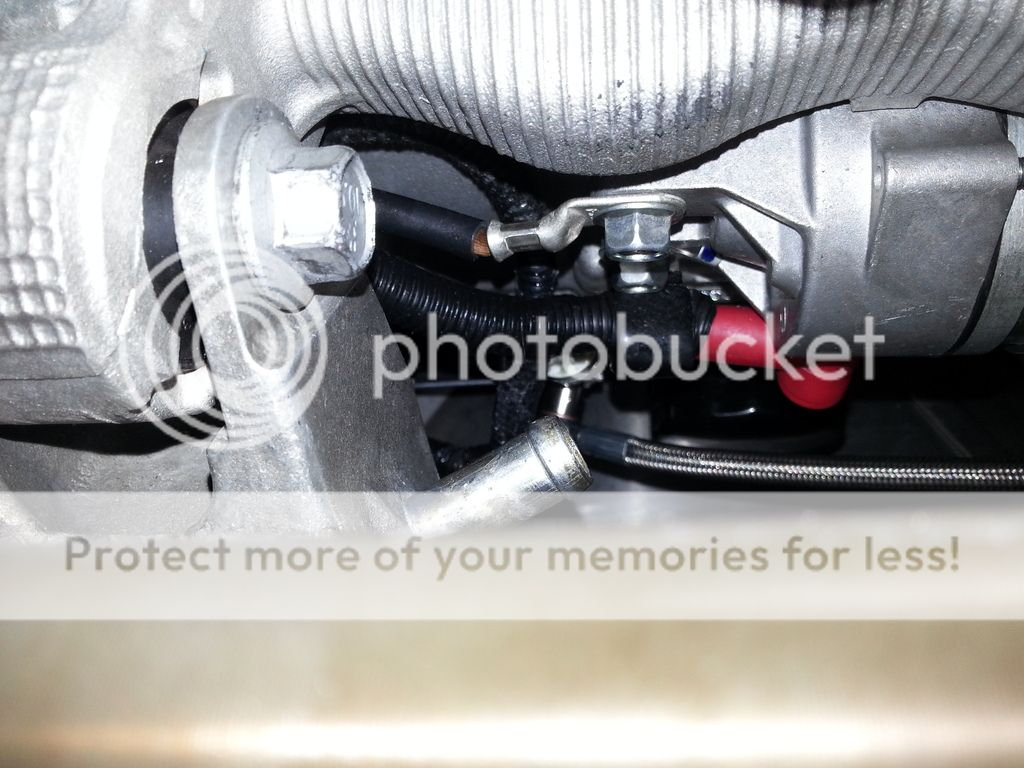
Oil line to turbo is Attached before the oil pressor sensor.

The cylinder head is done, valve shim clearance adjusted and New headgasket/shim installed.
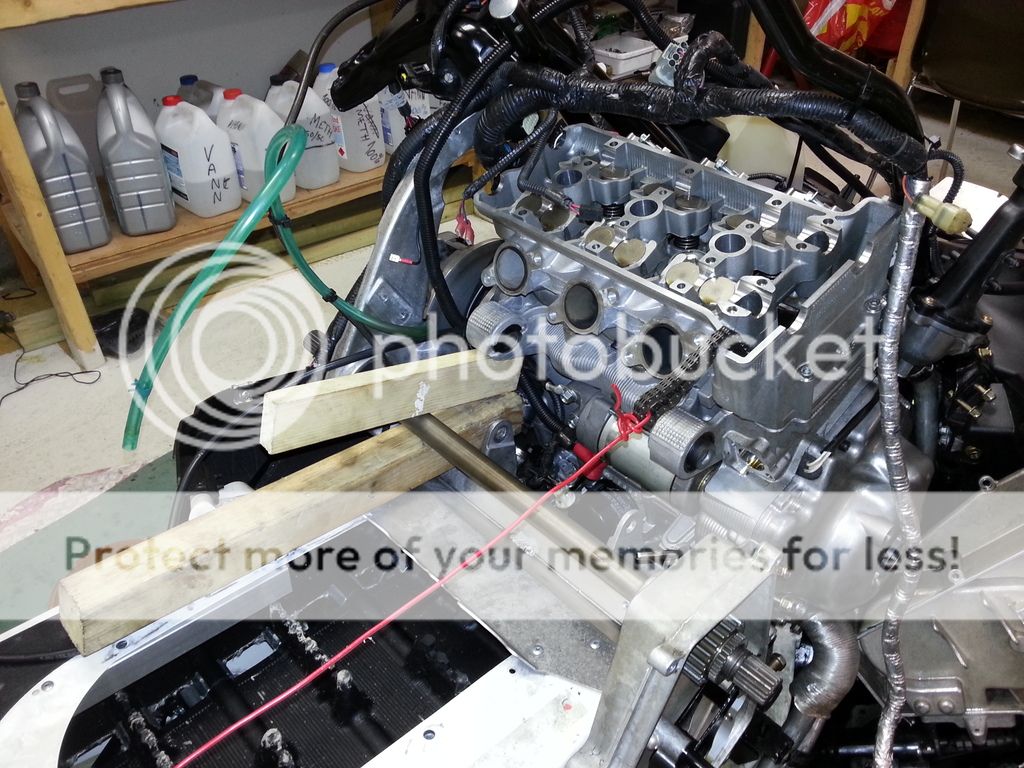
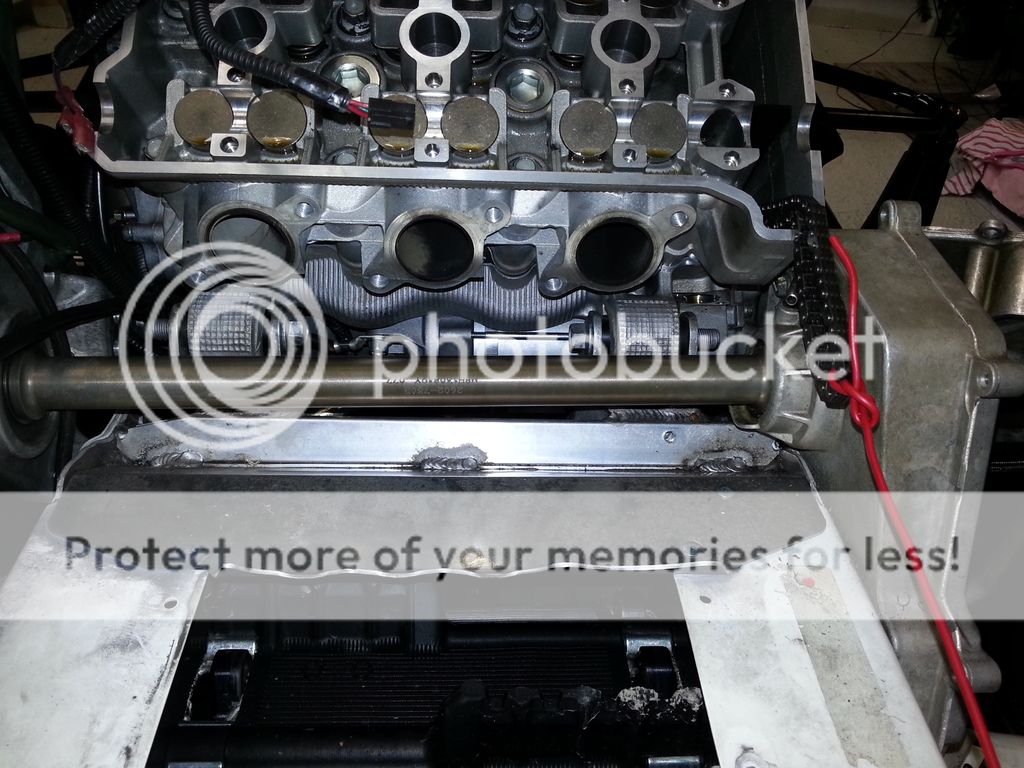
With the oil line to the turbo and the coolant lines in Place I reinstalled the rear engine bolts and tightened Down the motor.
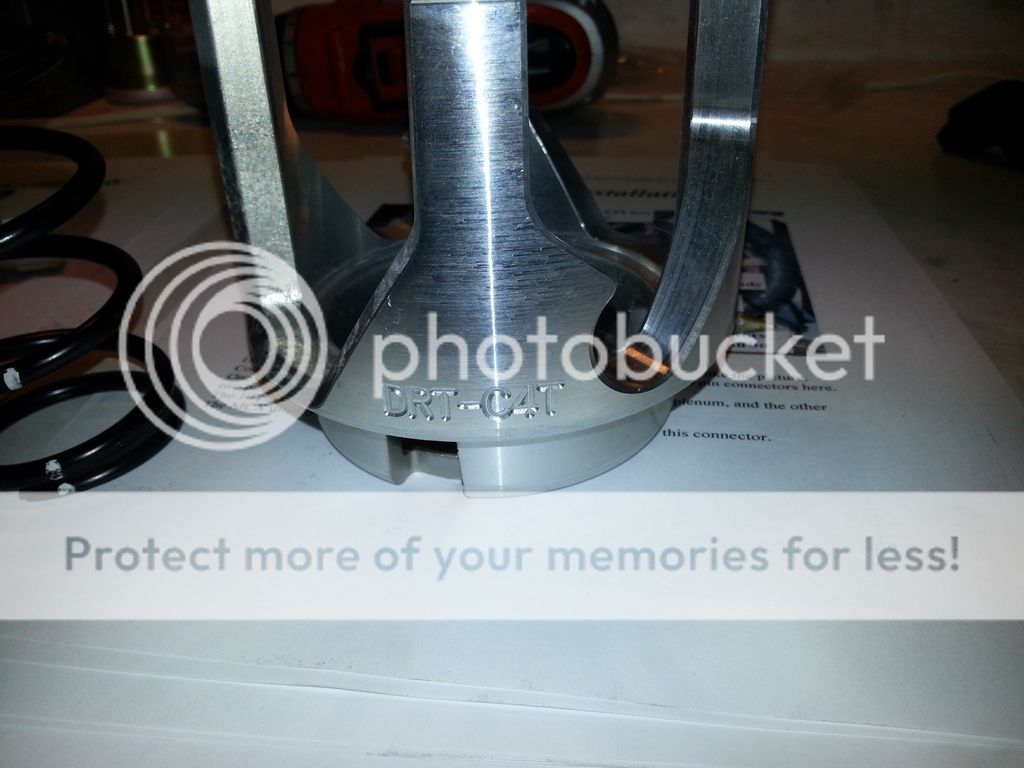
New clutch parts are going in to take care of the added Power
A New Helix is going in.
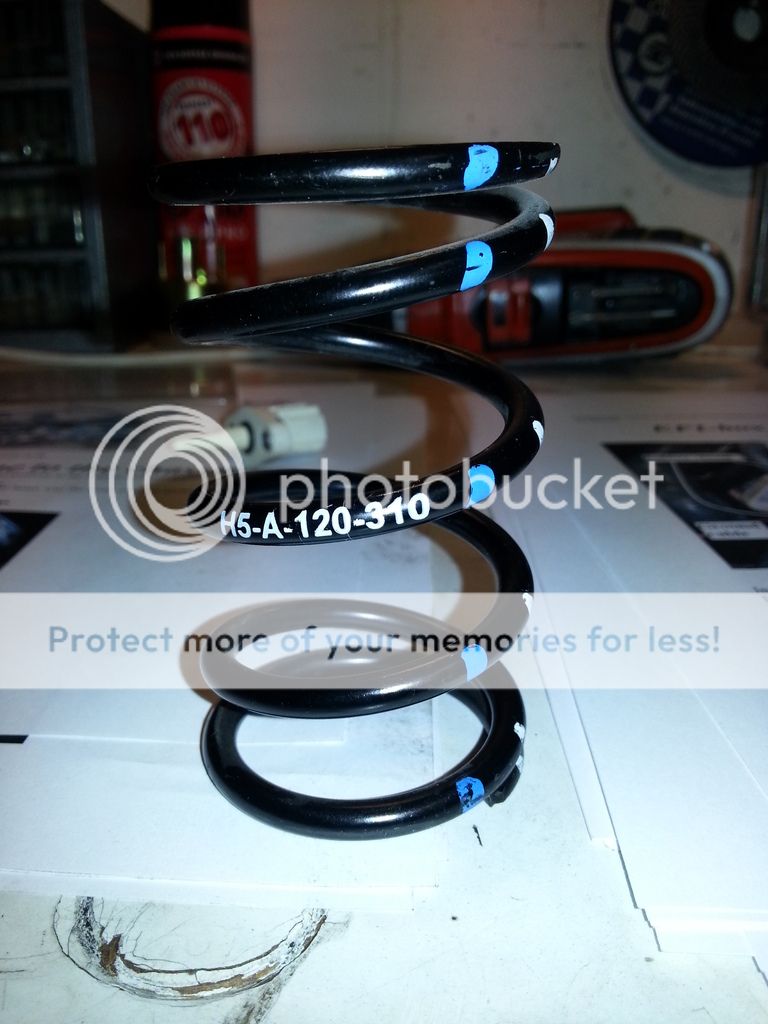
A New primary spring is going in.
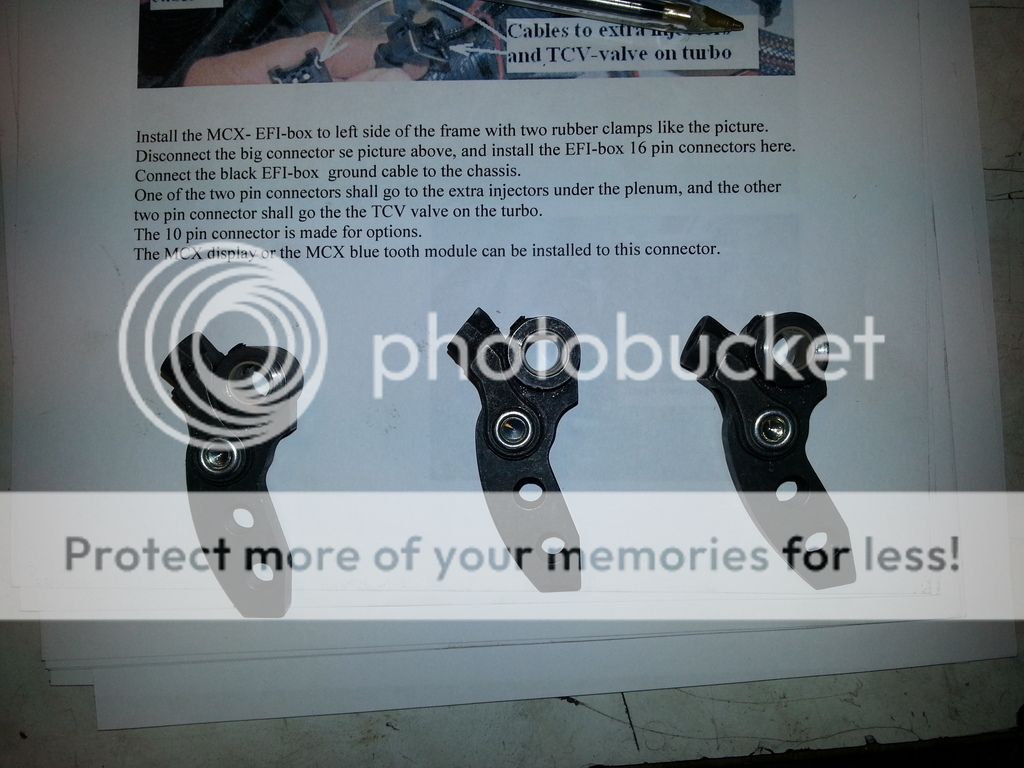
New clutch weights are going in.
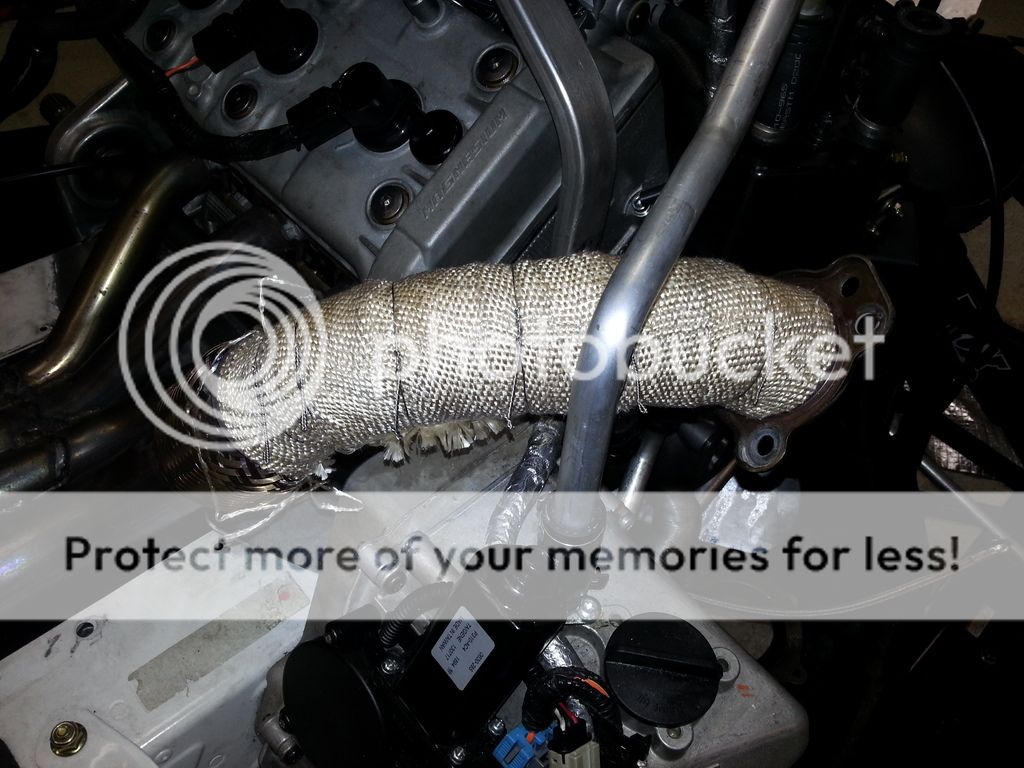
I have installed exhaust wrapping to reduce problems With radiant heat from the exhaust parts and turbo.
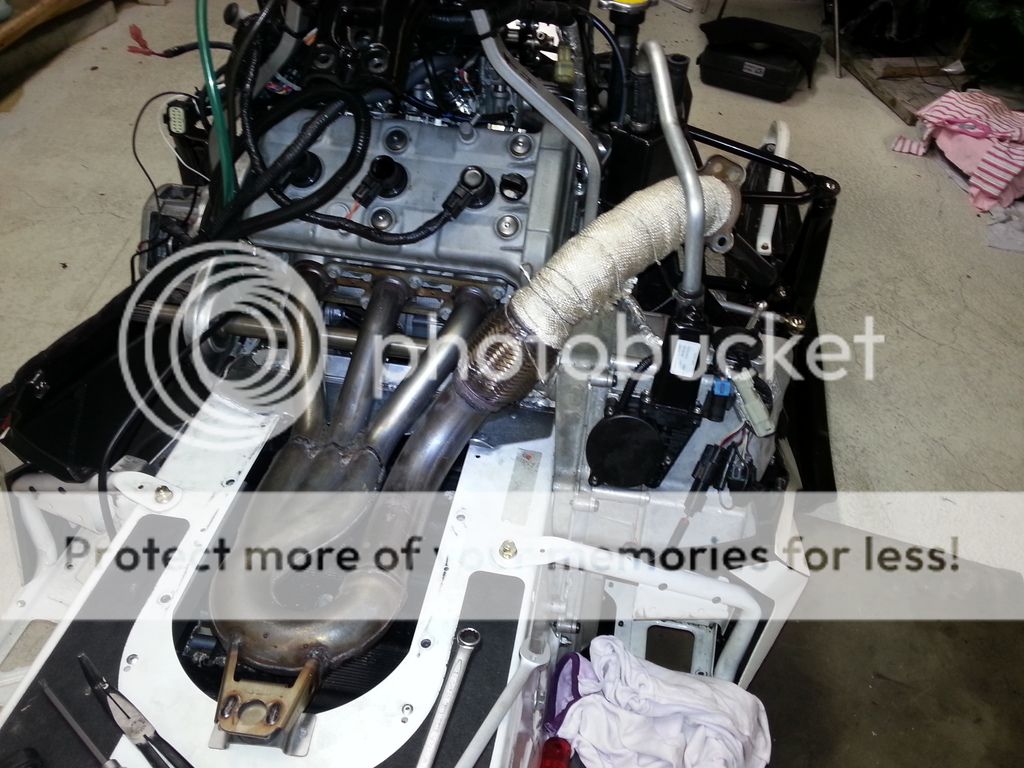
The turbo and exhaust parts are installed.
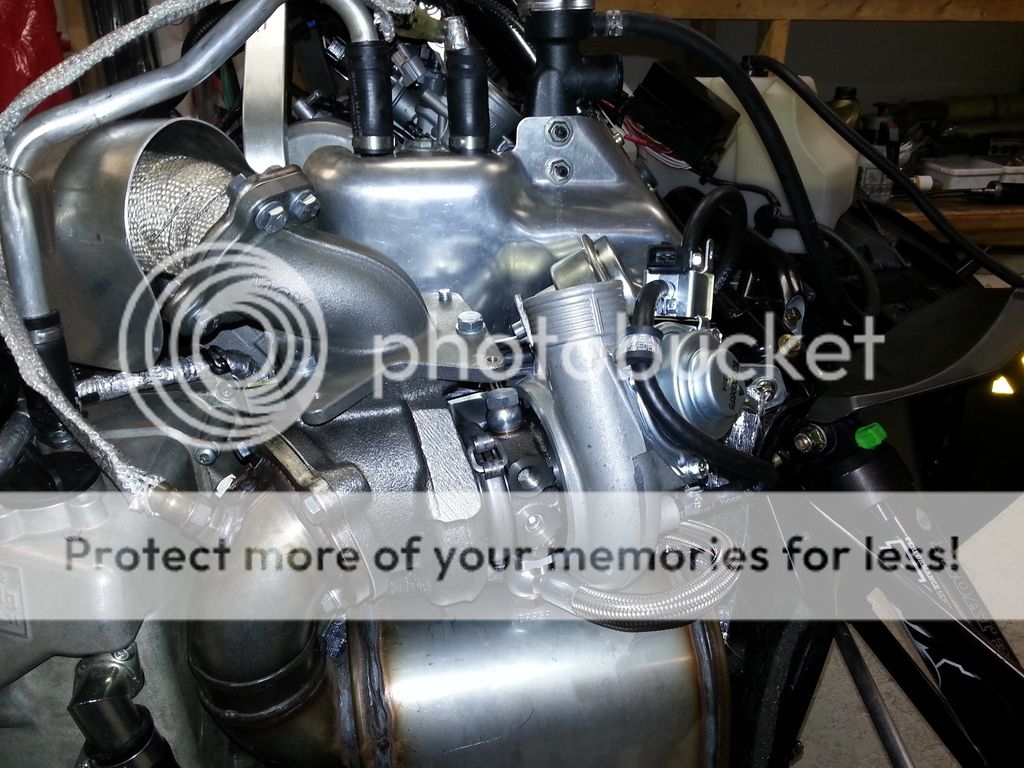
The sled is done.
No more pics were shot as I approached the deadline and did not have time to shoot more pics.
Oil line to turbo is Attached before the oil pressor sensor.


The cylinder head is done, valve shim clearance adjusted and New headgasket/shim installed.

With the oil line to the turbo and the coolant lines in Place I reinstalled the rear engine bolts and tightened Down the motor.

New clutch parts are going in to take care of the added Power
A New Helix is going in.

A New primary spring is going in.

New clutch weights are going in.

I have installed exhaust wrapping to reduce problems With radiant heat from the exhaust parts and turbo.


The turbo and exhaust parts are installed.

The sled is done.
No more pics were shot as I approached the deadline and did not have time to shoot more pics.
Last edited:


thor452
Because I can
- Joined
- Jan 5, 2010
- Messages
- 3,029
- Reaction score
- 621
- Points
- 1,603
- Location
- Shawano,WI 54166
- Country
- USA
- Snowmobile
- 2012 Apex XTX 2017 Sidewinder LTX-LE
I have spent the last 2.5 weeks of my spare time at work reading every post in this thread . what an awesome post you have going here I feel as thou I may now want to put a low level boost in my xtx apex. I cant believe the hours you must have spent putting this together for us here. I have been on this site for a long time and never noticed your post before. Thank you if I do boost it I will be all over this post. I also now want to move to Norway lets see which one happens first hahaha.

kinger
VIP Member
- Joined
- Jan 17, 2005
- Messages
- 7,422
- Reaction score
- 1,556
- Points
- 1,963
- Location
- Clear Lake, IA
- Website
- www.piergenius.com
Rxrider is very talented as a mechanic, and as a IT guy, and lastly as a journalist! Thank you Jan-Ove for all the documentation, I still refer to it often!
rxrider
Jan-Ove Pedersen
- Joined
- Apr 25, 2003
- Messages
- 7,355
- Reaction score
- 64
- Points
- 1,753
- Location
- Lakselv - 70N & 25E
- Country
- Norway
- Snowmobile
- 2014 Phazer XTX, 2013 Phazer RTX, 2008 Apex RTX, 2007 Warrior, 2006 Attak
Thanks for the kind words guys, warms my heart.
I love to work on my sleds and to build engines, always has.
I've got the inspiration from engine builders like "lakercr", "Ted Jannetty", "Simons CPR" and many others.
A lot of guys have shared information on their work and I thought I could do the same, and thus I have created this post documenting my work.
Even though I'm a IT-guy as a profession, running the computer systems for the local government, it's only what I do for a living.
I'm no way a computer geek, far from so.
If I'm a sled geek, I'm OK with that LOL, it's my passion and hobby during the winter season, Autumn to spring.
In the summer I'm completely off sleds.
I try to spend as much time of our short summer (40-days approx) with my family in the great outdoors where the sun shines 24/7 from May 17 to July 27.
rxrider
Jan-Ove Pedersen
- Joined
- Apr 25, 2003
- Messages
- 7,355
- Reaction score
- 64
- Points
- 1,753
- Location
- Lakselv - 70N & 25E
- Country
- Norway
- Snowmobile
- 2014 Phazer XTX, 2013 Phazer RTX, 2008 Apex RTX, 2007 Warrior, 2006 Attak
Update - April 16. - Engine Rebuild, Apex 2006, valve shim adjustment.
Valves are installed.
Valve shims are and buckets are installed as well.
It's time to start the work adjusting the valve shim clearances.
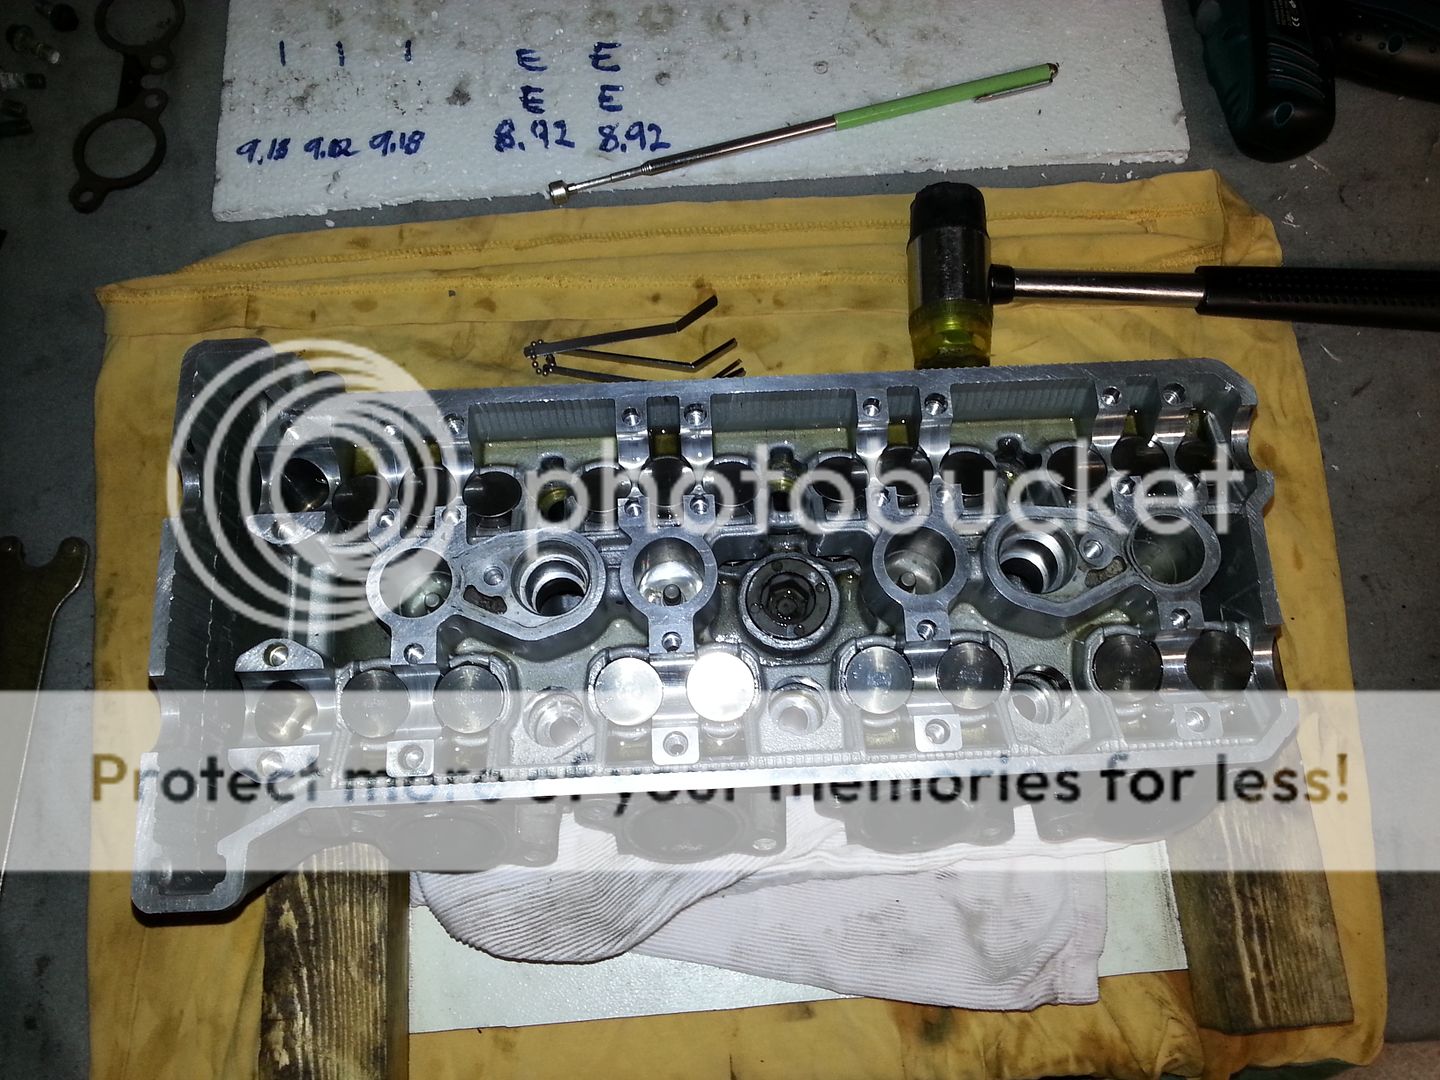
First I will have to install the cams, then use the Yamaha feeler gauges to measure the clearances.
I assume it will be way off, at least at the #4 cylinder where I have changed all the valves.
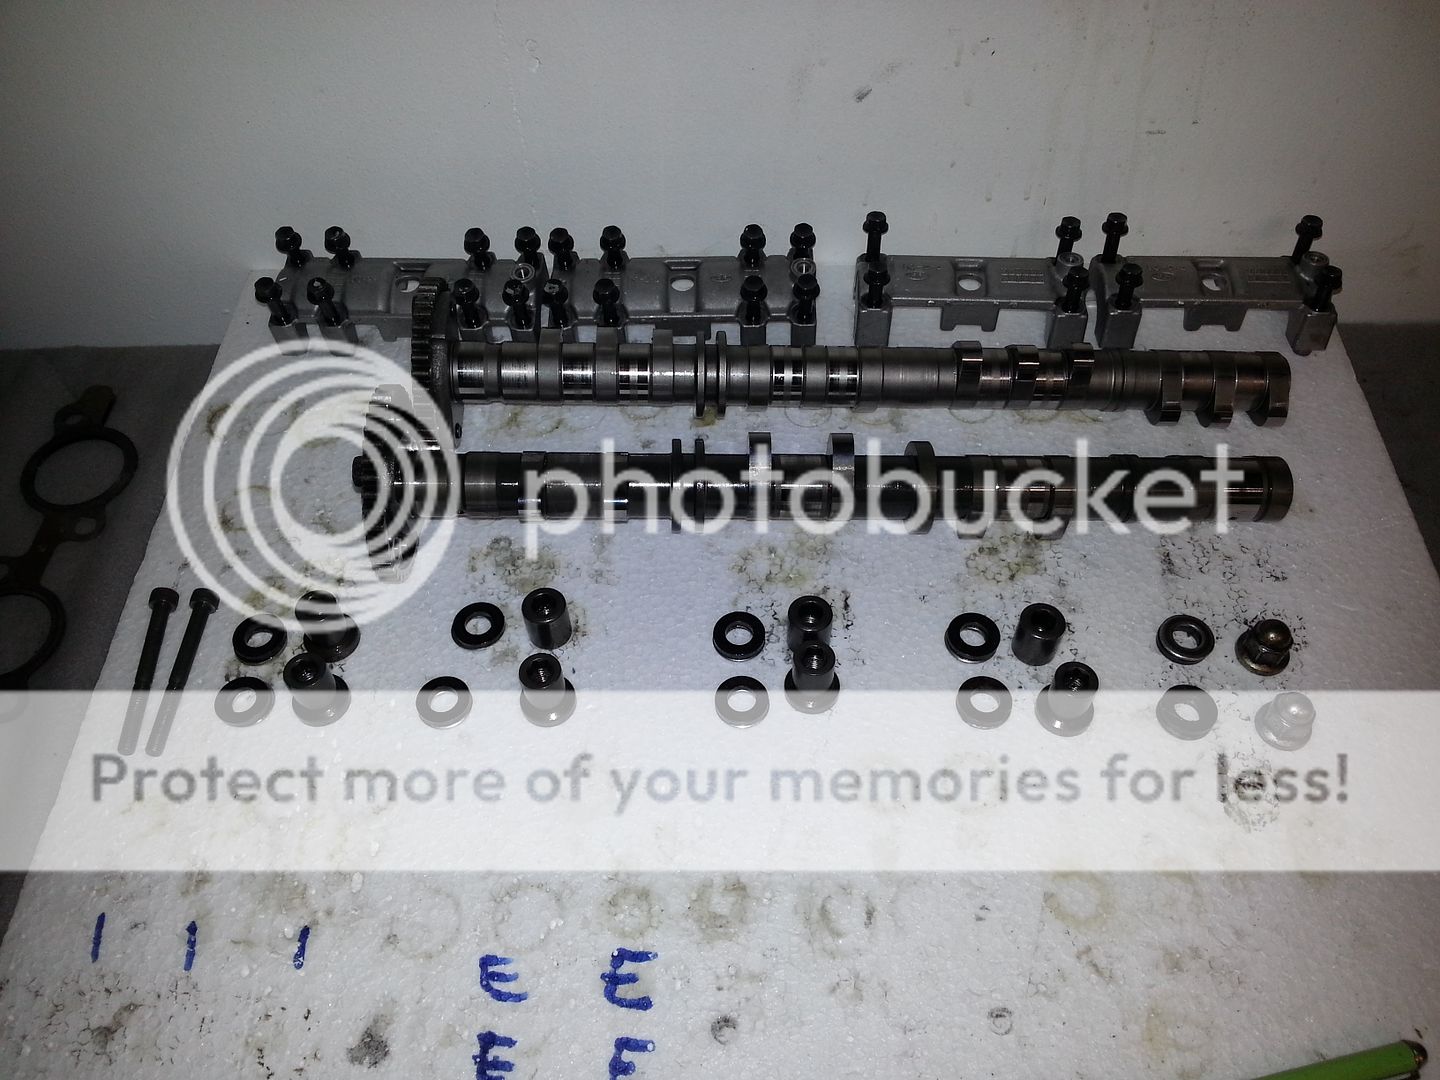
I use a Excel spread sheet when calculating what shims to use after measuring is done.
I put in the current valve shim thickness (the number is stamped on the valve shims) into the spread sheet.
Then I put in the measured values.
I use the Yamaha valve shim feeler gauge.
The spread sheet calculates the proper valve shim thickness to install to get the desired valve clearance.
Install new shims and redo the prosess.
Iterate until all clearances are within specification.
Remember to tork the cam shaft cups to spec before measuring the valve clearance.
Spec is 10 Nm on the bolts.
You do not have to install the two cups closest to the cam gears.
On a boosted engine the valve clearance should be as close to the upper limit in the specification.
On the RX-1 and Apex engines the specs are:
Intake: 0.11-0.20 mm - adjust the clearance as close to 0.20 mm as possible but not over 0.20 mm.
Exhaust: 0.21-0.26 mm - adjust the clearance as close to 0.26 mm as possible but not over 0.26 mm.
I did not shoot any pictures of the measuring process. There is actually not much to show.
If you need the procedure documented with pics it's covered in a earlier post, have a look in the thread index, it's in there somewhere
The valve clearance adjustments were done with the cylinder head on the work bench.
With the valve clearance adjusted I removed the cams, installed a new thicker head gasket.
I used a new Cometics 0.36 head gasket to get the proper squish band, I got this tip from engine builder Dave Marshall aka Hurricane.
Then I tightened down the cylinder nuts to 60 Nm.
Remember to add moly lube to all threads and surfaces of all washers before torking down the head. Engine oil can be used if you do not have moly lube.
This is important, the tork should be reached by the stretch of the bolt, not because of the friction on the threads and surfaces.
Moly lube makes sure the proper bolt stretch is achieved.
Next work is installing the cam shafts.
Have to work on the stock 08 Apex first.
I donated my old 03 RX-1 to a good friend of mine, but before handing it over to him I had to remove the ZX-2 suspension.
I want to stretch the 08 Apex from 136 to 144, the ZX-2 will do the trick, the 144x1.5 Crossover track will be moved over as well.
More to come.
Valves are installed.
Valve shims are and buckets are installed as well.
It's time to start the work adjusting the valve shim clearances.

First I will have to install the cams, then use the Yamaha feeler gauges to measure the clearances.
I assume it will be way off, at least at the #4 cylinder where I have changed all the valves.

I use a Excel spread sheet when calculating what shims to use after measuring is done.
I put in the current valve shim thickness (the number is stamped on the valve shims) into the spread sheet.
Then I put in the measured values.
I use the Yamaha valve shim feeler gauge.
The spread sheet calculates the proper valve shim thickness to install to get the desired valve clearance.
Install new shims and redo the prosess.
Iterate until all clearances are within specification.
Remember to tork the cam shaft cups to spec before measuring the valve clearance.
Spec is 10 Nm on the bolts.
You do not have to install the two cups closest to the cam gears.
On a boosted engine the valve clearance should be as close to the upper limit in the specification.
On the RX-1 and Apex engines the specs are:
Intake: 0.11-0.20 mm - adjust the clearance as close to 0.20 mm as possible but not over 0.20 mm.
Exhaust: 0.21-0.26 mm - adjust the clearance as close to 0.26 mm as possible but not over 0.26 mm.
I did not shoot any pictures of the measuring process. There is actually not much to show.
If you need the procedure documented with pics it's covered in a earlier post, have a look in the thread index, it's in there somewhere
The valve clearance adjustments were done with the cylinder head on the work bench.
With the valve clearance adjusted I removed the cams, installed a new thicker head gasket.
I used a new Cometics 0.36 head gasket to get the proper squish band, I got this tip from engine builder Dave Marshall aka Hurricane.
Then I tightened down the cylinder nuts to 60 Nm.
Remember to add moly lube to all threads and surfaces of all washers before torking down the head. Engine oil can be used if you do not have moly lube.
This is important, the tork should be reached by the stretch of the bolt, not because of the friction on the threads and surfaces.
Moly lube makes sure the proper bolt stretch is achieved.
Next work is installing the cam shafts.
Have to work on the stock 08 Apex first.
I donated my old 03 RX-1 to a good friend of mine, but before handing it over to him I had to remove the ZX-2 suspension.
I want to stretch the 08 Apex from 136 to 144, the ZX-2 will do the trick, the 144x1.5 Crossover track will be moved over as well.
More to come.
rxrider
Jan-Ove Pedersen
- Joined
- Apr 25, 2003
- Messages
- 7,355
- Reaction score
- 64
- Points
- 1,753
- Location
- Lakselv - 70N & 25E
- Country
- Norway
- Snowmobile
- 2014 Phazer XTX, 2013 Phazer RTX, 2008 Apex RTX, 2007 Warrior, 2006 Attak
THREAD INDEX SEASON 2015-2016
Page 76 - http://www.ty4stroke.com/threads/rxriders-turbo-garage-rebuilding-06-apex-turbo-engine.47473/page-76
- Installing ZX-2 skid and Yamaha Combination Trail Bag.
Page 77 - http://www.ty4stroke.com/threads/rx...ebuilding-06-apex-turbo-engine.47473/page-767
- Building a 2014 Apex turbo engine with CP pistons and Carrillo rods.
- Removing stock engine mounts and replacing them with solid motor mounts from Hurricane Racing.
- Assembling the pistons, rods, crank, the works.
- Adjusting valve clearance.
- Installing cams shafts.
- Installing the engine into chassis.
- Installing the deltabox frame.
Last edited:
rxrider
Jan-Ove Pedersen
- Joined
- Apr 25, 2003
- Messages
- 7,355
- Reaction score
- 64
- Points
- 1,753
- Location
- Lakselv - 70N & 25E
- Country
- Norway
- Snowmobile
- 2014 Phazer XTX, 2013 Phazer RTX, 2008 Apex RTX, 2007 Warrior, 2006 Attak
Update - October 24. - Installing ZX-2 skid and Yamaha Combination Trail Bag.
I've been away for a while. Been fishing Salmon and Sea Troat in August and September.
Got a few of eash, not a lot but I'm pretty happy about it.
I started by removing the ZX-2 skid and steel tunnel plates from the old 03 RX-1.
I blew the engine at the end of the 2014 season and have not been able to get hold of an engine for it.
I decided to donate the sled to Mikkel, a good friend of mine.
He helped me with moving the ZX-2 from the RX-1 to my 08 Apex.
I also installed the Yamaha Combination Trail Bag.
The engine oil and filter was replaced, the chaincase got new oil as well.
While at it I serviced and lubricated the sled, even gave it a spray of WD40 and cleaned it off to make it shine
Here's a few pics of the final result.
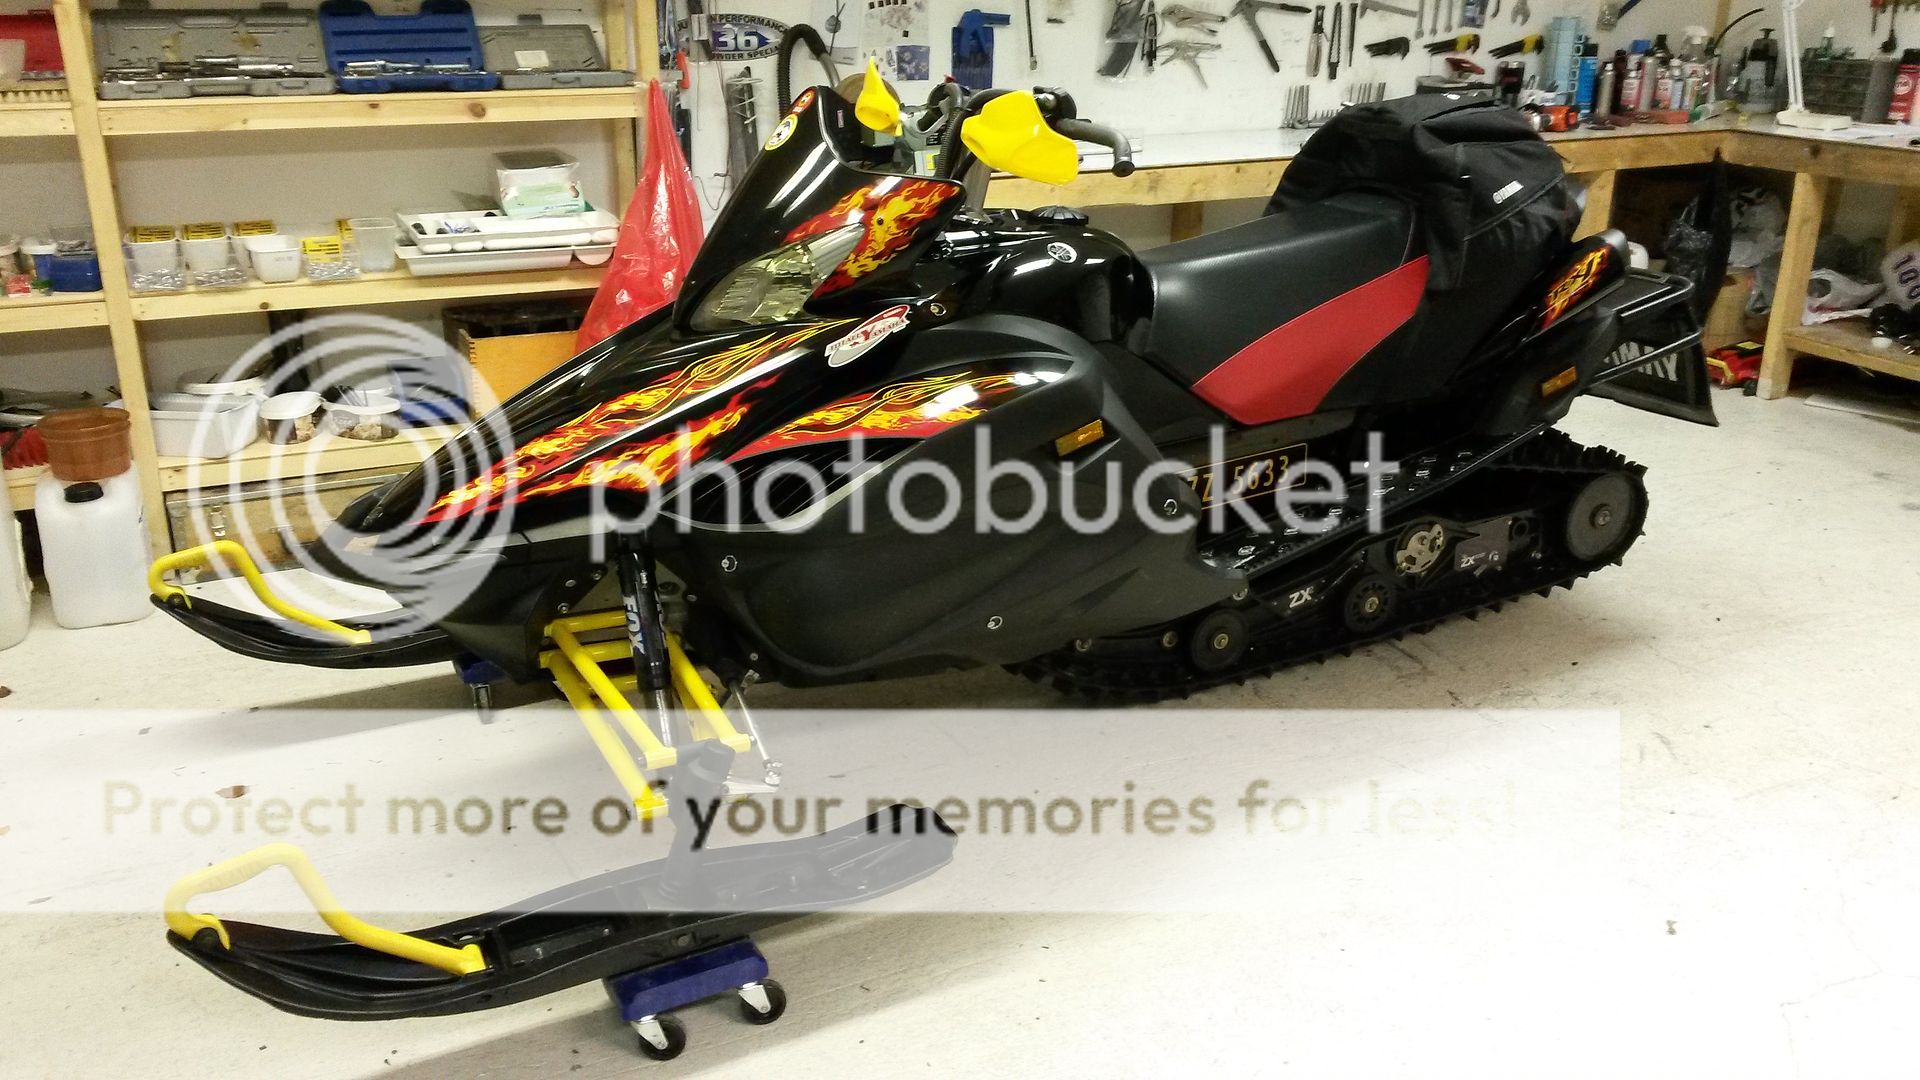
The 144 ZX-2 skid is installed.
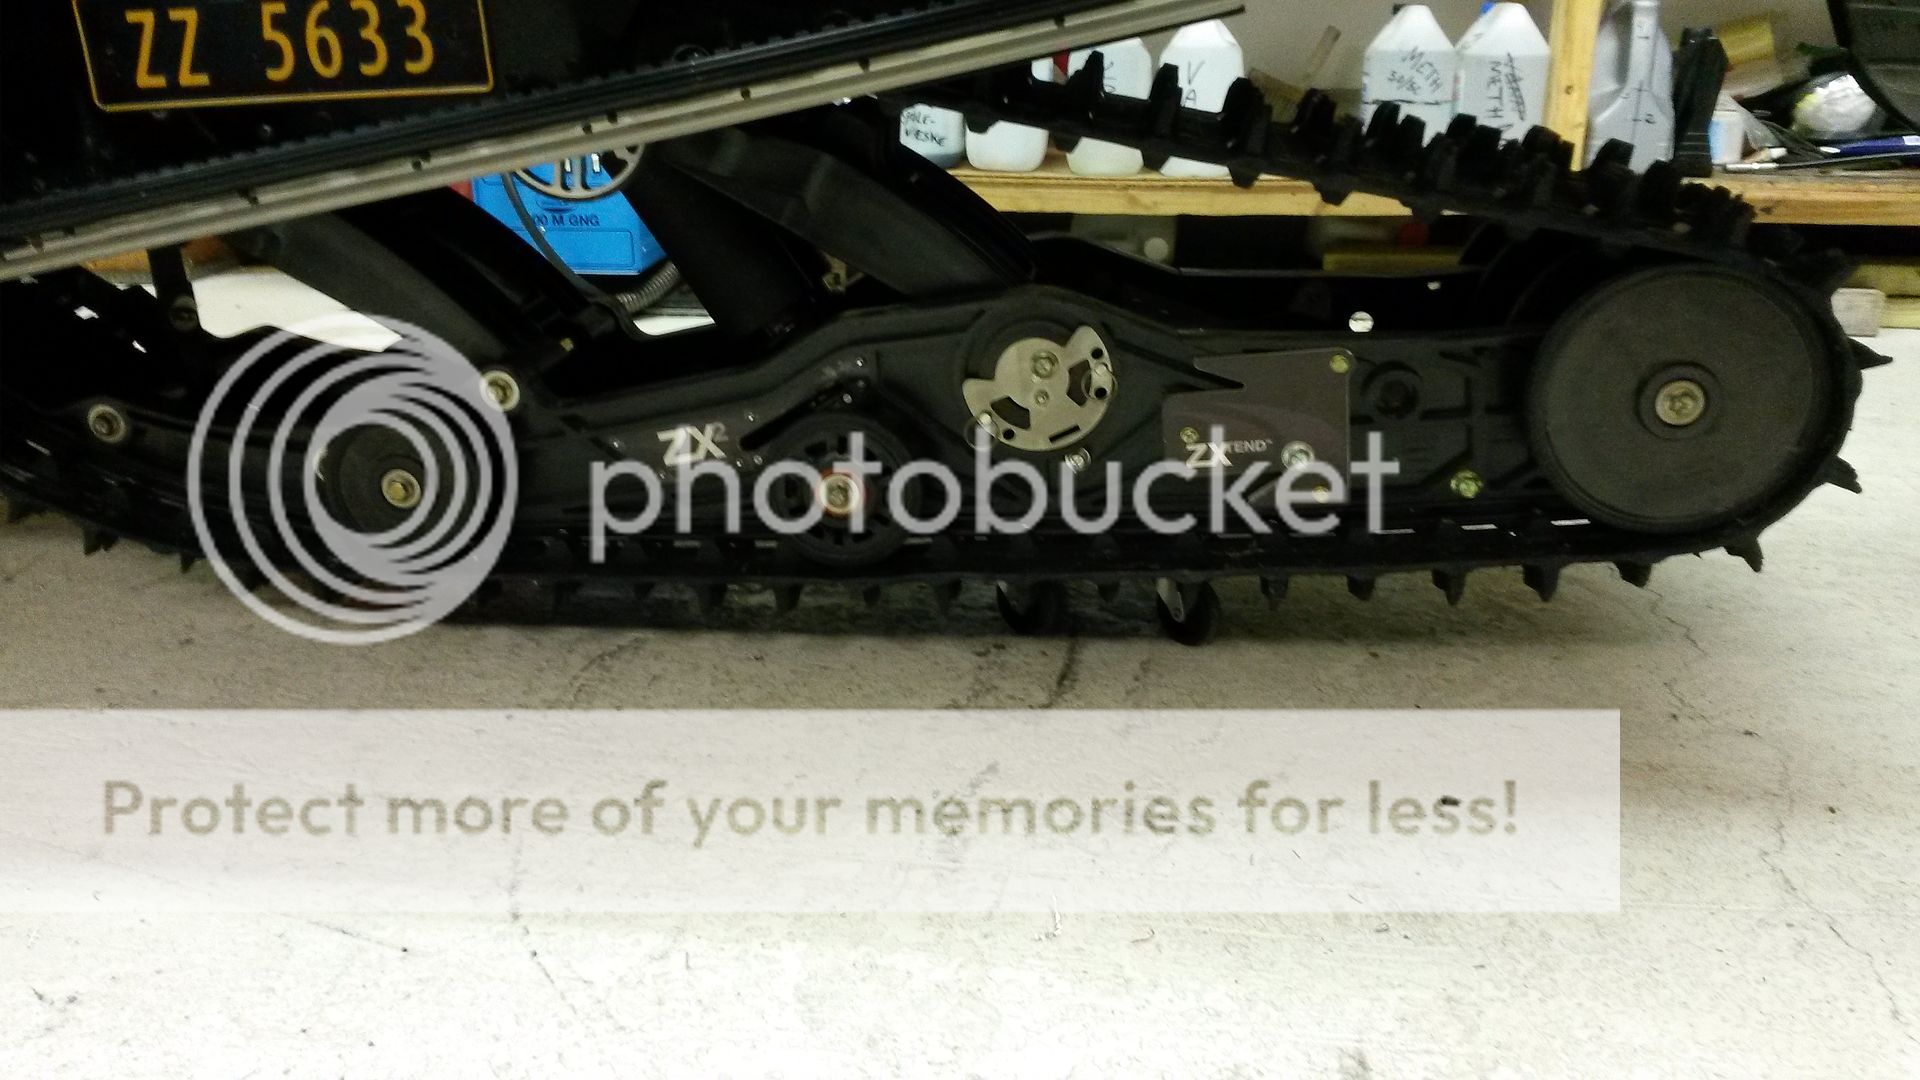
I had to service the skid before the install. A few idler wheels and a few bearings were shot and needed replacement.
There is no Ski-Doo dealership in town so I had to go with a set of Yamaha idler wheels.
As you may notice there are a set of aluminum billet wheels up on the rear shaft.
I had to go with what I could get hold of, got the billet wheels at a good price.
The rear idler wheels are a set of plastic Yamaha 128 mm idler wheels. They are slightly larger than the stock 12o mm Ski-Doo wheels they replaced.
The plastic Yamaha ider wheels had the 6205RS bearings and the stock Ski-Doo wheels had the 6004RS bearings.
Luckily my friend had a set of plastic inserts for the 6205RS bearings to convert the bearing to fit a 6004 size shaft.
I had to modify the inserts to fit the Yamaha idlers and the ZX-2 bolt and shaft.
The modification worked nicely
I also installed a skid plate to cover the bottom of the sled to protect the engine compartment from impact from rocks and tree stumps.
Finally I installed the Yamaha Combination Trail Bag.
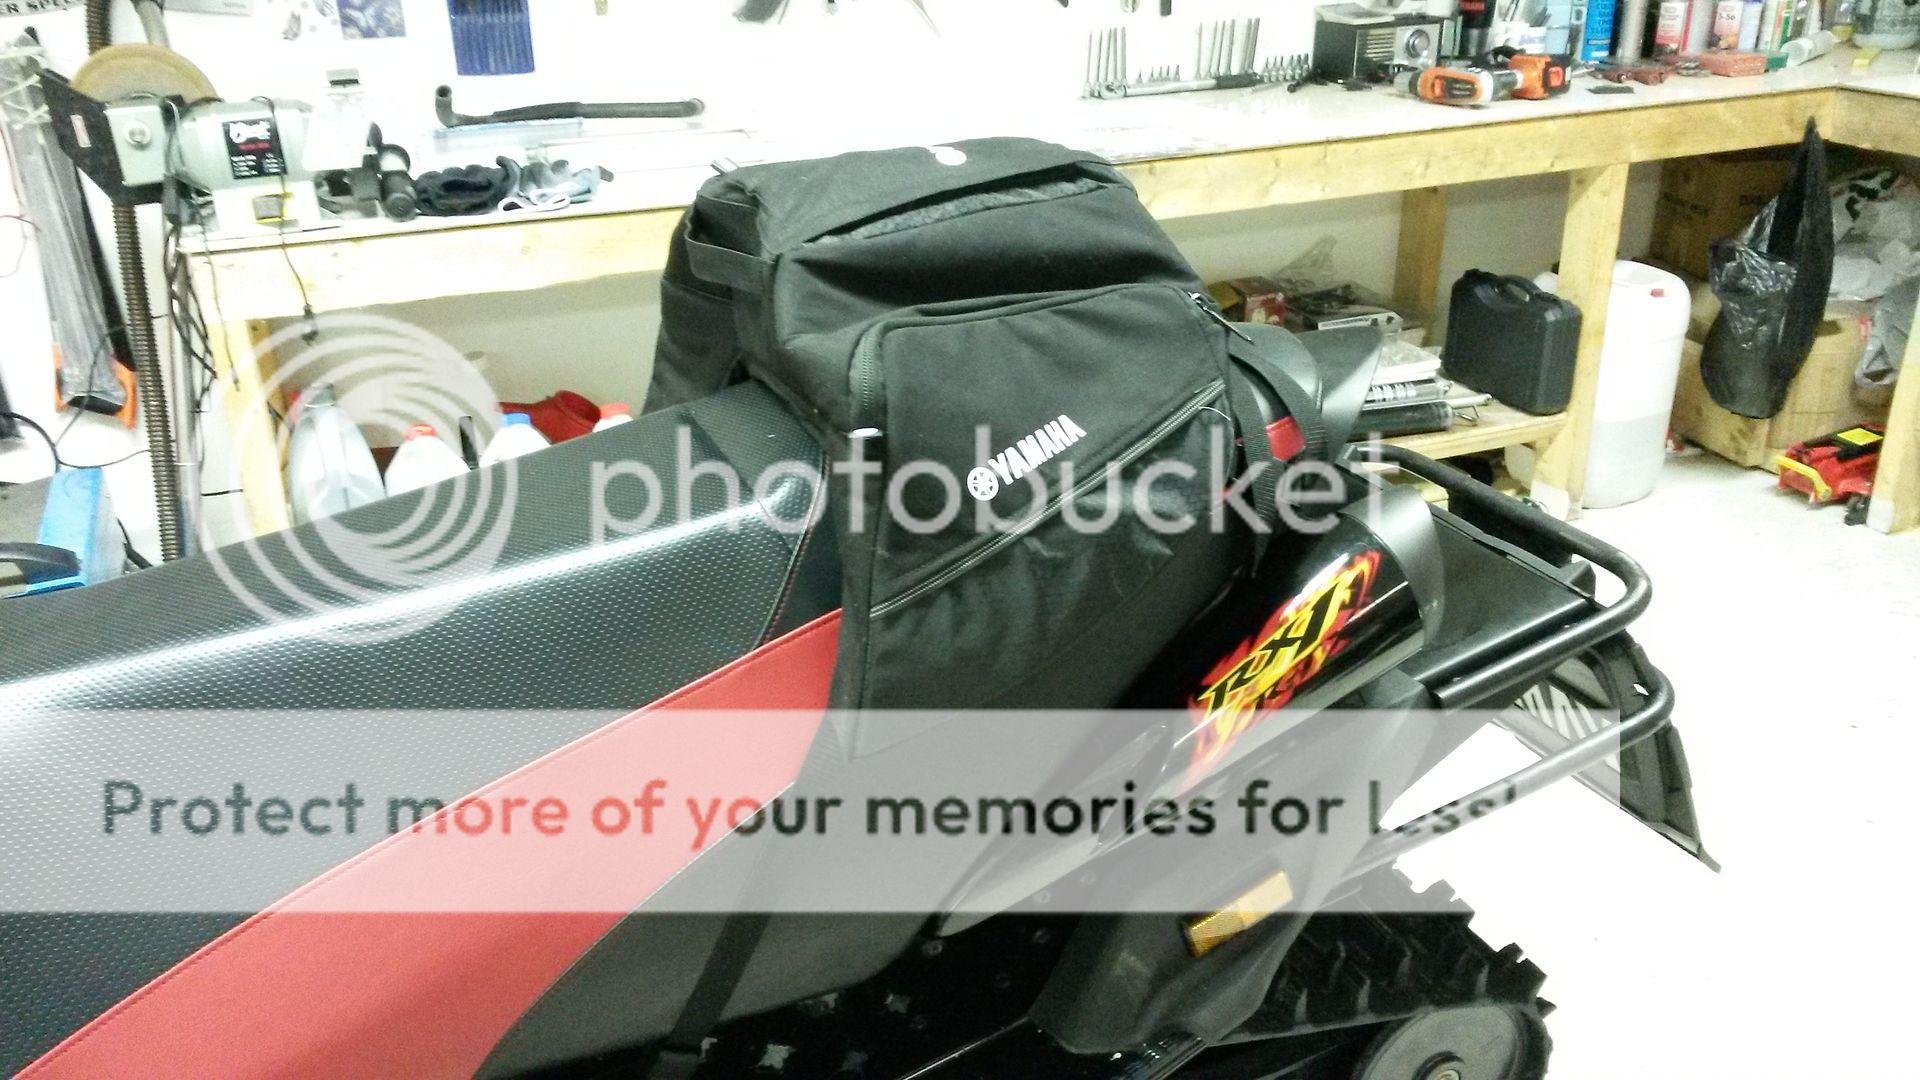
Work is done, the sled is ready for winter.
While installing the skid plate I serviced the Fox Floats, cleaned them and added Float oil to the outside of the shocks.
The internal pressure was 45 PSI or LBS. I pumped the shocks up to 60 PSI or LBS to raise the front slightly.
The pressure shall be measured with the skis hanging freely in the air with no pressure on the shocks.
I used a garage jack to raise the front enough to take the pressure off the shocks.
With the skis in the air I grabbed the skis and shook it back and forth.... I found I had serious play in the A-Arms.
The bushings are probably shot. I will order the Oil-lite bushings from Hurricane Racing.
I need more cooling capacity as the sled overheats when conditions are icy of the snow is rock hard.
Stretching the sled makes the rear of the sled move higher preventing snow from hitting the cross tube in the rear,
and less snow are dragged around to the front heat exchanger in the front of the tunnel.
I'm going to order a Warrior/Attak/LTX rear heat exchanger and modify it to fit my MuffinWorks tunnel extension.
The old RX-1 has now moved to a new home at my friends place, "The Turbo Garage 2"
I've been away for a while. Been fishing Salmon and Sea Troat in August and September.
Got a few of eash, not a lot but I'm pretty happy about it.
I started by removing the ZX-2 skid and steel tunnel plates from the old 03 RX-1.
I blew the engine at the end of the 2014 season and have not been able to get hold of an engine for it.
I decided to donate the sled to Mikkel, a good friend of mine.
He helped me with moving the ZX-2 from the RX-1 to my 08 Apex.
I also installed the Yamaha Combination Trail Bag.
The engine oil and filter was replaced, the chaincase got new oil as well.
While at it I serviced and lubricated the sled, even gave it a spray of WD40 and cleaned it off to make it shine
Here's a few pics of the final result.

The 144 ZX-2 skid is installed.

I had to service the skid before the install. A few idler wheels and a few bearings were shot and needed replacement.
There is no Ski-Doo dealership in town so I had to go with a set of Yamaha idler wheels.
As you may notice there are a set of aluminum billet wheels up on the rear shaft.
I had to go with what I could get hold of, got the billet wheels at a good price.
The rear idler wheels are a set of plastic Yamaha 128 mm idler wheels. They are slightly larger than the stock 12o mm Ski-Doo wheels they replaced.
The plastic Yamaha ider wheels had the 6205RS bearings and the stock Ski-Doo wheels had the 6004RS bearings.
Luckily my friend had a set of plastic inserts for the 6205RS bearings to convert the bearing to fit a 6004 size shaft.
I had to modify the inserts to fit the Yamaha idlers and the ZX-2 bolt and shaft.
The modification worked nicely
I also installed a skid plate to cover the bottom of the sled to protect the engine compartment from impact from rocks and tree stumps.
Finally I installed the Yamaha Combination Trail Bag.

Work is done, the sled is ready for winter.
While installing the skid plate I serviced the Fox Floats, cleaned them and added Float oil to the outside of the shocks.
The internal pressure was 45 PSI or LBS. I pumped the shocks up to 60 PSI or LBS to raise the front slightly.
The pressure shall be measured with the skis hanging freely in the air with no pressure on the shocks.
I used a garage jack to raise the front enough to take the pressure off the shocks.
With the skis in the air I grabbed the skis and shook it back and forth.... I found I had serious play in the A-Arms.
The bushings are probably shot. I will order the Oil-lite bushings from Hurricane Racing.
I need more cooling capacity as the sled overheats when conditions are icy of the snow is rock hard.
Stretching the sled makes the rear of the sled move higher preventing snow from hitting the cross tube in the rear,
and less snow are dragged around to the front heat exchanger in the front of the tunnel.
I'm going to order a Warrior/Attak/LTX rear heat exchanger and modify it to fit my MuffinWorks tunnel extension.
The old RX-1 has now moved to a new home at my friends place, "The Turbo Garage 2"
Similar threads
- Replies
- 3
- Views
- 2K
- Replies
- 3
- Views
- 2K
- Replies
- 46
- Views
- 155K
-
This site uses cookies to help personalise content, tailor your experience and to keep you logged in if you register.
By continuing to use this site, you are consenting to our use of cookies.
