mtdream
TY 4 Stroke Master
ust421 said:Is there any discount on the updated kit for the Timbersled skid, if you have the old style?
not that I am aware of...give the boys at Oft Racing a call, they might swing you a deal though...they are Timbersled Dealers...
ust421
Pro
I will give them a call. How have you been anyhow MT? Sure hope to hook up this year for some riding.
mtdream
TY 4 Stroke Master
yeah, let me know when your coming out...
I have not been out...been busy with work and Honey-do's and they are priority as long as the snow is not good...so my sled is still totally apart...
I have not been out...been busy with work and Honey-do's and they are priority as long as the snow is not good...so my sled is still totally apart...
mtdream
TY 4 Stroke Master
Ok, here comes the start of the updates for the year...
First, Headlights...I chose to purchase the AirFrame Hood from Skinz...I wanted better cooling for the Intercooler, and to get rid of the headlight...Weight was a side issue, and this is a net decrease of about 2-3 lbs., but once again, the weight wasnt the biggest issue for me...
So, after removing the light...we are left with a frame and the stock mounting bolts for the OEM headlight...I made an Aluminum bracket to connect between the two OEM bolts...It is only about 3/4" tall, and the distance Center to Center on teh bolts is approximately 10.5"...
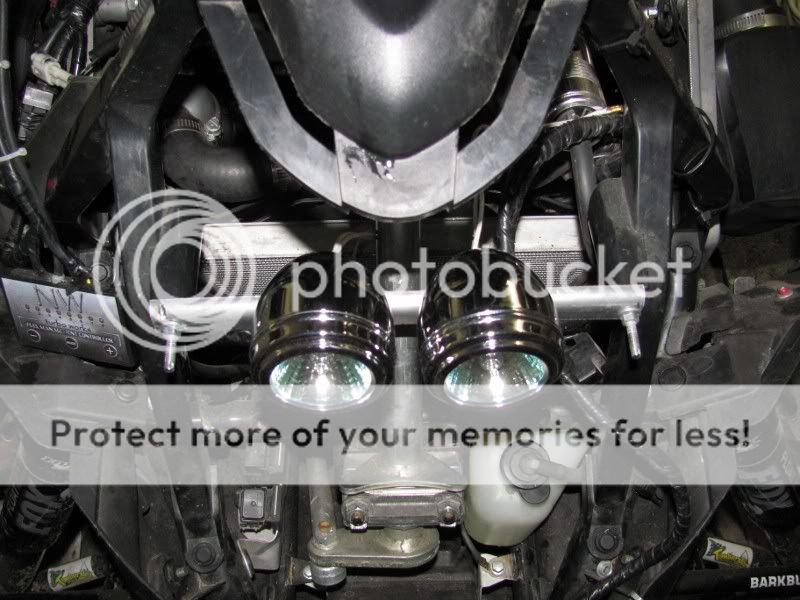
So, Mark the center between the bolts, and then measure Diameter of your lights...mine were 2.5" across, so I moved mounting location from center 2" so as there is a slight gap in between the lights... Drill a hole for the mounting of the PIAA light, and you will then need to adjust the light...
Yamaha has three wires on the back of the light...a ground, and then power for dim lights, and power for bright lights...Personally, I only hook up the dim lights...This allows me to turn the lights off if I want (rarely do) and when they are off, it shows me the bright lights warning light is on...
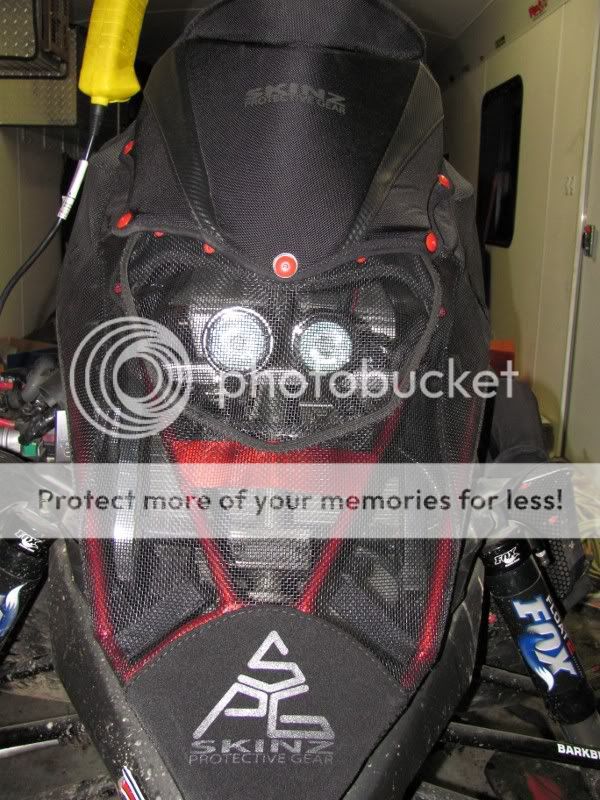
Here is a pic with the hood on...things are not tightened up, so things are a little canted etc. but you clearly get the idea...
First, Headlights...I chose to purchase the AirFrame Hood from Skinz...I wanted better cooling for the Intercooler, and to get rid of the headlight...Weight was a side issue, and this is a net decrease of about 2-3 lbs., but once again, the weight wasnt the biggest issue for me...
So, after removing the light...we are left with a frame and the stock mounting bolts for the OEM headlight...I made an Aluminum bracket to connect between the two OEM bolts...It is only about 3/4" tall, and the distance Center to Center on teh bolts is approximately 10.5"...
So, Mark the center between the bolts, and then measure Diameter of your lights...mine were 2.5" across, so I moved mounting location from center 2" so as there is a slight gap in between the lights... Drill a hole for the mounting of the PIAA light, and you will then need to adjust the light...
Yamaha has three wires on the back of the light...a ground, and then power for dim lights, and power for bright lights...Personally, I only hook up the dim lights...This allows me to turn the lights off if I want (rarely do) and when they are off, it shows me the bright lights warning light is on...
Here is a pic with the hood on...things are not tightened up, so things are a little canted etc. but you clearly get the idea...
mtdream
TY 4 Stroke Master
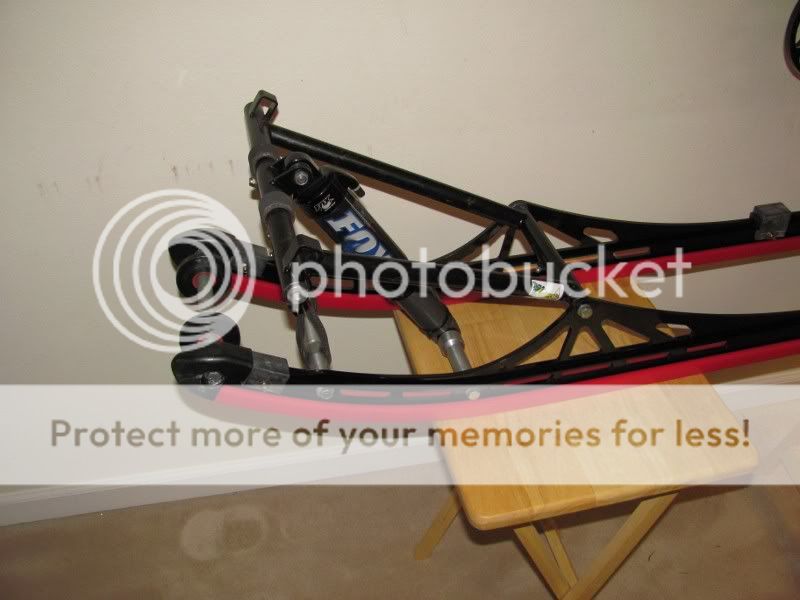
Next, onto the skid...
I chose to move up to a 174" 2.5" camo Extreme track this year...I had the 162 PowerClaw last year, and it did ok, but not what I was hoping it would be...Is a nice all around track, but we ride too deep and tight, and the 2.5" does significantly better...would have gone with 3.0" but would have required MAJOR surgery to make it work...
Also, used HiperFax for the sliders, as they are more than double the heat resistance from stock sliders...have never had them burn through...can take them from sled to sled...
anyway...here are the pics...
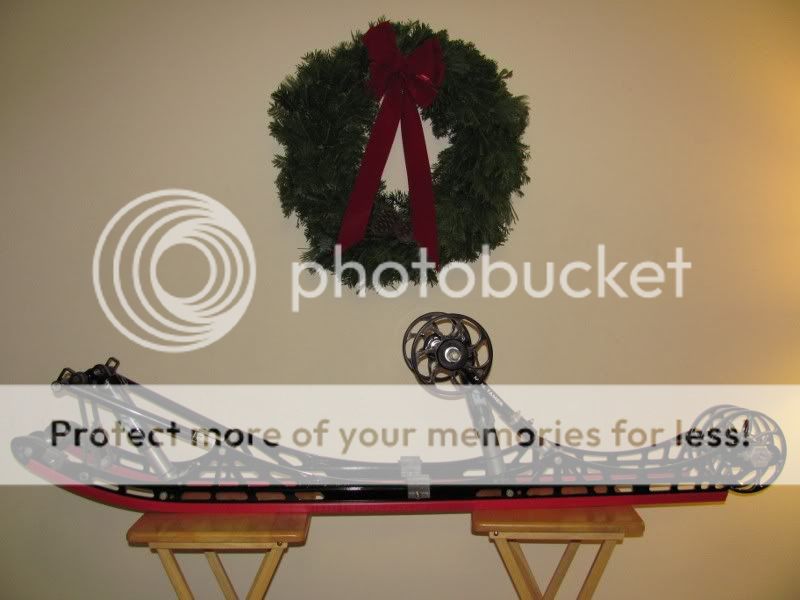
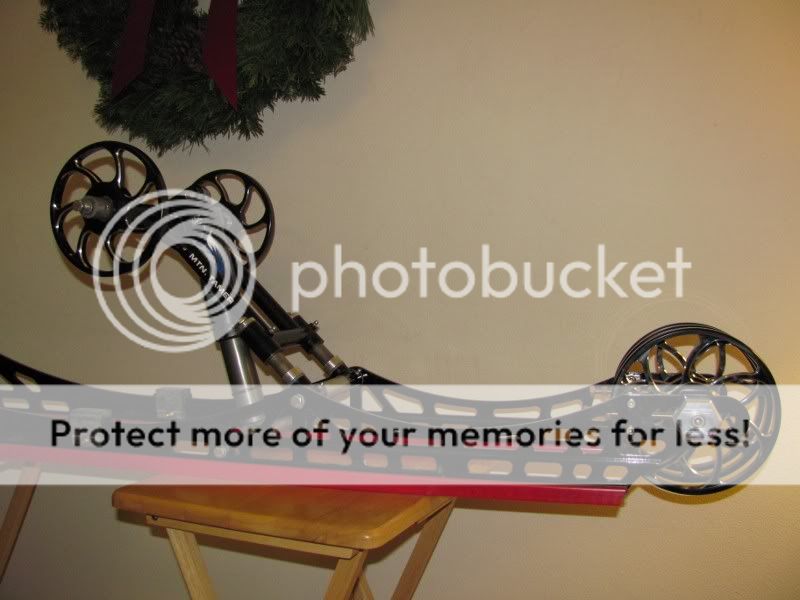
I mounted the Anti Stab kit on the very front in the mounting holes for the rail caps...Had to drill them out, but it is WELL worth it for the insurance of an anti-stab kit...Too many tracks get ripped apart that could have been prevented by this little insurance piece...
I chose to move up to a 174" 2.5" camo Extreme track this year...I had the 162 PowerClaw last year, and it did ok, but not what I was hoping it would be...Is a nice all around track, but we ride too deep and tight, and the 2.5" does significantly better...would have gone with 3.0" but would have required MAJOR surgery to make it work...
Also, used HiperFax for the sliders, as they are more than double the heat resistance from stock sliders...have never had them burn through...can take them from sled to sled...
anyway...here are the pics...
I mounted the Anti Stab kit on the very front in the mounting holes for the rail caps...Had to drill them out, but it is WELL worth it for the insurance of an anti-stab kit...Too many tracks get ripped apart that could have been prevented by this little insurance piece...
mtdream
TY 4 Stroke Master
Next it is time to move on to the Clutching...
As background...I ride between 5,000 and 10,000 feet...The sled has shed approximately 100 lbs., I have not shed any, and am roughly 250 without gear...
Sled has 10PSI of boost (Ulmer Turbo kit)...I moved to fixing the clutching this year...So, I called Val Simmons and then sent him my Secondary, and purchased a SHockwave Helix...He does some magic machinining to both, and allows the clutch to actually shift out fully (design issue with Yammie)
Next, he suggested some different clutching components...
Primary Spring...I had been running the Orange Pink Orange as it gave me really low RPM engagement, so I could creep onto a start (which is very important in steep and deep)...He suggested moving to the Orange Silver Orange, a little stouter spring but allows for nice engagement...
Then we moved onto the Secondary, and I have installed the Arctic Cat Red/White Spring...in 6/0 position...I might migrate to the EPI Purple but this is a starting point for this configuration...
as you all know clutching is a balance, what you take form the Primary, you must take from Secondary, and vice versa...
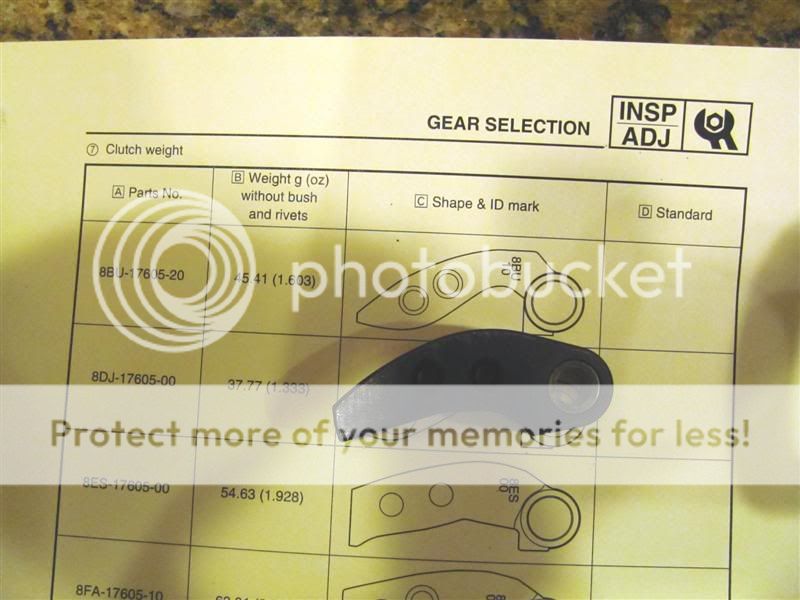
So, in the Primary, I also went to a dramatically different weight...I had been using the stock weights but just had them LOADED with Rivets to compensate for the turbo...Lots of people have been going with the 8-BU weights when going boost...In talking with Michelle (Oregon Trail sports) she also recommended Val Simmons weights, so I purchased these...
Here is a pic of the profile comparison to the 8-BU weights...They are pictured below the 8-BU, but there are made by Val they are NOT the 8-DJ weights...just below the 8-BU to show the difference...
As background...I ride between 5,000 and 10,000 feet...The sled has shed approximately 100 lbs., I have not shed any, and am roughly 250 without gear...
Sled has 10PSI of boost (Ulmer Turbo kit)...I moved to fixing the clutching this year...So, I called Val Simmons and then sent him my Secondary, and purchased a SHockwave Helix...He does some magic machinining to both, and allows the clutch to actually shift out fully (design issue with Yammie)
Next, he suggested some different clutching components...
Primary Spring...I had been running the Orange Pink Orange as it gave me really low RPM engagement, so I could creep onto a start (which is very important in steep and deep)...He suggested moving to the Orange Silver Orange, a little stouter spring but allows for nice engagement...
Then we moved onto the Secondary, and I have installed the Arctic Cat Red/White Spring...in 6/0 position...I might migrate to the EPI Purple but this is a starting point for this configuration...
as you all know clutching is a balance, what you take form the Primary, you must take from Secondary, and vice versa...
So, in the Primary, I also went to a dramatically different weight...I had been using the stock weights but just had them LOADED with Rivets to compensate for the turbo...Lots of people have been going with the 8-BU weights when going boost...In talking with Michelle (Oregon Trail sports) she also recommended Val Simmons weights, so I purchased these...
Here is a pic of the profile comparison to the 8-BU weights...They are pictured below the 8-BU, but there are made by Val they are NOT the 8-DJ weights...just below the 8-BU to show the difference...


YamaMTX
Lifetime Member
- Joined
- Feb 7, 2009
- Messages
- 550
- Reaction score
- 7
- Points
- 973
- Location
- crosslake MN
- Country
- USA
- Snowmobile
- 2009 Yamaha nytro and polaris 600 rush
Looks awesome!!!!
mtdream
TY 4 Stroke Master
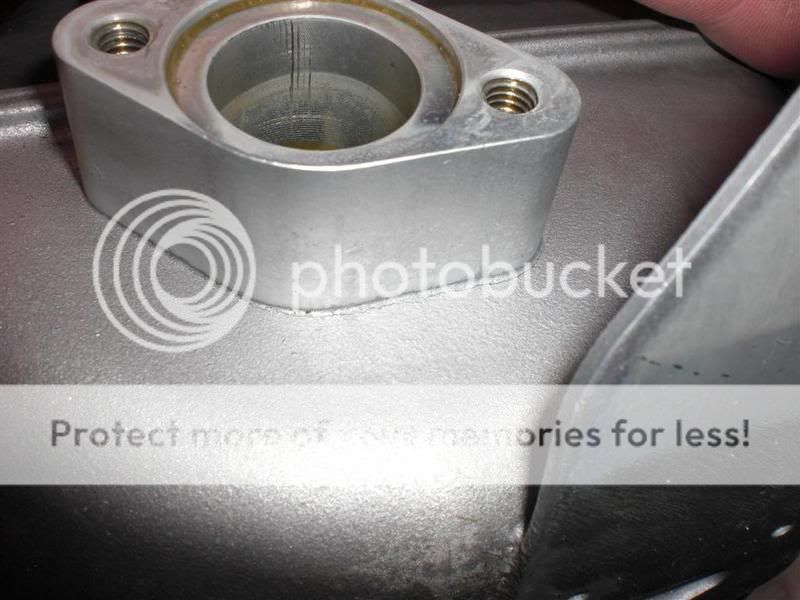
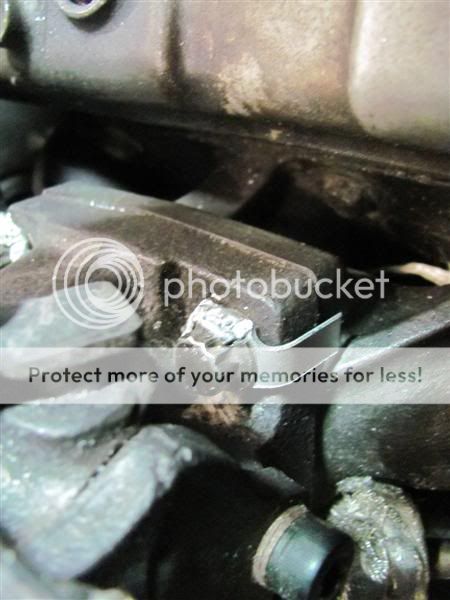
Got oil Leak
Rumor has it Ttabs is cranking up the mods...and rumor has it, he found some oilll....
just a reminder, check the base of your oil tank...for this little hairline crack...it could, and can ruin a trip!!!
Rumor has it Ttabs is cranking up the mods...and rumor has it, he found some oilll....
just a reminder, check the base of your oil tank...for this little hairline crack...it could, and can ruin a trip!!!
mtdream
TY 4 Stroke Master
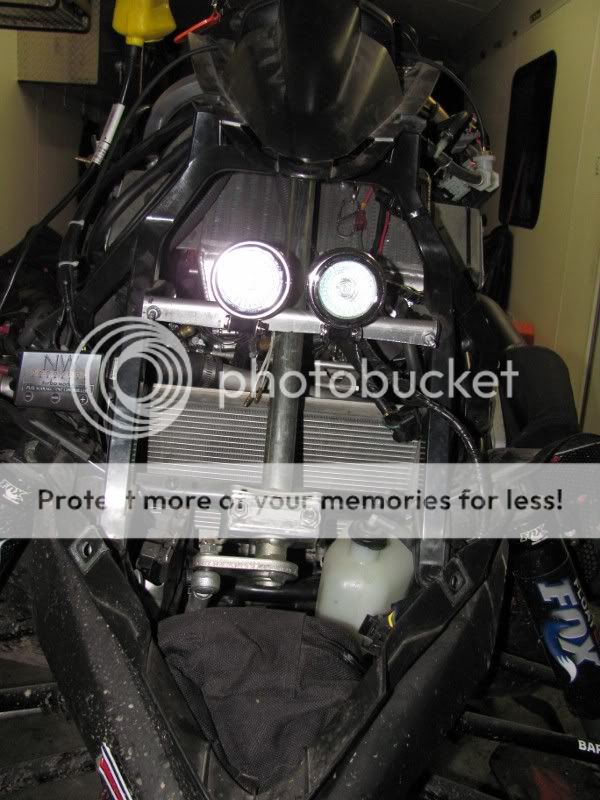
Several have asked about the light output of the PIAA lights I installed...Here are a few pics...Sorry for the shaky pics...
It is up inside an enclosed trailer, so it is about 3 feet up off ground, but also lights up immediately in front of you...One thing I just thought of, is since they are SOOOOO bright, I might hook up just one light to the Bright switch, so if someone is coming down the trail, I can cut the light output in half...
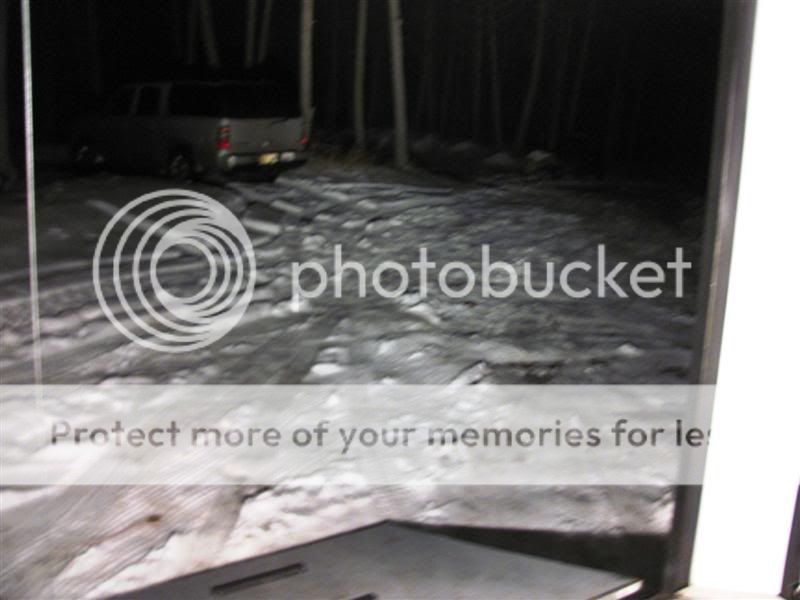

Here is looking from the side of the trailer, so you can see the directional etc. of the lights...

It is up inside an enclosed trailer, so it is about 3 feet up off ground, but also lights up immediately in front of you...One thing I just thought of, is since they are SOOOOO bright, I might hook up just one light to the Bright switch, so if someone is coming down the trail, I can cut the light output in half...
Here is looking from the side of the trailer, so you can see the directional etc. of the lights...
ust421
Pro
Looks good to me. I would think one would be enough. Or the guys coming to you will be driving in the trees.
mtdream
TY 4 Stroke Master
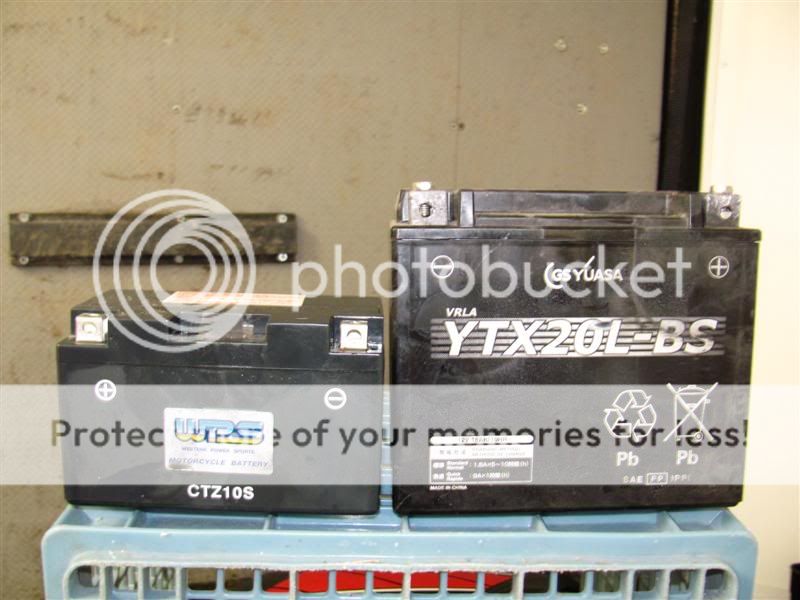
Smaller Lighter Battery
Gonna post here and in normal MTX, as it is something I think a few would want to do...
So, had this little battery on my shelf for a few months...and two nights ago finally got around to installing it...
Anyways...it is about 10 lbs. lighter than stock, and you should be able to find one for about $60 This one is a CTZ10s but Yuasa would be the YTZ 10S...I could have gone wiht the even lighter one (the YTZ7s) and it would have been another 2 lbs. lighter...but there are some cold days out west, and you never know if your going to need to have to try and start your engine for a while (like if you popped off your Throttle bodies while doing a pull and thought you blew your engine..., DONT ask") )
)
Anyway, I used the stock bracket just slightly modified with the use of a vice...It is VERY secure in there, and the way I bent it, the right bolt puts a good amount of pressure on it to secure it...


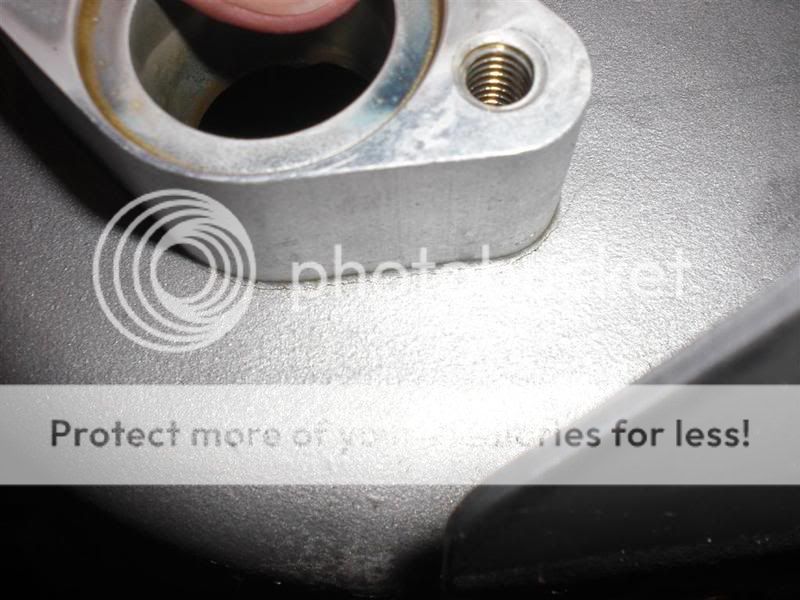
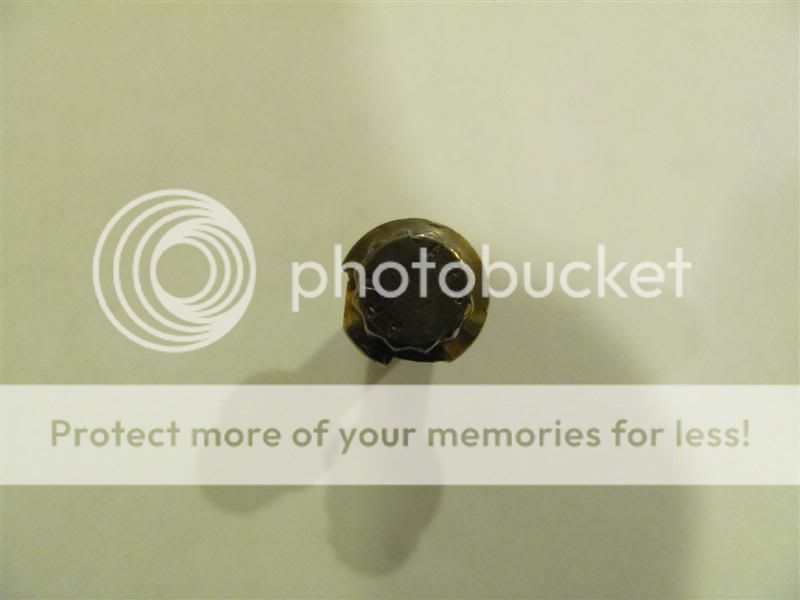
oh, and if any of you have a turbo, and have a bolt issue, you can take one of these....About a $ at your dealer (mine charges $2, their normal 180% markup)
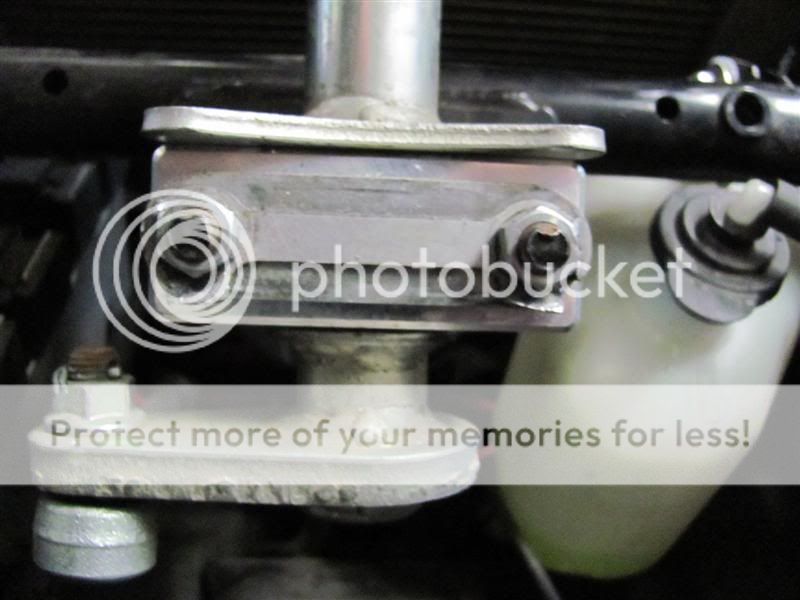
My turbo has a Center to Center of 40 MM, and so, they did not fit direct bolt on, which is fine...so, i just cut it in half and bent it over the edge...
And if your super anal, and want that bolt to NEVER come un done...Do this to your bolt, just used a file, and then secured the flange into the edge...
Gonna post here and in normal MTX, as it is something I think a few would want to do...
So, had this little battery on my shelf for a few months...and two nights ago finally got around to installing it...
Anyways...it is about 10 lbs. lighter than stock, and you should be able to find one for about $60 This one is a CTZ10s but Yuasa would be the YTZ 10S...I could have gone wiht the even lighter one (the YTZ7s) and it would have been another 2 lbs. lighter...but there are some cold days out west, and you never know if your going to need to have to try and start your engine for a while (like if you popped off your Throttle bodies while doing a pull and thought you blew your engine..., DONT ask
)Anyway, I used the stock bracket just slightly modified with the use of a vice...It is VERY secure in there, and the way I bent it, the right bolt puts a good amount of pressure on it to secure it...
oh, and if any of you have a turbo, and have a bolt issue, you can take one of these....About a $ at your dealer (mine charges $2, their normal 180% markup)
My turbo has a Center to Center of 40 MM, and so, they did not fit direct bolt on, which is fine...so, i just cut it in half and bent it over the edge...
And if your super anal, and want that bolt to NEVER come un done...Do this to your bolt, just used a file, and then secured the flange into the edge...
evil1
Pro
- Joined
- Sep 26, 2008
- Messages
- 165
- Reaction score
- 0
- Points
- 226
- Location
- fort mcurray, alberta
- Website
- lewishillbillies.com
k on the battery issue,,how cold is cold out your way? I was tempted to change mine but was warned by so many that the light weight won't start my sled in -15 or so. -20 is ussually my cut-off for riding
mtdream
TY 4 Stroke Master
Evil,
are you talking -15 or -20 Celsius? or Fahrenheit?
This battery is more than fine for -15F to -20 F (or -20 to -28 celsius) But then I am NOT riding at -20 unless the weather pattern is not gonna change and it is Holiday or something...
loads of people use the ytz 10s...and have done so for a couple seasons now...Only issue I have heard of, is possibly first start in the morning at -25 Fahrenheit (pretty sure it was an alaska guy)
I will be keeping my big tank battery in the trailer...will let you know what I find...
I have a YTZ7S, and have had it start my Nytro @ -20 on several occassions. It isn't real happy to do so, nor do I think it would go at -30, but neither would I.
MT, great idea on the bolt retainer.
You could also drill the bolt heads with a 1/16" drill bit and install stainless aircraft safety wire to achieve the same result. As you can see in the pic, when installed properly the wire causes each bolt to pull the next one in the "tighten" direction.
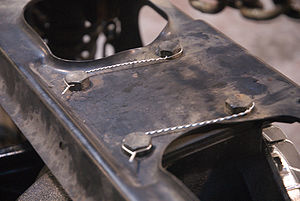
Or, you could install studs set with super strength high temp loc-tite and use high temp lock nuts (also an aircraft part, generally used on exhausts and supercharger components) These need to be replaced each time they are removed.

MT, great idea on the bolt retainer.
You could also drill the bolt heads with a 1/16" drill bit and install stainless aircraft safety wire to achieve the same result. As you can see in the pic, when installed properly the wire causes each bolt to pull the next one in the "tighten" direction.
Or, you could install studs set with super strength high temp loc-tite and use high temp lock nuts (also an aircraft part, generally used on exhausts and supercharger components) These need to be replaced each time they are removed.
mtdream
TY 4 Stroke Master
Hmmm, the highest temp possible of high temp loctite I could find was 600 degrees...and well, that wont cut it in a turbo...
might have to look into those aircraft super nutz though...got a source for a few of them? only really need 2 but knowing me, better get 8 of them
would have done the drill a whole thing, but I didnt have a drill press...and was too lazy to go get it done...
might have to look into those aircraft super nutz though...got a source for a few of them? only really need 2 but knowing me, better get 8 of them
would have done the drill a whole thing, but I didnt have a drill press...and was too lazy to go get it done...
Similar threads
- Replies
- 386
- Views
- 179K
- Replies
- 29
- Views
- 5K
- Replies
- 30
- Views
- 4K
-
This site uses cookies to help personalise content, tailor your experience and to keep you logged in if you register.
By continuing to use this site, you are consenting to our use of cookies.