

Nice. Yea that one is more than mine. Make a sleeve and maybe even a bigger bolt with grease fitting. Would be easily 50% tighter.Here is a video of the steering play I was talking about. This Viper has 3500 miles on it and I believe it pretty much had this much play from the day I bought it new. I’ve always been disappointed by this and now I’m finally going to try to do something about it. I have checked other ProCross chassis sleds on the showroom floor and they seem to have just as much play.
You can easily see that the source of the play isn’t tie rod ends and other joints, but instead the pivot for the bellcrank itself. I’m sure just having a pressurized grease port will help, but I may try to go even further. You do have to take the upper plate of the steering post lower mount out (10 rivets to drill out) in order to disassemble to the bushings, but I’m going to update this one to the newer stronger lower mount so it’s a good time to address the bell crank assembly too.
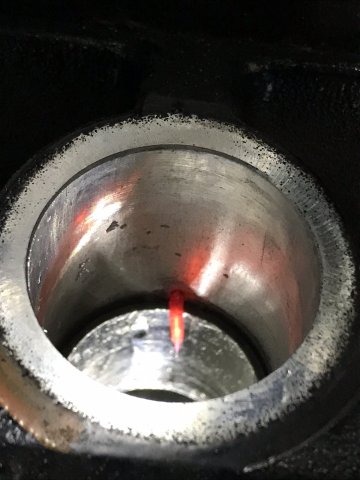
Here is the spindle bushing grease fitting.


ksiesel
Pro
- Joined
- Mar 25, 2016
- Messages
- 177
- Reaction score
- 119
- Points
- 703
- Location
- Columbus, Indiana
- Country
- USA
- Snowmobile
- 2015 Viper RTX-DX with QS3’s, winder jackshaft, RR front arm shaft, 4 wheel kit, and many more upgrades
- LOCATION
- Columbus, Indiana
Updated post #60 with a couple more videos as I continued to take things apart.
I've also now added a grease zerk, but haven't decided if I'm going to proceed with the stock parts or do something custom for bushings. May be a few weeks until I have more on this.

I've also now added a grease zerk, but haven't decided if I'm going to proceed with the stock parts or do something custom for bushings. May be a few weeks until I have more on this.
Last edited:
ksiesel
Pro
- Joined
- Mar 25, 2016
- Messages
- 177
- Reaction score
- 119
- Points
- 703
- Location
- Columbus, Indiana
- Country
- USA
- Snowmobile
- 2015 Viper RTX-DX with QS3’s, winder jackshaft, RR front arm shaft, 4 wheel kit, and many more upgrades
- LOCATION
- Columbus, Indiana
I ordered in new stock bushings and bellcrank and proceeded to do some test fitting. As you can see in the videos, there is clearly more play with the worn bellcrank. Surprisingly though, the new bushings result in more play as they have a larger ID than the old ones. Old and New bushings are clearly not the same as the old one is grey and the new is black.
I won’t be using the new bushings, but not yet sure if I’ll use the combination of old bushings and new bellcrank (best combination I have on hand) or have some custom made bushings.
If my measurements are correct, there is about 16 to 18 thousandths installed clearance between the shaft and the old bushings. It’s over 20 with the new bushings. That seems pretty sloppy and could probably be tightened up a LOT to make for a better feel.
New Bushings, New Bellcrank
Clearly more play than with the old bushings. Very disappointed as these factory new bushings...
Janne339
TY 4 Stroke Junkie
- Joined
- Oct 31, 2015
- Messages
- 559
- Reaction score
- 395
- Points
- 738
- Location
- Sweden
- Country
- Sweden
- Snowmobile
- 2021 Sidewinder LTX GT
I ordered in new stock bushings and bellcrank and proceeded to do some test fitting. As you can see in the videos, there is clearly more play with the worn bellcrank. Surprisingly though, the new bushings result in more play as they have a larger ID than the old ones. Old and New bushings are clearly not the same as the old one is grey and the new is black.
I won’t be using the new bushings, but not yet sure if I’ll use the combination of old bushings and new bellcrank (best combination I have on hand) or have some custom made bushings.
If my measurements are correct, there is about 16 to 18 thousandths installed clearance between the shaft and the old bushings. It’s over 20 with the new bushings. That seems pretty sloppy and could probably be tightened up a LOT to make for a better feel.
New Bushings, New Bellcrank
Clearly more play than with the old bushings. Very disappointed as these factory new bushings...
Do you know size of the new bushings? Any number on them? Which manufacturer?
ksiesel
Pro
- Joined
- Mar 25, 2016
- Messages
- 177
- Reaction score
- 119
- Points
- 703
- Location
- Columbus, Indiana
- Country
- USA
- Snowmobile
- 2015 Viper RTX-DX with QS3’s, winder jackshaft, RR front arm shaft, 4 wheel kit, and many more upgrades
- LOCATION
- Columbus, Indiana
Do you know size of the new bushings? Any number on them? Which manufacturer?
I don’t see any number or manufacturer on them. I grabbed my cheapo calipers and measured them though. Here are a few pics. The last one is the ID of the New (Black) bushing.
Janne339
TY 4 Stroke Junkie
- Joined
- Oct 31, 2015
- Messages
- 559
- Reaction score
- 395
- Points
- 738
- Location
- Sweden
- Country
- Sweden
- Snowmobile
- 2021 Sidewinder LTX GT
Tanks!
ksiesel
Pro
- Joined
- Mar 25, 2016
- Messages
- 177
- Reaction score
- 119
- Points
- 703
- Location
- Columbus, Indiana
- Country
- USA
- Snowmobile
- 2015 Viper RTX-DX with QS3’s, winder jackshaft, RR front arm shaft, 4 wheel kit, and many more upgrades
- LOCATION
- Columbus, Indiana
Well, it’s back together and a very significant amount of the play has been eliminated. What little bit is left appears to be coming from he steering post and drag link ball joints. It’s small enough I’m not going to go after it.
I ended up using off the shelf bronze bushings from McMaster with a 7/8” ID and a 1 1/4” OD. I had a local machinist make me a solid shaft for the 7/8” bore and he cut the old hollow shaft off the bellcrank and pressed the new one in. He also pinned it from the side and faced the bottom of the bellcrank. The old beveled washers were eliminated with threading the solid shaft and making a lower washer. This does take more room on the bottom and had interference with the front plastic skid plate. I just bored a hole in it since I run the aftermarket plastic front skid plate over this anyway. With grease, this thing moves like butter.


Here are a couple showing the skid plate modification.


I ended up using off the shelf bronze bushings from McMaster with a 7/8” ID and a 1 1/4” OD. I had a local machinist make me a solid shaft for the 7/8” bore and he cut the old hollow shaft off the bellcrank and pressed the new one in. He also pinned it from the side and faced the bottom of the bellcrank. The old beveled washers were eliminated with threading the solid shaft and making a lower washer. This does take more room on the bottom and had interference with the front plastic skid plate. I just bored a hole in it since I run the aftermarket plastic front skid plate over this anyway. With grease, this thing moves like butter.
Here are a couple showing the skid plate modification.
Last edited:
ksiesel
Pro
- Joined
- Mar 25, 2016
- Messages
- 177
- Reaction score
- 119
- Points
- 703
- Location
- Columbus, Indiana
- Country
- USA
- Snowmobile
- 2015 Viper RTX-DX with QS3’s, winder jackshaft, RR front arm shaft, 4 wheel kit, and many more upgrades
- LOCATION
- Columbus, Indiana
Here is a video of the final product.
ksiesel
Pro
- Joined
- Mar 25, 2016
- Messages
- 177
- Reaction score
- 119
- Points
- 703
- Location
- Columbus, Indiana
- Country
- USA
- Snowmobile
- 2015 Viper RTX-DX with QS3’s, winder jackshaft, RR front arm shaft, 4 wheel kit, and many more upgrades
- LOCATION
- Columbus, Indiana
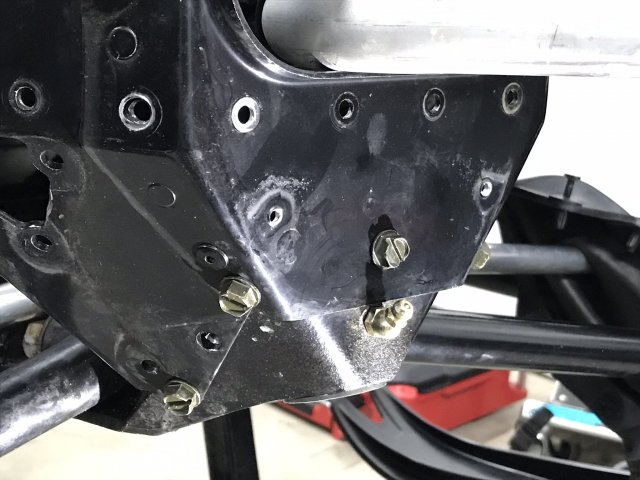
One more thing that I noticed while upgrading the lower steering bracket. The kit comes with the brackets, a bunch of rivets, and a new lock nut for the steering post ball joint. The new nut is still an M10, but it has a larger hex on it (IIRC it was 17mm where the original was 15mm). The problem with this is that I couldn’t get the larger socket on the nut through the triangle cutout in the bulkhead. I ended up not using the new “upgraded” locknut because of this fitment issue.
Has anyone else had this issue while doing the steering mount upgrade? What did you do to get around it?
Has anyone else had this issue while doing the steering mount upgrade? What did you do to get around it?
Last edited:
Wow that will work nice!
Similar threads
-
This site uses cookies to help personalise content, tailor your experience and to keep you logged in if you register.
By continuing to use this site, you are consenting to our use of cookies.